| “This site contains affiliate links for which OEMDTC may be compensated” |
February 27, 2023 NHTSA CAMPAIGN NUMBER: 23V129000
Loss of Brake Function from Caliper Corrosion
A loss of brake function can increase the risk of a crash.
NHTSA Campaign Number: 23V129000
Manufacturer Royal Enfield North America Limited
Components SERVICE BRAKES, HYDRAULIC
Potential Number of Units Affected 4,891
Summary
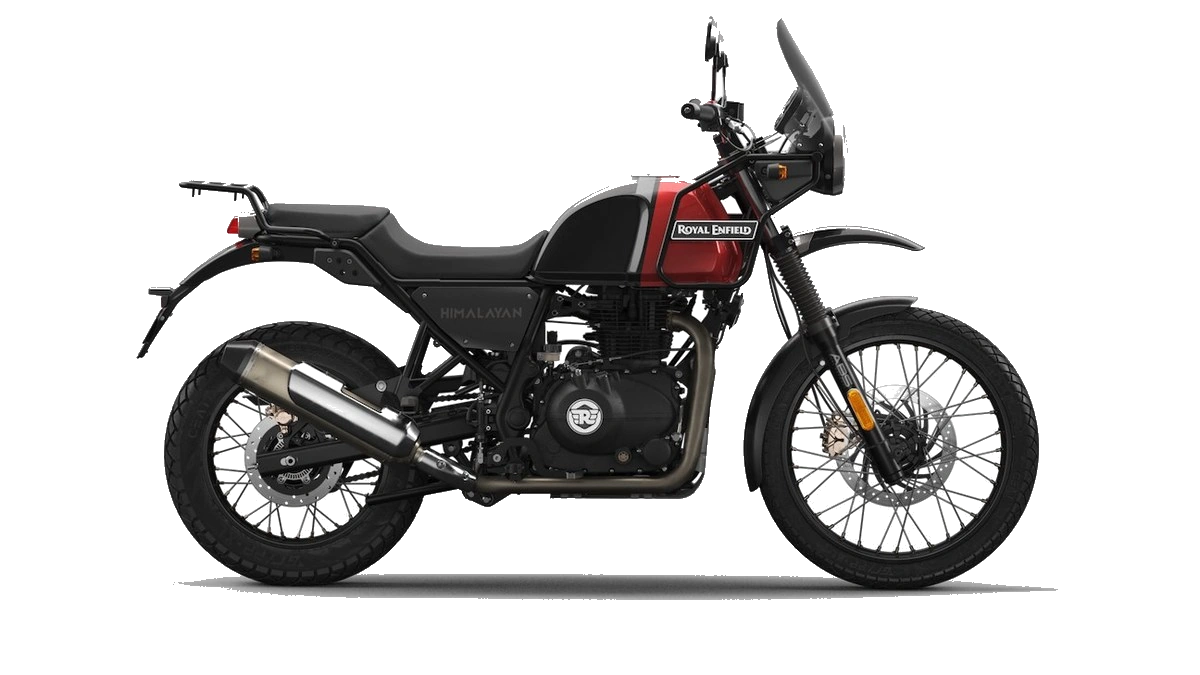
Royal Enfield North America Limited (Royal Enfield) is recalling certain 2017-2021 Himalayan motorcycles. The salt used to treat the roads in the winter may corrode the brake calipers, causing a decrease or total loss of brake function.
Remedy
Dealers will replace the front and rear brake calipers, free of charge. The manufacturer has not yet provided a schedule for recall notification. Owners may contact Royal Enfield’s customer service at 1-866-600-1122. Royal Enfield’s number for this recall is SC-31.
Notes
Owners may also contact the National Highway Traffic Safety Administration Vehicle Safety Hotline at 1-888-327-4236 (TTY 1-800-424-9153), or go to www.nhtsa.gov.
Bleeding the Hydraulic Brake System With DOL Tool (Front & Rear)
 Loading...
CALIPER DISMANTLING & ASSEMBLY PROCEDURE (FRONT & REAR) HIMALAYAN MODEL
Loading...
Chronology :
Below mentioned motorcycle customer reported for front wheel dragging / locking phenomenon while riding their motorcycle. (This incident was in the UK)
Case 1 : Himalayan reported on 11th Mar’20 at 2,000 Miles
Steps taken by Royal Enfield after the reported events.
Analysis and discussion with safety office, QA, etc., with dates
Root Cause: Joint analysis with Bosch (ABS system supplier) and Brembo (brake caliper supplier) was performed on the affected part.
It was concluded that when motorcycles are used on roads on which a large quantity of salt has been applied during the winter for melting ice, and if brake calipers are not cleaned thereafter, corrosion of the brake calipers can occur which can cause the brakes to drag or become ineffective.
Even though feedback was received only from the UK, Brake Caliper manufacturer Brembo, advised that this phenomenon may occur in other countries where salt is used in winter such as the US, other European Countries and South Korea.
Brembo has recommended using anodized calipers to combat this corrosion for the countries using salt to melt ice on the roads.
5 Affected Products
Vehicle
| MAKE | MODEL | YEAR |
| ROYAL ENFIELD | HIMALAYAN | 2017-2021 |
13 Associated Documents
Manufacturer Notices(to Dealers,etc) – CALIPER DISMANTLING & ASSEMBLY PROCEDURE (FRONT & REAR) HIMALAYAN MODEL
RCMN-23V129-3073.pdf 7927.597KB
Loading...
Defect Notice 573 Report
RCLRPT-23V129-3590.PDF 214.062KB
573 Report – Himalayan
RMISC-23V129-0183.pdf 103.643KB
Loading...
Manufacturer Notices(to Dealers,etc) – Himalayan Recall Email
Loading...
Recall Acknowledgement
RCAK-23V129-3197.pdf 647.959KB
Manufacturer Notices(to Dealers,etc) – Bleeding the Hydraulic Brake System With DOL Tool (Front & Rear)
RCMN-23V129-9885.pdf 6404.457KB
Loading...
Safety Bulletin
RCSB-23V129-4975.pdf 1399.897KB
Loading...
Royal Enfield – Dealer Email Body – February 2023
RCMN-23V129-7848.pdf 143.891KB
Loading...
ISSUED Owner Notification Letter(Part 577)
RCONL-23V129-3457.pdf 181.396KB
Loading...
ISSUED Owner Notification Letter(Part 577)
RCONL-23V129-7380.pdf 97.653KB
Loading...
Recall 573 Report – May 4, 2023
RCLRPT-23V129-4496.PDF 215.853KB
Recall 573 Report – May 4, 2023
RCLRPT-23V129-5514.PDF 215.853KB
Recall Quarterly Report #3, 2023-3
RCLQRT-23V129-9630.PDF 211.469KB
Latest Recalls Documents
https://www-odi.nhtsa.dot.gov/acms/cs/documentList.xhtml?docId=23V129&docType=RCL
- High quality blend of polyethylene glycol ethers and additives
- Compatible with all brake system rubber components and other brake fluids
- Prevents seal hardening or softening
- Protects against rust and corrosion
- Provides excellent lubricity
- High compatibility. Use with or direct replacement for DOT 3, DOT 4, and DOT 5. 1
- Extended Service Interval (ESI): Lasts 100 percent longer than DOT 3, 50 percent longer than DOT 4, and 10 percent longer than DOT 5. 1
- Exceeds all DOT 3, DOT 4, and DOT 5. 1 standards
- Wet boiling point ~ 365 DegreeF/Viscosity at -40 DegreeC ~ 685mm2/s
- Standard brake fluid has a recommended change interval of 2 years. The recommended change interval for Bosch ESI6 is 3 years.

- Provides an extra margin of safety in extreme braking conditions
- Mix of polyglycol ethers ensures hot brake-system operation will not create dangerous vapor
- Excellent for ABS, disc and drum brake systems
- Delivers braking power when needed by avoiding a spongy pedal
- Both wet and dry boiling points exceed the minimum government standards

- The 336⁰F wet boil point and 521⁰F dry boil point exceeds common characteristics for DOT 4 brake fluids
- Provides corrosion protection in brake components
- Matches needs of all DOT 4 manufacturer recommendations
- Compatible with all DOT 3 and DOT 4 applications

- Synthetic quality brake fluid
- Contains special ingredients to guard against vapor lock and moisture absorption
- Exceeds requirements for both DOT 3 and DOT 4 brake fluids
- Specially formulated for DOT 4 brake fluid applications
- Designed for use in disc, drum and ABS brake systems

- Premium brake and hydraulic clutch fluid that protects internal components from corrosion under normal use
- High boiling point to minimize brake fluid boiling and vapor lock
- Excellent low temperature capability and stability when used where lower cold viscosities are required
- Excellent low temperature capability and stability when used where lower cold viscosities are required

- Premium DOT 3 Brake Fluid has a minimum boiling point of 450°F
- Meets and exceeds DOT 3 and all other Federal and SAE specifications and standards for motor vehicle brake fluids
- Mixes with all DOT 3 approved brake fluids
- Designed for use in disc, drum and ABS brake systems
- Helps provide protection against brake failure from vapor lock
- Helps prevent corrosion in brake system
- Works with all brake system requiring DOT 3 fluids
- Exceeds federal motor vehicle safety standard No. 116
- Meets SAE spec. J1703.
- Minimal decrease of boiling point due to excellent water locking properties
- Non-foaming when filling and bleeding the brake system
- Excellent corrosion protection due to selected additives
- High safety tolerance against steam bubbles
- Makes brake fluid changing intervals of up to 3 years possible
Last update on 2024-06-11 / Affiliate links / Images from Amazon Product Advertising API
This product presentation was made with AAWP plugin.
SEOCONTENT-START
USE NHTSA’S SAFETY RECALL PORTAL – THERE WILL BE A TEMPLATE ON THE
PORTAL
Re: Report of Voluntary Recall
Dear Administrator,
Pursuant to 49 CFR § 573.6, Royal Enfield North America hereby advises NHTSA that
its parent company, Royal Enfield (A Unit of Eicher Motors Ltd.), has determined to conduct a
voluntary safety recall campaign in the United States covering certain models of motorcycles –
Royal Enfield North America has received no reports of the potential defect occurring in the
United States and currently believes that the conditions that led to the potential defect in foreign
countries are not present to the same extent in the United States. However, we have decided to
move forward with this voluntary recall in the interest of our customers and the unlikely event
this may occur in the United States
THIS IS THE INFORMATION YOU’LL NEED TO PROVIDE IN THE PART 573
SAFETY RECALL TEMPLATE:
:
1. Manufacturer’s Name: Royal Enfield (A Unit of Eicher Motors Ltd.)
Manufacturer’s Agent: ROYAL ENFIELD of North America
Royal Enfield North America
226 N. Water St., Milwaukee WI, 53202
2. Identification of Potentially Affected Vehicles:
Model: Dates of Manufacture:
Himalayan March 2017 – February 2021
Component at Issue: Front and Rear Calipers
Manufacturer: Brembo Brake India PVT / LTD Chakan Company,
10 Gaye NO 307, Village, Nanekarwadi,
Chakan Maharashtra, 410501
The recall population was determined based on the usage of the specific
component at issue.
3. Total Number of Vehicles Potentially Affected: 4,891 motorcycles SOLD IN
NORTH AMERICA
4. The percentage of vehicles or items of equipment specified pursuant to paragraph
(c)(2) of this section estimated to actually contain the defect or noncompliance – less than 0.01%
5. Description of potential defect:
When the motorcycles within the population at issue are used on roads on which a
large quantity of salt has been applied during the winter for melting ice, and if
brake calipers are not cleaned thereafter, corrosion of the brake calipers can occur
which can cause the brakes to drag or braking performance could be affected or
become ineffective.
The potential defect may cause unusual and/or increased brake noise when
applying brakes, an unusual odor/burning smell near the calipers, a drag feeling
when attempting to accelerate, or unusual difficulty in pushing the motorcycle
manually. If these warning conditions are not heeded, braking performance could
be affected or become ineffective, increasing the risk of a vehicle crash.
6. Royal Enfield made the determination to conduct the voluntary safety recall.
1. Below mentioned motorcycle customer reported for front wheel dragging / locking
phenomenon while riding their motorcycle. (This incident was in the UK)
a. Case 1 : Himalayan reported on 11th Mar’20 at 2,000 Miles
2. Steps taken by Royal Enfield after the reported events.
a. Analysis and discussion with safety office, QA, etc., with dates
b. Root Cause: Joint analysis with Bosch (ABS system supplier) and Brembo
(brake caliper supplier) was performed on the affected part.
c. It was concluded that when motorcycles are used on roads on which a large
quantity of salt has been applied during the winter for melting ice, and if brake
calipers are not cleaned thereafter, corrosion of the brake calipers can occur
which can cause the brakes to drag or become ineffective.
d. Even though feedback was received only from the UK, Brake Caliper
manufacturer Brembo, advised that this phenomenon may occur in other
countries where salt is used in winter such as the US, other European Countries
and South Korea.
e. Brembo has recommended using anodized calipers to combat this corrosion for
the countries using salt to melt ice on the roads.
3. Corrective Action: To ensure there is no major damage, RE is voluntarily recalling all the
motorcycles supplied in these countries.
4. Recall: Replace Front and Rear calipers with Anodized Calipers for all motorcycles fitted
with non-anodized calipers for the EU, UK, Korea, Japan and USA.
7. Noncompliance – doesn’t apply
8. Program for Remedying Defect:
Royal Enfield, through its authorized dealers, is offering owners of potentially
affected motorcycles the complete replacement of the current non-anodized brake
calipers (front and rear) with anodized calipers (front and rear)
a. Royal Enfield of North America will begin notifying its dealer network
regarding the recall through email/dealer communication the week of
February 27th, 2023
b. Royal Enfield of North America will begin notifying the affected
customers regarding the recall through mail. The customer
communication will be sent out starting the week of March 31st, 2023
Sincerely,
Royal Enfield North America
_________________________
**************************************************************************************************************
INFORMATION REDACTED PURSUANT TOTHE FREEDOM
OF INFORMATION ACT (FOIA), 5 U.S.C.552(8)(6)
DEALER COMMUNICATIONS February 27th, 2023 DC — Safety Recall
Campaign SC-31
Department Attention
~ Dealer M a111agc mcnt
!ZiVehicle Sales
jgService
□ —-~
□—-
□ —–
181Pa·11s
□ Gear
□Accessories
Subject: IMPORTANT DEALER COMMUNICATION! Safety Recall Campaign
SC-31
Dear Royal Enfield Dealers:
This Service Circular is to inform you about a voluntary Safety recall announcement by Royal
Enfield of North America (RENA) pertaining to Himalayan models. It outlines the required
replacement of front and rear brake calipers and the appropriate actions to take.
Royal Enfield has discovered a brake caliper corrosion-related issue in a very small
number of Himalayan motorcycles in some specific countries outside of North America.
Upon investigation, it was revealed that this corrosion is brought about by sustained,
long-term exposure to riding on roads treated with certain salts or a combination of salts,
to prevent formation of ice during winters. This corrosion causes damage to the brake
caliper piston bore and assemblies, and can result in unusual braking sound, increased
brake drag, unusual difficulty in pushing the motorcycle manually and may impact
braking action.
To date, RENA has received no reports or complaints from our dealers or customers related
to this concern. RENA has decided to voluntarily launch this recall in the very rare instance
this may occur
This recall pertains to model year 2017-2021 Himalayan models. The brake calipers both
front and rear will be replaced through this process. Please find the Service Circular,
Technical instructions, Parts ordering, and claim filing process information on the following
pages.
Bel o w are t he VIN ranoes t h at are ootent,.a II1 v af f ecte
Beginning VIN
ME3FSM249H~
Royal Enfield North America Limited www.royalenfield.com/USA
226 North Water Street
Milwaukee, WI 53202
dbIV t h”1 s con d1T 1 0n:
Ending VIN
ME3FSM24XMtilllll
We are including photos as a visual indicator to confirm the completion of this action.
The images below show the visual identification differences between the
NON-Anodized and Anodized calipers.
Non-Anodized Rear Non-Anodized Front
Anodized Rear Anodized Front
__________________________________ ______________________
Royal Enfield North America Limited www.royalenfield.com/USA
226 North Water Street
Milwaukee, WI 53202
SERVICE CIRCULAR Issue no. RE-IB-SC-31
Issue date 2-28-2023
Page No 01 of 02
SUBJECT FRONT AND REAR CALIPER ASSEMBLY REPLACEMENT RECALL
APPLICABLE
MODELS
Himalayan
Attn: Service Manager/ Technicians
The technical action required to perform this recall are as follows:
The current non-anodized brake calipers (front and rear) will be replaced with anodized
calipers (front and rear) The respective service manual outlines the proper procedure for
caliper replacement. For convenience these have been attached.
Please note:
• The original brake pads should be inspected to ensure they are free of any
contaminants and are within their operational specification which is listed in the
service manual. Please see Section 13 of the Service Manual -Attached.
• If the brake pads are under the minimum specification, contaminated, or functionally
compromised, the customer will need to be notified and the brake pads should be
replaced. Brake pad replacement will not be covered under this recall.
• After the new anodized calipers are installed, the brake system must be bled and the
DOL tool must be used to perform the modulator actuation. The process is
outlined in Annexure 1 -Attached.
Pending approval from NHTSA, the owner letter will include the following direction:
• IMPORTANT: Should you choose to ride your motorcycle before this safety
recall service has been completed, to reduce the risk associated with this
condition, we recommend that you evaluate your motorcycle BEFORE each
ride per the following procedure:
o With your bike in neutral –
o Fully depress rear brake pedal and release.
o Fully squeeze the front brake lever and release.
o Slightly rock the motorcycle back and forth to ensure that brakes have
released normally and increased brake drag is not present.
o NOTE: If increased brake drag from either the front or rear brake is
noted, your motorcycle may be exhibiting the recall condition.
Royal Enfield North America Limited www.royalenfield.com/USA
226 North Water Street
Milwaukee, WI 53202
Part Details and Ordering Process
Due to low part availability dealer orders containing caliper part numbers will not be fulfilled.
We will provide an initial wave shipment of anodized replacement calipers and will be
shipped to your dealership starting the week of February 22nd 2021. A dealer
communication will be released to notify that sufficient stock is available and dealer ordering
may begin. Calipers will be invoiced per transaction and will be filed for reimbursement with
labor in the warranty claim submission process.
Part Description New Part Number
FRONT CALIPER KAB00305/A
REAR CALIPER KAB00307/A
Claim filing
RENA will reimburse parts and labor cost under the standard warranty process using
job type “Campaign” and Campaign type “Campaign SC 31”. This reimbursement will also
cover consumables and administrative time. Any additional claim lines added will not be
accepted. They will be automatically removed from the claim and may result in delayed
reimbursement.
Upon completion of caliper (front and rear) replacement, use the standard claim
submission process within the DMS. Listed below are filing details specific to this
campaign. Please use the following part numbers and warranty flat rate time (frt) to
complete the claim: If this process is not followed the claim will not be processed and will be
rejected.
Job type: Campaign
Campaign Type: Campaign SC 31
Part numbers: Front Caliper – KAB00305/A
Rear Caliper- KAB00307/A
Labor Codes: Front Caliper – HIM-VEH-74 .5 hours
Rear Caliper – HIM-VEH-80 .5 hours
If you have any questions, please contact Technical Service at
Renaservice@royalenfield.com or call 414-501-3809
Sincerely,
Royal Enfield of North America
– RoYAL LllllflEVJ·~~~~~~
Royal Enfield North America Limited www.royalenfield.com/USA
226 North Water Street
Milwaukee, WI 53202
**************************************************************************************************************
IMPORTANT SAFETY RECALL
This notice applies to your vehicle, VIN #
Model: Royal Enfield Himalayan
March 31, 2023
Royal Enfield Recall No.SC 31
NHTSA Recall No. 23V129
Dear Royal Enfield Motorcycle Owner
This notice is sent to you in accordance with the requirements of the National Traffic Motor and Vehicle
Safety Act. Royal Enfield of North America LTD has decided that a defect which relates to motor vehicle
safety exists in certain 2017-2021 Himalayan motorcycles. This is to inform you that your vehicle has been
included in a voluntary safety recall campaign. We would like to ensure your safety, and that your riding
experience is not compromised. According to our records, you are the owner of the vehicle mentioned
above.
Reason for this action:
The brake calipers can corrode when exposed to elements such as salt applied during the winter for
melting ice. This can cause the brakes to drag and braking performance could be affected or become
ineffective, possibly resulting in a crash. 2017-2021 Himalayan motorcycles that were likely being used in
such conditions may be impacted.
Royal Enfield North America LTD is focused on delivering an exceptional ownership experience and
requires your attention in addressing this matter.
Owner required actions:
At your earliest convenience, we request that you call an authorized Royal Enfield dealer to schedule a
service appointment to replace the front and rear brake calipers. IMPORTANT: Should you choose to
ride your motorcycle before this safety recall service has been completed, to reduce the risk
associated with this condition, we recommend that you evaluate your motorcycle BEFORE each
ride per the following procedure:
With your bike in neutral –
1. Fully depress rear brake pedal and release.
2. Fully squeeze the front brake lever and release.
3. Slightly rock the motorcycle back and forth to ensure that brakes have released normally
and increased brake drag is not present.
NOTE: If increased brake drag from either the front or rear brake is noted, your motorcycle may
be exhibiting the recall condition.
You can find your nearby dealer at https://www.royalenfield.com/ca/en/locate-us/dealers
Royal Enfield, through its authorized dealers, is offering owners of identified motorcycles, complete
replacement of the current front and rear non-anodized brake calipers with anodized calipers, free of
charge. All work performed, related to this replacement will be free of charge to you. It is estimated this
work will take approximately 1.0 hours (60 minutes).
If you have sold your motorcycle and have an address for the current owner, it is important that you forward
this notice to the new owner. Alternatively, you may contact us at the Royal Enfield North America email
address below and provide us with the new contact information so that we may notify the new owner of this
recall. If you have leased the vehicle, federal law requires that you send the lessee a copy of this and any
subsequent notice within 10 working days of receiving it. Should you have any questions about this
voluntary recall, please contact your authorized Royal Enfield Motorcycle dealer. If you need additional
assistance, contact us at u.scustomerservice@royalenfield.com
If your dealer fails or is unable to remedy this defect without charge, or within a reasonable amount
of time, you may submit a written complaint to:
Administrator
National Highway Traffic Safety Administration
1200 New Jersey AVE SE
Washington, DC 20590
You may also call the toll-free Vehicle Safety Hotline at 1-888-327-4236 (TTY: 1-800-424-9153); or go
to http://www.safercar.gov.
You may be eligible to receive a reimbursement for the cost of repairs made prior to this notice. If this
applies to you, please contact your local dealership for further information.
We sincerely apologize if this affirmative action causes any inconvenience to you and please be assured
that your safety is of the utmost importance to us.
Yours Sincerely
Royal Enfield North America Limited www.royalenfield.com/USA
226 North Water Street
Milwaukee, WI 53202
**************************************************************************************************************
IMPORTANT SAFETY RECALL
This notice applies to your vehicle, VIN #
Model: Royal Enfield Himalayan
March 31, 2023
Royal Enfield Recall No. SC 31
NHTSA Recall No. 23V129
Dear Royal Enfield Motorcycle Owner
This notice is sent to you in accordance with the requirements of the National Traffic Motor and Vehicle
Safety Act. Royal Enfield of North America LTD has decided that a defect which relates to motor vehicle
safety exists on certain 2017-2021 Himalayan motorcycles. This is to inform you that your vehicle has been
included in a voluntary safety recall campaign. We would like to ensure your safety, and that your riding
experience is not compromised. According to our records, you are the owner of the vehicle mentioned
above.
Reason for this action:
We have determined when motorcycles are used on roads on which salt has been applied during the
winter for melting ice, corrosion of the brake calipers can occur. This can cause the brakes to drag and
braking performance could be affected or become ineffective, possibly resulting in a crash. 2017-2021
Himalayan motorcycles that were likely being used in such conditions may be impacted.
Royal Enfield North America LTD is focused on delivering an exceptional ownership experience and
requires your attention in addressing this matter.
Owner required actions:
At your earliest convenience, we request that you call an authorized Royal Enfield dealer to schedule a
service appointment to replace the front and rear brake calipers. IMPORTANT: Should you choose to
ride your motorcycle before this safety recall service has been completed, to reduce the risk
associated with this condition, we recommend that you evaluate your motorcycle BEFORE each
ride per the following procedure:
With your bike in neutral –
1. Fully depress rear brake pedal and release.
2. Fully squeeze the front brake lever and release.
3. Slightly rock the motorcycle back and forth to ensure that brakes have released normally
and increased brake drag is not present.
NOTE: If increased brake drag from either the front or rear brake is noted, your motorcycle may
be exhibiting the recall condition.
You can find your nearby dealer at https://www.royalenfield.com/ca/en/locate-us/dealers
Royal Enfield, through its authorized dealers, is offering owners of identified motorcycles, complete
replacement of the current front and rear non-anodized brake calipers with anodized calipers, free of
charge. All work performed, related to this replacement will be free of charge to you. It is estimated this
work will take approximately 1.0 hours (60 minutes).
If you have sold your motorcycle and have an address for the current owner, it is important that you forward
this notice to the new owner. Alternatively, you may contact us at the Royal Enfield North America email
address below and provide us with the new contact information so that we may notify the new owner of this
recall. If you have leased the vehicle, federal law requires that you send the lessee a copy of this and any
subsequent notice within 10 working days of receiving it. Should you have any questions about this
voluntary recall, please contact your authorized Royal Enfield Motorcycle dealer. If you need additional
assistance, contact us at u.scustomerservice@royalenfield.com
If your dealer fails or is unable to remedy this defect without charge, or within a reasonable amount of time, you
may submit a written complaint to:
Administrator
National Highway Traffic Safety Administration
1200 New Jersey AVE SE
Washington, DC 20590
You may also call the toll-free Vehicle Safety Hotline at 1-888-327-4236 (TTY: 1-800-424-9153); or go to
http://www.safercar.gov.
We sincerely apologize if this affirmative action causes any inconvenience to you and please be assured
that your safety is of the utmost importance to us.
Yours Sincerely
Royal Enfield North America Limited www.royalenfield.com/USA
226 North Water Street
Milwaukee, WI 53202
**************************************************************************************************************
RECSTA
Bleeding the Hydraulic
Brake System
With DOL Tool
(Front & Rear)
– ABS
RECSTA
ABS
Preparation ( Front Disc Brake)
1.
2.
3.
4.
5.
DOL Tool
Connector
Transparent Jar
Vinyl Pipe
Ring Spanner
10 mm
Bleeder Nipple
Use a Philips screwdriver to loosen and
remove the screws of the front disc brake
master cylinder.
Remove the cap, and Diaphragm Plate with
diaphragm
Remove the dust cap and place the suitable
ring spanner on the bleeding nipple attach a
Vinyl Pipe ( transparent)
Thereafter, take a Clean glass / Plastic
container (transparent) with fresh brake fluid,
and dip the other end of the vinyl pipe
(transparent) in it (make sure that the vinyl
pipe is always submerged in the fluid during
the bleeding process.)
Connect the DOL tool switch on the ignition
RECSTA
ABS
Procedure
1 2 3
Select – F1 Diagnosis Select – Royal D1 Select – Bosch ABS
4 5
Default Screen Press C
6
Select – Spl Function
0412520
95405
KEIHIN Engine System
BOSCH ABS System
Vehicle Info
Diagnostic Trouble Code
Live Data
Special Function
RECSTA
ABS
Procedure
7
Select – Repair Air Bleed
8
Default Screen
9
Default Screen
10
Loosen the bleeder nipple
11
Operate the brake lever
Repair Air Bleed
SILA Lamp Blinking Test
Front Channel Activation
Rear Channel Activation
Pump Motor
ABS OFF
It ts absolute important for a sufficient bleeding
result that the brake pedal is alternate apphed
the enbre process!l!I
In case of repetition of a once phase or lhe entire
bleeding routine it is absolute necessary to wait a
lime of 5 minutes to cool the solenoid valves
Otherwise the solenoid valves could be damaged
by overheating
WARNING!
\l\lhen bleeding the ABS make sure lhal here 1s
always enough brake fluid before applying the brake
0-LOWDI
Front
M/C
RECSTA
ABS
12
Hold the lever in pressed
condition and tighten the
bleeder nipple
13
Loosen the bleeder
nipple – (Brake lever
in released condition )
14
* Operate the brake
lever till the next
window open in DOL
* During this operation pump will run and expel the air trapped in the system through bleeder nipple
Procedure
15
Hold the brake lever in pressed
condition and tighten the bleeding
nipple
This step takes 45 sec.
CD l
rn® ) I\ Front ~ MIC
RECSTA
ABS
Reassembly
1.
2.
3.
4.
5.
6.
Switch off the ignition
Disconnect the DOL Tool
Remove the vinyl pipe and remove the ring spanner
Refit the dust cap ( make sure that there is no leak from the
bleeder nipple)
Refit the diaphragm with diaphragm plate of the master cylinder
Refit the master cylinder cap taking care that the vent slot in the
cap is facing rider
RECSTA
ABS
Preparation ( Rear Disc Brake)
1.
2.
3.
4.
5.
6.
DOL Tool
Connector
Remove the reservoir cap of the rear disc
brake
Remove the Diaphragm Plate with
diaphragm
Remove the dust cap and place the suitable
ring spanner on the bleeding nipple
Attach a Vinyl Pipe ( transparent)
Thereafter, take a Clean glass / Plastic
container (transparent) with fresh brake
fluid, and dip the other end of the vinyl pipe
(transparent) in it (make sure that the vinyl
pipe is always submerged in the fluid during
the bleeding process.)
Connect the DOL tool switch on the ignition
RECSTA
ABS
16
Loosen the bleeder nipple
17 18
19
Hold the brake Pedal in
pressed condition and
tighten the bleeding
nipple
Operate the brake lever
Loosen the bleeder
nipple – (Brake lever
in released condition )
20
Default Screen
WARNING!
When bleeding the ABS
always enough brake fluid rr;:;;e sure that here is
ore applying the brake
0-LOWER LI
tJ)
Release
RECSTA
ABS
21
* Operate the brake
lever till the next
window open in DOL
* During this operation pump will run and expel the air trapped in the system through bleeder nipple
22
Hold the brake lever in pressed
condition and tighten the bleeding
nipple
This step takes 45 sec. G)
This function is finished
·1 , 11111,, 1·111111’1•”11•111111111111w,qmirm1·H~- – – ……, ~
I 11 11 ‘I I I: I I : 11 , ,…,,..
‘ 1 11 I I
RECSTA
ABS
Reassembly
1.
2.
3.
4.
5.
Switch off the ignition and disconnect and remove the DOL tool
Remove the vinyl pipe and remove the ring spanner
Refit the dust cap ( make sure that there is no leak from the
bleeder nipple)
Refit the diaphragm with diaphragm plate of the reservoir
Refit the reservoir cap
RECSTA
Bleeding the Hydraulic
Brake System
Manual
(Front & Rear)
– ABS
RECSTA
1.
2.
3.
4.
Preparation ( Front Disc Brake)
ABS
Use a Philips screwdriver to loosen and remove the screws of the
front disc brake master cylinder.
Remove the cap, and Diaphragm Plate with diaphragm
Remove the dust cap and place the suitable ring spanner on the
bleeding nipple attach a Vinyl Pipe ( transparent)
Thereafter, take a Clean glass / Plastic container (transparent)
with fresh brake fluid, and dip the other end of the vinyl pipe
(transparent) in it (make sure that the vinyl pipe is always
submerged in the fluid during the bleeding process.)
RECSTA
Bleeding procedure
1.
2.
3.
4.
5.
6.
ABS
Operate the brake lever to the maximum travel, three to four times and
hold the lever in pressed condition
Then, use the suitable ring spanner to loosen the bleeding nipple
Now you will notice that the brake fluid is coming out of bleeding
nipple with air bubbles.
As and when brake fluid flow stops tighten the bleeding nipple using
suitable ring spanner. Release the brake lever
Repeat step (1) through step (5) several times until the discharged fluid
is free of air bubbles. And Check the travel of the brake lever. If a firm
resistance is felt, the manual bleeding is complete.
Do not let the brake master cylinder/reservoir fluid get below the MIN
level during the bleeding operation. Keep the master cylinder /
reservoir filled with fresh DOT4 brake fluid (never fill the reservoir with
the used brake fluid)
RECSTA
Reassembly
1.
2.
3.
4.
ABS
Remove the vinyl pipe and remove the ring spanner
Refit the dust cap ( make sure that there is no leak from the
bleeder nipple)
Refit the diaphragm with diaphragm plate of the master cylinder
Refit the master cylinder cap taking care that the vent slot in the
cap is facing rider
RECSTA
Preparation ( Rear Disc Brake)
1.
2.
3.
4.
5.
ABS
Remove the reservoir cap of the rear disc brake
Remove the Diaphragm Plate with diaphragm
Remove the dust cap and place the suitable ring spanner on the
bleeding nipple
Attach a Vinyl Pipe ( transparent)
Thereafter, take a Clean glass / Plastic container (transparent)
with fresh brake fluid, and dip the other end of the vinyl pipe
(transparent) in it (make sure that the vinyl pipe is always
submerged in the fluid during the bleeding process.)
RECSTA
Bleeding procedure
1.
2.
3.
4.
5.
6.
ABS
Operate the brake lever to the maximum travel, three to four times and
hold the lever in pressed condition
Then, use the suitable ring spanner to loosen the bleeding nipple
Now you will notice that the brake fluid is coming out of bleeding
nipple with air bubbles.
As and when brake fluid flow stops tighten the bleeding nipple using
suitable ring spanner. Release the brake lever
Repeat step (1) through step (5) several times until the discharged fluid
is free of air bubbles. And Check the travel of the brake lever. If a firm
resistance is felt, the manual bleeding is complete.
Do not let the brake master cylinder/reservoir fluid get below the MIN
level during the bleeding operation. Keep the master cylinder /
reservoir filled with fresh DOT4 brake fluid (never fill the reservoir with
the used brake fluid)
RECSTA
Reassembly
1.
2.
3.
4.
ABS
Remove the vinyl pipe and remove the ring spanner
Refit the dust cap { make sure that there is no leak from the
bleeder nipple)
Refit the diaphragm with diaphragm plate of the reservoir
Refit the reservoir cap
RECSTA
Bleeding the Hydraulic
Brake System
Bleeder equipment
pneumatic assisted
(Front & Rear)
ABS
Connector for air
pressure
Connector for
Bleeding Nipple Operating Lever
RECSTA
ABS
Preparation ( Front Disc Brake)
1.
2.
3.
4.
Use a Philips screwdriver to loosen and remove the screws of
the front disc brake master cylinder.
Remove the cap, and Diaphragm Plate with diaphragm
Remove the dust cap and place the suitable ring spanner on the
bleeding nipple
Make sure that the brake fluid reservoir level is maintained
RECSTA
ABS
Bleeding procedure
1.
2.
3.
4.
5.
Attach the bleeding equipment pipe to the bleeding nipple
Attach the other end of the bleeding equipment connecter to the
compressed air line
Now open the bleeding nipple by using appropriate spanner, and
simultaneously press the lever of bleeding equipment for a few
seconds and observe that the brake fluid is coming out of the
bleeding nipple into the container of the bleeding equipment – if
you observe that, air bubble along with brake fluid, continue the
above procedure for more duration
Simultaneously fill the reservoir to the specified mark and close
the bleeding nipple with the help of appropriate spanner
And Check the travel of the brake lever. If a firm resistance is felt,
the bleeding is complete.
RECSTA
ABS
Reassembly
1.
2.
3.
4.
Disconnect the compressor connection from the equipment and
pipe line from the bleeding nipple
Refit the dust cap { make sure that there is no leak from the
bleeder nipple)
Refit the diaphragm with diaphragm plate of the reservoir
Refit the reservoir cap
RECSTA
ABS
Preparation (Rear Disc Brake)
1.
2.
3.
4.
Remove the reservoir cap of the rear disc brake
Remove the Diaphragm Plate with diaphragm
Remove the dust cap and place the suitable ring spanner on the
bleeding nipple
Make sure that the brake fluid reservoir level is maintained
RECSTA
ABS
Bleeding procedure
1.
2.
3.
4.
5.
Attach the bleeding equipment pipe to the bleeding nipple
Attach the other end of the bleeding equipment connecter to the
compressed air line
Now open the bleeding nipple by using appropriate spanner, and
simultaneously press the lever of bleeding equipment for a few
seconds and observe that the brake fluid is coming out of the
bleeding nipple into the container of the bleeding equipment – if
you observe that, air bubble along with brake fluid, continue the
above procedure for more duration
Simultaneously fill the reservoir to the specified mark and close
the bleeding nipple with the help of appropriate spanner
And Check the travel of the brake lever. If a firm resistance is felt,
the bleeding is complete.
RECSTA
ABS
Reassembly
1.
2.
3.
4.
Disconnect the compressor connection from the equipment and
pipe line from the bleeding nipple
Refit the dust cap ( make sure that there is no leak from the
bleeder nipple)
Refit the diaphragm with diaphragm plate of the reservoir
Refit the reservoir cap
RECSTA
Periodic Maintainence Service & Schedule
1.
2.
3.
4.
5.
6.
7.
ABS
Need schedule
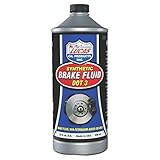
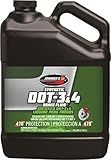
Use only DOT 4 Brake Fluid
Never mix the multi grade brake fluid
Every Service inspect the Bundy pipe for damage, leaks, cracks
clinks and proper routing.
Every Service inspect the Banjo union for its tightness and for
leak
Maintain the brake fluid level above the minimum level in the
.
reservoir
Replace the Brake fluid at every XXXXXXX Km/ XXXXX Months
which ever is earlier
Replace the Bundy pipe and Banjo bolt at every XXXXX Km/ XXXX
Months which ever is earlier (always use new banjo washer)
RE ACADEMY
HAPPY LEARNING
THANK
YOU
**************************************************************************************************************
Important Safety Recall Information
Safety Recall Campaign#
Dear Royal Enfield Dealers,
Royal Enfield North America (RENA) (A Unit of Eicher Motors Ltd.), has determined to conduct a
voluntary safety-related recall in the United States covering Himalayan models. RENA has discovered a
brake caliper corrosion-related issue in a very small number of Himalayan models.
RENA has received no reports or complaints from our dealers or customers related to this concern.
Description of the concern outside of North America:
Royal Enfield has discovered a brake caliper corrosion-related issue in a very small number of Himalayan
model motorcycles in some specific countries outside of North America. Upon investigation, it was
revealed that this corrosion is brought about by sustained, long-term exposure to riding on roads treated
with certain salts or a combination of salts, to prevent formation of ice during winters.
This corrosion causes damage to the brake caliper piston bore and assemblies, and can result in unusual
braking sound, increased brake drag, unusual difficulty in pushing the motorcycle manually and may
impact braking action.
Royal Enfield of North America will begin notifying the affected customers regarding the recall through
mail the week of February 6, 2023. The brake calipers both front and rear will be replaced through this
process.
PLEASE BE ADVISED, IT’S A VIOLATION OF FEDERAL LAW FOR A DEALER TO DELIVER A NEW
MOTOR VEHICLE COVERED BY THE NOTIFICATION UNDER A SALE OR LEASE UNTIL THE
DEFECT IS REMEDIED
Please find attached:
1. The service circular (shows visual difference between anodized and non-anodized)
2. Technical reference material (from service manual)
3. Campaign claim / reimbursement process
4. A copy of the customer letter
We ask that you please read these materials thoroughly and share them with all of your staff as soon as
possible. Copies of this notification and its attachments can be found on the Dealer Portal and can be
accessed through this link (https://usa.royalenfield-mediaportal.com/login.aspx). You will need to create
an account if you have not already done so. Once logged into the portal proceed to Technical Service &
Warranty > Recalls > SC-28.
In the meantime, we ask that you and your staff answer any questions your customers may have
regarding this subject utilizing the information shared within this dealer communication only. In addition
we ask that you contact RENA’s technical service department if you have additional technical questions or
concerns regarding this matter, please email us at RENAService@royalenfield.com or via phone
414-501-3809.
**************************************************************************************************************
Important Safety Recall Information
Safety Recall Campaign#23V129
Dear Royal Enfield Dealers,
Royal Enfield North America (RENA) (A Unit of Eicher Motors Ltd.), has determined to conduct a
voluntary safety-related recall in the United States covering Himalayan models. RENA has discovered a
brake caliper corrosion-related issue in a very small number of Himalayan models.
RENA has received no reports or complaints from our dealers or customers related to this concern.
Description of the concern outside of North America:
Royal Enfield has discovered a brake caliper corrosion-related issue in a very small number of Himalayan
model motorcycles in some specific countries outside of North America. Upon investigation, it was
revealed that this corrosion is brought about by sustained, long-term exposure to riding on roads treated
with certain salts or a combination of salts, to prevent formation of ice during winters.
This corrosion causes damage to the brake caliper piston bore and assemblies, and can result in unusual
braking sound, increased brake drag, unusual difficulty in pushing the motorcycle manually and may
impact braking action.
Royal Enfield of North America will begin notifying the affected customers regarding the recall through
mail the week of February 6, 2023. The brake calipers both front and rear will be replaced through this
process.
PLEASE BE ADVISED, IT’S A VIOLATION OF FEDERAL LAW FOR A DEALER TO DELIVER A NEW
MOTOR VEHICLE COVERED BY THE NOTIFICATION UNDER A SALE OR LEASE UNTIL THE
DEFECT IS REMEDIED
Please find attached:
1. The service circular (shows visual difference between anodized and non-anodized)
2. Technical reference material (from service manual)
3. Campaign claim / reimbursement process
4. A copy of the customer letter
We ask that you please read these materials thoroughly and share them with all of your staff as soon as
possible. Copies of this notification and its attachments can be found on the Dealer Portal and can be
accessed through this link (https://usa.royalenfield-mediaportal.com/login.aspx). You will need to create
an account if you have not already done so. Once logged into the portal proceed to Technical Service &
Warranty > Recalls > SC-31.
In the meantime, we ask that you and your staff answer any questions your customers may have
regarding this subject utilizing the information shared within this dealer communication only. In addition
we ask that you contact RENA’s technical service department if you have additional technical questions or
concerns regarding this matter, please email us at RENAService@royalenfield.com or via phone
414-501-3809.
**************************************************************************************************************
1
S.
No.
Fastener, Size, Aggregate to Dismantle/ Tool Usage, Precautions, Photos
Instructions
13.1
13.1.2
Front Disc Brake
Wheel caliper from
fork end LH
Loosen the 2 hex bolts
holding brake caliper to
fork end.
Remove caliper assembly
from fork end.
Remove Banjo Bolt 12
mm
Hex nut: M10
Socket spanner: 12mm
13.1.3 Brake pads from
caliper
Remove clip gently.
Nose Plier
Remove pin from
caliper using a punch
and hammer
Remove the brake pads
Allen screws : 4mm
Allen key : M5
CALIPER DISMANTLING & ASSEMBLY PROCEDURE (FRONT & REAR)
HIMALAYAN MODEL
2
S.
No.
Fastener, Size, Aggregate to Dismantle/ Tool Usage, Precautions, Photos
Instructions
13.1.3 Brake pads from
caliper
Remove Mounting
Bracket from the Caliper
Assembly.
Remove the Pad
tensioner spring plate
from caliper.
13.1 Front Disc Brake
13.1.4 Pistons & seals
from caliper
Remove the bellow &
boot from the caliper
assembly.
Hold the caliper body
with the pistons facing
downwards.
Blow low pressure
compressed air with a
nozzle into the oil
passage hole on the
caliper, to drive out the
pistons from the caliper
bores.
Gently remove the seals
from caliper using a
blunt and soft tool.
3
Fastener, Size, Aggregate to Assemble/ Tool Usage, Precautions, Photos
Instructions
13.3 Front Disc Brake
Coat fresh brake fluid on
new dust seals and
piston seals.
Install piston seals in the
inner groove and dust
seals in the outer groove
in the bore in caliper
assembly.
Coat the caliper
cylinders and pistons
with fresh brake fluid.
Insert the closed end of
the pistons into the
caliper bores and gently
press it into caliper fully
till the open ends of the
piston are flush with the
caliper bore outer edge.
Smear fresh brake fluid
on the caliper boot and
bellow and assemble
them on the caliper
body.
S.
No.
13.3.1 Pistons & seals in
caliper
NOTE:
Do not apply force while
assembling the pistons into
the caliper. Press only with
minimal hand pressure.
Assemble pistons one at a
time into the caliper.
4
Fastener, Size, Aggregate to Assemble/ Tool Usage, Precautions, Photos
Instructions
13.3 Front Disc Brake
Install the pad tension
spring plate in the Caliper
body.
S.
No.
13.3.1 Pistons & seals in
caliper
Assemble Bleed screw
with the dust cap on the
caliper body.
Assemble the Mounting
Bracket on the caliper
Body.
Ring Spanner: 10 mm
Torque: 10Nm (0.1Kgm)
5
Fastener, Size, Aggregate to Assemble/ Tool Usage, Precautions, Photos
Instructions
13.3 Front Disc Brake
S.
No.
13.3.2 Brake pads in
caliper
Install brake pad on the
piston side first with its
friction material facing
outside.
Install the other brake
pad with the friction
material facing the
opposite brake pad.
Insert the pin in the
caliper
NOTE:
Ensure pads are positioned
and locked correctly in the
mounting bracket lug.
Insert the clip in
the caliper pin
Brake pad pins
Allen key: 5mm
Torque: 20Nm (2.0Kgm)
6
Fastener, Size, Aggregate to Assemble/ Tool Usage, Precautions, Photos
Instructions
13.3 Front Disc Brake
Locate caliper on fork
end LH and ensure the
brake disc is positioned
between the brake
pads.
Tighten Banjo Bolt 12
mm
Tighten caliper
assembly to fork end
with 2 hex bolts and
tighten to torque
S.
No.
13.3.3 Wheel caliper on
fork end LH
Hex bolt: M10
Socket spanner: 12mm
Torque: 30Nm (3.0Kgm)
7
GENERAL PRECAUTIONS
Check the system for any fluid leaks at banjo union joints, damaged brake hose etc. at periodic intervals as detailed
in the maintenance schedule.
Whenever checking brake fluid level, ensure vehicle is on its centre stand and the fluid reservoir is parallel to the
ground, whenever checking fluid level.
Cover motorcycle painted surfaces, plastic and rubber parts while overhauling or bleeding a brake system. Do
not allow brake fluid to come in contact with any parts of the motorcycle as brake fluid has highly corrosive
properties.
CLEANING
Clean master cylinder filler cap before removing.
Use only fresh brake fluid to clean rubber and other parts of the hydraulic brake system. DO NOT use any
petroleum based cleaning solvents, water or detergents etc.
INSPECTION:
Inspect brake fluid level is always between the MAX and MIN level markings in the reservoir.
Prior to riding the motorcycle every time, check brake disc inside and outside surfaces carefully for any
contamination with oil, grease, slippery substances, brake fluid etc. as these will render the braking system
ineffective. In case of any contamination, wash the brake disk with water and mild detergent to remove the
contaminations, clean well with a good degreasing agent, blow compressed air to dry the brake disc thoroughly.
Inspect brake hose joints; reservoir and wheel caliper ends for any traces of fluid seepage or leaks. Check and
correct the leaks immediately, if any noticed.
Inspect Brake hoses for any damage, cracks or cuts, ageing etc and replace damaged parts immediately.
Inspect brake pads for embedded foreign objects, abnormal wear, age hardening of friction material etc.
Inspect and ensure the pads are not worn out beyond the wear indication limit marks on the pads. Replace pads
as soon as they have reached the wear limit marks
Check rubber seals on the plunger for wear, cracked edges or any other damage. Replace seals whenever the
plunger is removed
Check master cylinder housing and piston for any scoring, pitting due to corrosion or any other damages.
Check the master cylinder bore for any damages, scoring marks etc.
Check piston outside surfaces for any damages, scoring marks, corrosion etc. Replace pistons if any of the above
is observed.
CAUTION:
Use only DOT 3 or DOT 4 grade brake fluid from a sealed container. Do not mix different types of brake fluid
as they may not be compatible.
Whenever the disc brake system is overhauled, ensure that the old fluid is drained out completely and then filled
with fresh brake fluid ONLY from a sealed container.
In case of any brake fluid contamination in the brake system, the contaminated brake fluid must be flushed out
completely from the entire system, the internal parts cleaned well, filled with fresh brake fluid and the brake
system bleeding must be carried out.
8
S.
No.
Fastener, Size, Aggregate to Dismantle/ Tool Usage, Precautions, Photos
Instructions
13.2 Rear Disc Brake
13.2.4. Brake pads from
wheel caliper
Pull out the pivot pin
from the inside of the
caliper.
13.2.5. Wheel caliper from
swing arm
Remove Banjo Bolt
Separate the Mounting
Bracket from the Caliper
Assembly by gently
pulling them apart.
Remove the brake padsfrom
the caliper.
9
S.
No.
Fastener, Size, Aggregate to Dismantle/ Tool Usage, Precautions, Photos
Instructions
13.2 Rear Disc Brake
13.2.5. Wheel caliper from
swing arm
Remove the Pad
tensioner spring plate
from caliper and
mounting bracket.
Hold the caliper body
with the piston facing
downwards.
Blow low pressure
compressed air with a
nozzle into the oil
passage hole on the
caliper, to drive out the
piston from the caliper
bore.
Gently remove the
piston with seal from
caliper using a blunt and
soft tool.
13.2 Rear Disc Brake
13.2.5. Piston & seal from
caliper
CAUTION:
Do not use high pressure air.
Support piston while
removing from caliper.
Ensure the bore in the
caliper does not get scored
or damaged.
Ensure piston outside
surfaces does not get
scored or damaged.
10
13.4 Rear Disc Brake
13.4.1 Piston & seals in
caliper
Coat fresh brake fluid on
new dust seals and
piston seals.
Install piston seals in the
inner groove and dust
seals in the outer groove
in the bore in caliper
assembly.
Coat the caliper cylinder
and piston with fresh
brake fluid.
Insert the closed end of
the piston into the
caliper bore and gently
press it into caliper fully
till the open ends of the
piston are flush with the
caliper bore outer edge.
NOTE:
Do not apply force while
assembling the piston into
the caliper. Press only with
minimal hand pressure.
S.
No.
Fastener, Size, Aggregate to Dismantle/ Tool Usage, Precautions, Photos
Instructions
The images shown here are
for illustrative purpose only
11
Fastener, Size, Aggregate to Assemble/ Tool Usage, Precautions, Photos
Instructions
13.4 Rear Disc Brake
Install the pad tension
spring plate in the Caliper
body.
S.
No.
13.4.1 Piston & seals in
caliper
Ring Spanner: 8 mm
Torque: 10Nm (0.1Kgm)
Assemble Bleed screw
with the dust cap on the
caliper body.
Position the guides on
the Caliper and
mounting bracket
correctly on the rubber
boot and assemble
caliper body in the
mounting bracket
12
Fastener, Size, Aggregate to Assemble/ Tool Usage, Precautions, Photos
Instructions
13.4 Rear Disc Brake
Locate caliper with
mounting bracket on
the swing arm such that
the brake disc is
correctly positioned
inside the caliper.
Assemble wheel axle
through the caliper
bracket on the swing
arm.
Assemble axle nut and
tighten to torque.
S.
No.
13.4.1 Wheel caliper on
swing arm
Locate the brake pads
inside the caliper on
either sides of the disc
with the friction material
facing the disc.
13.4.2 Brake pads on
wheel caliper
Locate the pivot pin
from the inside of the
caliper correctly.
Assemble the 2 locking
clips on the brake pad
pivot pin.
Install Banjo Bolt
**************************************************************************************************************
OMB Control No.: 2127-0004
Part 573 Safety Recall Report 23V-129
The information contained in this report was submitted pursuant to 49 CFR §573
Manufacturer Name : Submission Date :
Royal Enfield North America Limited MAY 04, 2023 NHTSA Recall No. : 23V-129 Manufacturer Recall No. : SC-31 Manufacturer Information :
Manufacturer Name : Royal Enfield North America Limited Address : 226 North Water Street
Milwaukee WI 53202
Company phone : 866-600-1122 Population :
Number of potentially involved : 4,891 Estimated percentage with defect : 1 % Vehicle Information : Vehicle 1 : 2017-2021 Royal Enfield Himalayan Vehicle Type : MOTORCYCLES Body Style : UNKNOWN Power Train : GAS
Descriptive Information : When the motorcycles within the population at issue are used on roads on which a large quantity of salt has been applied during the winter for melting ice, and if brake calipers are not cleaned thereafter, corrosion of the brake calipers can occur which can cause the brakes to drag or braking performance could be affected or become ineffective.
The potential defect may cause unusual and/or increased brake noise when applying brakes, an unusual odor/burning smell near the calipers, a drag feeling when attempting to accelerate, or unusual difficulty in pushing the motorcycle manually. If these warning conditions are not heeded, braking performance could be affected or become ineffective, increasing the risk of a vehicle crash.
Joint analysis with Bosch (ABS system supplier) and Brembo (brake caliper supplier) was performed on the affected part.
c. It was concluded that when motorcycles are used on roads on which a large quantity of salt has been applied during the winter for melting ice, and if brake calipers are not cleaned thereafter, corrosion of the brake calipers can occur which can cause the brakes to drag or become ineffective.
d. Even though feedback was received only from the UK, Brake Caliper manufacturer Brembo, advised that this phenomenon may occur in other countries where salt is used in winter such as the US, other European Countries and South Korea.
e. Brembo has recommended using anodized calipers to combat this corrosion for the countries using salt to melt ice on the roads.
4,891 motorcycles SOLD IN NORTH AMERICA less that 0.01% involved.
Production Dates : MAR 01, 2017 – FEB 28, 2021
VIN Range 1 : Begin : ME3FSM249HK411921 End : ME3FSM24XMK401568 entia
l Part 573 Safety Recall Report 23V-129 Page 2 Description of Defect :
Description of the Defect : When the motorcycles within the population at issue are used on roads on which a
large quantity of salt has been applied during the winter for melting ice, and if brake calipers are not cleaned thereafter, corrosion of the brake calipers can occur
which can cause the brakes to drag or braking performance could be affected or
become ineffective.
The potential defect may cause unusual and/or increased brake noise when applying brakes, an unusual odor/burning smell near the calipers, a drag feeling
when attempting to accelerate, or unusual difficulty in pushing the motorcycle manually. If these warning conditions are not heeded, braking performance could
be affected or become ineffective, increasing the risk of a vehicle crash.
FMVSS 1 : NR FMVSS 2 : NR
Description of the Safety Risk : It was concluded that when motorcycles are used on roads on which a large quantity of salt has been applied during the winter for melting ice, and if brake
calipers are not cleaned thereafter, corrosion of the brake calipers can occur which can cause the brakes to drag or become ineffective.
Description of the Cause : We have determined when motorcycles are used on roads on which salt has been applied during the
winter for melting ice, corrosion of the brake calipers can occur. This can cause the brakes to drag and
braking performance could be affected or become ineffective, possibly resulting in a crash. 2017-2021
Himalayan motorcycles that were likely being used in such conditions may be impacted. Identification of Any Warning
that can Occur : increased brake drag from either the front or rear brake is noted, your motorcycle may be exhibiting the recall condition. Involved Components : Component Name 1 : Front Brake Caliper
Component Description : Front brake caliper assembly, anodized Component Part Number : KAB00305/A The information contained in this report was submitted pursuant to 49 CFR §573 Part 573 Safety Recall Report 23V-129 Page 3 Component Name 2 : Rear Brake Caliper
Component Description : Rear brake caliper assembly, anodized Component Part Number : KAB00307/A Supplier Identification : Component Manufacturer
Name : Brembo Brake India PVT / LTD Chakan Comp Address : 10 Gaye NO 307
Nanekarwadi Chakan Maharashtra, Foreign States 410501
Country : India Chronology :
Below mentioned motorcycle customer reported for front wheel dragging / locking phenomenon while riding their motorcycle. (This incident was in the UK)
Case 1 : Himalayan reported on 11th Mar’20 at 2,000 Miles Steps taken by Royal Enfield after the reported events. Analysis and discussion with safety office, QA, etc., with dates
Root Cause: Joint analysis with Bosch (ABS system supplier) and Brembo (brake caliper supplier) was performed on the affected part.
It was concluded that when motorcycles are used on roads on which a large quantity of salt has been applied during the winter for melting ice, and if brake calipers are not cleaned thereafter, corrosion of the brake calipers can occur which can cause the brakes to drag or become ineffective.
Even though feedback was received only from the UK, Brake Caliper manufacturer Brembo, advised that this phenomenon may occur in other countries where salt is used in winter such as the US, other European Countries and South Korea.
Brembo has recommended using anodized calipers to combat this corrosion for the countries using salt to melt ice on the roads. The information contained in this report was submitted pursuant to 49 CFR §573 Part 573 Safety Recall Report 23V-129
Page 4
The information contained in this report was submitted pursuant to 49 CFR §573
Description of Remedy :
Description of Remedy Program : To ensure there is no major damage, RE is voluntarily recalling all the
motorcycles supplied in these countries.
Replace Front and Rear calipers with Anodized Calipers for all motorcycles fitted with non-anodized calipers for the EU, UK, Korea, Japan and USA. How Remedy Component Differs from Recalled Component : Identify How/When Recall Condition was Corrected in Production : There are distinguishing casting marks to visually determine the difference between the non-anodized caliper and the anodized caliper. These photos are highlighted in the SC-31 communicated to our dealership network.
NR Recall Schedule :
Description of Recall Schedule : We will internally provide support to communicate a recall package to
the dealership network that includes all relevant information.
We will be using a mail service to ship out all customer communications Planned Dealer Notification Date : MAR 27, 2023 – APR 07, 2023
Planned Owner Notification Date : MAY 04, 2023 – MAY 05, 2023
* NR – Not Reported
**************************************************************************************************************
OMB Control No.: 2127-0004
Part 573 Safety Recall Report 23V-129
The information contained in this report was submitted pursuant to 49 CFR §573
Manufacturer Name : Submission Date :
Royal Enfield North America Limited FEB 27, 2023 NHTSA Recall No. : 23V-129 Manufacturer Recall No. : SC-28 Manufacturer Information :
Manufacturer Name : Royal Enfield North America Limited Address : 226 North Water Street
Milwaukee WI 53202
Company phone : 262-617-2129 Population :
Number of potentially involved : 4,891 Estimated percentage with defect : NR Vehicle Information : Vehicle 1 : 2017-2021 Royal Enfield Himalayan Vehicle Type : MOTORCYCLES Body Style : UNKNOWN Power Train : GAS
Descriptive Information : When the motorcycles within the population at issue are used on roads on which a large quantity of salt has been applied during the winter for melting ice, and if brake calipers are not cleaned thereafter, corrosion of the brake calipers can occur which can cause the brakes to drag or braking performance could be affected or become ineffective.
The potential defect may cause unusual and/or increased brake noise when applying brakes, an unusual odor/burning smell near the calipers, a drag feeling when attempting to accelerate, or unusual difficulty in pushing the motorcycle manually. If these warning conditions are not heeded, braking performance could be affected or become ineffective, increasing the risk of a vehicle crash.
Joint analysis with Bosch (ABS system supplier) and Brembo (brake caliper supplier) was performed on the affected part.
c. It was concluded that when motorcycles are used on roads on which a large quantity of salt has been applied during the winter for melting ice, and if brake calipers are not cleaned thereafter, corrosion of the brake calipers can occur which can cause the brakes to drag or become ineffective.
d. Even though feedback was received only from the UK, Brake Caliper manufacturer Brembo, advised that this phenomenon may occur in other countries where salt is used in winter such as the US, other European Countries and South Korea.
e. Brembo has recommended using anodized calipers to combat this corrosion for the countries using salt to melt ice on the roads.
4,891 motorcycles SOLD IN NORTH AMERICA less that 0.01% involved.
Production Dates : MAR 01, 2017 – FEB 28, 2021
VIN Range 1 : Begin : ME3FSM249HK411921 End : ME3FSM24XMK401568 entia
l Part 573 Safety Recall Report 23V-129 Page 2 Description of Defect :
Description of the Defect : When the motorcycles within the population at issue are used on roads on which a
large quantity of salt has been applied during the winter for melting ice, and if brake calipers are not cleaned thereafter, corrosion of the brake calipers can occur
which can cause the brakes to drag or braking performance could be affected or
become ineffective.
The potential defect may cause unusual and/or increased brake noise when applying brakes, an unusual odor/burning smell near the calipers, a drag feeling
when attempting to accelerate, or unusual difficulty in pushing the motorcycle manually. If these warning conditions are not heeded, braking performance could
be affected or become ineffective, increasing the risk of a vehicle crash.
FMVSS 1 : NR FMVSS 2 : NR
Description of the Safety Risk : It was concluded that when motorcycles are used on roads on which a large quantity of salt has been applied during the winter for melting ice, and if brake
calipers are not cleaned thereafter, corrosion of the brake calipers can occur which can cause the brakes to drag or become ineffective.
Description of the Cause : We have determined when motorcycles are used on roads on which salt has been applied during the
winter for melting ice, corrosion of the brake calipers can occur. This can cause the brakes to drag and
braking performance could be affected or become ineffective, possibly resulting in a crash. 2017-2021
Himalayan motorcycles that were likely being used in such conditions may be impacted. Identification of Any Warning
that can Occur : increased brake drag from either the front or rear brake is noted, your motorcycle may be exhibiting the recall condition. Involved Components : Component Name 1 : NR Component Description : NR Component Part Number : NR The information contained in this report was submitted pursuant to 49 CFR §573 Part 573 Safety Recall Report 23V-129
Page 3
The information contained in this report was submitted pursuant to 49 CFR §573
Supplier Identification : Component Manufacturer
Name : Brembo Brake India PVT / LTD Chakan Comp Address : 10 Gaye NO 307
Nanekarwadi Chakan Maharashtra, Foreign States 410501
Country : India
Chronology :
NR
Description of Remedy :
Description of Remedy Program : NR How Remedy Component Differs NR from Recalled Component :
Identify How/When Recall Condition NR was Corrected in Production : Recall Schedule :
Description of Recall Schedule : NR
Planned Dealer Notification Date : NR – NR Planned Owner Notification Date : NR – NR
* NR – Not Reported
SEOCONTENT-END