| “This site contains affiliate links for which OEMDTC may be compensated” |
February 3, 2021 NHTSA CAMPAIGN NUMBER: 21V045000
Brake Caliper Malfunction Due To Corrosion
Corroded brake calipers may cause the brakes to drag or decrease braking performance, increasing the risk of a crash.
NHTSA Campaign Number: 21V045
Manufacturer Royal Enfield North America Limited
Components SERVICE BRAKES, HYDRAULIC
Summary
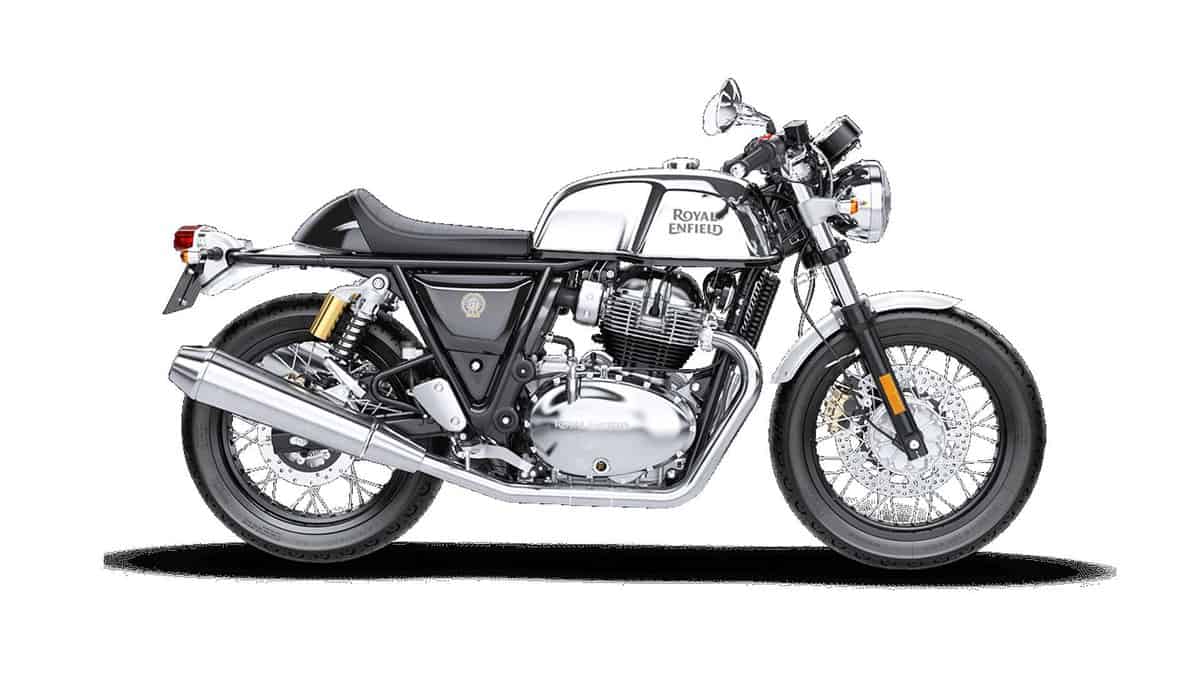
Royal Enfield North America Limited (Royal Enfield) is recalling certain 2018-2020 Continental GT 650 and Interceptor 650 motorcycles. Road salt may cause corrosion on the brake calipers.
Remedy
Royal Enfield will notify owners, and dealers will replace front and rear calipers, free of charge. Owner notification letters were mailed March 15, 2021. Owners may contact Royal Enfield customer service at 1-414-502-1214.
Notes
Owners may also contact the National Highway Traffic Safety Administration Vehicle Safety Hotline at 1-888-327-4236 (TTY 1-800-424-9153), or go to www.safercar.gov.
Bleeding the Hydraulic Brake System With DOL Tool (Front & Rear)
Preparation ( Front Disc Brake)
1. Use a Philips screwdriver to loosen and remove the screws of the front disc brake master cylinder.
2. Remove the cap, and Diaphragm Plate with diaphragm
3. Remove the dust cap and place the suitable ring spanner on the bleeding nipple attach a Vinyl Pipe ( transparent)
4. Thereafter, take a Clean glass / Plastic container (transparent) with fresh brake fluid, and dip the other end of the vinyl pipe (transparent) in it (make sure that the vinyl pipe is always submerged in the fluid during the bleeding process.)
5. Connect the DOL tool switch on the ignition
Procedure
1. Select – F1 Diagnosis
2. Select – Royal D1
4. Default Screen
5. Press C
6. Select – Spl Function
7. Select – Repair Air Bleed
8. Default Screen
9. Default Screen
10. Loosen the bleeder nipple
11. Operate the brake lever
12. Hold the lever in pressed condition and tighten the bleeder nipple
13. Loosen the bleeder nipple – (Brake lever in released condition )
14. * Operate the brake lever till the next window open in DOL
15. Hold the brake lever in pressed condition and tighten the bleeding nipple
* During this operation pump will run and expel the air trapped in the system through bleeder nipple
Reassembly
1. Switch off the ignition
2. Disconnect the DOL Tool
3. Remove the vinyl pipe and remove the ring spanner
4. Refit the dust cap ( make sure that there is no leak from the bleeder nipple)
5. Refit the diaphragm with diaphragm plate of the master cylinder
6. Refit the master cylinder cap taking care that the vent slot in the cap is facing rider
Preparation ( Rear Disc Brake)
1. Remove the reservoir cap of the rear disc brake
2. Remove the Diaphragm Plate with diaphragm
3. Remove the dust cap and place the suitable ring spanner on the bleeding nipple
4. Attach a Vinyl Pipe ( transparent)
5. Thereafter, take a Clean glass / Plastic container (transparent) with fresh brake fluid, and dip the other end of the vinyl pipe (transparent) in it (make sure that the vinyl pipe is always submerged in the fluid during the bleeding process.)
6.Connect the DOL tool switch on the ignition
16. Loosen the bleeder nipple
17. Default Screen
18. Operate the brake lever
19. Hold the brake Pedal in pressed condition and tighten the bleeding nipple
20. Loosen the bleeder nipple – (Brake lever in released condition )
21. * Operate the brake lever till the next window open in DOL
22. Hold the brake lever in pressed condition and tighten the bleeding nipple
* During this operation pump will run and expel the air trapped in the system through bleeder nipple
Reassembly
1. Switch off the ignition and disconnect and remove the DOL tool
2. Remove the vinyl pipe and remove the ring spanner
3. Refit the dust cap ( make sure that there is no leak from the bleeder nipple)
4. Refit the diaphragm with diaphragm plate of the reservoir
5. Refit the reservoir cap
Bleeding the Hydraulic Brake System Manual (Front & Rear)
Preparation ( Front Disc Brake)
1. Use a Philips screwdriver to loosen and remove the screws of the front disc brake master cylinder.
2. Remove the cap, and Diaphragm Plate with diaphragm
3. Remove the dust cap and place the suitable ring spanner on the bleeding nipple attach a Vinyl Pipe ( transparent)
4. Thereafter, take a Clean glass / Plastic container (transparent) with fresh brake fluid, and dip the other end of the vinyl pipe (transparent) in it (make sure that the vinyl pipe is always submerged in the fluid during the bleeding process.)
Bleeding procedure
1. Operate the brake lever to the maximum travel, three to four times and hold the lever in pressed condition
3. Then, use the suitable ring spanner to loosen the bleeding nipple Now you will notice that the brake fluid is coming out of bleeding nipple with air bubbles.
4. As and when brake fluid flow stops tighten the bleeding nipple using suitable ring spanner. Release the brake lever
5. Repeat step (1) through step (5) several times until the discharged fluid is free of air bubbles. And Check the travel of the brake lever. If a firm resistance is felt, the manual bleeding is complete.
6. Do not let the brake master cylinder/reservoir fluid get below the MIN level during the bleeding operation. Keep the master cylinder / reservoir filled with fresh DOT4 brake fluid (never fill the reservoir with the used brake fluid)
Reassembly
1. Remove the vinyl pipe and remove the ring spanner
2. Refit the dust cap ( make sure that there is no leak from the bleeder nipple)
3. Refit the diaphragm with diaphragm plate of the master cylinder
4. Refit the master cylinder cap taking care that the vent slot in the cap is facing rider
Preparation ( Rear Disc Brake)
1. Remove the reservoir cap of the rear disc brake
2. Remove the Diaphragm Plate with diaphragm
3. Remove the dust cap and place the suitable ring spanner on the bleeding nipple
4. Attach a Vinyl Pipe ( transparent)
5. Thereafter, take a Clean glass / Plastic container (transparent) with fresh brake fluid, and dip the other end of the vinyl pipe (transparent) in it (make sure that the vinyl pipe is always submerged in the fluid during the bleeding process.)
Bleeding procedure
1. Operate the brake lever to the maximum travel, three to four times and hold the lever in pressed condition
2. Then, use the suitable ring spanner to loosen the bleeding nipple Now you will notice that the brake fluid is coming out of bleeding nipple with air bubbles.
3. As and when brake fluid flow stops tighten the bleeding nipple using suitable ring spanner. Release the brake lever
4. Repeat step (1) through step (5) several times until the discharged fluid is free of air bubbles. And Check the travel of the brake lever. If a firm resistance is felt, the manual bleeding is complete.
5. Do not let the brake master cylinder/reservoir fluid get below the MIN level during the bleeding operation. Keep the master cylinder / reservoir filled with fresh DOT4 brake fluid (never fill the reservoir with the used brake fluid)
Reassembly
1. Remove the vinyl pipe and remove the ring spanner
2. Refit the dust cap { make sure that there is no leak from the bleeder nipple)
3. Refit the diaphragm with diaphragm plate of the reservoir
4. Refit the reservoir cap
Bleeding the Hydraulic Brake System Bleeder equipment pneumatic assisted (Front & Rear)
Preparation ( Front Disc Brake)
1. Use a Philips screwdriver to loosen and remove the screws of the front disc brake master cylinder.
2. Remove the cap, and Diaphragm Plate with diaphragm
3. Remove the dust cap and place the suitable ring spanner on the bleeding nipple
4. Make sure that the brake fluid reservoir level is maintained
Bleeding procedure
1. Attach the bleeding equipment pipe to the bleeding nipple
2. Attach the other end of the bleeding equipment connecter to the compressed air line
3. Now open the bleeding nipple by using appropriate spanner, and simultaneously press the lever of bleeding equipment for a few seconds and observe that the brake fluid is coming out of the bleeding nipple into the container of the bleeding equipment – if you observe that, air bubble along with brake fluid, continue the above procedure for more duration
4. Simultaneously fill the reservoir to the specified mark and close the bleeding nipple with the help of appropriate spanner
5. And Check the travel of the brake lever. If a firm resistance is felt, the bleeding is complete.
Reassembly
1. Disconnect the compressor connection from the equipment and pipe line from the bleeding nipple
2. Refit the dust cap { make sure that there is no leak from the bleeder nipple)
3. Refit the diaphragm with diaphragm plate of the reservoir
4. Refit the reservoir cap
Preparation (Rear Disc Brake)
1. Remove the reservoir cap of the rear disc brake
2. Remove the Diaphragm Plate with diaphragm
3. Remove the dust cap and place the suitable ring spanner on the bleeding nipple
4. Make sure that the brake fluid reservoir level is maintained
Bleeding procedure
1. Attach the bleeding equipment pipe to the bleeding nipple
2. Attach the other end of the bleeding equipment connecter to the compressed air line
3. Now open the bleeding nipple by using appropriate spanner, and simultaneously press the lever of bleeding equipment for a few seconds and observe that the brake fluid is coming out of the bleeding nipple into the container of the bleeding equipment – if you observe that, air bubble along with brake fluid, continue the above procedure for more duration
4. Simultaneously fill the reservoir to the specified mark and close the bleeding nipple with the help of appropriate spanner
5. And Check the travel of the brake lever. If a firm resistance is felt, the bleeding is complete.
Reassembly
1. Disconnect the compressor connection from the equipment and pipe line from the bleeding nipple
2. Refit the dust cap ( make sure that there is no leak from the bleeder nipple)
3. Refit the diaphragm with diaphragm plate of the reservoir
4. Refit the reservoir cap
Periodic Maintainence Service & Schedule
1. Use only DOT 4 Brake Fluid
2. Never mix the multi grade brake fluid
3. Every Service inspect the Bundy pipe for damage, leaks, cracks clinks and proper routing.
4. Every Service inspect the Banjo union for its tightness and for leak
5. Maintain the brake fluid level above the minimum level in the reservoir
6. Replace the Brake fluid at every XXXXXXX Km/ XXXXX Months which ever is earlier
7. Replace the Bundy pipe and Banjo bolt at every XXXXX Km/ XXXX Months which ever is earlier (always use new banjo washer)
Important Safety Recall Information
Safety Recall Campaign# 21V-045
Dear Royal Enfield Dealers,
Royal Enfield North America (RENA) (A Unit of Eicher Motors Ltd.), has determined to conduct a voluntary safety-related recall in the United States covering models under the names INT 650, Continental GT 650. RENA has discovered a brake caliper corrosion-related issue in a very small number of Interceptor INT 650, Continental GT 650 motorcycles.
RENA has received no reports or complaints from our dealers or customers related to this concern.
Description of the concern outside of North America:
Royal Enfield has discovered a brake caliper corrosion-related issue in a very small number of Interceptor INT 650, Continental GT 650 motorcycles in some specific countries outside of North America. Upon investigation, it was revealed that this corrosion is brought about by sustained, longterm exposure to riding on roads treated with certain salts or a combination of salts, to prevent formation of ice during winters.
This corrosion causes damage to the brake caliper piston bore and assemblies, and can result in unusual braking sound, increased brake drag, unusual difficulty in pushing the motorcycle manually and may impact braking action.
Royal Enfield of North America will begin notifying the affected customers regarding the recall through mail the week of March 22. The brake calipers both front and rear will be replaced through this process.
PLEASE BE ADVISED, IT’S A VIOLATION OF FEDERAL LAW FOR A DEALER TO DELIVER A NEW MOTOR VEHICLE COVERED BY THE NOTIFICATION UNDER A SALE OR LEASE UNTIL THE DEFECT IS REMEDIED
Please find attached:
- The service circular
- Technical reference material
- Parts ordering process
- Campaign claim / reimbursement process
- A copy of the customer letter
We ask that you please read these materials thoroughly and share them with all of your staff as soon as possible. Copies of this notification and its attachments can be found on the Google Drive within the dealer Toolbox and can be accessed through this link (Link To Documents)
In the meantime, we ask that you and your staff answer any questions your customers may have regarding this subject utilizing the information shared within this dealer communication only. In addition we ask that you contact RENA’s technical service department if you have additional technical questions or concerns regarding this matter, please email us at RENAService@royalenfield.com or via phone 414-501-3809.
DEALER COMMUNICATIONS
February 17th 2021
DC — Campaign SC-14
Subject: IMPORTANT DEALER COMMUNICATION!
Dear Royal Enfield Dealers:
This Service Circular is to inform you about a voluntary Safety recall announcement by Royal Enfield of North America (RENA) pertaining to specific INT 650 and Continental GT 650 models. It outlines the required replacement of front and rear brake calipers and the appropriate actions to take.
Royal Enfield has discovered a brake caliper corrosion-related issue in a very small number of Interceptor “INT” 650, Continental GT 650 motorcycles in some specific countries outside of North America. Upon investigation, it was revealed that this corrosion is brought about by sustained, long-term exposure to riding on roads treated with certain salts or a combination of salts, to prevent formation of ice during winters. This corrosion causes damage to the brake caliper piston bore and assemblies, and can result in unusual braking sound, increased brake drag, unusual difficulty in pushing the motorcycle manually and may impact braking action.
To date, RENA has received no reports or complaints from our dealers or customers related to this concern. RENA has decided to voluntarily launch this recall in the very rare instance this may occur
This recall pertains to model year 2019-2021 INT 650 and Continental GT 650 models. The brake calipers both front and rear will be replaced through this process. Please find the Service Circular, Technical instructions, Parts ordering, and claim filing process information on the following pages.
Below are the VIN ranges that are potentially affected by this condition:
| Beginning VIN | Ending VIN |
| ME3FPN476KK | ME3FPN471MK |
| ME3FPN478MK | ME3FPN477MK |
We are including photos as a visual indicator to confirm the completion of this action. The images below show the visual identification differences between the NONAnodized and Anodized calipers.
| SERVICE CIRCULAR | Issue no. | RE-IB-SC-11-R1 | |
| Issue date | |||
| Page No | 01 of 02 | ||
| SUBJECT | FRONT AND REAR CALIPER ASSEMBLY REPLACEMENT RECALL | ||
| APPLICABLE MODELS | INT 650, GT 650 | ||
Attn: Service Manager / Technicians
The technical action required to perform this recall are as follows:
The current non-anodized brake calipers (front and rear) will be replaced with anodized calipers (front and rear) The respective service manual outlines the proper procedure for caliper replacement. For convenience these have been attached.
Please note:
- The original brake pads should be inspected to ensure they are free of any contaminants and are within their operational specification which is listed in the service manual. Please see Section 9 of the Service Manual – Attached.
- If the brake pads are under the minimum specification, contaminated, or functionally compromised, the customer will need to be notified and the brake pads should be replaced. Brake pad replacement will not be covered under this recall.
- After the new anodized calipers are installed, the brake system must be bled and the DOL tool must be used to perform the modulator actuation. The process is outlined in Annexure 1 – Attached.
Pending approval from NHTSA, the owner letter will include the following direction:
- IMPORTANT: Should you choose to ride your motorcycle before this safety recall service has been completed, to reduce the risk associated with this condition, we recommend that you evaluate your motorcycle BEFORE each ride per the following procedure: o With your bike in neutral – o Fully depress rear brake pedal and release. o Fully squeeze front brake lever and release.
- Slightly rock the motorcycle back and forth to ensure that brakes have released normally and increased brake drag is not present.
- NOTE: If increased brake drag from either the front or rear brake is noted, your motorcycle may be exhibiting the recall condition.
Part Details and Ordering Process
Due to low part availability dealer orders containing caliper part numbers will not be fulfilled. We will provide an initial wave shipment of anodized replacement calipers and will be shipped to your dealership starting the week of February 22nd 2021. A dealer communication will be released to notify that sufficient stock is available and dealer ordering may begin. Calipers will be invoiced per transaction and will be filed for reimbursement with labor in the warranty claim submission process.
| Part Description | New Part Number |
| FRONT CALIPER | KAB00267/A |
| REAR CALIPER | KAB00268/A |
Claim filing
RENA will reimburse parts and labor cost under the standard warranty process using job type “Campaign” and Campaign type “Campaign SC 14”. This reimbursement will also cover consumables and administrative time: See the attached screenshots as an aid.
Upon completion of caliper (front and rear) replacement, use the standard claim submission process within the DMS. Listed below are filing details specific to this campaign. Please use the following part numbers and warranty flat rate time (frt) to complete the claim:(INSERT IMAGE)
Job type: Campaign
Campaign Type: Campaign SC 14
Part numbers:
Front Caliper – KAB00267/A
Rear Caliper – KAB00268/A
Labor Codes:
Front Caliper – INGT-WBFB001 .4 hours
Rear Caliper – INGT-WBRB001 .4 hours
If you have any questions, please contact Technical service at
Renaservice@royalenfield.com or call 414-501-3809
Sincerely,
Royal Enfield of North America
6 Affected Products
Vehicles
| MAKE | MODEL | YEAR |
| ROYAL ENFIELD | CONTINENTAL GT 650 | 2018-2020 |
| ROYAL ENFIELD | INTERCEPTOR 650 | 2018-2020 |
12 Associated Documents
Remedy Instructions and TSB
RCRIT-21V045-8952.pdf 642.029KB
 Loading...
Recall Acknowledgement
RCAK-21V045-9673.pdf 689.777KB
Loading...
ISSUED Owner Notification Letter(Part 577)
RCONL-21V045-8716.pdf 87.534KB
Loading...
Recall 573 Report-Amendment 1
RCLRPT-21V045-5820.PDF 218.777KB
Loading...
Recall Quarterly Report #1, 2021-1
RCLQRT-21V045-2992.PDF 211.144KB
Loading...
Recall 573 Report-Amendment 2
RCLRPT-21V045-9867.PDF 219.288KB
Loading...
Manufacturer Notices(to Dealers,etc) – February 16th 2021 Subject: IMPORTANT DEALER COMMUNICATION! Voluntary Safety Recall Campaign SC-14
RCMN-21V045-2126.pdf 414.489KB
Loading...
Manufacturer Notices(to Dealers,etc) – Service manual section 9
RCMN-21V045-2123.pdf 4919.395KB
Loading...
Manufacturer Notices(to Dealers,etc) – Annexure 1 Bleeding the Hydraulic Brake System With DOL Tool (Front & Rear)
RCMN-21V045-9983.pdf 6404.457KB
Loading...
Recall Quarterly Report #3, 2021-3
RCLQRT-21V045-0418.PDF 211.324KB
Loading...
Recall Quarterly Report #2, 2021-2
RCLQRT-21V045-0720.PDF 211.244KB
Loading...
Recall Quarterly Report #4, 2021-4
RCLQRT-21V045-8658.PDF 211.437KB
Loading...
Latest Recalls Documents
For the Latest and Most Recent Recalls Information Visit the link below…
https://www-odi.nhtsa.dot.gov/acms/cs/documentList.xhtml?docId=21V045&docType=RCL
- Made using high pressure die cast alluminium platforms with bonded brake linings
- All shoes are radius ground and edge trimmed
- Features lead in and lead out chamfers at lining ends
- Original equipment style brake shoe springs included

- Made using high pressure die cast alluminium platforms with bonded brake linings
- All shoes are radius ground and edge trimmed
- Features lead in and lead out chamfers at lining ends
- Original equipment style brake shoe springs included
- Fits: Harley Davidson FLHX Street Glide 2008-2013, FLHX Street Glide 2014-2015, FLHXS Street Glide Special 2015
- Complete Double-H Sintered Brake Pad Change Kit includes 2 EBC FA409HH Front Brake Pads and 1 EBC FA409HH Rear Brake Pad
- Double-H Sintered Brake Pads deliver high performance and are well known as the EBC flagship sintered high-performance brake pad
- ECE R 90 brake safety approved and TUV tested, these ultra high friction HH rated brake pads remain a market leader above the rest as nothing else beats the performance of the Double-H Sintered Brake Pad
- Manufactured in the US in the state-of-the-art sintering plant in Ohio, Double-H Sintered Brake Pads perform well in all weather conditions be it dry or wet and have a high longevity lasting for many miles

- Features the highest friction HH rating for maximum stopping power, made in the USA from sintered copper alloy like original pads for longer life and perfect braking
- Stainless steel radiator plates are fitted to reduce heat transfer into bikes hydraulics where required
- The unique double segment vented design improves braking under all riding conditions, keeping the pads cooler and preventing pad drag and overheat or fade
- EBC removed the iron powders commonly used in many sintered pads that cause the pad to weld to the disc under corrosion when the bike is parked and replaced it with stainless powder
- Uses EBCs SB101C friction material which completely eliminates brake noise, improves the pads heat cycling capability and improves feel at the lever

- 【Fitment】Fit for Harley Davidson Motorcycle ▶ Electra Glide FLHT 2008-2020 ▶ Night Rod VRSCD 2006-2011 ▶ Road Glide FLTR 2008-2020 ▶ Road King FLHR 2008-2020
- 【Fitment】 ▶ Street Glide FLHX 2008-2020 ▶ Street Rod VRSCR 2006-2007 ▶ Tri Glide FLHTCUTG 2008-2013 2019-2020 ▶ Ultra Limited FLHTK 2014-2020 ▶ V-Rod VRSC 2005-2017
- 【Material】1. With copper plating base is good for dissipation 2.Sintered by copper and tin formula compound is designed to any poor condictions.
- 【OEM#】41854-08 42850-06 42897-06 42897-08 FA409. 【Repalcement OEM#】42850-06A 42897-06A
- 【Package】Brake Pads Set x 3. Not included instruction manual. Easy to install

- Premium Brake Pads for Your Motorcycle or ATV: Brake Pads fit for 2008-2022 FLHR Road King FLHX Street Glide + 2008-2020 FLHTCU Ultra Classic Electra Glide & FLHRC Road King Classic & VRSCDX Night Rod, 2015-2022 Road Glide FLTRX Limited & FLHXS Street Glide Special & FLTRXS Road Glide Special + 2015-2021 FLHTK Electra Glide Ultra LTD & FLHTKL Electra Glide Ultra LTD Low, 2016-2020 FLTRU Road Glide Ultra + 2007-2020 VRSCDX Night Rod Special + 2009-2020 VRSCF V-Rod Muscle
- High-Performance Braking: Our brake pads are made from the highest quality Carbon Fiber materials and are designed to provide superior stopping power, ensuring that you can stop your motorcycle or ATV safely and quickly when you need to.
- Quiet and Durable: ECCPP brake pads are designed to be quiet and long-lasting, so you can enjoy a smooth and noise-free ride while also getting the most out of your investment.
- Easy to Install: Installing our brake pads is a breeze, and can be done by anyone without the need for any special tools. We've designed our brake pads to fit perfectly onto your motorcycle or ATV, so you can get back on the road in no time.
- Satisfaction Guaranteed: We're confident that you'll love ECCPP brake pads, and we stand behind them with our satisfaction guarantee. If for any reason you're not completely satisfied, we offer a hassle-free return policy.

- All shoes are radius ground and edge trimmed
- Package Dimensions: 15.748 H x 1.016 L x 12.192 W (centimetres)
- Package Weight: 0.227 kilograms
- Country of Origin : Wales
- Made using high pressure die cast alluminium platforms with bonded brake linings

- Made using high pressure die cast alluminium platforms with bonded brake linings
- All shoes are radius ground and edge trimmed
- Features lead in and lead out chamfers at lining ends
- Original equipment style brake shoe springs included

- Premium Brake Pads for Your Motorcycle or ATV: Brake Pads fit for SUZUKI GSXR600 GSXR750 GSXR 600 GSXR 750 K6/K7/K8/K9/L0 2006 2007 2008 2009 2010; GSXR1000 K7/K8 2007 2008 2009 2010; GSX1300 RK8/RK9/RL0/RL1/RL2 2008 2009 2010 2011 2012 Fitment: for SUZUKI DL1000 AL4/AL5/AL6/AL7/AL8/AL9 V-Strom(ABS) 2014 2015 2016 2017 2018 2019 2020; DL1000XT XAL8/XAL9 V-Strom(ABS) 2018 2019 2020
- High-Performance Braking: Our brake pads or brake shoes are made from the highest quality Carbon Fiber materials and are designed to provide superior stopping power, ensuring that you can stop your motorcycle or ATV safely and quickly when you need to.
- Quiet and Durable: ECCPP brake pads are designed to be quiet and long-lasting, so you can enjoy a smooth and noise-free ride while also getting the most out of your investment.
- Easy to Install: Installing our brake pads is a breeze, and can be done by anyone without the need for any special tools. We've designed our brake pads to fit perfectly onto your motorcycle or ATV, so you can get back on the road in no time.
- Satisfaction Guaranteed: We're confident that you'll love ECCPP brake pads, and we stand behind them with our satisfaction guarantee. If for any reason you're not completely satisfied, we offer a hassle-free return policy.

- Made using high pressure die cast alluminium platforms with bonded brake linings
- All shoes are radius ground and edge trimmed
- Features lead in and lead out chamfers at lining ends
- Original equipment style brake shoe springs included
Last update on 2024-04-12 / Affiliate links / Images from Amazon Product Advertising API
This product presentation was made with AAWP plugin.