
| “This site contains affiliate links for which OEMDTC may be compensated” |
NHTSA ID Number: 10057445
Manufacturer Communication Number: XL-TA20012RM
Summary
SAF REMOVAL AND REASSEMBLY OF CAM BEARING SEALS, AT AXLE SPIDER ,ARE BEING PROVIDED, WITH INSTRUCTIONS; ALSO ADDITIONAL INFORMATION IS FOUND IN DRUM BRAKE AXLE SERVICE MANUAL. *PE
1 Affected Product
Equipment
| BRAND | PART NO. | PRODUCTION DATES |
| SAF-HOLLAND | INTEGRAL DISC BRAKE AXLES | |
Work Instruction Drum Brake Axles
Cam Bearing Seal Replacement
December 2014
These instructions are for the removal and reassembly of your cam bearing seals at the axle spider on your SAF® axle. Additional information can also be found in our drum brake axle service manual document number XL-TA10006OM-en-US
NOTE: Before starting any axle/brake service procedures, park the trailer on a level surface. Exhaust the air from the suspension(s), chock the wheels to prevent the trailer from moving and support the trailer and axle(s) with safety stands.
WARNING
Failure to properly support the vehicle and axles prior to commencing work could create a crush hazard which, if not avoided, could result in death or serious injury.
- Release the trailer brakes and cage the spring brakes according to the spring brake manufacturer’s instructions. Remove the trailer tires from the axle you will be performing service on to access the hub and drum.
- Remove the drum from the hub using a support device such as a drum dolly. It will be necessary to retract the brake shoes to allow the brake drum to clear the brake shoes during the brake drum removal.
CAUTION
Failure to support weight during installation or removal of brake drum could create a crush hazard which, if not avoided, could result in minor to moderate injury.
- Unhook both the brake retaining springs from the brake shoes.
- Press down on the lower brake shoe to disengage it from the anchor pin. Move the lower shoe to the side of the anchor bracket and lift the upper and lower shoes to remove them.
- Remove the hub.
- Remove the cotter pin that secure the brake adjuster/brake chamber clevis pin. Remove the clevis pin.
- Remove the retaining ring and washer that secure the brake adjuster to the S-Camshaft.
- Remove brake adjuster from cam shaft spline.
- Remove the retaining ring from the spider end of the S-Camshaft.
- Remove the S-Camshaft and guide plate by sliding the cam shaft out of the bearing housing and bearings. It might be necessary to tap the end of the shaft with a soft mallet to release it from the bearings.
- Remove the cam seals from the brake spider.
- Install the new cam seals on the bearing housing of the brake spider.
NOTE: Cam seals MUST be installed in the brake spider with the steel shoulder oriented toward the wheel, and the rubber wiper oriented toward the center of the vehicle. This facilitates complete lubrication of the s-cam bearing while allowing air to purge from the s-cam bearing away from the brakes (Figure 1).
Figure 1
- Reinstall guide plate and S-Camshaft by sliding it through the S-Camshaft bearing in the brake spider. Once through the brake spider, reinstall the washer and snap ring to the end of the brake spider. Apply grease to the bearing at the grease fitting.
- Apply an even coat of anti-seize compound to the splined surface of the S-Camshaft.
- Re-install the brake adjuster.
- Re-install the hub and add proper lubricant.
- Re-install the brake shoes.
CAUTION
Failure to control spring pressure during the brake shoe installation could create a pinch hazard which, if not avoided, could result in minor to moderate injury.
- Re-install the drum to the hub.
CAUTION
Failure to support weight during installation or removal of brake drum could create a crush hazard which, if not avoided, could result in minor to moderate injury.
- Re-install the tires per manufacturers instructions.
- Adjust the brakes per manufacturers instructions.
SEOCONTENT-START
From fifth wheel rebuild kits to suspension bushing repair kits,
SAF-HOLLAND Original Parts are the same quality components used
in the original component assembly.
SAF-HOLLAND Original Parts are tested and designed to provide maximum performance and durability. Will-fits, look-alikes or, worse yet, counterfeit parts will only limit the performance potential and could possibly void SAF-HOLLAND’s warranty. Always be sure to spec
SAF-HOLLAND Original Parts when servicing your
SAF-HOLLAND product.
SAF-HOLLAND USA · 888.396.6501 · Fax 800.356.3929
www.safholland.us
SAF-HOLLAND CANADA · 519.537.3494 · Fax 800.565.7753
WESTERN CANADA · 604.574.7491 · Fax 604.574.0244
www.safholland.ca
SAF-HOLLAND MEXICO · 52.55.5362.8743 · Fax 52.55.5362.8743
www.safholland.com.mx
info@safholland.com
SAF-HOLLAND USA, INC.1950 Industrial Blvd., Muskegon, MI 49442www.safholland.com
XL-TA20012RM
https://www.nhtsa.gov/recalls?nhtsaId=10057445
https://static.nhtsa.gov/odi/tsbs/2014/SB-10057445-4378.pdf
 Loading...
| “This site contains affiliate links for which OEMDTC may be compensated” |

- Compact tube cutter
- Tool solutions for most all situations
- Built to exceed tool standards
- The comfort grip handle makes the job even easier
- Highly durable
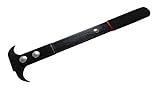

- Comes with an extra blade for future replacement, realize one buy get 2 piece of blades. No need to wait, can replace the blade immediately.
- Heat treated steel provides your daily basic using with necessary hardness, ensures product durability, can effectively prolong the service life.
- 2 size hook tips fit more repairing situation and allows easier removal of hard-to-get-at seals.
- Quality material handle avoids distortion, ensures durability. Chrome plated can perfectly prevent the seal puller from rusting. And enables you easily wipe away gunk and grease, preparing them for the next job at hand.
- Ideal for light trucks, cars, and SUVs seal removal, is your seal pulling job's good helper.

- Remove oil and grease seals when servicing cars SUVs and light trucks
- Removal without damaging the housing or bearing
- Hook tips in two sizes and professional handle design allows removal of hard-to-get-at seals by getting under them
- The tool is 12" long and the hook tip is double-secured for durability
- An extra blade is included


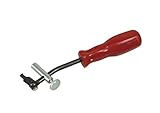
- EASY OIL SEAL REMOVAL: Use the indexing twin hooks to easily remove oil and grease seals without damaging the housing or bearing.
- ADJUSTABLE FOR VERSATILITY: Quickly adjust the hook to 14 different locking positions with a press of a button for flexibility and efficiency.
- VERSATILE APPLICATION: The 195 degrees of flexibility make it easier to reach and remove hard-to-reach seals, great for front-wheel drive transaxles, camshaft, and crankshaft seals.
- DURABLE MATERIAL: Made of Chrome Vanadium steel with a black phosphate coating, the seal puller is corrosion-resistant for long-lasting use.
- COMFORTABLE GRIP HANDLE: The 12-inch shaft is mounted on a double injection comfort grip handle for easy and comfortable use on most cars, SUVs, and light and heavy-duty trucks.

- Designed for Oil and Grease Seals: The BESTONG 56750 seal puller is specifically designed for use on oil and grease seals, offering versatility and efficiency in seal removal tasks.
- Simple Operation: With this seal puller, removing oil or grease seals is a straightforward process. Just insert the tip of the tool behind the seal, apply pressure, and pull. The leverage provided by the tool makes seal removal quick and easy.
- Dual Size Tips: The dual hook tips features two size tips that reach into and fit nearly all seal applications, ensuring compatibility with a wide range of seals. This versatility makes it a valuable tool for various automotive and mechanical projects.
- Convenient Handle: The handle of the seal puller is 12-1/2 inches long, providing ample leverage and grip for efficient seal removal. The ergonomic design ensures comfortable handling during use.
- Universal Fit: This seal puller is designed to offer a universal fit, making it suitable for use with different types of seals across various applications. Whether you're working on vehicles, machinery, or other equipment, this tool provides reliable seal removal capabilities.


- 【Size】: 12.5in Length
- 【Fitment】: Works on oil and grease seals. The size of the top tip is a large and small design, which can act on most of the sealing parts.
- 【Function】: Easy to operate. Just insert the tip part of the tool into the oil or grease sealing gap; Use the principle of leverage to press and pull. Using this tool can easily separate the seal kit, which can bring convenience to your work and is also a good gift for family and friends.
- 【Material】: Seal Puller Tool is made of high-quality metal, which has high hardness and high intensity. It is made strictly in accordance with the quality requirements. Enjoy a long sevice life.
- 【Package】: 1PC Black Seal Puller Tool. ------One-Year Warranty Service. Any problem about the product, please feel free to contact us, we will reply asap.
Last update on 2024-06-25 / Affiliate links / Images from Amazon Product Advertising API
This product presentation was made with AAWP plugin.