
| “This site contains affiliate links for which OEMDTC may be compensated” |
NHTSA ID Number: 10110609
Manufacturer Communication Number: SMB127
Summary
Service Manual Bulletin – Vapor Doors Proximity Switch Adjustment
1 Affected Product
Vehicle
| MAKE | MODEL | YEAR |
| NEW FLYER | NEW FLYER | 9999 |
SMB-127
ISSUE DATE: Sep 06 2013
Vapor Doors Proximity Switch Adjustment
16 – Entrance & Exit Door
This Bulletin provides revised information on the adjustment of the proximity switches located on the baseplate of the front and rear Vapor Slide Glide doors as installed on your New Flyer vehicle.
This information supersedes any prior information on this subject already provided in your New Flyer Manuals. Make this Service Bulletin available to service personnel to inform them of changed information.
SEOCONTENT-START
SMB-127 Copyright © 2013 New Flyer Industries Canada ULC Cover
SERVICE MANUAL BULLETIN
This Service Manual Bulletin is prepared by the Publications Department of New Flyer Industries
Canada ULC. Refer to details below.
ISSUE DATE: Sep 06 2013
SMB-127
APPLICABILITY
VEHICLE LENGTH 30ft. 35ft. 40ft. 60ft. ALL
VEHICLE TYPE High Floor Low Floor Invero Xcelsior ALL
FUEL TYPE
Diesel Electric CNG LNG
ALL
Diesel/Electric Gas/Electric Fuel Cell
SUBJECT Vapor Doors Proximity Switch Adjustment
SECTION TITLE 16 – Entrance & Exit Door
DETAILS This Bulletin provides revised information on the adjustment of the proximity
switches located on the baseplate of the front and rear Vapor Slide Glide
doors as installed on your New Flyer vehicle.
This information supersedes any prior information on this subject
already provided in your New Flyer Manuals. Make this Service Bulletin
available to service personnel to inform them of changed information.
SMB-127 Copyright © 2013 New Flyer Industries Canada ULC 1 of 3
SERVICE MANUAL BULLETIN
SMB-127
1. Entrance Door Switch Plate
& Proximity Switches
1.1. Installation
1. Install the switch into the front plate of the
door operator in reverse of removal.
1.2. Proximity Switch Adjustment
Adjust the distance between the switch
and the teeter plate to ensure correct actuation
of the entrance door. Ensure the following
conditions are met prior to
proceeding with adjustments:
❒ Using a digital multimeter (DMM), verify
each proximity switch is receiving power
and ground.
❒ Open the hinged access panel above the
entrance door and operate the emergency
release control to exhaust air from the door
system.
1. Manually move door panels to the fully
closed position and ensure output lever is
rotated fully clockwise (as viewed from the
bottom looking up.
2. Use a feeler gauge to measure gap
between teeter lever and bottom of the
LS1 proximity switch. Loosen switch lock
nuts as required and adjust switch to
obtain a gap of 0.080 ± 0.010 inches (2.00
± 0.13 mm) (Dim “A”). See “Fig. 1: Proximity
Switch Adjustment (Door Closed).” on
page 2.
3. Manually open the door and ensure the
output shaft is rotated fully counter-clockwise
as viewed from the bottom looking up.
The LS2 proximity switch should actuate
just prior to the door being fully opened,
and remain actuated with the door fully
open, illuminating the LED light at the rear
of the switch. This actuation point is
referred to as 85° open.
4. Use a feeler gauge to measure gap
between teeter lever and bottom of the
LS2 proximity switch. Loosen switch lock
nuts as required and adjust switch to
obtain a gap of 0.080 ± 0.010 inches
(2.00±0.13 mm) Dimensions in Fig 1
applies to LS2
5. Manually close the door and ensure the
output shaft is rotated fully clockwise as
viewed from the bottom looking up. The
LS1 proximity switch should actuate just
prior to the door being fully closed, and
remain actuated with the door fully closed,
illuminating the LED light at the rear of the
switch. This actuation point is referred to
as 5° closed.
6. Manually operate the door mechanism
several times between fully open and fully
closed to ensure proper actuation of the
switches.
7. Torque switch lock nuts to 130 in-lb.
8. Close the emergency release control to
apply system air pressure to door motor.
9. Cycle door controller several times
between open and closed to ensure proper
operation of the door mechanism and limit
switches.
2 of 3 Copyright © 2013 New Flyer Industries Canada ULC SMB-127
SERVICE MANUAL BULLETIN
SMB-127
Fig. 1: Proximity Switch Adjustment (Door Closed).
2. Exit Door Switch Plate &
Proximity Switches
☞ NOTE:
The following procedure only applies to Slide
Glide style rear (exit) doors.
2.1. Installation
1. Install proximity switches in their positions
on the baseplate.
2. Connect wiring to switches
???????????? ????????????
????????????????????????????????????????????????????????????
????????????????????????????????????????????????????????????????????
????????????
????????????????????????????????
s033913c.svg
SMB-127 Copyright © 2013 New Flyer Industries Canada ULC 3 of 3
SERVICE MANUAL BULLETIN
SMB-127
2.2. Proximity Switch Adjustment
Adjust the distance between the switch
and the output lever to ensure correct actuation
of the entrance door. Ensure the following
conditions are met prior to
proceeding with adjustments:
❒ Using a digital multimeter (DMM), verify
each proximity switch is receiving power
and ground.
❒ Open the exit door emergency valve cover
and operate the emergency release control
to exhaust air from the door system.
1. Manually close the exit door to rotate the
output lever fully clockwise to the closed
position. Position the 5° (lower) proximity
switch so that the head of the proximity
switch is centered over the flat of the output
lever and install lock nut.
2. Adjust proximity switch in or out as
required to obtain a 0.080 ± 0.010 inches
(2.00±0.13 mm) (Dim. “A”) gap between
the end of the switch and the flat of the output
lever. See “Fig. 2: Proximity Switch
Adjustment – Door Closed” on page 3.
3. Manually open the exit door to rotate the
output lever fully counter-clock-wise to the
open position. Position the 85° (upper) limit
switch so that the head of the proximity
switch is centered over the flat of the output
lever and install lock nut.
4. Adjust proximity switch in or out as
required to obtain a 0.080 ± 0.010 inches
(2.00 ± 0.13 mm) gap between the end of
the switch and the flat of the output lever.
The Dimensions in Fig 2 also applies to the
door open proximity switch.
5. Manually operate the door mechanism
several times between fully open and fully
closed to ensure proper actuation of the
switches.
6. Torque switch lock nuts to 130 in-lb.
7. Close the emergency release control to
apply system air pressure to door motor.
8. Cycle door controller several times
between open and closed to ensure proper
operation of the door mechanism and limit
switches.
Fig. 2: Proximity Switch Adjustment – Door Closed
????????????
????????????????????????????????????
????????????????????????????????????????????????????????????????
????????????????????????????????????????
????????????????????????????????????????????????????????????????
s033921a.svg
SMB127
https://www.nhtsa.gov/recalls?nhtsaId=10110609
https://static.nhtsa.gov/odi/tsbs/2013/MC-10110609-9999.pdf
 Loading...
| “This site contains affiliate links for which OEMDTC may be compensated” |

- Pushbutton Switches
- Capacitive proximity switch M30 CR30-15DN cylinder level sensor electrode long distance
- Material: paper
- Switch type: Push Button
- Color: One Color
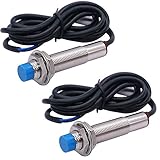
- Product Name : Inductive Proximity Switch;Model : LJ12A3-4-Z/AX;Theory : Inductive Sensor;Wire Type : 3 Wire Type (Brown, Blue, Black)
- Switch Appearance Type : Cylinder Type, Metal Shell;Output Type : NPN NC;
- Detecting Distance : 4mm(+/-10%);Supply Voltage : DC 6-36V Output Current : 300mA;Detect Object : Iron;Column Sensor Diameter : 10.4mm/0.4";Thread Diameter : 12mm/0.5"
- Total Size : 66 x 21mm/ 2.6'' x 0.8'' (L*Max.D);Cable Length : 1.16m/35.7'';External Material : Plastic, Metal
- Net Weight :100g;Color : Blue Tone, Black ;Package Content : 2 x Inductive Proximity Switch

- 🌟Inductive Proximity Switch Type: SN04-N, 3 Wire NPN NO. Detecting Distance: 4mm. Supply Voltage: 5-30VDC, Current Output: 300mA.
- 🌟LED working indicator: signal indicator, when sensing metal objects the light is on for normally open, the light is off for normally closed.
- 🌟Wiring Method: Brown connect to Positive, Blue connect to Negative, Black connect to Load (signal output).
- 🌟When proximity switch is close to some target object, it will send out control signal. Widely used for machine tool industry, frequency counters and other automatic control system, or you can use it for DIY 3D Printer.
- 🌟You will get 4pcs inductive proximity switch + 4pcs SN Bracket


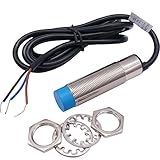
- Product Name : Inductive Proximity Switch;Model : LJ18A3-8-Z/BX;Wire Type : DC 3 Wire Type (Black, Brown, Blue);Switch Appearance Type : Cylinder Type
- Theory : Inductive Sensor;Output Type: NPN NO(Normal Open);Thread diameter: 18mm : 18mm;Detecting Distance : 8mm
- Supply Voltage : DC 6-36V;Current Output : 300mA;Detect Object : Iron
- Operating Temperature : -25C to +55C (Non-freezing Condition);Size : 7 x 3cm/2.8'' x 1.2'' (L*Max. Dia);Cable Length : 103cm / 40.55"
- External Material : Plastic, Alloy;Net Weight : 160g;Package Content : 2 x Inductive Proximity Switch

- 【Product Name】:Inductive Proximity Switch; Wire Type : DC 3 Wire Type (Black, Brown, Blue);Switch Appearance Type : Cylinder Type.
- 【Supply Voltage】 : DC12-24V;Current Output : 300mA;Detect Object : Iron,When proximity switch is close to some target object, it will send out control signal.
- 【Theory】 : Inductive Sensor;Output Type : NPN NO(Normal Open);Thread Diameter : 10.5mm/0.41";Head Diameter : 11.8mm/0.46".
- 【LED working indicator】: signal indicator, when sensing metal objects the light is on for normally open, the light is off for normally closed.
- 【Applied Range】:It is widely used in machine, paper making, light industry for limiting station, orientation taking count, speeding trial ect.

- LJ12A3-4-Z/AX inductive proximity switch; Theory: Inductive sensor; Wire Type: 3 wire type (brown, blue, black)
- Switch appearance type : Cylinder type, metal shell; Output type : NPN NC (Normally Closed); Detecting distance: 4mm(+/-10%)
- Supply voltage: DC 10-30V output current : 200mA; Respond Frequency: 0.5KHZ
- Detect object: Iron; Column sensor diameter: 10.4mm/0.4""""; Thread diameter: 12mm/0.5"""", Total size : 66 x 21mm/ 2.6'' x 0.8'' (L*Max.D); Cable length : 115.5cm/45''
- LJ12A3-4-Z/AX is a component widely used for detecting, controlling and non-contact switching
- Special attention: After the switch is installed, the sensing distance needs to be adjusted, otherwise, there will be no response when the switch is turned on.There are two friends recently. The reaction product does not work, First note: our products are 100 % tested before they leave the factory. Solution: 1. Turn Switch control sensing distance behind the product; 2 .Send us an email and we will send you a new one.
- Product Name : Capacitive Proximity Switch; Model : LJC18A3-H-Z/BX;Wire Type : DC 3 Wire Type (Brown, Black, Blue);Theory : Capacitance Sensor; Output Type : NPN NO(Normal Open);Diameter of Head : 16mm; Thread Diameter:18mm; Detecting Distance : 1-10mm
- Operating Temperature : -25 to +65 Celsius (Non-freezing Condition);Size : 7.5 x 3cm / 3"x 1.2"(L*Max. Dia);Cable Length : 120cm/47";External Material : Plastic, Alloy
- Detecting Object : Metal or Nonmetal Material; Supply Voltage : DC 6-36V;Current Output : 300mA;Response Frequency : 100Hz
- Net Weight : 85g;Color : Silver Tone, blue, Gray; Package Content : 1 x Capacitive Proximity Switch

- This proximity sensor has excellent performance, high sensitivity, good linearity, fast response, and can detect high-speed moving targets.
- This proximity sensor is not affected by external electromagnetic field interference when working, has strong anti-interference performance, and can detect all types of target materials.
- This proximity switch can choose NPN/PNP/NC/NO multiple output modes to meet different selection requirements
- This proximity switch adopts non-contact working mode, which will not scratch or damage the target surface due to contact, and has a long service life.
- This proximity sensor has a simple and compact mechanical structure, small size, and easy integration and installation.
Last update on 2024-06-18 / Affiliate links / Images from Amazon Product Advertising API
This product presentation was made with AAWP plugin.