| “This site contains affiliate links for which OEMDTC may be compensated” |
December 23, 2019 NHTSA CAMPAIGN NUMBER: 19V919000
Engine Cooling Fan May Seize and Cause Fire
An overheated fan motor increases the risk of a fire.
NHTSA Campaign Number: 19V919
Manufacturer Forest River, Inc.
Components ENGINE AND ENGINE COOLING
Potential Number of Units Affected 9
Summary
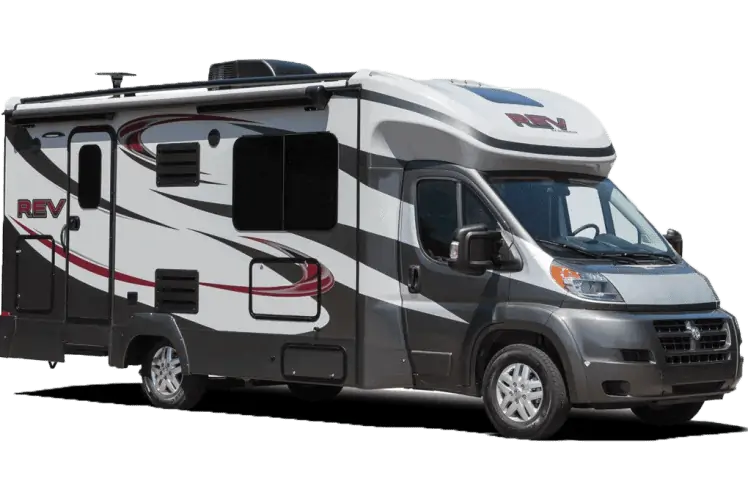
Forest River, Inc. (Forest River) is recalling certain 2016-2018 Dynamax Rev and Coachmen Orion motorhomes built on Ram ProMaster chassis equipped with 3.0L diesel or 3.6L gasoline engines and air conditioning (A/C). The engine cooling fan may seize which can cause the cooling fan motor to overheat.
Remedy
Forest River will notify owners, and Chrysler dealers will replace the engine cooling fan module, free of charge. This recall began September 14, 2020. Owners may contact Forest River customer service at 1-800-348-7440 or Chrysler customer service at 1-800-853-1403. Forest River’s number for this recall is 51-1121 and Chrysler’s number for this recall is VB2.
Notes
Owners may also contact the National Highway Traffic Safety Administration Vehicle Safety Hotline at 1-888-327-4236 (TTY 1-800-424-9153), or go to www.safercar.gov.
Revision (2) July 2020
Dealer Service Instructions for:
Safety Recall VB2 / NHTSA 19V-818 Engine Cooling Fan
NOTE: Remedy for 3.0L diesel engine equipped vehicles is now available in addition to 3.6L gasoline engine equipped vehicles.
NOTE: ProMaster repairs can only be performed by BusinessLink Dealers. Non BusinessLink Dealers should not order parts or perform the repair.
Remedy Available
| 2015-2018 | (VF) | Ram ProMaster |
NOTE: This recall remedy applies only to the above vehicles equipped with a 3.0L diesel engine or 3.6L gasoline engine and equipped with Air Conditioning (A/C).
NOTE: Some vehicles above may have been identified as not involved in this recall and therefore have been excluded from this recall.
| IMPORTANT: Some of the involved vehicles may be in dealer new vehicle inventory. Federal law requires you to complete this recall service on these vehicles before retail delivery. Dealers should also consider this requirement to apply to used vehicle inventory and should perform this recall on vehicles in for service. Involved vehicles can be determined by using the VIP inquiry process. |
Subject
The engine cooling fan on about 99,100 of the above vehicles may be susceptible to seizure and a cooling fan circuit protection design that may not be sufficient to protect the fan from overheating during a cooling fan seize condition in high speed mode. A cooling fan stall / seizure event could lead to electrical overloading of the fan motor potentially resulting in the thermal degradation of the brush housing, which may lead to a vehicle fire. In some circumstances, the Check Engine and/or the Engine Temperature Malfunction Indicator Lights may illuminate. A vehicle fire may increase the risk of injury to occupants and persons outside of the vehicle, as well as property damage.
Repair
Replace the engine cooling fan module.
Alternate Transportation
Dealers should attempt to minimize customer inconvenience by placing the owner in a loaner vehicle if the vehicle must be held overnight.
Parts Information
| Description | Part Number |
| Campaign Kit – All Vehicles | CSNJVB24AA |
| Each package contains the following components: | |
| Description | Quantity |
| Cable Ties for Wire Harness to Cooling Fan Module | 8 |
| Description | Part Number |
| Campaign Kit – 3.6L Gasoline Engine Only | CSNJVB21AA |
| Each package contains the following components: | |
| Description | Quantity |
| Cooling Fan Module Assembly | 1 |
| Description | Part Number |
| Campaign Kit – 3.0L Diesel Engine Only | CSNJVB22AA |
| Each package contains the following components: | |
| Description | Quantity |
| Cooling Fan Module Assembly | 1 |
| Description | Part Number |
| Campaign Kit – 3.0L Diesel Engine Only | CSNJVB23AA |
| Each package contains the following components: | |
| Description | Quantity |
| Hose Clamp for Charge Air Cooler | 1 |
Parts Return
No parts return required for this campaign. Render the old fan module unusable and discard.
Special Tools
The following special tools are required to perform this repair:
|
wiTECH MicroPod II |
|
Laptop Computer |
|
wiTECH Software |
Service Procedure
A. Battery Disconnect
WARNING: Remove metallic jewelry to avoid injury by accidental arcing of battery current.
WARNING: The battery negative and positive cable polarity are different from the gasoline engine equipped vehicles to the diesel engine equipped vehicles. Please note the location of the positive and negative cables prior to service of the battery or related components.
NOTE: To enhance customer satisfaction, remember to reset the clock when you have completed the service procedure.
NOTE: It may be necessary to use a battery terminal puller if the battery cable terminal clamp is seized on to the battery post.
- Turn the ignition switch to the “Off” position. Be certain that all electrical accessories are turned off.
- Remove the battery cover (Figure 1).
- Loosen the battery negative cable terminal clamp then remove and isolate the negative cable terminal from the battery post (Figure 1).
- Proceed to the appropriate service procedure for cooling fan replacement:
- Section B. 3.6L Gasoline Engine Cooling Fan Replacement – Page 6
- Section C. 3.0L Diesel Engine Cooling Fan Replacement – Page 13
B. 3.6L Gasoline Engine Cooling Fan Replacement
- Open and support the hood.
- Remove the bolt and position aside the pressurized coolant recovery bottle (Figure 2).
- Remove the two Pozidriv screws securing the fresh air duct to the upper radiator core support (Figure 3).
- Loosen the clamp securing the fresh air duct to the air cleaner housing (Figure 3).
- Remove the fresh air supply duct from the vehicle (Figure 3).
- Release the coolant degasser hose from the four retainers along the top edge of the cooling fan module then position the hose out of the way (Figure 4).
- The following cooling fan module steps may be performed together; some connectors or retainers may be more easily accessible from above or below. Disconnect any that are accessible from above first then raise and support the vehicle to access those accessible from below (Figures 5 through 7).
- From above or below as necessary, release the coolant recovery hose from the four retainers on the fan module (Figure 5).
- From above or below as necessary, disconnect the wire harness connectors from the cooling fan relays (1), the resistors (2) and the cooling fan motors (3) (Figure 6).
- From above or below as necessary, separate the wire harness (1) retainers from the cooling fan shroud (Figure 7).
- Position the coolant recovery hose and wire harness out of the way to prepare for cooling fan module removal.
- Remove the fastener (3) that secures the right side underbody shield (1) to the cradle (Figure 8).
- Remove the five fasteners (2) that secure the right side underbody shield (1) to the fascia and wheel liner (Figure 8).
- Remove the right side underbody shield (1) from the vehicle (Figure 8).
- From above or below as necessary for access, on each side of the cooling fan module, use a screwdriver or equivalent tool to depress the retaining clip (1) then lift upward to release the cooling fan module (2) from the mounts (Figure 9).
NOTE: The retaining clips (1) are only present on the upper right and upper left cooling fan module mounts. The lower right and lower left cooling fan module mounts do not have a retaining clips (Figure 9).
- Remove the cooling fan module (1) from the bottom of the vehicle (Figure 10).
- As necessary, transfer any coolant recovery hose retainers from the old cooling fan module to the NEW cooling fan module (Figure 5).
- Render the old cooling fan module unusable and DISCARD.
- Replace any damaged retainers on the cooling fan module wire harness. Install the replacement retainers in the same location and direction as the original retainer (Figure 11).
- Install the NEW cooling fan module (1) to the vehicle from the bottom (Figure 10).
- Position the cooling fan module (2) into the four mounting locations. Push the cooling fan module downward into the mounts and ensure to fully engage the two retaining clips (1) that are only present on the upper right side and upper left side cooling fan module mounts (Figure 9).
- Install the right side underbody shield (1) to the vehicle (Figure 8).
- Install the five fasteners (2) that secure the right side underbody shield (1) to the fascia and wheel liner, tighten securely (Figure 8).
- Install the fastener (3) that secures the right side underbody shield (1) to the cradle, tighten to 20 N·m (15 ft lbs). (Figure 8).
- The following cooling fan module steps may be performed together; some connectors or retainers may be more easily accessible from above or below. Connect any that are accessible from below first then lower the vehicle to access those accessible from above (Figures 5 through 7).
- From below or above as necessary, install the wire harness (1) retainers to the cooling fan shroud (Figure 7).
- From below or above as necessary, connect the wire harness connectors to the cooling fan relays (1), the resistors (2) and the cooling fan motors (3) (Figure 6). NOTE: Ensure the connectors are fully connected.
- From below or above as necessary, install the coolant recovery hose to the four retainers on the fan module (Figure 5).
- Install the coolant degasser hose to the four retainers along the top edge of the cooling fan module (Figure 4).
- Position the fresh air duct to the vehicle (Figure 3).
- Install the two Pozidriv screws securing the fresh air duct to the upper radiator core support, tighten securely (Figure 3).
- Tighten the clamp securing the fresh air duct to the air cleaner housing, tighten to 5 N·m (44 in. lbs.) (Figure 3).
- Position the pressurized coolant recovery bottle in the proper location then install the bolt. Tighten the bolt to 12 N·m (9 ft. lbs.) (Figure 2).
- Connect and secure the battery negative cable terminal clamp to the battery negative post (Figure 1).
- Install a battery charger and verify that the charging rate provides 13.2 to 13.5 volts. Set the battery charger timer (if so equipped) to continuous charge.
NOTE: Use an accurate stand-alone voltmeter. The battery charger volt meter may not be sufficiently accurate. If voltage reading is too high, apply an electrical load by activating the park or headlamps and/or HVAC blower motor to lower the voltage.
- Connect the wiTECH MicroPod II to the vehicle Data Link Connector (DLC).
- Turn the ignition to the “RUN” position.
- Open the wiTECH 2.0 website.
- Enter your “User id” and “Password” and your “Dealer Code”, then select “Sign In” at the bottom of the screen. Click “Accept”.
- From the “Vehicle Selection” screen, select the appropriate vehicle.
- From the vehicle “Topology” screen, select the “PCM” icon.
- From the “PCM” screen select the “Actuators” tab.
- From the “Actuators” tab select “Radiator/Condenser Cooling Fan Relay #1 Control State” routine and set to “Selected On”. Click “Start” and observe fan operation to confirm the fan is running then click “Stop” to stop the fan before exiting the routine. If the fan does not operate, check and ensure that the fan electrical connectors are fully connected and latched before performing further diagnosis.
- From the “Actuators” tab select “Radiator/Condenser Cooling Fan Relay #2 Control State” routine and set to “Selected On”. Click “Start” and observe fan operation to confirm the fan is running then click “Stop” to stop the fan before exiting the routine. If the fan does not operate, check and ensure that the fan electrical connectors are fully connected and latched before performing further diagnosis.
- Turn the ignition in the “OFF” position.
- Remove the wiTECH MicroPod II from the vehicle DLC.
- Remove the battery changer.
- Install the battery cover (Figure 1).
- Stow the hood prop-rod then close the hood.
- Set the date/time on the instrument panel information center.
- Complete the Proof of Correction form for California residents Page 23.
- Return the vehicle to customer or vehicle inventory.
- Ensure the old fan module has been rendered UNUSABLE and DISCARD.
C. 3.0L Diesel Engine Cooling Fan Replacement
- Open and support the hood.
- Remove the two lower fasteners securing the radiator grille (Figure 12).
- Remove the four upper fasteners securing the radiator grille (Figure 12).
- Remove the radiator grille from the vehicle (Figure 12).
- Remove the two lower fasteners securing the center bumper fascia (Figure 13).
- Remove the twelve upper fasteners securing the center bumper fascia (Figure 13).
- Remove the center bumper fascia from the vehicle (Figure 13).
- Release the band clamp then separate the fresh air duct connection (Figure 14).
- Remove the six fasteners securing the upper radiator crossmember (Figure 15).
- Reposition the upper radiator crossmember and secure it to the hood hinges (Figure 15).
- The following cooling fan module steps may be performed together; some connectors or retainers may be more easily accessible from above or below. Disconnect any that are accessible from above first then raise and support the vehicle to access those accessible from below (Figures 17 and 18).
- From above or below as necessary, disconnect the wire harness connectors from the cooling fan relays (1), the resistors (2) and the cooling fan motors (3) (Figure 17).
- From above or below as necessary, separate the wire harness (1) retainers from the cooling fan shroud (Figure 18).
- Position the wire harness out of the way to prepare for cooling fan module removal.
- Remove the fastener (3) that secures the right side underbody shield (1) to the cradle (Figure 19).
- Remove the five fasteners (2) that secure the right side underbody shield (1) to the fascia and wheel liner (Figure 19).
- Remove the right side underbody shield (1) from the vehicle (Figure 19).
- Release the hose clamp from the lower charge air cooler hose. A NEW hose clamp is supplied with this campaign (Figure 20).
- Disconnect the lower charge air cooler hose from the charge air cooler (Figure 20).
- Remove and DISCARD the old clamp from the charge air cooler hose (Figure 20).
- From above or below as necessary for access, on each side of the cooling fan module, use a screwdriver or equivalent to depress the retaining clip (1) then lift upward to release the cooling fan module (2) from the mounts (Figure 21).
NOTE: The retaining clips (1) are only present on the upper right and upper left cooling fan module mounts. The lower right and lower left cooling fan module mounts do not have a retaining clips (Figure 21).
- Remove the cooling fan module from the bottom of the vehicle (Figure 22).
- Render the old cooling fan module unusable and DISCARD.
- Replace any damaged retainers on the cooling fan module wire harness. Install the replacement retainers in the same location and direction as the original retainer (Figure 23).
- Install the NEW cooling fan module to the vehicle from the bottom (Figure 22).
- Position the cooling fan module (2) into the four mounting locations. Push the cooling fan module downward into the mounts and ensure to fully engage the two retaining clips (1) that are only present on the upper right side and upper left side cooling fan module mounts (Figure 21).
- Install a NEW hose clamp on the lower charge air cooler hose (Figure 20).
- Connect the lower charge air cooler hose to the charge air cooler (Figure 20).
- Tighten the NEW hose clamp until the outer breakaway head snaps off, this will set the clamp to the proper torque specification, no further tightening is needed. Clamp head breakaway torque is approximately 3 N·m (27 in. lbs.) (Figure 20).
- Install the right side underbody shield (1) to the vehicle (Figure 19).
- Install the five fasteners (2) that secure the right side underbody shield (1) to the fascia and wheel liner, tighten securely (Figure 19).
- Install the fastener (3) that secures the right side underbody shield (1) to the cradle, tighten to 20 N·m (15 ft lbs). (Figure 19).
- The following cooling fan module steps may be performed together; some connectors or retainers may be more easily accessible from above or below. Connect any that are accessible from below first then lower the vehicle to access those accessible from above (Figures 18 and 17).
- From below or above as necessary, install the wire harness (1) retainers to the cooling fan shroud (Figure 18).
- From below or above as necessary, connect the wire harness connectors to the cooling fan relays (1), the resistors (2) and the cooling fan motors (3) (Figure 17). NOTE: Ensure the connectors are fully connected.
- Position the upper radiator crossmember back in its proper location (Figure 15).
- Install the six fasteners securing the upper radiator crossmember. Tighten the fasteners to 45 N·m (33 ft. lbs.) (Figure 15).
- Connect the fresh air duct and secure the band clamp (Figure 14).
- Position the center bumper fascia to the vehicle (Figure 13).
- Install the twelve upper fasteners securing the center bumper fascia and tighten securely (Figure 13).
- Install the two lower fasteners securing the center bumper fascia and tighten securely (Figure 13).
- Position the radiator grille to the vehicle (Figure 12).
- Install the four upper fasteners securing the radiator grille and tighten securely (Figure 12).
- Install the two lower fasteners securing the radiator grille and tighten securely (Figure 12).
- Connect and secure the battery negative cable terminal clamp to the battery negative post (Figure 1).
- Install the battery cover (Figure 1).
- Start the engine and set the air conditioning (A/C) to high / maximum cold.
- Visually verify that both fans in the engine cooling fan module are functioning. If either fan does not operate, check and ensure that the fan electrical connectors are fully connected and latched before performing further diagnosis.
- Stow the hood prop-rod then close the hood.
- Set the date/time on the instrument panel information center.
- Complete the Proof of Correction form for California residents Page 23.
- Return the vehicle to customer or vehicle inventory.
- Ensure the old fan module has been rendered UNUSABLE and DISCARD.
Complete Proof of Correction Form for California Residents
This recall is subject to the State of California Registration Renewal/Emissions Recall Enforcement Program. Complete a Vehicle Emission Recall Proof of Correction Form (Form No. 81-016-1053) and supply it to vehicle owners residing in the state of California for proof that this recall has been performed when they renew the vehicle registration.
Process Steps to obtain the California Proof of Correction form:
- Access the “DealerCONNECT” website.
- Select the “Service” tab.
- Under the “Publications” heading, select the “ePublishing” link.
- Sign in using your Dealer Code and Password.
- Select the “Proof of Correction form”.
Completion Reporting and Reimbursement
Claims for vehicles that have been serviced must be submitted on the DealerCONNECT Claim Entry Screen located on the Service tab. Claims paid will be used by FCA to record recall service completions and provide dealer payments.
Use one of the following labor operation numbers and time allowances:
| Labor Operation Number |
Time Allowance |
|
| Replace Engine Cooling Fan Module and Verify Operation (3.6L Gasoline Engine) | 07-VB-21-82 | 1.2 hours |
| Replace Engine Cooling Fan Module and Verify Operation (3.0L Diesel Engine) | 07-VB-21-83 | 1.3 hours |
| Floor Plan Reimbursement | 95-95-95-97 | Calculate See Below |
Floor Plan Reimbursement represents the vehicle’s average daily allowance (see table below) multiplied by the number of days the vehicle was in dealer inventory and not available for sale. This reimbursement is limited to the number of days from the date of the stop sale to the date that the remedy was made available. Note: If the vehicle was received by your dealership (KZX date) AFTER the stop sale date, you will use the KZX date instead of the stop sale date. For this Recall, the stop sale was initiated on 11/21/2019.
- For 3.6L gasoline engines, the remedy was made available on 06/30/2020, therefore, the number of days cannot exceed 222 days.
- For 3.0L diesel engines, the remedy was made available on 07/16/2020, therefore, the number of days cannot exceed 238 days.
| Vehicle | Average Daily Allowance |
| 2015-2018 (VF) Ram ProMaster |
Add the cost of the recall parts package plus applicable dealer allowance to your claim.
NOTE: See the Warranty Administration Manual, Recall Claim Processing Section, for complete recall claim processing instructions.
Dealer Notification
To view this notification on DealerCONNECT, select “Global Recall System” on the Service tab, then click on the description of this notification.
Owner Notification and Service Scheduling
All involved vehicle owners known to FCA are being notified of the service requirement by first class mail. They are requested to schedule appointments for this service with their dealers. A generic copy of the owner letter is attached.
Vehicle Lists, Global Recall System, VIP and Dealer Follow Up
All involved vehicles have been entered into the DealerCONNECT Global Recall System (GRS) and Vehicle Information Plus (VIP) for dealer inquiry as needed.
GRS provides involved dealers with an updated VIN list of their incomplete vehicles. The owner’s name, address and phone number are listed if known. Completed vehicles are removed from GRS within several days of repair claim submission.
To use this system, click on the “Service” tab and then click on “Global Recall System.” Your dealer’s VIN list for each recall displayed can be sorted by: those vehicles that were unsold at recall launch, those with a phone number, city, zip code, or VIN sequence.
Dealers must perform this repair on all unsold vehicles before retail delivery. Dealers should also use the VIN list to follow up with all owners to schedule appointments for this repair.
Recall VIN lists may contain confidential, restricted owner name and address information that was obtained from the Department of Motor Vehicles of various states. Use of this information is permitted for this recall only and is strictly prohibited from all other use.
Additional Information
If you have any questions or need assistance in completing this action, please contact your Service and Parts District Manager.
Customer Services / Field Operations
FCA US LLC
IMPORTANT SAFETY RECALL
NHTSA RECALL: 19V919
CANADA RECALL: 2019-669
FR ID: 51-1121
<<VIN>>
<<OWNER NAME/DEALERNAME>>
<<ADDRESS>>
<<CITY>>, <<ST>> <<ZIP-XXX>>
<<DATE>>
This Notice applies to your vehicle VIN listed above.
Dear Forest River Customer:
This notice is sent to you in accordance with the requirements of the Motor Vehicle Safety Act. This notice is also sent to you in accordance with the requirements of the National Traffic and Motor Vehicle Safety Act. Forest River – Office of Corporate Compliance (“OCC”) has decided that a defect, which relates to the motor vehicle safety, exists in certain 20162018 Coachmen Orion and Dynamax REV Motorhome recreational vehicles. This is to inform you that your vehicle may contain a defect that could affect the safety of a person.
WHAT IS THE DEFECT/NONCOMPLIANCE?
Per FCA’s Recall 19V818 – A cooling fan stall / seizure event could lead to electrical overloading of the fan motor potentially resulting in the thermal degradation of the brush housing, which may lead to a vehicle fire.
EVALUATION OF THE RISK TO THE VEHICLE AND OPERATOR(S) RELATED TO THE RECALL.
A vehicle fire may increase the risk of injury to occupants and persons outside of the vehicle, as well as property damage.
WHAT IS FCA GOING TO DO?
FCA US will repair your vehicle [2] free of charge (parts and labor). To do this, your dealer will replace the engine cooling fan module.
WHAT SHOULD YOU DO?
Your time is important to us, so we recommend that you schedule a service appointment to minimize your inconvenience. Please bring this letter with you to your dealership. TO SCHEDULE YOUR FREE REPAIR, CALL YOUR FCA BUSINESSLINK DEALER TODAY.
CALIFORNIA RESIDENTS
The State of California requires the completion of emission recall repairs prior to vehicle registration renewal. Your dealer will provide you with a Vehicle Emission Recall Proof of Correction Form after the Emission Recall service is performed. Be sure to save this form since the California Department of Motor Vehicles may require that you supply it as proof that the Emission Recall has been performed. In order to ensure your full protection under the emissions warranty provisions, it is recommended that you have your (vehicle or engine) serviced as soon as possible. Failure to do so could be determined as lack of proper maintenance of your (vehicle or engine).
HOW LONG WILL THE REMEDY PROCESS TAKE?
The estimated time of repair is 2.0 hours. However, the dealership may need to keep your vehicle or schedule an appointment with you for a later date to fit into their regular service schedule.
WHAT IF YOU HAVE PREVIOUSLY PAID FOR REPAIRS TO YOUR VEHICLE FOR THIS PARTICULAR CONDITION?
If you have already experienced this specific condition and have paid to have it repaired, you may visit www.fcarecallreimbursement.com to submit your reimbursement request online. [3] Once we receive and verify the required documents, reimbursement will be sent to you within 60 days. If you have had previous repairs performed and/or already received reimbursement, you may still need to have the recall repair performed.
What if you no longer own this vehicle?
If you no longer own this vehicle and have the address for the current owner, please forward this letter to the new owner within 10 working days after the day in which the notice is received. You have received this letter because government regulations require that a notification is sent to the last known owner of record. Our records indicate that you are the current owner.
PLEASE NOTE: FEDERAL LAW REQUIRES THAT ANY VEHICLE LESSOR RECEIVING THIS RECALL NOTICE MUST FORWARD A COPY OF THIS NOTICE TO THE LESSEE WITHIN TEN DAYS.
MAY FOREST RIVER ASSIST YOU FURTHER?
If you have difficulties getting your vehicle repaired, please contact your Forest River Representative listed below:
| CONTACT | PHONE |
| FCA CUSTOMER SERVICE | (800) 853-1403 |
If you are still having difficulty getting your vehicle/towable repaired in a reasonable amount of time or without change, you may write to the following address:
| For US Owners Please Contact: | For Canadian Owners Please Contact: |
| Administrator National Highway Traffic Safety Administration 1200 New Jersey Ave, S.E. Washington, D.C. 20590Or you may call the toll free Vehicle Safety Hotline at 1-888-327-4236 or (TTY: 1-800-424-9153).Or visit www.safercar.gov and search; Recall ID: 19V919 |
Head of Recalls Motor Vehicle Safety Investigations Laboratory Transport Canada 80 Noël street, Gatineau, Quebec, J8Z 0A1Telephone (800) 333-0510 Facsimile (819) 420-4292Recall ID: 2019-669 |
This notice applies to your vehicle,
2015 RAM 3500 ProMaster
VB2/NHTSA 19V-818
YOUR SCHEDULING OPTIONS
- Visit mopar.com to sign up for email or SMS notifications for when remedy pa11s become available. You will be asked to provide your Vehicle Identification Number (VIN), provided above
- Scan below using your smartphone or tablet to sign up to be notified when remedy parts become available
- Wait for FCA US to contact you agai n, by mail, with a follow-up recall notice when remedy parts are available
- Call the FCA Recall Assistance Center at 1-800-853-1403. An agent can sign you up to be notified when remedy parts become available, or answer any other questions you may have
DEALERSHIP INSTRUCTIONS
Please reference Safety Recall VB2.
IMPORTANT SAFETY RECALL
Dear 00DNS-Forest River In:
This notice is sent to you in accordance with the National Traffic and Motor Vehicle Safety Act.
FCA US has decided that a defect, which relates to motor vehicle safety, exists in certain 2015 RAM 3500 ProMaster vehicles with a 3.0L diesel engine or 3.6L gasoline engine and equipped with Air Conditioning (A/C).
WHY DOES MY VEHICLE NEED REPAIRS?
The engine cooling fan on your vehicle CIJ may be susceptible to seizure and a cooling fan circuit protection design that may not be sufficient to protect the fan from overheating during a cooling fan seize condition in high speed mode. A cooling fan stall / seizure event could lead to electrical overloading of the fan motor potentially resulting in the thermal degradation of the brush housing, which may lead to a vehicle fire. In some circumstances, the Check Engine and/or the Engine Temperature Malfunction Indicator Lights may illuminate. A vehicle fire may increase the risk of injury to occupants and persons outside of the vehicle, as well as property damage.
HOW DO I RESOLVE THIS IMPORTANT SAFETY ISSUE?
The remedy for this condition is not currently available. We are making eve1y effort to finalize the remedy as quickly as possible, and will service your vehicle free of charge (parts and labor).
FCA US will contact you again, by mail, with a follow-up recall notice when the remedy is available. Once you receive your follow-up notice, simply contact your Chrysler, Jeep®, Dodge or RAM dealer right away to schedule a service appointment r21. Additional options for your next steps are included on the left side of this notification. We appreciate your patience.
WHAT IF I ALREADY PAID TO HAVE THIS REPAIR COMPLETED?
If you have already experienced this specific condition and have paid to have it repaired, you may visit www.fcarecallreimbursement.com to submit your reimbursement request online [3] Once we receive and verify the required documents, reimbursement will be sent to you within 60 days. If you have had previous repairs performed and/or already received reimbursement, you may still need to have the recall repair performed.
We apologize for any inconvenience, but are sincerely concerned about your safety. Thank you for your attention to this important matter.
Customer Assistance/Field Operations
FCA US LLC
6 Affected Products
Vehicles
| MAKE | MODEL | YEAR |
| COACHMEN | ORION | 2016-2018 |
| DYNAMAX | REV | 2016-2018 |
6 Associated Documents
Recall Acknowledgement
RCAK-19V919-2736.pdf 244.816KB
 Loading...
Defect Notice 573 Report
RCLRPT-19V919-6765.PDF 213.997KB
Loading...
Miscellaneous Document – FCA 19V-818 Notice to Forest River
RMISC-19V919-7752.pdf 549.536KB
Loading...
Recall 573 Report – Amendment 1
RCLRPT-19V919-6613.PDF 215.575KB
Loading...
ISSUED Owner Notification Letter(Part 577)
RCONL-19V919-7539.pdf 211.128KB
Loading...
Miscellaneous Document-RCRIT-19V818-5515 – Final Notice With Remedy
RMISC-19V919-0019.pdf 1919.436KB
Loading...
Latest Recalls Documents
https://www-odi.nhtsa.dot.gov/acms/cs/documentList.xhtml?docId=19V919&docType=RCL
| “This site contains affiliate links for which OEMDTC may be compensated” |

- Ideal replacement - this engine cooling fan assembly was precision-engineered to match the fit and performance of the stock radiator fan assembly on specific vehicles
- Complete package - assembly is designed with the same materials and components as the original part
- Quality assured - motors are tested in laboratory settings to ensure performance
- Cost effective and reliable - trustworthy manufacturing for far less than same part at the dealership
- Ensure fit - to make sure this part fits your exact vehicle, input your make, model and trim level into the garage tool

- √ 【HIGH-PERFORMANCE】10 Blades 12V 80W 12 Inch radiator engine cooling fan with mount brackets and tie straps kit.Maximum Fan CFM=800 CFM, Maximum Fan RPM=2000±10% RPM.Overall Diameter (in): 12.44''.Thickness (in): 2.36''.Amp Draw: ≤7.5 amp.
- √【DESIGN】Slim design provides excellent engine bay clearance.Good heat resistance and corrosion resistance ensure a long service life for the electronic radiator.
- 【PUSH/PULL】electric radiator cooling fan is reversible. It can be used as a puller.
- 【WIDE USE】Universal radiator cooling fan fit various vehicles and engines. It depends on the size of your radiator. Auxiliary equipment for cooling the entire engine compartment, including radiators, air conditioning systems, intercoolers, oil systems, and transmissions.
- 【SERVICE GUARANTEE】A customer said that the fan was not available. We put the instructions on the main picture for reference. Thank you. You can contact us if you have any questions.

- 【Perfect Fit】Direct OE replacement with OE comparable motor, mounting provisions, and wiring harness to ensure drop-in precise fitment
- 【Premium Quality】 Built with high-quality PA material for higher heat resistance and higher flexibility, resulting in increased durability and fewer vibrations/noise
- 【Exceptional Performance】 Utilizes licensed Bosch/Continental VDO shroud and blade design patents (where applicable) for true OE comparable construction and airflow
- 【Vehicle Tested】Tested on applicable vehicles prior to market release, providing seamless integration for control module and brushless units

- Direct replacement - this engine cooling fan blade fits and functions like the original equipment fan blade
- Quality construction - manufactured from premium materials for a long service life
- Quality tested - has undergone testing to ensure proper fit and performance
- Ensure fit - to make sure this part fits your exact vehicle, input your make, model and trim level into the garage tool

- OE-comparable, perfectly balanced unit ensures ease of installation
- Unitized replacement unit with fan, motor, and shroud maximizes efficiency in replacement
- All components are new, not refurbished
- All units are test-fitted onto the corresponding radiators prior to release to ensure precise, consistent fit
- Legal compliance through patent license agreements with Bosch/Continental VDO (where applicable) for turbine-like blade and shroud designs, providing an additional level of confidence and protection

- Replacement for: 2006-2011 for Chevy Impala, 2006-2007 for Chevy Monte Carlo
- OEM Part Numbers: 621420, 674-00240,GM3115187, Professional industrial process production, Electric radiator fan is closed and stable, low noise, can bring a comfortable driving experience. Excellent function, heat dissipation performance has been professional and guaranteed
- Specification: PSI: Color: Black, Plug Pin Number: 2/2, Voltage: 12, Cool the entire engine bay, including Radiator, A/C System, Intercooler, Oil System and Transmission
- Wide Use:Electric radiator fan kit are suitable for a lot of vehicles and engines. You can find the right model according to the product model. We will solve your troubles as much as possible, and hope that you have a good shopping experience
- Service: We offer a 1-year replacement service. However, please ensure that you double-check the compatibility to confirm that it is the suitable part for your vehicle. You can verify this by using the compatibility bar above or referring to the detailed compatibility information provided in the product description below.

- Quality Inspection .
- Easy Installation.
- Fitment Info In The Product Description.
- OEM: 2786.
- If You Have Any Questions, Please Tell Us .

- Ideal replacement - this engine cooling fan assembly was precision-engineered to match the fit and performance of the stock radiator fan assembly on specific vehicles
- Complete package - assembly is designed with the same materials and components as the original part
- Quality assured - motors are tested in laboratory settings to ensure performance
- Cost effective and reliable - trustworthy manufacturing for far less than same part at the dealership
- Ensure fit - to make sure this part fits your exact vehicle, input your make, model and trim level into the garage tool

- 【COMPATIBLE WITH】Cooling Fan Assembly is for 2012-2012 Verano,2011 2012 2013 2014 2015 2016 Cruze.
- 【HIGH QUALITY】The 2012 Verano engine cooling fan assembly is made of high-quality materials for durability and resistance to wear and tear, making it a reliable choice for your car's cooling system.
- 【EASY TO INSTALL】The 2011 Cruze Radiator Cooling Fan Assembly is designed to perfectly fit your vehicle, providing you with enhanced cooling and improved overall performance.
- 【NOISE REDUCTION】 Our 2013 Cruze Radiator cooling fan operates quietly, reducing noise levels and providing a more comfortable driving experience.
- 【Note】Dear Customer, Before you purchase this product, please make sure that it is suitable for the specific model you have. We offer a one-year warranty to protect your rights and interests. If you encounter any problems during purchase or use, please feel free to contact us, we will be happy to serve you. Please feel free to purchase, wish you happy shopping!
Last update on 2024-06-13 / Affiliate links / Images from Amazon Product Advertising API
This product presentation was made with AAWP plugin.