
| “This site contains affiliate links for which OEMDTC may be compensated” |
October 3, 2019 NHTSA CAMPAIGN NUMBER: 19V705000
Incorrectly Routed Hydraulic Lines
Incorrect routing of the hydraulic line can cause the line to melt from the exhaust heat, resulting in a loss of braking, increasing the risk of a crash or fire.
NHTSA Campaign Number: 19V705
Manufacturer Jayco, Inc.
Components SERVICE BRAKES, HYDRAULIC
Potential Number of Units Affected 1,660
Summary
Jayco, Inc. (Jayco) is recalling certain 2014-2018 Precept motorhomes built on Ford F53 chassis. The hydraulic lines may have been incorrectly routed too close to the exhaust without a heat shield.
Remedy
Jayco will notify owners, and dealers will inspect and correct the hydraulic line routing as necessary and install a heat shield, free of charge. The recall began November 14, 2019. Owners may contact Jayco customer service at 1-800-517-9137. Jayco’s number for this recall is 9903440.
Notes
Owners may also contact the National Highway Traffic Safety Administration Vehicle Safety Hotline at 1-888-327-4236 (TTY 1-800-424-9153), or go to www.safercar.gov.
Heat Shield Installation/Hydraulic Hose Routing
| Bulletin Type: | RECALL | Publication Date: | November 2019 |
| Recall #s: | 19V-705 US
2019-504 CN |
Make: | Jayco |
| Job Code: | 9903440 | Model: | Precept |
| Flat Rate: | RC024 Inspt for Heat Shield and Damages .2hr
RC025 Inspt & Install Heat Shield 1.5hr RC026 Inspt for Hose Routing and Damages .2hr RC027 Inspt & reroute Hoses 1hr
|
Model Year(s): | 2014-2018 |
Damage caused by a missing Heat Shield and/or by incorrect routing of the Hydraulic hoses, requires Pre-Authorization from Service Group prior to starting the repair.
| Affected Units: | 2014 E1UL0051-0258
2015 F1UL0051-0356 UP0051-0086 2016 G1UL0051-0395 UP0051-0082 2017 H1UL0051-0210 UP0051-0061 UT0051-0053 2018 J1UL0051-0288 US0051-0154 UT0051-0168 UU0051-0176 UV0051-0146 |
| Heat Shield Installation | Inspect for heat shield above the catalytic converter and install as required. | ||||||
| Parts Kit A: | Parts Kit #: 19V-705/706A | ||||||
Parts Kit Contents:
|
|||||||
| Misc. Tools & Supplies: |
|
| Hydraulic hose routing for leveling system | Excess hydraulic hoses for the leveling system are coiled and located in an area that may allow damage to a hose/s. (i.e. kinks, restrictions scuffed, melted, etc.) Inspect Hoses (3) and reroute as required. |
| Parts Kit B: | Parts Kit #: 19V-705/706B |
| Parts Kit Contents: 12 – 15” UV mounting hole cable zip ties |
INSPECTION STEPS
TURN OFF ENGINE & ALLOW ENGINE EXHAUST TO COOL COMPLETELY PRIOR TO INSPECTIONS
Inspection A Heat Shield above Catalytic Converter
Inspect to confirm if a heat shield is present above the catalytic converter.
If heat shield is in place above the catalytic converter, move to Inspection B.
If heat shield is missing, inspect for any damage caused by the missing shield.
Contact Customer Service for Pre-authorization to repair damages noted. Proceed with Heat Shield installation instructions.
While you are under the vehicle, proceed with the Hydraulic Hose Routing inspection.
Inspection B Hydraulic Hose Routing
Inspect the routing of the hydraulic hoses for the leveling system along the passenger side frame rail.
FIG 1
Example of hydraulic hose incorrectly coiled along chassis rail & above exhaust
FIG 2
Example of hydraulic hose correctly routed along chassis frame rail
Step 1 – Locate the hydraulic hose for the leveling system secured to the underbody, routed along the passenger-side frame rail. If there was excess hose during the build process, it will be bundled at a point approximately 3-5 feet forward of the pump box as shown in (Fig 1). After locating the hydraulic hosing, inspect the area where the hose coil is located and/or secured to the frame. If the hydraulic hose is positioned without slack along the frame rail with coil located at reservoir tank (Fig 2 and Fig 3), the hose coil is positioned correctly and no repair is necessary. If the hydraulic hose coil is confirmed to be incorrectly positioned on the frame side rail (Fig 1), proceed to inspection Step #2.
FIG 3
Example of hydraulic hose coil correctly located at the hydraulic oil reservoir tank
Step 2 – If the hydraulic hose coil has fallen or is lacking the factory installed zip ties, carefully examine the hoses (3) for any signs of wear or damage. If signs of
hose damage are visible, a replacement hose is necessary before proceeding to the Hydraulic Hose repair nstructions. If the hoses are damaged, contact Customer Service for pre-authorization of hose replacement. If no signs of hose damage are visible, proceed with the Hydraulic Hose repair instructions.
INSTRUCTIONS – HEAT SHIELD INSTALLATION
TURN OFF ENGINE & ALLOW EXHAUST SYSTEM AND CATALYTIC CONVERTER TO COOL BEFORE STARTING THE PROCESS TO AVOID RISK OF SERIOUS BURNS.
FIG 1:
- Locate the catalytic converter. Install the heat shield above the catalytic converter with the (front) edge of the shield lined up with the exhaust brackets (circled) on the converter.
FIG 2 & 3:
- The heat shield will need to sit on top of the frame rail. To allow for this, locate any wire ties/straps (P-clamps) in the heat shield area that may prevent the heat shield from resting on the frame rail, and cut the wire ties/straps and remove them.
FIG 4 & 5:
- Push any wires/cables hanging at the side of the frame rail on top of the frame to allow for the heat shield.
FIG 6:
- Install the heat shield by inserting it over the drive shaft (with the flat side against the floor of the unit). The angle cut of the heat shield should face towards the frame rail, the bend of the shield should face downward.
FIG 7:
- Place both support bars in place between the heat shield and the drive shaft. The support bars will fit into the notches on the heat shield. The shield and the support bars will set on top of the frame rail.
- Put the (hex) bolt in the heat shield pre-drilled holes. The bolt head should be on the top of the heat shield. You may need to pull the heat shield back to get the bolt into place. Pushing up on the trunk box bottom will help you with the clearance to install the bolts.
FIG 8 & 9:
- Starting with the rear support bracket, attach the bracket to the heat shield using the (2) center hex bolts (refer to drawing below), split washers and hex nuts. Match the pre-drilled holes in the heat shield and bracket.
Install the split washers with the hex nuts. DO NOT TIGHTEN THE BOLTS YET.
FIG 9 & 10:
- Refer to the drawings below for bolt and “Z” bracket locations.
- Install the bolts on the two outside pre-drilled holes adding a “Z” bracket between the heat shield and the hex nut (Fig 10 – Detail B). DO NOT TIGHTEN THE BOLTS WITH THE “Z” BRACKETS YET.
- Repeat this process on the rear support, starting with the 2 center bolts and ending with the bolts with the “Z” brackets.
FIG 11:
- Put the heat shield back in place. The flat edge of the heat shield (without the bend) should rest on the frame rail.
FIG 12:
- Position the shield with the front edge of the shield over the bracket area of the exhaust.
FIG 13:
- Position the heat shield on top of the frame rail with the “Z” bracket directly below to secure the shield in place. Tighten the nut enough to hold the support bracket in place.
FIG 14:
- Position the other end of the support bracket on top of the frame rail with the “Z” bracket under the rail. Tighten the nut enough to hold the bracket in place.
FIG 15:
- Repeat this process for the front bracket. The bracket should fit in the notch on the heat shield. The front support bracket will cross the heat shield at an angle.
- Fasten the bracket to the heat shield starting with the 2 center bolts. The split washer should be next to the nut. DO NOT TIGHTEN YET.
- The heat shield should already be resting on the frame rail. Install the “Z” bracket below the rail. Tighten the nut enough to hold the heat shield in place. Install the bolt and the “Z” bracket on the other end of the support bracket.
FIG 16:
- When all bolts, nuts and “Z” brackets are in place, and with the front of the heat shield lined up with the exhaust brackets, tighten the nuts starting at the ends with the “Z” brackets.
- Use either a ½ “socket and ratchet wrench, a ½” box end wrench, or an impact driver.
- Secure ALL nuts tightly.
INSTRUCTIONS – HYDRAULIC HOSE ROUTING
TURN OFF ENGINE & ALLOW ENGINE EXHAUST TO COOL COMPLETELY
Cut the zip tie and correctly re-route the hose coil (Fig 1) to the hydraulic oil reservoir pump tank (Fig 3).
FIG 1
Example of hydraulic hose incorrectly coiled along chassis rail & above exhaust
FIG 3
Example of hydraulic hose coil correctly located at hydraulic oil reservoir tank
Straighten and secure the hose along the passenger side frame rail with zip ties, at a maximum distance of 36”, or as needed, to prevent any slack in the hose line (Fig 4).
| Jayco’s sole obligation under our limited warranty is to repair or replace defective materials and/or workmanship deemed our responsibility as determined by Jayco in our sole discretion. Jayco reserves the right to use new and/or remanufactured parts or materials of similar quality to complete any work, and to make parts and/or design changes as appropriate without notice to anyone. Jayco designs and/or materials changes are done without obligation to incorporate such changes in previously manufactured product. Jayco makes every reasonable effort to ensure field remedies will not adversely affect performance and/or safety of the unit. This field remedy is not intended to extend to future performance of this RV, or any of its materials, components or parts beyond the standard warranty period. The RV owner’s obligation to notify Jayco, or one of its independent, authorized dealers, of a claimed defect does not modify any obligation placed on the RV owner to contact Jayco directly when attempting to pursue remedies under state or federal law. Jan. 2019. |
| 903 South Main Street • P.O. Box 460 • Middlebury, IN 46540 |
19V-705 2019-504 Precept- Heat Shield/Hydraulic Hose routing
November 2019
Safety Recall: 19V-705
November 2019
IMPORTANT SAFETY RECALL
This Notice Applies to Your Recreational Vehicle «vin»
Dear Valued Customer:
This notice is sent to you in accordance with the National Traffic and Motor Vehicle Safety Act.
| Reason for this recall | Routing of the hydraulic hoses for the leveling system, may be too close to the exhaust system. Improper routing may cause damage to the hoses and allow oil to leak onto the exhaust system, increasing the risk of a fire. Additionally, a required protective heat shield over the exhaust system may be missing. |
| Recall Remedy | Inspect for proper hose routing and presence of the heat shield and any damages caused by incorrect routing and/or absence of a heat shield. Reroute hoses and install the heat shield as required. |
| What we need you to do | Please contact an authorized Dealer as soon as possible to schedule an appointment. The Recall Remedy is free of charge and may take up to 2 hours to complete. |
If you had this repair completed prior to receipt of this recall notice, you may be eligible to receive reimbursement for the cost of obtaining a pre-notification remedy of the problem associated with this recall.
If you take your recreational vehicle to your dealer on the agreed service date and the dealer does not remedy this condition on that date or within three (3) days, please contact our Customer Service Department at 800-517-9137. If you are unable to get this safety defect remedied without charge and/or within a reasonable amount of time after contacting your dealer and customer service you may want to contact NHTSA. To submit a written complaint contact the Administrator, National Highway Traffic Safety Administration, 1200 New Jersey Avenue, SE., Washington, DC 20590; or call the toll-free Vehicle Safety Hotline at 1-888-327-4236 (TTY: 1-800-424-9153): or go to https://www.safercar.gov. Federal regulations require that any vehicle lessor receiving this recall notice must forward a copy of this notice to the lessee within ten days.
We certainly regret this inconvenience; however, your safety is our most important priority.
Sincerely,
Jayco Motorized
Safety Recall: 19V-705
November 2019
IMPORTANT SAFETY RECALL
Dear Valued Dealer:
This notice is sent to you in accordance with the National Traffic and Motor Vehicle Safety Act.
Jayco has decided that a defect, which relates to motor vehicle safety, exits in certain Model Year 2014-2018 Precept motorhomes.
| Reason for this recall | Routing of the hydraulic hoses for the leveling system, may be too close to the exhaust system. Improper routing may cause damage to the hoses and allow oil to leak onto the exhaust system, increasing the risk of a fire.
Additionally, a required protective heat shield over the exhaust system may be missing. |
| Recall Remedy | Inspect for proper hose routing and presence of the heat shield and any damages caused by incorrect routing and/or absence of a heat shield. Reroute hoses and install the heat shield as required. |
| All pertinent information regarding this recall is available under the Service and Parts Tab of our Website. If you need further assistance, please Contact Customer Service at 800-517-9137. | |
| What we need you to do | Our records show the following unit is affected by this recall and is currently part of the inventory at your Dealership. The Recall Remedy must be completed on this unit prior to customer delivery. |
VIN
Federal law requires that all units in your inventory be repaired prior to delivery to a customer. If you have sold a unit recently that you have received a stock recall notice on, please contact the owner immediately to advise of the recall. In addition, please register the unit by submitting the Warranty Registration.
We certainly regret this inconvenience; however, our Customers’ safety is our most important priority.
Sincerely,
Jayco Motorized
5 Affected Products
Vehicle
| MAKE | MODEL | YEAR |
| JAYCO | PRECEPT | 2014-2018 |
11 Associated Documents
Miscellaneous Document-19V-705 2019-504 ORDER FORM FINAL
RMISC-19V705-7180.pdf 155.483KB
 Loading...
ISSUED Owner Notification Letter(Part 577)
RCONL-19V705-0244.pdf 50.921KB
Loading...
Manufacturer Notices(to Dealers,etc)
RCMN-19V705-0371.pdf 188.005KB
Loading...
Recall Quarterly Report #3, 2020-2
RCLQRT-19V705-4585.PDF 211.307KB
Loading...
Recall Quarterly Report #1, 2019-4
RCLQRT-19V705-9272.PDF 211.124KB
Loading...
Recall Quarterly Report #2, 2020-1
RCLQRT-19V705-2339.PDF 211.225KB
Loading...
Remedy Instructions and TSB
RCRIT-19V705-5850.pdf 905.663KB
Loading...
Recall Acknowledgement
RCAK-19V705-2172.pdf 244.848KB
Loading...
Defect Notice 573 Report
RCLRPT-19V705-8886.PDF 212.838KB
Loading...
Recall 573 Report – Amendment 1
RCLRPT-19V705-2404.PDF 213.362KB
Loading...
Recall Quarterly Report #4, 2020-3
RCLQRT-19V705-3333.PDF 211.419KB
Loading...
Latest Recalls Documents
https://www-odi.nhtsa.dot.gov/acms/cs/documentList.xhtml?docId=19V705&docType=RCL
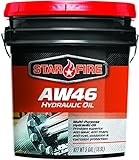
- Formulated with premium base stocks for added resistance to thermal breakdown
- Outstanding wear protection
- Excellent resistance to system rust and oil oxidation
- Maintains excellent water separating properties
- Excellent foam control and air release deliver consistent system operation
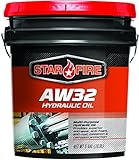
- Formulated with premium base stocks for added resistance to thermal breakdown
- Outstanding wear protection
- Excellent resistance to system rust and oil oxidation
- Maintains excellent water separating properties
- Excellent foam control and air release deliver consistent system operation

- Formulated with highly refined group ii base stocks for added resistance to thermal breakdown
- Superior wear protection to protect critical components
- Excellent frictional properties for smooth-shifting, excellent anti-shudder performance
- J20c equivalent, protection against varnish and sludge formation
- Superior thermal stability and oxidation resistance, good seal compatibility

- Meets and exceeds all OEM specifications for power shift transmissions
- Extends equipment and fluid life
- Reduces downtime and major overhaul

- Formulated with premium base stocks for added resistance to thermal breakdown
- Outstanding wear protection
- Excellent resistance to system rust and oil oxidation
- Maintains excellent water separating properties
- Excellent foam control and air release deliver consistent system operation

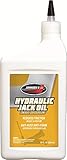
- Reduces the operating temperature of hydraulic systems
- Conditions old seals and O-rings to stop and prevent future leaks
- Well suited for use in equipment with wet brakes
- Removes varnish and restores pressure for more efficient operation
- Compatible with both synthetic and conventional hydraulic fluids

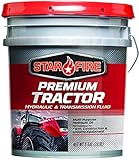
- MULTI-PURPOSE & ALL SEASON: A premium transmission-hydraulic fluid recommended for the complex lubrication systems of modern tractors, including industrial models. In these systems, the same lubricant may serve the hydraulic system, torque converter, transmission, power take-off, differential, power steering, and wet brakes.
- SPECIFICATIONS: Our tractor hydraulic fluid meets the following manufacturers specifications: (J20C, JD303), (Q-1826), (Improved power fluid 821XL), (ESN-M2C134-D, FNHA-2-C-201), (M1135, M1141, M1143), (Type 55), (JIC-143,144, 145, MS1206,127, 1209, 1210, TCH), (Fluids), (TO-2, MTD), (Bus Automatic Transmission Fluid), (UDT), (B6), (WB 101).
- APPLICATIONS: Included in the above applications, this universal tractor fluid also meets most other manufacturers' specifications for transmission hydraulic fluid. It can be used for makeup or refill in almost all tractor hydrostatic, hydraulic jack oil, transmission oil, differential fluid, and other systems involving common lube oil sumps.
- BENEFITS: This tractor transmission oil gives all-season protection. It flows readily at low temperatures due to its low-temperature viscosity and pour point, and yet retains its body at high temperatures due to a high viscosity index. Other benefits include anti-foam, anti-rust, anti-wear, extreme pressure, seal protection, oxidative and thermal stability, and controlled frictional characteristics.
- PREMIUM LUBRICANTS: Presidential Engineered Lubricants offers premium machine oils, lubricants, and sealants for various industries. Founded in 1877, we're an employee-owned company dedicated to crafting high-quality products at our UO facility, with customer satisfaction as our top priority.
Last update on 2024-06-10 / Affiliate links / Images from Amazon Product Advertising API
This product presentation was made with AAWP plugin.