| “This site contains affiliate links for which OEMDTC may be compensated” |
March 20, 2024 NHTSA CAMPAIGN NUMBER: 24V216000
Loose Axle or Shock Nut May Cause Instability
A loose axle or shock nut can result in a loss of stability, increasing the risk of a crash.
NHTSA Campaign Number: 24V216
Manufacturer LIVEWIRE EV, LLC
Components SUSPENSION
Potential Number of Units Affected 165
Summary
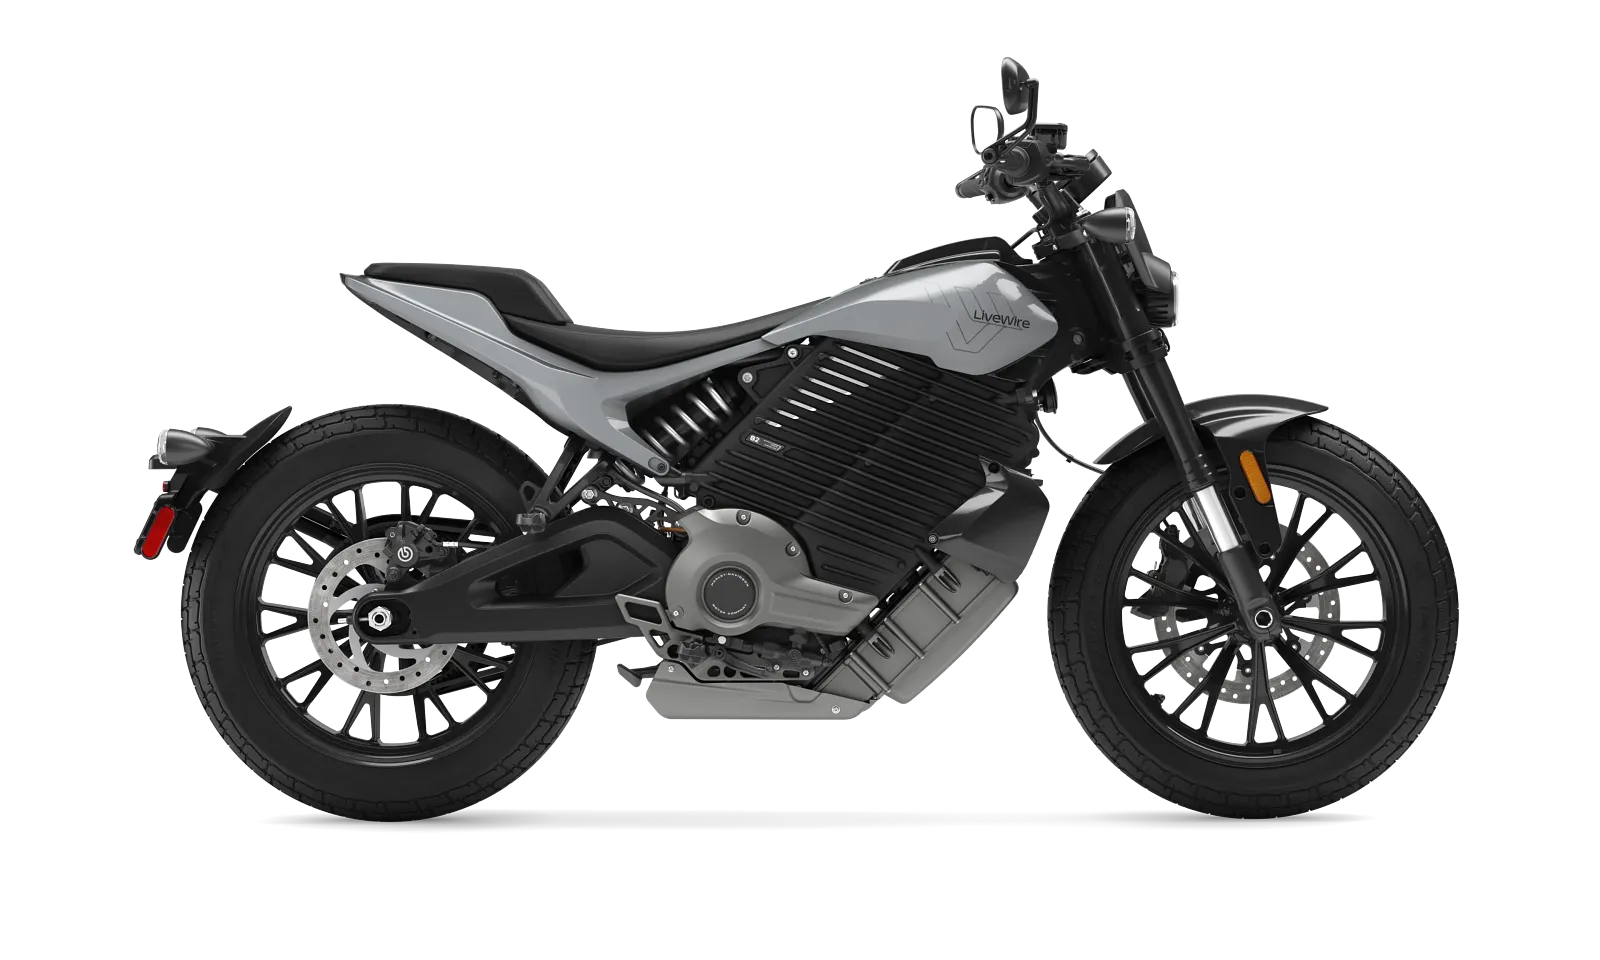
LiveWire EV, LLC (LiveWire) is recalling certain 2024 S2DM (S2 Del Mar) motorcycles. The rear axle and lower shock joint nuts may not have been properly tightened.
Remedy
Dealers will inspect, tighten any loose nuts and replace damaged components as necessary, free of charge. Owner notification letters were mailed May 26, 2024. Owners may contact LiveWire customer service at 1-855-387-4337. LiveWire’s number for this recall is 1002.
Notes
Owners may also contact the National Highway Traffic Safety Administration Vehicle Safety Hotline at 1-888-327-4236 (TTY 1-800-424-9153), or go to www.nhtsa.gov.
L1012
2024-03-26
L1012 (REV A): RECALL 1002 – LIVEWIRE S2 DEL MAR FASTENER INSPECTION
Purpose for Service Bulletin
This bulletin informs dealers of a voluntary safety recall that LiveWire will be conducting on a small population of S2 Del Mar vehicles.
The issue on these select Vehicle Identification Numbers (VINs) relates to an improperly performed inspection conducted by a third-party subcontractor at our factory which may have allowed some vehicles to leave the factory with insufficiently tightened components.
This procedure should be followed in sequence exactly for each vehicle to ensure that all fasteners are torqued properly. If a customer vehicle needs to be picked up for this work, contact LiveWire Technical Service for reimbursement 833-951-7433.
NOTE
This procedure should only be performed on a vehicle that has no pre-existing issues or concerns. If any are noted, those issues should be resolved before proceeding with the recall.
Vehicles Affected
2024: Del Mar (S2DM)
Markets Affected
United States.
 Loading...
Chronology :
01/11/2024 – The LiveWire Service Team was made aware of three motorcycles that allegedly were delivered to a dealer with loose rear axles and/or lower shock bolts.
02/08/2024 – The Technical Subcommittee (TSC) was made aware of this issue.
02/12/2024 – The TSC launched a formal investigation of this issue.
02/13/2024 – 02/26/2024 – The TSC requested a screening of motorcycles within LiveWire control. During the screening process, the TSC determined that only motorcycles that were inspected by a third-party subcontractor were affected. The TSC escalated the matter to the Field Action Committee (FAC). The TSC also requested that additional motorcycles should be inspected to determine if there may be concerns with other joints that were potentially disturbed during the third-party inspection.
03/07/2024 – The FAC reviewed the TSC’s findings and analysis and escalated the matter to LiveWire’s Executive Decision Authority (EDA).
03/13/2024 – Based upon the information developed during the investigation, the EDA authorized a safety recall to address the condition on the shock bolt and the rear axle. In addition, new results of the continued screening of motorcycles that were part of the third-party inspection were reviewed with the EDA, revealing additional areas of potential concern. The LiveWire EDA further authorized the recall repair to encompass additional areas that may have been disturbed during the third-party inspection.
There have been no reports of crashes or injuries related to this issue.
1 Affected Product
Vehicle
| MAKE | MODEL | YEAR |
| LIVEWIRE | S2 DEL MAR | 2024 |
7 Associated Documents
Defect Notice 573 Report
RCLRPT-24V216-7487.PDF 216.302KB
Recall 573 Report – 03/22/2024
RCLRPT-24V216-6529.PDF 216.224KB
Recall Acknowledgement
RCAK-24V216-3076.pdf 874.174KB
Manufacturer Notices(to Dealers,etc)
RCMN-24V216-7731.pdf 150.174KB
Loading...
Remedy Instructions and TSB
RCRIT-24V216-7480.pdf 1196.246KB
Loading...
ISSUED Owner Notification Letter(Part 577)
RCONL-24V216-0399.pdf 210.972KB
Loading...
Remedy Instructions and TSB
RCRIT-24V216-5552.pdf 1204.103KB
Loading...
Latest Recalls Documents
For the Latest and Most recent Recall Information Visit the link below…
https://www-odi.nhtsa.dot.gov/acms/cs/documentList.xhtml?docId=24V216&docType=RCL
- Durable Ratchet Head: Made from Hardened treated Chrome Vanadium steel alloy (Cr-V) Corrosion-Retardant: Satin Finish. Made in Taiwan
- Easy Storage: A sturdy plastic storage case is included. Non-Slip Grip: Knurled handle
- Easy to Read: High Contrast & Dual Range Scale. Accurate: Pre-Calibrated to ± 4%
- Accessories included: 1/2" Drive 5" long Extension Bar and 1/2" Drive to 3/8" Drive Reducer
- Simple and Reliable: “Click” sound tells the preset torque value is reached. Stop applying force when you hear and feel it.

- PORTABILITY: Torque wrench 1/2 inch drive has a durable case for portability or storage
- ADDED COMFORT: Bi-material handle for comfort and grip of the 1/2 torque wrench
- HASSLE FREE USE: Locking feature adjusts quick and easily for hassle free use
- QUICK IDENTIFICATION: Scales stamped into housing showing inch and metric torque settings
- Meets or Exceeds ASME Specifications

- PRECISION - Ships pre-calibrated to +/- 4% accuracy and ready to use. Include calibration certificate with traceable serial number.
- DURABLE - Reinforced ratchet gear head constructed from hardened, heat treated Chrome Vanadium alloy steel.
- LONG-LASTING - Rust & corrosion protection with our unique and newly invented Electro-Black finish treatment.
- PERFORMANCE - Features an easy-to-read, highlighted yellow print dual-range scale. Identify the markings even in low-light conditions.
- COMFORTABLE - Comes with a reversible ratchet head that drives in both directions and measure torque in a clockwise direction.

- 【High Precision&Quick Reading】: 3/8 torque wrench has high contrast and dual range scale( 5-45 Ft-Lb/6.8-61 Nm),making it clear and easy to read. We have professional torque wrench production technology, and after 20000 tests, the calibration error range of the torque wrench is ± 3%, making it an essential helper for you.
- 【Safe and Reliable Operation】: Equipped with a bidirectional drive ratchet head, torque can be measured clockwise or counterclockwise. When the set torque value is reached, a "click" sound will remind you to stop applying force to prevent damage to the item due to excessive torque.
- 【High Quality and Durable Material】: Made of hardened chromium vanadium steel alloy (Cr-V). At the same time, the bottom buckle tail plug adopts a red anodizing process to improve the product's oxidation resistance during use and enhance surface wear resistance. 72 tooth ratchet head, made of chromium molybdenum steel. High quality materials resist corrosion and are durable.
- 【Quick Torque Setting】: Simple and fast torque setting, pull down the locking knob and hold it down to rotate to the torque you need. Release the hand and the locking knob will automatically rebound to lock the torque value. And the designer referred to the appearance of the flashlight handle and designed a non slip and labor-saving knurled handle, making it more comfortable and easy to hold when using.
- 【Easy to Store and Widely Use】: You will receive the 3/8-inch drive click torque wrench with a sturdy plastic shell storage box, which is very delicate and durable. Torque wrench is suitable nuts and bolts on various occasions, such as bike, motorcycle, car spark, and is the best helper for you🎁. 🔔 And we provide 12 months warranty. If you have any questions, please feel free to contact us.

- 【3Pcs Torque Wrench Set】 The calibration error range is ±3%, each torque wrench has a calibration certificate. The 3-in-1 torque wrench set can meet your different needs. Including 1/4 inch 20-240in.lb, 3/8 inch 5-45ft.lb, 1/2 inch 20-160ft.lb.
- 【Safe & Reliable】 When the 1/2 torque wrench reaches the preset torque value, it makes a clear "click" sound, accompanied by an obvious hand vibration that reminds you no longer to apply force, prevent damage caused. 72-tooth reversible ratchet head, it can be used both clockwise and counterclockwise directions.
- 【Quick Release Button】 This 3/8 torque wrench has a quick release button with which accessories can easily be installed and removed, the accessories can grip and is not easy to fall down. It is more convenient to use. The torque wrench is made of CR-MO with a higher hardness.
- 【Easy to Set】First pull down the locking knob and hold it down and then start setting the desired torque value. Release the hand and the locking knob will automatically rebound to lock the torque value. If you do not use, please set the torque key to the minimal torque value.
- 【Widely Use】The torque wrenches can satisfy you in bicycle, motorcycle, car, truck and wheel screws, wheel nuts and in the device installation, electrical engineering, etc. We provide 12 months warranty. If you have any questions, please feel free to contact us.

- 🔧【𝐌𝐢𝐥𝐢𝐭𝐚𝐫𝐲-𝐠𝐫𝐚𝐝𝐞 𝐒𝐭𝐞𝐞𝐥】ETOOLAB torque wrench utilizes military-grade steel as its base material, coupled with professional surface rust protection methods tailored to usage habits. While ensuring user comfort, it enhances product strength, wear resistance, and rust resistance. offers a more comfortable experience and a longer lifespan!
- 👍【𝐄𝐚𝐬𝐲-𝐭𝐨-𝐑𝐞𝐚𝐝】The scale of this 1/2 drive torque wrench is laser-engraved, using a black background with white markings. dinamometrica de 1/2 ensures clear and easy readability of the scale, even in sunlight. With a dual-scale design, users can conveniently read torque values in two different units according to their preferences, without the need for conversion!
- ⚙️【±𝟑% 𝐏𝐫𝐞𝐜𝐢𝐬𝐢𝐨𝐧 & 𝐒𝐢𝐦𝐩𝐥𝐞 𝐋𝐨𝐜𝐤𝐢𝐧𝐠 𝐑𝐢𝐧𝐠】Our torque wrench 1/2 drive meets the high precision standard of ±3% and comes with a traceable serial certificate. You can use it with confidence! Moreover, its graduation ring is tightly locked, with smaller incremental values, ensuring precise and consistent torque output even after multiple uses. This reduces the hassle of frequent adjustments. It is undoubtedly an excellent tool for your work!
- 🔊【𝐋𝐨𝐮𝐝 𝐂𝐥𝐢𝐜𝐤 𝐒𝐨𝐮𝐧𝐝】This torque wrenches has been upgraded to have a louder "Click" sound. We conducted over 25,000 tests to ensure that each product produces a click sound volume of no less than 45dB when the torque value exceeds 34 lbf·ft. When you hear the distinct click sound, it indicates that the preset torque has been reached, signaling you to stop applying force. You no longer need to worry about damaging your mechanical components.
- 💯【𝐔𝐬𝐞𝐫-𝐅𝐫𝐢𝐞𝐧𝐝𝐥𝐲】Our torque wrench set features a 72-tooth dual-directional ratchet head, allowing for easy operation in both clockwise and counterclockwise directions. It is designed with an adjustable locking ring, making it effortless to adjust the preset torque value. Additionally, it includes a quick-release head design, along with a 1/2" drive 5" long extension bar and 1/2" to 3/8" drive reducer, making it capable of tackling complex repairs even in tight spaces.

- Protective head bumper included
- Bi-Material grip for comfort during use
- Locking trigger to control the torque applied
- Forward and reverse torque capabilities
- Direct Torque trade; Technology on included sockets

- [Cr-V RATCHET HEAD] TICONN torque wrenches are made from hardened Cr-V alloy (Chrome Vanadium Steel) for the best performance and lifespan
- [HIGH ACCURACY] You can count on the inch pound torque wrench for repeated accuracy (±4%). The 45 teeth ratchet wheel is perfect for turning the torque wrench inch pounds in tight spots (8° turn). Choose the right bike torque wrench as you need!
- [EASY TO USE AND STORE] The high-contrast dual unit measurement is easy to read and set your desired torque. The knurled handle will offer non-slip operation. The torque wrench, extension rod, and adapter are well-stored inside the storage case.
- [WIDE APPLICATION] Our torque wrench set can be used in many applications in your daily life such as automobile maintenance, bike & boat repair, firearm assembly, and machinery troubleshooting.
- [TICONN BRAND QUALITY COMMITMENT] We stand behind the quality of our products. If for any reason you are not satisfied with your purchase, please contact us. We provide 30-day money back and 12-month warranty. 100% Satisfaction Guarantee for risk-free shopping!

- 【8-in-1 Torque Wrench Set】 Includes 1/4, 3/8, 1/2 inch drive torque wrenches that meet your different needs. 5Pcs Adapter: 1/4"Extension bar(4''), 3/8"Extension bar(6''), 1/2"Extension bar(5''), 3/8" Universal Joint, 1/2" to 3/8" Adapter with a sturdy plastic case for storage and portability
- 【Dual range scale & High Precision】 1/4 inch 10-220in.lb/1-24.7Nm with 1 in.lb micro-adjustment, 3/8 inch 10-45ft.lb/13.6-61Nm with 0.25 ft.lb micro-adjustment, 1/2 inch 10-160ft.lb/10-227Nm with 1 ft. lb micro-adjustment. Each wrench undergoes strict and specialized instrument testing before leaving the factory to ensure accuracy within ±3% and is provided with a formal calibration certificate
- 【Safe & Reliable】 This torque wrench set has been upgraded to have a louder "Click" sound, ensuring a clear and stronger click sound when the torque value exceeds 5 Nm, subtler click at lower than 5 Nm. The distinct click sound indicates that the preset torque has been reached, signaling you to stop applying force
- 【Releasable & Dual Direction】These torque wrenches has a quick release button with which accessories can easily be installed and removed, the accessories can grip and is not easy to fall down. With 72-tooth reversible ratchet head, it can be used in both clockwise and counterclockwise directions
- 【High Quality and Durable】 The torque wrench ratchet head is made from hardened treated Cr-Mo Steel for longevity. Handle crafted from high-grade aerospace aluminum for durability, and corrosion resistance. All adapters are treated with phosphating, with stronger wear resistance and a longer lifespan

- 50Pcs Master Bike Tool: This kit includes a 1/4" drive torque wrench and comprehensive bit sockets: Hex 2-10, Torx 8-40, 6 Point 4mm-15mm, Pozi PZ0-PZ3, Slotted SL4 SL8, Robertson Square S1 S2 S3. Adapters: 1/4" to 3/8" Adapter, 1/4" Bit Holder, 1/4" Universal Joint, 1/4" Bit Adapter, 1/4" Drill Adapter, and 4-inch Extension Bar. Comes with a protective storage case.
- ± 3% High Precision: Accuracy error within ±3%, dual torque range scale of 10-220 lbf.in/1-24.9 nm, with 1 in.lb (0.1nm) micro-adjustment. Each bike torque wrench includes a calibration certificate with a traceable serial number. This inch pound torque wrench ensures that bolts and nuts are tightened to the correct torque, preventing damage from over-tightening.
- Reliable Click-Stop, No More Guess: Simply listen for the reassuring "Click" or feel it through the wrench handle when you've reached the pre-set torque value. This signals you to stop applying force, ensuring your items are safe and secure.
- 72-Tooth and Quick Release: Featuring a reversible 72 teeth ratchet head, this small torque wrench allows for dual directions with ease. The quick-release button ensures a secure fit and rapid socket swapping. Various bit sockets and 1/4 inch drive adapters provides great compatibility.
- High Quality and Durable: Exceeds ASME & DIN-ISO Standards. Crafted from high-strength Cr-V steel and aerospace Aluminum, ensuring durability, rust resistance, and corrosion resistance. Perfect for bicycle and motorcycle repair, E-bike, home maintenance. Great gift for bicycle enthusiasts or anyone in need of a reliable and durable tool.
Last update on 2024-06-10 / Affiliate links / Images from Amazon Product Advertising API
This product presentation was made with AAWP plugin.
SEOCONTENT-START
OMB Control No.: 2127-0004
Part 573 Safety Recall Report 24V-216
The information contained in this report was submitted pursuant to 49 CFR §573
Manufacturer Name : Submission Date :
LIVEWIRE EV, LLC MAR 20, 2024 NHTSA Recall No. : 24V-216 Manufacturer Recall No. : 1002 Manufacturer Information :
Manufacturer Name : LIVEWIRE EV, LLC Address : 3700 W. Juneau Ave.
Milwaukee WI 53208
Company phone : 8553874337
Population :
Number of potentially involved : 165 Estimated percentage with defect : 58 %
Vehicle Information : Vehicle 1 : 2024-2024 LiveWire S2DM Vehicle Type : MOTORCYCLES Body Style : OTHER Power Train : HYBRID ELECTRIC
Descriptive Information : The recall population includes certain MY24 LiveWire S2DM model motorcycles which were inspected by a third-party. Other motorcycles either within the build range or built outside of the build range are not part of the recall population. The recall population was determined based upon a review of production records to determine which motorcycles underwent insufficient inspection and torquing by our third-party subcontractor.
Production Dates : JUL 31, 2023 – NOV 30, 2023 VIN Range 1 : Begin : 1HD3GCYB0RB550041 End : 1HD3GCYB0RB550699 VIN Range 2 : Begin : 1HD3GCYB0RB550041 End : 1HD3GCYB0RB550699 VIN Range 3 : Begin : 1HD3GCYB0RB550041 End : 1HD3GCYB0RB550699 ✔ Not sequential
✔ Not sequential
✔ Not sequential Description of Defect :
Description of the Defect : Motorcycles within the recall population may have been shipped to dealers with zero clamp load in several areas, including the rear axle assembly, lower shock joint, and certain powertrain fasteners, among others.
FMVSS 1 : NR FMVSS 2 : NR
Description of the Safety Risk : Zero clamp load on the rear axle assembly or the lower shock joint may lead to a loss of control which may increase the risk of a crash.
Description of the Cause : An improper third-party inspection process was performed on certain motorcycles within the build range. Identification of Any Warning
that can Occur : Part 573 Safety Recall Report 24V-216 Page 2 Involved Components : Component Name 1 : Nut
Component Description : Nut, lower rear shock mounting Component Part Number : 1040057 Component Name 2 : Nut Component Description : Nut, rear axle Component Part Number : 10100089 Supplier Identification : Component Manufacturer
Name : LiveWire LLC Address : 3700 Juneau Ave
Milwaukee Wisconsin 53208
Country : United States Chronology :
01/11/2024 – The LiveWire Service Team was made aware of three motorcycles that allegedly were delivered to a dealer with loose rear axles and/or lower shock bolts. 02/08/2024 – The Technical Subcommittee (TSC) was made aware of this issue. 02/12/2024 – The TSC launched a formal investigation of this issue.
02/13/2024 – 02/26/2024 – The TSC requested a screening of motorcycles within LiveWire control. During the screening process, the TSC determined that only motorcycles that were inspected by a third-party subcontractor were affected. The TSC escalated the matter to the Field Action Committee (FAC). The TSC also requested that additional motorcycles should be inspected to determine if there may be concerns with other joints that were potentially disturbed during the third-party inspection. 03/07/2024 – The FAC reviewed the TSC’s findings and analysis and escalated the matter to LiveWire’s Executive Decision Authority (EDA). 03/13/2024 – Based upon the information developed during the investigation, the EDA authorized a safety recall to address the condition on the shock bolt and the rear axle. In addition, new results of the continued The information contained in this report was submitted pursuant to 49 CFR §573 Part 573 Safety Recall Report 24V-216
Page 3
The information contained in this report was submitted pursuant to 49 CFR §573
screening of motorcycles that were part of the third-party inspection were reviewed with the EDA, revealing additional areas of potential concern. The LiveWire EDA further authorized the recall repair to encompass additional areas that may have been disturbed during the third-party inspection. There have been no reports of crashes or injuries related to this issue.
Description of Remedy :
Description of Remedy Program : Owners of affected motorcycles will be asked to arrange service with an
authorized LiveWire dealer, who will perform a thorough inspection of specific joints at no charge to the customer. Pursuant to 49 CFR 577.11(e), LiveWire requests that it be exempt from providing a notification of a reimbursement plan. Any pre-notification product failure would have been addressed under the manufacturer’s limited warranty. Accordingly, no person would be eligible for reimbursement pursuant to 573.13. How Remedy Component Differs from Recalled Component : No components are planned to be replaced as part of this inspection, unless related damage is noted. Identify How/When Recall Condition was Corrected in Production : Corrective action has been taken as of 3/11/2024 to address the third- party’s processes. Recall Schedule :
Description of Recall Schedule : Dealer notification is planned between 03/21/2024 and 03/28/2024.
Owner notification is planned between 03/22/2024 and 03/29/2024 Planned Dealer Notification Date : MAR 21, 2024 – MAR 28, 2024
Planned Owner Notification Date : MAR 22, 2024 – MAR 29, 2024
* NR – Not Reported
**************************************************************************************************************
OMB Control No.: 2127-0004
Part 573 Safety Recall Report 24V-216
The information contained in this report was submitted pursuant to 49 CFR §573
Manufacturer Name : Submission Date :
LIVEWIRE EV, LLC MAR 22, 2024 NHTSA Recall No. : 24V-216 Manufacturer Recall No. : 1002 Manufacturer Information :
Manufacturer Name : LIVEWIRE EV, LLC Address : 3700 W. Juneau Ave.
Milwaukee WI 53208
Company phone : 8553874337
Population :
Number of potentially involved : 165 Estimated percentage with defect : 58 %
Vehicle Information : Vehicle 1 : 2024-2024 LiveWire S2DM Vehicle Type : MOTORCYCLES Body Style : OTHER Power Train : HYBRID ELECTRIC
Descriptive Information : The recall population includes certain MY24 LiveWire S2DM model motorcycles which were inspected by a third-party. Other motorcycles either within the build range or built outside of the build range are not part of the recall population. The recall population was determined based upon a review of production records to determine which motorcycles underwent insufficient inspection and torquing by our third-party subcontractor.
Production Dates : JUL 31, 2023 – NOV 30, 2023 VIN Range 1 : Begin : 1HD3GCYB0RB550041 End : 1HD3GCYB0RB550699 ✔ Not sequential Description of Defect :
Description of the Defect : Motorcycles within the recall population may have been shipped to dealers with zero clamp load in several areas, including the rear axle assembly, lower shock joint, and certain powertrain fasteners, among others.
FMVSS 1 : NR FMVSS 2 : NR
Description of the Safety Risk : Zero clamp load on the rear axle assembly or the lower shock joint may lead to a loss of control which may increase the risk of a crash.
Description of the Cause : An improper third-party inspection process was performed on certain motorcycles within the build range. Identification of Any Warning
that can Occur : Part 573 Safety Recall Report 24V-216 Page 2 Involved Components : Component Name 1 : Nut
Component Description : Nut, lower rear shock mounting Component Part Number : 1040057 Component Name 2 : Nut Component Description : Nut, rear axle Component Part Number : 10100089 Supplier Identification : Component Manufacturer
Name : LiveWire LLC Address : 3700 Juneau Ave
Milwaukee Wisconsin 53208
Country : United States Chronology :
01/11/2024 – The LiveWire Service Team was made aware of three motorcycles that allegedly were delivered to a dealer with loose rear axles and/or lower shock bolts. 02/08/2024 – The Technical Subcommittee (TSC) was made aware of this issue. 02/12/2024 – The TSC launched a formal investigation of this issue.
02/13/2024 – 02/26/2024 – The TSC requested a screening of motorcycles within LiveWire control. During the screening process, the TSC determined that only motorcycles that were inspected by a third-party subcontractor were affected. The TSC escalated the matter to the Field Action Committee (FAC). The TSC also requested that additional motorcycles should be inspected to determine if there may be concerns with other joints that were potentially disturbed during the third-party inspection. 03/07/2024 – The FAC reviewed the TSC’s findings and analysis and escalated the matter to LiveWire’s Executive Decision Authority (EDA). 03/13/2024 – Based upon the information developed during the investigation, the EDA authorized a safety recall to address the condition on the shock bolt and the rear axle. In addition, new results of the continued The information contained in this report was submitted pursuant to 49 CFR §573 Part 573 Safety Recall Report 24V-216
Page 3
The information contained in this report was submitted pursuant to 49 CFR §573
screening of motorcycles that were part of the third-party inspection were reviewed with the EDA, revealing additional areas of potential concern. The LiveWire EDA further authorized the recall repair to encompass additional areas that may have been disturbed during the third-party inspection. There have been no reports of crashes or injuries related to this issue.
Description of Remedy :
Description of Remedy Program : Owners of affected motorcycles will be asked to arrange service with an
authorized LiveWire dealer, who will perform a thorough inspection of specific joints and properly tighten any loose joints to specifications at no charge to the customer. If damaged components caused by this condition are identified during the inspection, they will be replaced at no charge to the customer. Pursuant to 49 CFR 577.11(e), LiveWire requests that it be exempt from providing a notification of a reimbursement plan. Any pre- notification product failure would have been addressed under the manufacturer’s limited warranty. Accordingly, no person would be eligible for reimbursement pursuant to 573.13. How Remedy Component Differs from Recalled Component : No components are planned to be replaced as part of this inspection, unless related damage is noted. If additional components are needed as part of the repair, LiveWire dealers will be provided guidance on how to obtain replacement components at no charge to the customer. Identify How/When Recall Condition was Corrected in Production : Corrective action has been taken as of 3/11/2024 to address the third- party’s processes. Recall Schedule :
Description of Recall Schedule : Dealer notification is planned between 03/21/2024 and 03/28/2024.
Owner notification is planned between 03/26/2024 and 04/02/2024 Planned Dealer Notification Date : MAR 21, 2024 – MAR 28, 2024
Planned Owner Notification Date : MAR 26, 2024 – APR 02, 2024
* NR – Not Reported
**************************************************************************************************************
SERVICE BULLETIN
L1012 2024-03-21
L1012: RECALL 1002 – LIVEWIRE S2 DEL MAR FASTENER INSPECTION
Reason for Revision
Refer to Table 1.
Table 1. Document History
Date Rev Revision (Rev) Description
2024-03-21 – Initial release
Purpose for Service Bulletin
This bulletin informs dealers of a voluntary safety recall that
LiveWire will be conducting on a small population of S2 Del
Mar vehicles.
The issue on these select Vehicle Identification Numbers (VINs)
relates to an improperly performed inspection conducted by
a third-party subcontractor at our factory which may have
allowed some vehicles to leave the factory with insufficiently
tightened components.
This procedure should be followed in sequence exactly for
each vehicle to ensure that all fasteners are torqued properly.
If a customer vehicle needs to be picked up for this work,
contact LiveWire Technical Service for reimbursement
833-951-7433.
NOTE
This procedure should only be performed on a vehicle that has
no pre-existing issues or concerns. If any are noted, those
issues should be resolved before proceeding with the recall.
Vehicles Affected
2024: Del Mar (S2DM)
Markets Affected
United States.
Required Dealer Action
Table 2.
Action Resolution
Required
Actionable:
Any vehicle, component or software related issues
must be performed according to the service bulletin
procedure.
NO
YES
There is a supplemental video that provides an animation of
the recall procedure that can be used for reference.
Follow link here: https://youtu.be/3FUjV5-t7WE
De-Energize Vehicle
1. Follow Service Manual procedure to properly de-energize
and lock out the vehicle.
Right Foot Support
1. Skid plate removal.
a. Remove filter ground strap from filter assembly.
b. Disconnect inlet harness from filter assembly.
c. Remove screws fastening skid plate to vehicle.
d. Disconnect Onboard Charger (OBC) filter harness
retaining clip from coolant hose (leave radiator
overflow hose attached).
e. Disconnect OBC filter harness from Power
Electronics Unit (PEU).
f. Move skid plate to the left side of vehicle to allow
clearance.
2. Motor cover removal.
a. Remove screws fastening motor cover to
Rechargeable Energy Storage System (RESS) and
right foot support.
3. Brake line/wire harness caddy and right P-clip removal.
a. Remove brake line/wire harness caddy.
4. Remove right foot support with rear master cylinder still
installed.
Swingarm Dismount
1. Secure vehicle.
2. Jack rear wheel off the ground using a scissors jack under
the flat surface at the bottom of the PEU.
3. Remove left foot support.
4. Remove belt guards.
NOTE
In the interest of preserving customer safety and satisfaction, always check for outstanding recalls whenever any motorcycle is brought into your dealership for either maintenance or service.
LEAD TECHNICIAN TECHNICIAN NO. 1 TECHNICIAN NO. 2 TECHNICIAN NO. 3 RETURN THIS TO
WARRANTY
PROCESS
MANAGER
ROUTING SERVICE MANAGER SALES MANAGER PARTS MANAGER
INITIAL HERE
5. Loosen rear axle.
6. Remove drive belt.
a. Loosen axle adjuster on each side equally.
b. Remove drive belt from motor sprocket.
7. Remove rear shock lower bolt and motor to rocker bolt.
8. Remove brake line P-clamp on motor.
9. Remove first brake line P-clamp on right side of swingarm.
10. Remove first two rear lighting Christmas tree fasteners on
left side of swingarm.
11. See Figure 1. Remove both swingarm bearing caps (2).
1
2 3 4 5
1708333
1. Swingarm cap screws (2)
2. Bearing cap
3. Swingarm
4. Cable straps (5)
5. Rear lamp wire
Figure 1. LH Swingarm
12. NOTE
Lower flat jack a few inches to reduce strain on brakes
lines.
Carefully pull swingarm back and down to disengage from
bearings, tip front of swingarm down and set it on to work
surface.
Dismount Motor and Inspection
1. Remove High Voltage cover door on right side of vehicle.
a. Inspect cover seal and replace if any damage or
deformities are noted.
2. Disconnect the two low voltage connectors.
3. Disconnect 3 phase high voltage fasteners from motor.
a. Remove screws from 3 phase lead caddy.
4. Place a second flat jack with blocks of wood to support
motor.
a. Recommended: Protect painted parts around left
side tail section seat support weldment.
b. Route a ratchet strap around the weldment then
around the motor bearing.
c. Take slack out of strap. This will allow additional
support of the motor.
5. Remove seven right side motor screws.
6. Remove two left side motor screws.
7. Carefully rotate motor several inches away from RESS
assembly to provide tool access.
a. Inspect motor seal for any damage or if it has
become unseated. Replace if necessary.
8. Torque stator retaining ring fastener. Tighten.
Torque: 2.6–3.2 N·m (23–28 in-lbs)
Install Motor
1. See Figure 2 and Figure 3. Ensure seal is properly seated
in motor groove and align motor to RESS and start the
seven fasteners on the right side of the vehicle.
a. Remove ratchet strap from motor.
b. Start two fasteners on left side of vehicle.
8
9
3
1
4
6
2
5
7
1714838
1. Electric motor
2-8. Screw
9. Sealing surface
Figure 2. Right Motor Screws
2 / 4 L1012
1
8
9
1714857
1. Electric motor
8. Screw
9. Screw
Figure 3. Left Motor Screws
2. Tighten screws (5) and (7).
Torque: 5–7 N·m (44–62 in-lbs)
3. Tighten left side screws (8) and (9).
Torque: 31.5–38.5 N·m (23–28 ft-lbs)
4. Tighten right side screws (1-7) in sequence.
Torque: 31.5–38.5 N·m (23–28 ft-lbs)
a. Remove flat jack and wood.
5. Install 3 phase caddy. Tighten screws.
Torque: 2.4–3 N·m (21–27 in-lbs)
6. Install 3 phase leads to motor. Tighten.
Torque: 5.3–6.5 N·m (47–58 in-lbs)
1
6
5
2
3
4
1713465
1. Screws (3)
2. Screws (1)
3. Screws (2)
4. PEU
5. Screws (2)
6. Connector (2)
Figure 4. PEU Connections
7. Reconnect low voltage connectors and attach to caddy
retainers.
8. Inspect HV cover seal and ensure it is properly seated.
a. Install High-Voltage cover. Tighten.
Torque: 5–6.1 N·m (44–54 in-lbs)
Install Swingarm
1. Lift swingarm and ensure brake lines route under the shock
rocker.
2. Align and set swingarm against bearings securely.
3. Install bearing caps. Tighten beginning with left side.
Torque: 37.5–41.4 N·m (28–31 ft-lbs)
4. Install forward P-clamp on right side of swingarm. Tighten.
Torque: 8–10 N·m (71–89 in-lbs)
5. Install P-clamp on motor. Tighten.
Torque: 8–10 N·m (71–89 in-lbs)
6. Align rear shock rocker and install bolts.
a. Raising or lowering the vehicle on the jack can aid
with alignment.
7. Tighten shock to rocker bolt.
Torque: 90–100 N·m (66–74 ft-lbs)
8. Tighten motor to rocker bolt.
Torque: 90–100 N·m (66–74 ft-lbs)
9. Connect rear lighting Christmas tree fasteners on left side
of swingarm.
Tension Belt
1. Install belt on to sprocket and pulley.
2. Turn axle adjusters equal turns to take slack out of belt.
3. Adjust belt tension:
a. 57-63 Hz if new.
b. 48-52Hz if in service.
c. Or, adjust using Special Tool to 1/4 to 3/8-inch
deflection.
Special Tool: BELT TENSION GAUGE (HD-35381-A)
4. Lower vehicle and remove jack.
5. Tighten axle nut.
Torque: 129–142 N·m (95–105 ft-lbs)
6. Install E-clip on axle.
L1012 3 / 4
Install Right Foot Bracket
1. Install right foot bracket assembly. Tighten.
Torque: 28–36 N·m (21–27 ft-lbs)
2. Install brake line/wire harness caddy. Tighten.
Torque: 5–7 N·m (44–62 in-lbs)
3. Install front right P-clip. Tighten.
Torque: 5–7 N·m (44–62 in-lbs)
4. Install motor cover. Tighten.
Torque: 5.9–6.5 N·m (52–58 in-lbs)
Install Belt Guard
1. Install upper and lower belt guards. Tighten.
Torque: 5.9–6.5 N·m (52–58 in-lbs)
2. Install sprocket cover and screws. Tighten.
Torque: 5.9–6.5 N·m (52–58 in-lbs)
Install Left Foot Bracket
1. Install left foot bracket. Tighten.
Torque: 28–36 N·m (21–27 ft-lbs)
Install Skid Plate
1. Place skid plate underneath vehicle.
2. Connect OBC filter harness to PEU.
a. Ensure harness crosses over the Inlet harness and
under the coolant hoses.
3. Connect coolant hose retaining clip. Ensure the lock is
oriented facing down and position rear of the white
alignment marks on the hose. This will help prevent contact
with side stand spring.
4. Connect Inlet harness to OBC filter assembly.
a. Ensure both connector locks are fully engaged.
5. Lift skid plate and route the ground strap under the OBC
filter.
6. Install skid plate screws. Tighten.
Torque: 12.9–14.4 N·m (10–11 ft-lbs)
7. Install ground strap screw. Tighten.
Torque: 5–7 N·m (44–62 in-lbs)
Energize Vehicle
1. Remove fuse block cover.
2. Install 40 amp fuse.
3. Stow fuse block in rear caddy.
Complete
1. Install top cover. Tighten fasteners.
Torque: 5.9–6.5 N·m (52–58 in-lbs)
2. Turn vehicle ignition ON.
3. Connect Digital Technician II (DT II).
4. Navigate to Vehicle Setup.
5. Select Resolver Offset and perform the procedure.
6. Check Diagnostic Trouble Codes (DTCs). Clear if any are
found.
7. If any DTCs return. See the Electrical Diagnostic Manual
(EDM) to troubleshoot.
8. Install seat. See service manual.
Credit Procedure
NOTE
Enter bulletin and any part numbers with quantities replaced
into comment section of claim.
Submit a warranty claim per Table 3.
Table 3. S2 Del Mar Fastener Inspection
ITEM DATA
Claim Type Recall
Customer Concern Code 9981
Condition Code 1002
Problem Part Number 10100089
Replacement Part Number N/A
Quantity N/A
Model S2 Del Mar
Model Year 2024
Labor Time 3 hours
(1) Download may be required
4 / 4 L1012
**************************************************************************************************************
SERVICE BULLETIN
L1012 2024-03-26
L1012 (REV A): RECALL 1002 – LIVEWIRE S2 DEL MAR FASTENER INSPECTION
Reason for Revision
Refer to Table 1.
Table 1. Document History
Date Rev Revision (Rev) Description
Update legend in Fig 2.
A
2023-03-
26 * Updated: Install Motor
2024-03-21 – Initial release
Purpose for Service Bulletin
This bulletin informs dealers of a voluntary safety recall that
LiveWire will be conducting on a small population of S2 Del
Mar vehicles.
The issue on these select Vehicle Identification Numbers (VINs)
relates to an improperly performed inspection conducted by
a third-party subcontractor at our factory which may have
allowed some vehicles to leave the factory with insufficiently
tightened components.
This procedure should be followed in sequence exactly for
each vehicle to ensure that all fasteners are torqued properly.
If a customer vehicle needs to be picked up for this work,
contact LiveWire Technical Service for reimbursement
833-951-7433.
NOTE
This procedure should only be performed on a vehicle that has
no pre-existing issues or concerns. If any are noted, those
issues should be resolved before proceeding with the recall.
Vehicles Affected
2024: Del Mar (S2DM)
Markets Affected
United States.
Required Dealer Action
Table 2.
Action Resolution
Required
Actionable:
Any vehicle, component or software related issues
must be performed according to the service bulletin
procedure.
NO
YES
There is a supplemental video that provides an animation of
the recall procedure that can be used for reference.
Follow link here: https://youtu.be/3FUjV5-t7WE
De-Energize Vehicle
1. Follow Service Manual procedure to properly de-energize
and lock out the vehicle.
Right Foot Support
1. Skid plate removal.
a. Remove filter ground strap from filter assembly.
b. Disconnect inlet harness from filter assembly.
c. Remove screws fastening skid plate to vehicle.
d. Disconnect Onboard Charger (OBC) filter harness
retaining clip from coolant hose (leave radiator
overflow hose attached).
e. Disconnect OBC filter harness from Power
Electronics Unit (PEU).
f. Move skid plate to the left side of vehicle to allow
clearance.
2. Motor cover removal.
a. Remove screws fastening motor cover to
Rechargeable Energy Storage System (RESS) and
right foot support.
3. Brake line/wire harness caddy and right P-clip removal.
a. Remove brake line/wire harness caddy.
4. Remove right foot support with rear master cylinder still
installed.
Swingarm Dismount
1. Secure vehicle.
2. Jack rear wheel off the ground using a scissors jack under
the flat surface at the bottom of the PEU.
3. Remove left foot support.
NOTE
In the interest of preserving customer safety and satisfaction, always check for outstanding recalls whenever any motorcycle is brought into your dealership for either maintenance or service.
LEAD TECHNICIAN TECHNICIAN NO. 1 TECHNICIAN NO. 2 TECHNICIAN NO. 3 RETURN THIS TO
WARRANTY
PROCESS
MANAGER
ROUTING SERVICE MANAGER SALES MANAGER PARTS MANAGER
INITIAL HERE
4. Remove belt guards.
5. Loosen rear axle.
6. Remove drive belt.
a. Loosen axle adjuster on each side equally.
b. Remove drive belt from motor sprocket.
7. Remove rear shock lower bolt and motor to rocker bolt.
8. Remove brake line P-clamp on motor.
9. Remove first brake line P-clamp on right side of swingarm.
10. Remove first two rear lighting Christmas tree fasteners on
left side of swingarm.
11. See Figure 1. Remove both swingarm bearing caps (2).
1
2 3 4 5
1708333
1. Swingarm cap screws (2)
2. Bearing cap
3. Swingarm
4. Cable straps (5)
5. Rear lamp wire
Figure 1. LH Swingarm
12. NOTE
Lower flat jack a few inches to reduce strain on brakes
lines.
Carefully pull swingarm back and down to disengage from
bearings, tip front of swingarm down and set it on to work
surface.
Dismount Motor and Inspection
1. Remove High Voltage cover door on right side of vehicle.
a. Inspect cover seal and replace if any damage or
deformities are noted.
2. Disconnect the two low voltage connectors.
3. Disconnect 3 phase high voltage fasteners from motor.
a. Remove screws from 3 phase lead caddy.
4. Place a second flat jack with blocks of wood to support
motor.
a. Recommended: Protect painted parts around left
side tail section seat support weldment.
b. Route a ratchet strap around the weldment then
around the motor bearing.
c. Take slack out of strap. This will allow additional
support of the motor.
5. Remove seven right side motor screws.
6. Remove two left side motor screws.
7. Carefully rotate motor several inches away from RESS
assembly to provide tool access.
a. Inspect motor seal for any damage or if it has
become unseated. Replace if necessary.
8. Torque stator retaining ring fastener. Tighten.
Torque: 2.6–3.2 N·m (23–28 in-lbs)
Install Motor
1. See Figure 2 and Figure 3. Ensure seal is properly seated
in motor groove and align motor to RESS and start the
seven fasteners on the right side of the vehicle.
a. Remove ratchet strap from motor.
b. Start two fasteners on left side of vehicle.
8
9
3
1
4
6
2
5
7
1714838
1-7. Screw
8. Electric motor
9. Sealing surface
Figure 2. Right Motor Screws
2 / 4 L1012
1
8
9
1714857
1. Electric motor
8. Screw
9. Screw
Figure 3. Left Motor Screws
2. Tighten screws (5) and (7).
Torque: 5–7 N·m (44–62 in-lbs)
3. Tighten left side screws (8) and (9).
Torque: 31.5–38.5 N·m (23–28 ft-lbs)
4. Tighten right side screws (1-7) in sequence.
Torque: 31.5–38.5 N·m (23–28 ft-lbs)
a. Remove flat jack and wood.
5. Install 3 phase caddy. Tighten screws.
Torque: 2.4–3 N·m (21–27 in-lbs)
6. Install 3 phase leads to motor. Tighten.
Torque: 5.3–6.5 N·m (47–58 in-lbs)
1
6
5
2
3
4
1713465
1. Screws (3)
2. Screws (1)
3. Screws (2)
4. PEU
5. Screws (2)
6. Connector (2)
Figure 4. PEU Connections
7. Reconnect low voltage connectors and attach to caddy
retainers.
8. Inspect HV cover seal and ensure it is properly seated.
a. Install High-Voltage cover. Tighten.
Torque: 5–6.1 N·m (44–54 in-lbs)
Install Swingarm
1. Lift swingarm and ensure brake lines route under the shock
rocker.
2. Align and set swingarm against bearings securely.
3. Install bearing caps. Tighten beginning with left side.
Torque: 37.5–41.4 N·m (28–31 ft-lbs)
4. Install forward P-clamp on right side of swingarm. Tighten.
Torque: 8–10 N·m (71–89 in-lbs)
5. Install P-clamp on motor. Tighten.
Torque: 8–10 N·m (71–89 in-lbs)
6. Align rear shock rocker and install bolts.
a. Raising or lowering the vehicle on the jack can aid
with alignment.
7. Tighten shock to rocker bolt.
Torque: 90–100 N·m (66–74 ft-lbs)
8. Tighten motor to rocker bolt.
Torque: 90–100 N·m (66–74 ft-lbs)
9. Connect rear lighting Christmas tree fasteners on left side
of swingarm.
Tension Belt
1. Install belt on to sprocket and pulley.
2. Turn axle adjusters equal turns to take slack out of belt.
3. Adjust belt tension:
a. 57-63 Hz if new.
b. 48-52Hz if in service.
c. Or, adjust using Special Tool to 1/4 to 3/8-inch
deflection.
Special Tool: BELT TENSION GAUGE (HD-35381-A)
4. Lower vehicle and remove jack.
5. Tighten axle nut.
Torque: 129–142 N·m (95–105 ft-lbs)
6. Install E-clip on axle.
L1012 3 / 4
Install Right Foot Bracket
1. Install right foot bracket assembly. Tighten.
Torque: 28–36 N·m (21–27 ft-lbs)
2. Install brake line/wire harness caddy. Tighten.
Torque: 5–7 N·m (44–62 in-lbs)
3. Install front right P-clip. Tighten.
Torque: 5–7 N·m (44–62 in-lbs)
4. Install motor cover. Tighten.
Torque: 5.9–6.5 N·m (52–58 in-lbs)
Install Belt Guard
1. Install upper and lower belt guards. Tighten.
Torque: 5.9–6.5 N·m (52–58 in-lbs)
2. Install sprocket cover and screws. Tighten.
Torque: 5.9–6.5 N·m (52–58 in-lbs)
Install Left Foot Bracket
1. Install left foot bracket. Tighten.
Torque: 28–36 N·m (21–27 ft-lbs)
Install Skid Plate
1. Place skid plate underneath vehicle.
2. Connect OBC filter harness to PEU.
a. Ensure harness crosses over the Inlet harness and
under the coolant hoses.
3. Connect coolant hose retaining clip. Ensure the lock is
oriented facing down and position rear of the white
alignment marks on the hose. This will help prevent contact
with side stand spring.
4. Connect Inlet harness to OBC filter assembly.
a. Ensure both connector locks are fully engaged.
5. Lift skid plate and route the ground strap under the OBC
filter.
6. Install skid plate screws. Tighten.
Torque: 12.9–14.4 N·m (10–11 ft-lbs)
7. Install ground strap screw. Tighten.
Torque: 5–7 N·m (44–62 in-lbs)
Energize Vehicle
1. Remove fuse block cover.
2. Install 40 amp fuse.
3. Stow fuse block in rear caddy.
Complete
1. Install top cover. Tighten fasteners.
Torque: 5.9–6.5 N·m (52–58 in-lbs)
2. Turn vehicle ignition ON.
3. Connect Digital Technician II (DT II).
4. Navigate to Vehicle Setup.
5. Select Resolver Offset and perform the procedure.
6. Check Diagnostic Trouble Codes (DTCs). Clear if any are
found.
7. If any DTCs return. See the Electrical Diagnostic Manual
(EDM) to troubleshoot.
8. Install seat. See service manual.
Credit Procedure
NOTE
Enter bulletin and any part numbers with quantities replaced
into comment section of claim.
Submit a warranty claim per Table 3.
Table 3. S2 Del Mar Fastener Inspection
ITEM DATA
Claim Type Recall
Customer Concern Code 9981
Condition Code 1002
Problem Part Number 10100089
Replacement Part Number N/A
Quantity N/A
Model S2 Del Mar
Model Year 2024
Labor Time 3 hours
(1) Download may be required
4 / 4 L1012
**************************************************************************************************************
IMPORTANT SAFETY RECALL
This notice applies to your motorcycle, VIN # 1HD3GCYB7
March 26, 2024
LiveWire Recall No. 1002
NHTSA Recall No. 24V-216
Dear LiveWire® Motorcycle Owner:
This notice is sent to you in accordance with the National Traffic and Motor Vehicle Safety Act.
LiveWire EV, LLC has decided that a defect which relates to motor vehicle safety exists in certain
model year 2024 S2 Del Mar® motorcycles. We are notifying you because our records indicate
that you may own one of the affected motorcycles.
What is the Issue?
The motorcycle may have loose fasteners resulting from an improperly performed inspection by
a third party. The areas of concern include the rear axle assembly, lower shock joint, and certain
powertrain fasteners, among others. A loose rear axle assembly or lower shock joint may lead to
a loss of control, which may increase the risk of a crash.
What Should You Do?
Please contact your authorized LiveWire® motorcycle dealer and arrange an appointment to have
the recall service performed at no cost to you. The service will include inspecting certain fasteners
on the chassis and powertrain and properly tightening any loose joints to specification. If damaged
components caused by this condition are identified during the inspection, they will also be replaced
at no charge to you. If you prefer, you may contact your dealer and make arrangements to have
them pick up the motorcycle. The recall service may take up to three (3) hours. However, due to
scheduling, the dealer may require your motorcycle for a longer period. Once the service has been
completed, your dealer will ask you to sign a recall claim.
1HD3GCYB7RB550487
If you have sold your motorcycle and have an address for the current owner, it is important that
you forward this notice to the new owner. Alternatively, you may contact us at the LiveWire phone
number listed below and provide us with the new contact information so that we may notify the new
owner of this recall. Also, federal law requires that any vehicle lessor receiving this recall notice must
forward a copy of this notice to the lessee within ten (10) days.
What If You Have Additional Questions or Concerns?
For more information regarding eligibility, to locate a dealer, or if you take your motorcycle to
your dealer on a mutually agreed upon date and they are unable to perform the required service
to your satisfaction, please contact LiveWire EV, LLC for immediate assistance at 1-855-387-
4337.
If you believe that LiveWire has failed or is unable to remedy this defect in a reasonable
time or without charge, you may write the Administrator, National Highway Traffic Safety
Administration, 1200 New Jersey Avenue, SE, Washington, DC 20590; or call the toll-free Auto
Safety Hotline at 1-888-327-4236 (TTY: 1-800-424-9153); or go to http://www.safercar.gov.
We regret any inconvenience this may cause you, but we are initiating this action in the interest
of your personal safety and satisfaction with your LiveWire® motorcycle. Thank you for your
cooperation.
Sincerely,
LiveWire EV, LLC
Recall 1002
**************************************************************************************************************
IMPORTANT SAFETY RECALL INFORMATION
Safety Recall Campaign 1002
MY24 LiveWire® S2 Del Mar® Fastener Torque
To: US LiveWire® Dealers
Roles: Dealer Operator, General Manager, All P&A Roles, All Service Roles, Vehicle Sales Manager
March 21, 2024
Dear Dealer:
LiveWire has learned that certain Model Year 2024 S2 Del Mar® model motorcycles built between 07/31/2023 and 11/30/2023 may have loose fasteners resulting from an improperly performed inspection by a third party. The areas of concern include the rear axle assembly, lower shock joint, and certain powertrain fasteners, among others. Zero clamp load on the rear axle assembly or lower shock joint may lead to a loss of control, which may increase the risk of a crash. Accordingly, LiveWire is conducting a voluntary safety recall (Campaign 1002) to address this condition.
First, confirm that the motorcycles are covered by this recall. If covered, perform the recall remedy per Service Bulletin L1012, which outlines the repair and credit procedures for the recall and provides additional relevant information.
In the interest of our customers’ safety, and as required by federal law, you may sell but not deliver any affected motorcycles in your new vehicle inventory until the recall remedy has been performed. Please refer to H-Dnet / My Toolbox / Warranty Campaign Center. Select “Safety Campaign Open VIN list,” then select “1002 Campaign” to view the VIN list.
In accordance with federal regulations administered by the National Highway Traffic Safety Administration (NHTSA) and other appropriate market-specific government agencies, LiveWire expects to notify affected owners of record of this recall between March 22 and March 29, 2024.
If you have any questions related to this recall, you can contact us at 1-833-951-7433.
LiveWire takes pride in the quality standards and controls we employ in our drive to lead the industry and deliver the world’s most desirable electric motorcycles. Thank you for your cooperation.
Sincerely,
LiveWire EV, LLC
Recall 1002
Key Dates:
• March 21 – March 28, 2024 – Dealer Communication and Service Bulletin released.
• March 22 – March 29, 2024 – Owner Letters mailed.
**************************************************************************************************************
**************************************************************************************************************
**************************************************************************************************************
**************************************************************************************************************
SEOCONTENT-END