
NHTSA ID Number: 10253663
Manufacturer Communication Number: OwnersB
TSB/Document Date: 2024-04-29
Summary
Tesla![]() does not provide physical owner's manual copies. Instead, all available owner?s manual content is integrated into the vehicle software, and only the content relevant for a given vehicle, based on vehicle configuration and software version installed, is displayed on its touchscreen. This file contains all available owner?s manual content for 2015-2020 Model X vehicles converted to PDF format, and given the distribution method and NHTSA?s submission format requirements, it is the best available representative copy of owner?s manual content. However, a customer who accesses the owner?s manual via their vehicle?s touchscreen would only see the parts of this PDF file that are relevant to their vehicle.
does not provide physical owner's manual copies. Instead, all available owner?s manual content is integrated into the vehicle software, and only the content relevant for a given vehicle, based on vehicle configuration and software version installed, is displayed on its touchscreen. This file contains all available owner?s manual content for 2015-2020 Model X vehicles converted to PDF format, and given the distribution method and NHTSA?s submission format requirements, it is the best available representative copy of owner?s manual content. However, a customer who accesses the owner?s manual via their vehicle?s touchscreen would only see the parts of this PDF file that are relevant to their vehicle.
An electric arc flash can occur if you attempt to unplug while actively charging with the third-party charging
adapter, and an electric arc flash can cause serious bodily injury and/or property damage.
What to do:
Follow the steps below to mitigate this risk:
• Make sure charging is completely stopped.
1. Use your vehicle touchscreen to confirm charging has stopped, or to stop charging if necessary.
2. Use the charging station display and controls to confirm charging has stopped, or to end any active charging
session.
• Make sure no flashing green or blue light (LED) is visible on your vehicle’s charge port.
• Unplug the charging adapter from your vehicle’s charge port.
• Confirm again that the charging station indicates no active charging session.
• Unplug the charging adapter from the charge handle.
Use different charging equipment to charge your vehicle. For more information on charging, see Charging
Instructions on page 241.
You can also try charging your vehicle using a Tesla Supercharger![]() or Destination Charging location, all of which can
or Destination Charging location, all of which can
be located through the map on your vehicle's touchscreen display. See Maps and Navigation on page 225 for more
details.
BMS_u031
Battery fuse requires replacement soon
OK to drive - Schedule service
What this alert means:
313
Owners Manual
A fuse in your vehicle’s high voltage battery![]() is very near the end of its lifetime and requires replacement.
is very near the end of its lifetime and requires replacement.
What to do:
It is recommended that you schedule service as soon as possible to have the high voltage battery![]() fuse replaced.
fuse replaced.
Your vehicle is OK to drive in the meantime. However, you may notice reduced speed and acceleration while driving.
For more information on the high voltage battery![]() system, see High Voltage Battery
system, see High Voltage Battery![]() Information.
Information.
BMS_u032
Battery fuse replacement required
OK to drive - Schedule service
What this alert means:
A fuse in your vehicle’s high voltage battery![]() is very near the end of its lifetime and requires replacement.
is very near the end of its lifetime and requires replacement.
What to do:
It is recommended that you schedule service as soon as possible to have the high voltage battery![]() fuse replaced.
fuse replaced.
Your vehicle is OK to drive in the meantime. However, you may notice reduced speed and acceleration while driving.
For more information on the high voltage battery![]() system, see High Voltage Battery
system, see High Voltage Battery![]() Information.
Information.
BMS_w176
Battery fuse replacement required
OK to drive - Schedule service immediately
What this alert means:
A fuse in your vehicle’s high voltage battery![]() is at the end of its lifetime and requires immediate replacement.
is at the end of its lifetime and requires immediate replacement.
What to do:
It is recommended that you schedule service immediately to have the high voltage battery![]() fuse replaced.
fuse replaced.
Continue to your immediate destination. Your vehicle is OK to drive. However, you may notice reduced speed and
acceleration while driving.
For more information on the high voltage battery![]() system, see High Voltage Battery
system, see High Voltage Battery![]() Information.
Information.
CC_f001
Unable to charge - Insufficient grounding
Proper wiring or outlet grounding must be verified
What this alert means:
No ground connection detected in the Wall Connector![]() .
.
What to do:
Have the Wall Connector![]() inspected by an electrician to make sure it is properly grounded. Your electrician should
inspected by an electrician to make sure it is properly grounded. Your electrician should
ensure there is proper grounding at your circuit breaker or power distribution box and also ensure that appropriate
connections are made to the Wall Connector![]() .
.
For more information, see the installation guide for your Wall Connector![]() .
.
CC_f002
Unable to charge - Insufficient grounding
Disconnect and retry or use different equipment
What this alert means:
Ground fault. Current is leaking through an unsafe path. Possible Line to ground or Neutral to ground fault.
314
Owners Manual
What to do:
Try charging again by disconnecting the Wall Connector![]() from the vehicle and reconnecting. If the issue persists, turn
from the vehicle and reconnecting. If the issue persists, turn
OFF the circuit breaker servicing the Wall Connector![]() , wait 10 seconds, turn the circuit breaker ON again, then try
, wait 10 seconds, turn the circuit breaker ON again, then try
reconnecting the Wall Connector![]() to the vehicle. If the issue persists, consult your electrician or contact Tesla
to the vehicle. If the issue persists, consult your electrician or contact Tesla![]() .
.
For more information, see the installation guide for your Wall Connector![]() .
.
CC_f003
Unable to charge - Wall Connector![]() GFCI tripped
GFCI tripped
Disconnect and retry or use different equipment
What this alert means:
Ground fault. Current is leaking through an unsafe path. Possible Line to ground or Neutral to ground fault.
What to do:
Try charging again by disconnecting the Wall Connector![]() from the vehicle and reconnecting. If the issue persists, turn
from the vehicle and reconnecting. If the issue persists, turn
OFF the circuit breaker servicing the Wall Connector![]() , wait 10 seconds, turn the circuit breaker ON again, then try
, wait 10 seconds, turn the circuit breaker ON again, then try
reconnecting the Wall Connector![]() to the vehicle. If the issue persists, consult your electrician or contact Tesla
to the vehicle. If the issue persists, consult your electrician or contact Tesla![]() .
.
For more information, see the installation guide for your Wall Connector![]() .
.
CC_f004
Unable to charge - Wall Connector![]() issue
issue
Wall Connector![]() needs service
needs service
What this alert means:
Wall Connector![]() hardware issue. Possible issues include:
hardware issue. Possible issues include:
1. Contactor not working
2. Self-test of internal ground fault monitoring circuit failed
3. Thermal sensor disconnected
4. Other hardware component issues
What to do:
An internal issue was detected by the Wall Connector![]() .
.
1. Try charging again by disconnecting the Wall Connector![]() from the vehicle and reconnecting.
from the vehicle and reconnecting.
2. If the issue persists, turn OFF the circuit breaker for the Wall Connector![]() , wait 10 seconds, and turn the circuit
, wait 10 seconds, and turn the circuit
breaker ON again. Then try reconnecting the Wall Connector![]() to the vehicle.
to the vehicle.
3. If the issue persists, have an electrician make sure all wires are properly connected and torqued according to the
instructions in the Wall Connector![]() Installation Manual.
Installation Manual.
4. Once your electrician has completed all work and restored power to the Wall Connector![]() , try charging again by
, try charging again by
reconnecting the Wall Connector![]() to the vehicle.
to the vehicle.
5. If the issue persists, the Wall Connector![]() requires service.
requires service.
For more information, see the installation guide for your Wall Connector![]() .
.
CC_f005
Unable to charge - Wall Connector![]() GFCI tripped
GFCI tripped
Disconnect and retry or use different equipment
What this alert means:
Ground fault. Current is leaking through an unsafe path. Possible Line to ground or Neutral to ground fault.
What to do:
315
Owners Manual
Try charging again by disconnecting the Wall Connector![]() from the vehicle and reconnecting. If the issue persists, turn
from the vehicle and reconnecting. If the issue persists, turn
OFF the circuit breaker servicing the Wall Connector![]() , wait 10 seconds, turn the circuit breaker ON again, then try
, wait 10 seconds, turn the circuit breaker ON again, then try
reconnecting the Wall Connector![]() to the vehicle. If the issue persists, consult your electrician or contact Tesla
to the vehicle. If the issue persists, consult your electrician or contact Tesla![]() .
.
For more information, see the installation guide for your Wall Connector![]() .
.
CC_f006
Unable to charge - Wall Connector![]() overcurrent
overcurrent
Disconnect and retry or use different equipment
What this alert means:
Over current protection.
What to do:
Reduce the vehicle's charge current setting. If the issue persists, service is required.
For more information, see the installation guide for your Wall Connector![]() .
.
CC_f007
Unable to charge - Input voltage too high
Voltage must be within Wall Connector![]() rating
rating
What this alert means:
Over or under voltage protection.
What to do:
Consult your electrician to ensure appropriate voltage on the circuit breaker that services the Wall Connector![]() .
.
For more information, see the installation guide for your Wall Connector![]() .
.
CC_f008
Unable to charge - Input voltage too low
Voltage must be within Wall Connector![]() rating
rating
What this alert means:
Over or under voltage protection.
What to do:
Consult your electrician to ensure appropriate voltage on the circuit breaker that services the Wall Connector![]() .
.
For more information, see the installation guide for your Wall Connector![]() .
.
CC_f009
Unable to charge - Input wired incorrectly
Input wiring to Wall Connector![]() must be corrected
must be corrected
What this alert means:
Input miswired: possibly Line and Neutral are swapped.
What to do:
The wiring between the wall power and the Wall Connector![]() has been incorrectly installed. Consult your electrician.
has been incorrectly installed. Consult your electrician.
For more information, see the installation guide for your Wall Connector![]() .
.
316
Owners Manual
CC_f010
Unable to charge - Wall Connector![]() issue
issue
Wall Connector![]() needs service
needs service
What this alert means:
Wall Connector![]() hardware issue. Possible issues include:
hardware issue. Possible issues include:
1. Contactor not working
2. Self-test of internal ground fault monitoring circuit failed
3. Thermal sensor disconnected
4. Other hardware component issues
What to do:
An internal issue was detected by the Wall Connector![]() .
.
1. Try charging again by disconnecting the Wall Connector![]() from the vehicle and reconnecting.
from the vehicle and reconnecting.
2. If the issue persists, turn OFF the circuit breaker for the Wall Connector![]() , wait 10 seconds, and turn the circuit
, wait 10 seconds, and turn the circuit
breaker ON again. Then try reconnecting the Wall Connector![]() to the vehicle.
to the vehicle.
3. If the issue persists, have an electrician make sure all wires are properly connected and torqued according to the
instructions in the Wall Connector![]() Installation Manual.
Installation Manual.
4. Once your electrician has completed all work and restored power to the Wall Connector![]() , try charging again by
, try charging again by
reconnecting the Wall Connector![]() to the vehicle.
to the vehicle.
5. If the issue persists, the Wall Connector![]() requires service.
requires service.
For more information, see the installation guide for your Wall Connector![]() .
.
CC_f011
Unable to charge - Wall Connector![]() too hot
too hot
Let Wall Connector![]() cool and try again
cool and try again
What this alert means:
Over temperature protection (latchoff).
What to do:
Make sure the Wall Connector![]() is not covered by anything and that there is no heat source nearby. If the problem
is not covered by anything and that there is no heat source nearby. If the problem
persists in normal ambient temperatures (under 100°F or 38°C) , service is required.
For more information, see the installation guide for your Wall Connector![]() .
.
CC_f012
Unable to charge - Wall connection too hot
Outlet or Wall Connector![]() wiring must be checked
wiring must be checked
High temperature detected by Wall Connector![]() alerts indicate the building connection to the Wall Connector
alerts indicate the building connection to the Wall Connector![]() is
is
getting too warm, so charging has stopped to protect the wiring and Wall Connector![]() .
.
This is not typically an issue with your vehicle or your Wall Connector![]() , but rather an issue with the building wiring.
, but rather an issue with the building wiring.
This may be caused by a loose building wiring connection to the Wall Connector![]() and can be fixed quickly by an
and can be fixed quickly by an
electrician.
To regain normal charge operation, try the following steps.
If the Wall Connector![]() is plugged into a wall outlet, make sure:
is plugged into a wall outlet, make sure:
• The plug is fully inserted into the receptacle / outlet
• The plug / outlet area is not blocked or covered by anything
317
Owners Manual
• There is no heat source nearby
If the issue persists or the Wall Connector![]() is hard-wired, contact an electrician to inspect the building wiring
is hard-wired, contact an electrician to inspect the building wiring
connection to the Wall Connector![]() . They should make sure that all wires are properly connected and torqued
. They should make sure that all wires are properly connected and torqued
according to the installation guide for the Wall Connector![]() .
.
For more information, see the installation guide for your Wall Connector![]() .
.
CC_f013
Unable to charge - Charge handle too hot
Check charge handle or charge port for debris
What this alert means:
Over temperature protection (latchoff).
What to do:
Make sure the connector![]() is fully inserted into the charge inlet in the vehicle's charging port, is not covered by
is fully inserted into the charge inlet in the vehicle's charging port, is not covered by
anything, and there is no heat source nearby. If the issue persists in normal ambient temperatures (under 100°F or
38°C) , service is required.
For more information, see the installation guide for your Wall Connector![]() .
.
CC_f014
Unable to charge - Wall Connector![]() issue
issue
Wall Connector![]() needs service
needs service
What this alert means:
Wall Connector![]() hardware issue. Possible issues include:
hardware issue. Possible issues include:
1. Contactor not working
2. Self-test of internal ground fault monitoring circuit failed
3. Thermal sensor disconnected
4. Other hardware component issues
What to do:
An internal issue was detected by the Wall Connector![]() .
.
1. Try charging again by disconnecting the Wall Connector![]() from the vehicle and reconnecting.
from the vehicle and reconnecting.
2. If the issue persists, turn OFF the circuit breaker for the Wall Connector![]() , wait 10 seconds, and turn the circuit
, wait 10 seconds, and turn the circuit
breaker ON again. Then try reconnecting the Wall Connector![]() to the vehicle.
to the vehicle.
3. If the issue persists, have an electrician make sure all wires are properly connected and torqued according to the
instructions in the Wall Connector![]() Installation Manual.
Installation Manual.
4. Once your electrician has completed all work and restored power to the Wall Connector![]() , try charging again by
, try charging again by
reconnecting the Wall Connector![]() to the vehicle.
to the vehicle.
5. If the issue persists, the Wall Connector![]() requires service.
requires service.
For more information, see the installation guide for your Wall Connector![]() .
.
CC_f015
Unable to charge - Vehicle connection issue
Insert charge handle fully into charge port
What this alert means:
A communication error occurred between the Wall Connector![]() and the vehicle.
and the vehicle.
318
Owners Manual
What to do:
Try charging again by disconnecting the Wall Connector![]() from the vehicle and reconnecting.
from the vehicle and reconnecting.
1. If the issue persists, turn OFF the circuit breaker servicing the Wall Connector![]() , wait 10 seconds, turn the circuit
, wait 10 seconds, turn the circuit
breaker ON again, then try reconnecting the Wall Connector![]() to the vehicle.
to the vehicle.
2. If the issue persists and other charging equipment is available, plug the vehicle into another Wall Connector![]() or a
or a
Mobile Connector![]() to determine if the vehicle is able to communicate with other charging equipment.
to determine if the vehicle is able to communicate with other charging equipment.
3. If the issue persists, service is required.
For more information, see the installation guide for your Wall Connector![]() .
.
CC_f016
Unable to charge - Vehicle connection issue
Insert charge handle fully into charge port
What this alert means:
A communication error occurred between the Wall Connector![]() and the vehicle.
and the vehicle.
What to do:
Try charging again by disconnecting the Wall Connector![]() from the vehicle and reconnecting.
from the vehicle and reconnecting.
1. If the issue persists, turn OFF the circuit breaker servicing the Wall Connector![]() , wait 10 seconds, turn the circuit
, wait 10 seconds, turn the circuit
breaker ON again, then try reconnecting the Wall Connector![]() to the vehicle.
to the vehicle.
2. If the issue persists and other charging equipment is available, plug the vehicle into another Wall Connector![]() or a
or a
Mobile Connector![]() to determine if the vehicle is able to communicate with other charging equipment.
to determine if the vehicle is able to communicate with other charging equipment.
3. If the issue persists, service is required.
For more information, see the installation guide for your Wall Connector![]() .
.
CC_f017
Unable to charge - Vehicle connection issue
Insert charge handle fully into charge port
What this alert means:
A communication error occurred between the Wall Connector![]() and the vehicle.
and the vehicle.
What to do:
Try charging again by disconnecting the Wall Connector![]() from the vehicle and reconnecting.
from the vehicle and reconnecting.
1. If the issue persists, turn OFF the circuit breaker servicing the Wall Connector![]() , wait 10 seconds, turn the circuit
, wait 10 seconds, turn the circuit
breaker ON again, then try reconnecting the Wall Connector![]() to the vehicle.
to the vehicle.
2. If the issue persists and other charging equipment is available, plug the vehicle into another Wall Connector or a
Mobile Connector to determine if the vehicle is able to communicate with other charging equipment.
3. If the issue persists, service is required.
For more information, see the installation guide for your Wall Connector.
CC_f018
Unable to charge - Vehicle connection issue
Insert charge handle fully into charge port
What this alert means:
A communication error occurred between the Wall Connector and the vehicle.
What to do:
319
Owners Manual
Try charging again by disconnecting the Wall Connector from the vehicle and reconnecting.
1. If the issue persists, turn OFF the circuit breaker servicing the Wall Connector, wait 10 seconds, turn the circuit
breaker ON again, then try reconnecting the Wall Connector to the vehicle.
2. If the issue persists and other charging equipment is available, plug the vehicle into another Wall Connector or a
Mobile Connector to determine if the vehicle is able to communicate with other charging equipment.
3. If the issue persists, service is required.
For more information, see the installation guide for your Wall Connector.
CC_f019
Unable to charge - Vehicle connection issue
Insert charge handle fully into charge port
What this alert means:
A communication error occurred between the Wall Connector and the vehicle.
What to do:
Try charging again by disconnecting the Wall Connector from the vehicle and reconnecting.
1. If the issue persists, turn OFF the circuit breaker servicing the Wall Connector, wait 10 seconds, turn the circuit
breaker ON again, then try reconnecting the Wall Connector to the vehicle.
2. If the issue persists and other charging equipment is available, plug the vehicle into another Wall Connector or a
Mobile Connector to determine if the vehicle is able to communicate with other charging equipment.
3. If the issue persists, service is required.
For more information, see the installation guide for your Wall Connector.
CC_f020
Unable to charge - Wall Connector issue
Wall Connector needs service
What this alert means:
Wall Connector hardware issue. Possible issues include:
1. Contactor not working
2. Self-test of internal ground fault monitoring circuit failed
3. Thermal sensor disconnected
4. Other hardware component issues
What to do:
An internal issue was detected by the Wall Connector.
1. Try charging again by disconnecting the Wall Connector from the vehicle and reconnecting.
2. If the issue persists, turn OFF the circuit breaker for the Wall Connector, wait 10 seconds, and turn the circuit
breaker ON again. Then try reconnecting the Wall Connector to the vehicle.
3. If the issue persists, have an electrician make sure all wires are properly connected and torqued according to the
instructions in the Wall Connector Installation Manual.
4. Once your electrician has completed all work and restored power to the Wall Connector, try charging again by
reconnecting the Wall Connector to the vehicle.
5. If the issue persists, the Wall Connector requires service.
For more information, see the installation guide for your Wall Connector.
320
Owners Manual
CC_f021
Unable to charge - No primary Wall Connector
Check that primary unit is powered and available
What this alert means:
Load sharing (circuit breaker sharing) network: Need one (and only one) Wall Connector set as primary.
What to do:
Only one Wall Connector can be set to a primary configuration. Have your electrician confirm:
1. Only one of the Wall Connectors is set as primary.
2. All other Wall Connectors linked to the primary unit are set to paired position (position F).
For more information, see the installation guide for your Wall Connector.
CC_f022
Unable to charge - More than 1 primary unit
Ensure only 1 Wall Connector is set as primary
What this alert means:
Load sharing (circuit breaker sharing) network: Need one (and only one) Wall Connector set as primary.
What to do:
Only one Wall Connector can be set to a primary configuration. Have your electrician confirm:
1. Only one of the Wall Connectors is set as primary.
2. All other Wall Connectors linked to the primary unit are set to paired position (position F).
For more information, see the installation guide for your Wall Connector.
CC_f023
Unable to charge - Too many Wall Connectors
Ensure no more than 3 units paired with primary
What this alert means:
Load sharing (circuit breaker sharing) network: More than three Wall Connectors are paired with the same primary
unit.
What to do:
Consult your electrician to have one or more paired Wall Connectors moved to a different circuit and disconnected
(unpaired) from this load sharing (circuit breaker sharing) network.
For more information, see the installation guide for your Wall Connector.
CC_f024
Unable to charge - Low Wall Connector current
Primary unit current setting must be increased
What this alert means:
Incorrect rotary switch setting.
What to do:
Have your electrician adjust the Wall Connector’s internal rotary switch to a valid operating current setting. They
should first make sure there is no power to the Wall Connector. The correlation between switch setting and current
should be printed on the inside of the Wall Connector. Your electrician should also refer to the Set the Operating
Current section in the Wall Connector Installation Manual.
321
Owners Manual
If the Wall Connector is set up for load sharing (circuit breaker sharing) and paired with other Wall Connectors, the
rotary switch of the primary unit must be set to an operating current setting that allows each paired Wall Connector
to receive at least 6A of charge current.
Example: Three Wall Connectors are paired for load sharing. The primary unit needs to be set to a current of at least
3 * 6A = 18A or greater.
For more information, see the installation guide for your Wall Connector.
CC_f025
Unable to charge - Wall Connector issue
Wall Connector needs service
What this alert means:
Wall Connector hardware issue. Possible issues include:
1. Contactor not working
2. Self-test of internal ground fault monitoring circuit failed
3. Thermal sensor disconnected
4. Other hardware component issues
What to do:
An internal issue was detected by the Wall Connector.
1. Try charging again by disconnecting the Wall Connector from the vehicle and reconnecting.
2. If the issue persists, turn OFF the circuit breaker for the Wall Connector, wait 10 seconds, and turn the circuit
breaker ON again. Then try reconnecting the Wall Connector to the vehicle.
3. If the issue persists, have an electrician make sure all wires are properly connected and torqued according to the
instructions in the Wall Connector Installation Manual.
4. Once your electrician has completed all work and restored power to the Wall Connector, try charging again by
reconnecting the Wall Connector to the vehicle.
5. If the issue persists, the Wall Connector requires service.
For more information, see the installation guide for your Wall Connector.
CC_f026
Unable to charge - Wall Connector issue
Wall Connector needs service
What this alert means:
Wall Connector hardware issue. Possible issues include:
1. Contactor not working
2. Self-test of internal ground fault monitoring circuit failed
3. Thermal sensor disconnected
4. Other hardware component issues
What to do:
An internal issue was detected by the Wall Connector.
1. Try charging again by disconnecting the Wall Connector from the vehicle and reconnecting.
2. If the issue persists, turn OFF the circuit breaker for the Wall Connector, wait 10 seconds, and turn the circuit
breaker ON again. Then try reconnecting the Wall Connector to the vehicle.
322
Owners Manual
3. If the issue persists, have an electrician make sure all wires are properly connected and torqued according to the
instructions in the Wall Connector Installation Manual.
4. Once your electrician has completed all work and restored power to the Wall Connector, try charging again by
reconnecting the Wall Connector to the vehicle.
5. If the issue persists, the Wall Connector requires service.
For more information, see the installation guide for your Wall Connector.
CC_f027
Unable to charge - Wall Connector issue
Wall Connector needs service
What this alert means:
Wall Connector hardware issue. Possible issues include:
1. Contactor not working
2. Self-test of internal ground fault monitoring circuit failed
3. Thermal sensor disconnected
4. Other hardware component issues
What to do:
An internal issue was detected by the Wall Connector.
1. Try charging again by disconnecting the Wall Connector from the vehicle and reconnecting.
2. If the issue persists, turn OFF the circuit breaker for the Wall Connector, wait 10 seconds, and turn the circuit
breaker ON again. Then try reconnecting the Wall Connector to the vehicle.
3. If the issue persists, have an electrician make sure all wires are properly connected and torqued according to the
instructions in the Wall Connector Installation Manual.
4. Once your electrician has completed all work and restored power to the Wall Connector, try charging again by
reconnecting the Wall Connector to the vehicle.
5. If the issue persists, the Wall Connector requires service.
For more information, see the installation guide for your Wall Connector.
CC_f028
Unable to charge - Incorrect switch setting
Wall Connector rotary switch must be adjusted
What this alert means:
Incorrect rotary switch setting.
What to do:
Have your electrician adjust the Wall Connector’s internal rotary switch to a valid operating current setting. They
should first make sure there is no power to the Wall Connector. The correlation between switch setting and current
should be printed on the inside of the Wall Connector. Your electrician should also refer to the Set the Operating
Current section in the Wall Connector Installation Manual.
If the Wall Connector is set up for load sharing (circuit breaker sharing) and paired with other Wall Connectors, the
rotary switch of the primary unit must be set to an operating current setting that allows each paired Wall Connector
to receive at least 6A of charge current.
Example: Three Wall Connectors are paired for load sharing. The primary unit needs to be set to a current of at least
3 * 6A = 18A or greater.
For more information, see the installation guide for your Wall Connector.
323
Owners Manual
CC_f029
Unable to charge - Vehicle connection issue
Insert charge handle fully into charge port
What this alert means:
A communication error occurred between the Wall Connector and the vehicle.
What to do:
Try charging again by disconnecting the Wall Connector from the vehicle and reconnecting.
1. If the issue persists, turn OFF the circuit breaker servicing the Wall Connector, wait 10 seconds, turn the circuit
breaker ON again, then try reconnecting the Wall Connector to the vehicle.
2. If the issue persists and other charging equipment is available, plug the vehicle into another Wall Connector or a
Mobile Connector to determine if the vehicle is able to communicate with other charging equipment.
3. If the issue persists, service is required.
For more information, see the installation guide for your Wall Connector.
CC_f030
Unable to charge - Primary / paired unit mismatch
Wall Connector current ratings must match
What this alert means:
Load sharing (circuit breaker sharing) network: The paired Wall Connectors have different maximum current
capabilities.
What to do:
Only Wall Connectors with the same maximum current capabilities can be paired in a load sharing (circuit breaker
sharing) network. Have your electrician inspect the type labels on the Wall Connectors and make sure the current
capabilities match. It is further recommended that your electrician only pair Wall Connectors with the same part
number, as an easy way to make sure paired units are compatible.
For more information, see the installation guide for your Wall Connector.
CC_f041
Charge rate reduced - Wall connection hot
Outlet or Wall Connector wiring must be checked
What this alert means:
High temperature detected by Wall Connector alerts indicate the building connection to the Wall Connector is
getting too warm, so charging has been slowed to protect the wiring and Wall Connector.
This is not typically an issue with your vehicle or your Wall Connector, but rather an issue with the building wiring.
This may be caused by a loose building wiring connection to the Wall Connector and can be fixed quickly by an
electrician.
What to do:
Contact an electrician to inspect the building wiring connection to the Wall Connector. They should make sure that
all wires are properly connected and torqued according to the installation guide for the Wall Connector.
For more information, see the installation guide for your Wall Connector.
CHG_f035
Charging equipment communication error
Try again or try different equipment
What this alert means:
324
Owners Manual
Your vehicle is unable to charge because it cannot communicate effectively with the external charging equipment. It
cannot sense a valid control pilot signal coming from the charging equipment.
This alert is usually specific to external charging equipment and power sources and does not typically indicate an
issue with your vehicle that can be resolved by scheduling service.
What to do:
First, confirm the lack of effective communication is caused by the external charging equipment rather than an issue
with your vehicle. This is usually the case.
Try charging the vehicle using different external charging equipment (including charge cable, charging station, or
charging stall).
• If the vehicle begins charging, the issue was likely with the equipment.
• If the vehicle still does not charge, the issue may be with the vehicle.
If the issue is suspected to be with the vehicle, inspect the charge port inlet and the charge cable connector for any
obstructions, such as debris, moisture, and/or foreign objects. Make sure any charge port inlet obstruction has been
removed and any moisture has been allowed to dry, then try re-inserting the cable into the charge port.
You can also try charging your vehicle using a Tesla Supercharger![]() or Destination Charging location, all of which can
or Destination Charging location, all of which can
be located through the map on your vehicle's touchscreen display. See Maps and Navigation on page 225 for more
details.
For more information on troubleshooting Mobile Connector or Wall Connector status lights, refer to the product's
Owner's Manual at Charging & Adapter Product Guides.
For more information on charging, see Charging Instructions on page 241.
CHG_f083
Cannot charge - Poor grid power quality possible
Retry / Try other charge location or Supercharging
What this alert means:
Power has been lost during charging. This could result from the charging equipment losing power from the source
(for example, a wall outlet) or from an issue with the charging equipment.
What to do:
This alert is often accompanied by other alerts that can help you identify and troubleshoot the issue. Start by
investigating any other displayed alerts that relate to charging issues.
Alternatively, you can check Mobile Connector or Wall Connector status lights to confirm power to the device, and
also refer to the product owner’s manual for troubleshooting information based on blink codes. If using other (nonTesla) external charging equipment, check for a display or other user interface that provides troubleshooting help.
If there is clearly no power to the charging equipment, check the circuit breaker for the wall outlet / Wall Connector
to make sure it has not tripped.
Further troubleshooting tips based on equipment type:
• If using a Mobile Connector, try charging the vehicle with a different wall outlet.
◦ If the vehicle starts to charge, the issue was likely with the original wall outlet.
◦ If the vehicle still does not charge, the issue may be with the Mobile Connector.
• If using a Wall Connector, try charging the vehicle with different charging equipment like a Mobile Connector
powered by a separate wall outlet.
◦ If the vehicle starts to charge, the issue was likely with the Wall Connector.
If the issue is with the original wall outlet or the Wall Connector, contact an electrician to inspect the wiring
connection.
325
Owners Manual
This alert is usually specific to external charging equipment and power sources and does not typically indicate an
issue with your vehicle that can be resolved by scheduling service.
You can also try charging your vehicle using a Tesla Supercharger![]() or Destination Charging location, all of which can
or Destination Charging location, all of which can
be located through the map on your vehicle's touchscreen display. See Maps and Navigation on page 225 for more
details.
For more information on troubleshooting Mobile Connector or Wall Connector status lights, refer to the product's
Owner's Manual at Charging & Adapter Product Guides.
CHG_f091
Charging equipment not recognized
Try again or try different equipment
What this alert means:
The charge port is unable to detect whether a charge cable is inserted, or the type of charge cable connected.
This alert is usually specific to external charging equipment and power sources and does not typically indicate an
issue with your vehicle that can be resolved by scheduling service.
What to do:
If this alert appears while a charge cable is connected, determine whether the issue is caused by the charging
equipment or the vehicle. Try charging the vehicle using different external charging equipment (including charge
cable, charging station, or charging stall).
• If the vehicle begins charging, the issue was likely with the equipment.
• If the vehicle still does not charge, the issue may be with the vehicle.
If this alert appears while a charge cable is not connected or if the issue is suspected to be with the vehicle, inspect
the charge port inlet and the charge cable connector for any obstructions, such as debris, moisture, and/or foreign
objects. Make sure any charge port inlet obstruction has been removed and any moisture has been allowed to dry,
then try re-inserting the cable into the charge port.
You can also try charging your vehicle using a Tesla Supercharger![]() or Destination Charging location, all of which can
or Destination Charging location, all of which can
be located through the map on your vehicle's touchscreen display. See Maps and Navigation on page 225 for more
details.
For more information on troubleshooting Mobile Connector or Wall Connector status lights, refer to the product's
Owner's Manual at Charging & Adapter Product Guides.
For more information on charging, see Charging Instructions on page 241.
CHGS_f083
Cannot charge - Poor grid power quality possible
Retry / Try other charge location or Supercharging
What this alert means:
Power has been lost during charging. This could result from the charging equipment losing power from the source
(for example, a wall outlet) or from an issue with the charging equipment.
What to do:
This alert is often accompanied by other alerts that can help you identify and troubleshoot the issue. Start by
investigating any other displayed alerts that relate to charging issues.


- Advanced VCI Box, Industry-leading J2534 Pass-Thru...
- High-Speed OEM-Level Diagnostics & Programming: Unlock true...
- Coverage for 17 Car Brands & Ultra Reliability: Works...
- User-Friendly RLink Platform & Expert Support: TOPDON’s...
- 6.6 ft USB-C Cable & Portable Storage Case: The RLink J...
Last update on 2026-06-23 / Affiliate links / Images from Amazon Product Advertising API
If the PDF is very large, it may not load in the preview below.
Some older TSBs had multiple PDFs — visit the NHTSA Website to view all PDFs.
If the TSB PDF does not show, download or view it on the NHTSA Website.
Click on the (+) Plus Sign
Then Click on Associated Document(s)
Search NHTSA Database for Recalls
Search NHTSA Database for Vehicle Investigations
View Latest Vehicle Investigations
Search NHTSA Database for Vehicle Complaints
View Latest Vehicle Complaints
TSB/Document ID: OwnersB
Replacement Service Bulletin Number:
MFR Communication Date: 2024-03-27
MFR Internal Campaign ID/Software Version:
Communication Type: Service Bulletin/Repair Instructions
NHTSA Components: EQUIPMENT:ELECTRICAL:INFOTAINMENT:VIDEO (TOUCH)SCREEN/MONITOR/UNIT
MFR Component System:
MFR Component Subsystem:
Previous TSB | Next TSB |

- [Notice] When you receive a used device, it may be a customer return resold by Amazon without inspection. You can exchange it for a new one through Amazon. As this situation is unavoidable, we sincerely apologize. For any issues, contacting us via Amazon's "Messages" is the best way. THINKSCAN 689BT Bidirectional Scan Tool Can Be Used Immediately After It is Turned On, Without Complicated Registration Process, Which is More Convenient & Quick.
- Full Bi-Directional Control & 3000+ Active Tests: Take control and test components like actuators, fuel injectors, relays, and cooling fans in real time. You’ll quickly see if the problem is in the part itself or the control module — saving you hours of guesswork and frustrating trial-and-error.
- Advanced ECU Coding Capabilities: Handle module matching and hidden feature activation with confidence. When you replace an ECU or want to customize settings, this obd2 scanner diagnostic bi directional tool gives you the professional-level capabilities you need without the dealership price tag.
- 34+ Useful Reset and Maintenance Functions: Complete everyday service tasks smoothly with a wide range of helpful reset and maintenance functions. Whether you’re keeping up with regular upkeep or tackling a specific job, this scanner makes maintenance simpler and less stressful for both DIYers and pros.
- Comprehensive Full System Diagnostics: Diagnose every major system — Engine, Transmission, ABS
 , SRS, TPMS, and more — all in one place. Finally stop wondering if you’re missing something important; get the full picture and clear codes with ease.
Last update on 2026-07-02 / Affiliate links / Images from Amazon Product Advertising API

- Top Reasons to Choose the D7S OBD2 Scanner: XTOOL D7S car scan tool, an upgrade of XTOOL D7, offers comprehensive features for automotive technicians, workshops, and DIY enthusiasts 1. Upgraded Hardware: 2+64GB memory, rear camera, intuitive interface, foldable bracket 2. Complete Diagnostics: FCA Autoauth, OE-level all system scan, 39+ maintenance services, 4K+ bidirectional, CANFD/DoIP protocol 3. Advanced Capabilities: ECU c0ding, PMI functions 4. Wide Compatibility: Support 10,000+ models, covering 99% vehicle brands 5. Multi-language: Available in 22+ languages, No IP Restrictions 6. 3-Year Updates: Save 300 bucks on software updates for the latest features and optimizations
- 2026 Upgraded D7S Car Scanner Features: The newly 2026 D7S V2.0 scanner for car brings exciting features for advanced vehicle diagnostics and enhanced user experience 1. FCA AutoAuth: Now supports FCA SGW module for Chrysler, for Jeep, for Dodge (2018+), for Fiat (2017+), enabling faster vehicle communication without gateway restrictions 2. PMI (Offline ECU Pr0gramming): Allows for Ford, for Lincoln, and for Mazda ECU pr0gramming for new modules 3. Optimized Diagnostic Report 2.0: Personalized reports with logos and customer info for auto shops. Note: Compatibility varies by cars, please check before order
- 39+ Services/Resets/Adaptations/Relearns/Calibrations: XTOOL D7S full system car scanner diagnostic tool tackles 99% of common car issues through its 36+ special functions, including Oil Reset, EPB, SAS, BMS, Throttle Reset, Injector C0ding, ABS Bleed, TPMS Reset, Power Balance, etc and also covers specific-vehicle functions like Crank Sensor Relearn, ABS Initialization, Cylinder Power Balance, Fuel Trim Reset, Idle Relearn etc. This car diagnostic scanner enhances efficiency, making repairs and maintenance hassle-free. Tip: DO NOT for All vehicles, please check compatibility first
- Cost-effective ECU C0ding Scan Tool for Specific Brands: Enhance your vehicle's performance with XTOOL D7S! This obd2 scanner all systems bidirectional offers advanced capabilities at an affordable price, supports online for BMW, for Benz and offline for BENZ, for MIT, along with PMI functions for Ford, for Mazda, and for Lincoln. Ideal for technicians and DIY enthusiasts, this automotive scanner diagnostic tool optimizes vehicle performance and enhances the driving experience. Note: Not for all cars and modules, please send car VIN to check the compatibility before purchase
- OE All System Diagnostic & 8 Pids Graphing: XTOOL D7S is a comprehensive all system bi directional obd2 scanner that delivers dealer-level diagnostics, completely controlling over your vehicle’s performance and health. This automotive scan tool can read and clear DTCs, view live data and ECU information, retrieve freeze frames, and perform active tests and full obd2 functions. This bi-directional scan tool can can identify your vehicle's make, model, and year information with just one click and show up to 8 PIDs live data with options for CSV viewing, playback, and recording for in-depth analysis. It is easy-to-use for both professionals and beginners, helping pinpoint issues efficiently
Last update on 2026-06-30 / Affiliate links / Images from Amazon Product Advertising API
 Oil/EPB/SAS/Throttle/Battery, Scanner Diagnostic Tool for Vehicles, Lifetime Free Update, Auto VIN" title="TSB 6">
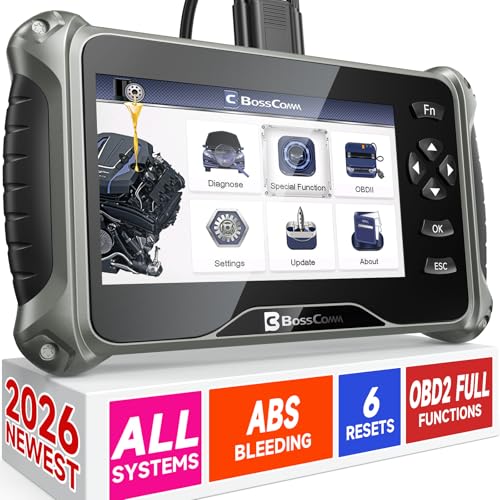
- 【✅Compared to BOSSCOMM IF742, IF745 Offers Full-System Diagnostics】The BOSSCOMM IF745 car diagnostic scanner is an upgraded model of IF742. In addition to supporting all OBD2 Code Reader functions and 6 reset options (ABS/EPB/SAS/BMS/Oil/Throttle), it expands diagnostics from 4 systems (Check Engine/ABS/SRS/Transmission) to vehicle All systems, including Steering, Suspension, and Body Electronics. This provides deeper, more comprehensive diagnostic capabilities.
- 【✨10 OBD2 Functions】The BOSSCOMM IF745 scan tool’s DTC Lookup instantly translates fault codes into user-friendly explanations, its I/M Readiness feature streamlines emissions testing with a single tap, and Freeze Frame lets you pinpoint the exact moment of a fault for in-depth root-cause diagnosis. Combined with a live data dashboard and advanced diagnostics (O2S, OBMon, EVAP), it delivers comprehensive insights for confident troubleshooting.
- 【✨Deep Diagnostics for All Vehicle System Modules】Beyond code reading/clearing and ECU information retrieval, our all-in-one data stream feature lets you inspect all current fault codes and their locations across the vehicle’s systems. This vehicle code reader helps you turn off dashboard warning lights and perform a comprehensive self-check of your car at home—no more back-and-forth trips to the repair shop or hefty inspection fees.
- 【✨6 Essential Resets: ABS Bleeding, Oil, EPB, SAS, Throttle, BMS】The BOSSCOMM IF745 obd2 scanner diagnostic tool swiftly purges air from brake lines to restore braking sensitivity, fine-tunes maintenance cycles to eliminate false alerts, resolves parking brake issues with one-click control, recalibrates steering sensors for stability, optimizes engine idling/acceleration for smoother performance, and deeply resets battery systems to extend lifespan and range via precise parameter adjustments.❗NOTE: Does NOT support bidirectional control, coding, or programming.
- 【✨10,000+ Car Models, AutoVIN, 13 Languages】The BOSSCOMM IF745 vehicle scanner diagnostic tool covers 73+ global car brands and offers support in 13 languages, making it perfect for DIYers, auto mechanics, or as a thoughtful gift. With a single-click AutoVIN feature, it instantly retrieves vehicle serial numbers, streamlining diagnostics for users globally. This adaptable tool balances user-friendliness with precision, catering to both personal and professional requirements.✅Unsure about compatibility? Compatibility will vary on vehicles' model and year, pls reach us via 📧 [email protected] 📧 before purchase.
Last update on 2026-07-02 / Affiliate links / Images from Amazon Product Advertising API
This product presentation was made with AAWP plugin.