
| “This site contains affiliate links for which OEMDTC may be compensated” |
May 4, 2022 NHTSA CAMPAIGN NUMBER: 22V299000
Reduced brake performance can increase the risk of a crash.
NHTSA Campaign Number: 22V299
Manufacturer Daimler Trucks North America, LLC
Components SERVICE BRAKES, AIR
Potential Number of Units Affected 15
Summary
Daimler Trucks North America, LLC (DTNA) is recalling certain 2023 Western Star 47X and 2022-2023 49X Western Star vehicles. The caliper mounting bolts may loosen and detach, which can reduce brake performance.
Remedy
Dealers will be inspect and tighten the caliper mounting bolts, as necessary, free of charge. Owner notification letters were mailed July 1, 2022. Owners may contact DTNA customer service at 1-800-547-0712. DTNA’s number for this recall is FL-930.
Notes
Owners may also contact the National Highway Traffic Safety Administration Vehicle Safety Hotline at 1-888-327-4236 (TTY 1-800-424-9153), or go to www.nhtsa.gov.
Check for Daimler Trucks North America Recalls
June 2022
FL930AB
NHTSA #22V-299
Subject: Western Star Brake Caliper Mounting Bolts
Models Affected: Specific model years 2022-2023 Western Star 47X and 49X vehicles manufactured December 6, 2021, through February 9, 2022.
General Information
Daimler Truck North America LLC (DTNA), on behalf of its wholly owned subsidiary Western Star Truck Sales, Inc., has decided that a defect that relates to motor vehicle safety exists on the vehicles mentioned above.
On certain vehicles, insufficiently torqued caliper mounting bolts may not provide adequate clamping force between the brake caliper and brake anchor plate, potentially resulting in reduced brake effectiveness, which could increase the risk of a crash.
The caliper mounting bolts will be torqued and replaced as needed.
There are approximately 15 vehicles involved in this campaign.
Additional Repairs
Dealers must complete all outstanding Recall and Field Service campaigns prior to the sale or delivery of a vehicle. A Dealer will be liable for any progressive damage that results from its failure to complete campaigns before sale or delivery of a vehicle.
Owners may be liable for any progressive damage that results from failure to complete campaigns within a reasonable time after receiving notification.
Work Instructions
Please refer to the attached work instructions. Prior to performing the campaign, check the vehicle for a completion sticker (Form WAR260).
Replacement Parts
Replacement parts are now available and can be obtained by ordering the kit and/or part number(s) listed below from your facing Parts Distribution Center.
If our records show your dealership has ordered any vehicle(s) involved in campaign number FL930, a list of the customers and vehicle identification numbers will be available on DTNAConnect. Please refer to this list when ordering parts for this recall.
Table 1 – Replacement Parts for FL930
| Campaign Number | Kit Number | Part Description | Part Number | Qty. per Caliper |
| FL930AB | N/A | BOLT (M20X2.5X60) | N210931 020001 | 6 ea |
| WASHER-FLAT,STEEL,HARDENED,3/4 IN | 23-09114-004 | 6 ea | ||
| BLANK COMPLETION STICKER | WAR260 | 1 ea |
Work Instructions
Subject: Western Star Brake Caliper Mounting Bolts
Models Affected: Specific model years 2022-2023 Western Star 47X and 49X vehicles manufactured December 6, 2021, through February 9, 2022.
General Information
See Table 3 to determine the type of caliper installed on the vehicle and the page number for the instructions.
The work instructions shall be carried out on the rear calipers only.
| Campaign Number | Caliper Type | Page Number |
| FL930A | Bendix Axial | 6 |
| FL930B | Meritor Axial | 11 |
Table 3, Caliper Type and Instruction Page Number
Rear Caliper/Carrier Assembly Torque and Replacement Bendix Axial Mounted Calipers
- Check the base label (Form WAR259) for a completion sticker for FL930 (Form WAR260) indicating this work has been done. The base label is usually located on the passenger-side door, about 12 inches (30 cm) below the door latch. If a sticker is present for FL930, no work is needed. If there is no sticker, proceed with the next step.
- Park the vehicle on a level surface, shut down the engine, and set the parking brake. Chock the tires.
WARNING
Never work around or under a vehicle that is supported only by a jack. Always support the vehicle with safety stands. Jacks can slip, allowing the vehicle to fall, which could result in serious injury or death.
- Raise the rear axle and support it on jack stands. For detailed instructions, see Section 00.06 of the 47X & 49X workshop manual.
- Remove the rear wheel assembly.
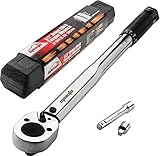
NOTE: In all steps that require a torque wrench, use a snap-on torque wrench ATECH4RS600, or an equivalent, with a center to handle length of 47 inches (119 cm).
- Set a torque wrench to 350 lbf·ft (475 N·m) and tighten the caliper mounting bolts. If they do not turn, go to step 13. If they turn, go to step 6. Due to limited caliper bolt access, it may be necessary to use tool DDC DSNCHA018005 referenced in tool letter 18TL18. If the tool is needed, use tool DDC DSNCHA018005 only and no other tools. See Fig. 1 for a 47 in (119 cm) long wrench, see Table 4 for torque specifications.
WARNING
When replacing brake pads, shoes, rotors, or drums, always replace components as an axle set.
- Always reline both sets of brakes on an axle at the same time.
- Always replace both rotors/drums on an axle at the same time.
- Always install the same type of linings/pads or drums/rotors on both axle ends of a single axle, and all four axle ends of a tandem axle, at the same time. Do not mix component types.
Failure to do so could cause uneven braking and loss of vehicle control, resulting in property damage, personal injury, or death.
- Remove the retainer pin, cotter pin, and brake pad retainer. Inspect the brake pad hardware to ensure it is in good condition. If it is, reuse the brake pad hardware. If the brake pad hardware is not in good condition, replace brake pad sets on both ends of the axle.
- Remove the brake pads.
- Remove caliper bolts.
IMPORTANT: The caliper/carrier assemblies are left and right handed. Ensure that the correct assembly (left or right) is installed on each side of the vehicle.
- Align the caliper/carrier assembly with the rotor by pushing the caliper against the shelf on the torque plate, then install the caliper/carrier assembly using new caliper mounting bolts. See Fig. 2.
- Tighten the carrier mounting bolts in two steps as follows.
10.1 Start on one side of the caliper and tighten all three bolts 20 to 60 lbf·ft (27 to 81 N·m), beginning with the inner-most bolt and moving to the outer-most bolt. Then tighten the three bolts on the other side of the caliper 20 to 60 lbf·ft (27 to 81 N·m), beginning with the inner-most bolt and moving to the outer-most bolt. See Fig. 3.
10.2 Repeat this process, increasing the torque value to 350 to 400 lbf·ft (475 to 542 N·m). If tool DDC DSNCHA018005 referenced in tool letter 18TL18 is used, see Table 5 for torque specifications.
Do not use a motor driven tool to tighten the manual brake adjuster nut, or use excessive force to tighten the nut. Doing so could damage the manual brake adjuster nut.
- Install the brake pads. Provided it is in good condition, use the brake pad hardware removed earlier.
- Back off the adjuster nut three clicks.
- Install the rear wheel assembly.
- Raise the rear axle, remove the jack stands, then lower the rear axle. For detailed instructions, see Section
00.06 of the 47X & 49X workshop manual.
- Charge the air system and check for leaks.
WARNING
Do not operate the vehicle until the brakes have been adjusted and checked for proper operation. To do so could result in inadequate or no braking ability, which could cause personal injury or death, and property damage.
- In a safe area, check for proper brake operation, as follows, before putting the vehicle in service.
- Apply and release the brakes several times to check for air leaks and proper operation.
- Perform six low-speed stops to ensure proper parts replacement and full vehicle control.
- Immediately after doing the above stops, check the rotor temperatures. Any rotors that are significantly cooler than others indicate a lack of braking effort on those wheels. Inspect and repair as necessary. For instructions, see Group 40 of the 47X & 49X workshop manual.
- Clean a spot on the base label (Form WAR259). Write the recall number, FL930, on a completion sticker(Form WAR260), and attach it to the base label to indicate this recall has been completed.
Rear Caliper/Carrier Assembly Inspection and Installation Meritor Axial Mounted Calipers
- Check the base label (Form WAR259) for a completion sticker for FL930 (Form WAR260) indicating this work has been done. The base label is usually located on the passenger-side door, about 12 inches (30 cm) below the door latch. If a sticker is present for FL930, no work is needed. If there is no sticker, proceed with the next step.
- Park the vehicle on a level surface, shut down the engine, and set the parking brake. Chock the tires.
WARNING
Never work around or under a vehicle that is supported only by a jack. Always support the vehicle with safety stands. Jacks can slip, allowing the vehicle to fall, which could result in serious injury or death.
- Raise the rear axle and support it on jack stands. For detailed instructions, see Section 00.06 of the 47X & 49X workshop manual.
- Remove the rear wheel assembly.
NOTE: In all steps that require a torque wrench, use a snap-on torque wrench ATECH4RS600, or an equivalent, with a center to handle length of 47 inches (119 cm).
- Set a torque wrench to 350 lbf·ft (475 N·m) and tighten the caliper mounting bolts. If they do not turn, go to step 13. If they turn, go to step 6. Due to limited caliper bolt access, it may be necessary to use tool DDC DSNCHA018005 referenced in tool letter 18TL18. If the tool is needed, use tool DDC DSNCHA018005 only and no other tools. See Fig. 1. See Table 4 for torque specifications.
WARNING
When replacing brake pads, shoes, rotors, or drums, always replace components as an axle set.
- Always reline both sets of brakes on an axle at the same time.
- Always replace both rotors/drums on an axle at the same time.
- Always install the same type of linings/pads or drums/rotors on both axle ends of a single axle, and all four axle ends of a tandem axle, at the same time. Do not mix component types.
Failure to do so could cause uneven braking and loss of vehicle control, resulting in property damage, personal injury, or death.
- Remove the retainer pin, cotter pin, and brake pad retainer. Inspect the brake pad hardware to ensure it is in good condition. If it is, reuse the brake pad hardware. If the brake pad hardware is not in good condition, replace brake pad sets on both ends of the axle.
- Remove the brake pads.
- Remove caliper bolts.
IMPORTANT: The caliper/carrier assemblies are left and right handed. Ensure that the correct assembly (left or right) is installed on each side of the vehicle.
NOTE: The Meritor axial mounted caliper is similar to the Bendix axial mounted caliper shown in Fig. 2.
- Align the caliper/carrier assembly with the rotor by pushing the caliper against the shelf on the torque plate, then install the caliper/carrier assembly using new caliper mounting bolts.
- Tighten the carrier mounting bolts in two steps as follows.
10.1 Start on one side of the caliper and tighten all of the bolts 40 to 50 lbf·ft (54 to 68 N·m). Then tighten the bolts on the other side of the caliper 40 to 50 lbf·ft (54 to 68 N·m). See Fig. 3.
10.2 Repeat this process, increasing the torque value to 350 to 450 lbf·ft (475 to 610 N·m). If tool DDC DSNCHA018005 referenced in tool letter 18TL18 is used, see Table 6 for torque specifications.
Table 6, Meritor Installation with a 47 Inch (119 cm) Torque Wrench and Tool DDC DSNCHA018005
Do not use a motor driven tool to tighten the manual brake adjuster nut, or use excessive force to tighten the nut. Doing so could damage the manual brake adjuster nut.
- Install the brake pads. Provided it is in good condition, use the brake pad hardware removed earlier.
- Back off the adjuster nut three clicks.
- Install the rear wheel assembly.
- Raise the rear axle, remove the jack stands, then lower the rear axle.
- Charge the air system and check for leaks.
WARNING
Do not operate the vehicle until the brakes have been adjusted and checked for proper operation. To do so could result in inadequate or no braking ability, which could cause personal injury or death, and property damage.
- In a safe area, check for proper brake operation, as follows, before putting the vehicle in service.
16.1 Apply and release the brakes several times to check for air leaks and proper operation.
16.2 Perform six low-speed stops to ensure proper parts replacement and full vehicle control.
16.3 Immediately after doing the above stops, check the rotor temperatures. Any rotors that are significantly cooler than others indicate a lack of braking effort on those wheels. Inspect and repair as necessary. For instructions, see Group 40 of the 47X & 49X workshop manual.
- Clean a spot on the base label (Form WAR259). Write the recall number, FL930, on a completion sticker(Form WAR260), and attach it to the base label to indicate this recall has been completed.
Chronology :
On April 14th 2022, while reviewing warranty claims on caliper mounting bolts, DTNA found a claim for one vehicle, which indicated that three caliper mounting bolts of right rear drive axle missing. DTNA notified the axle assembly supplier and promptly began a plant inspection. Recognizing that the vehicle in question was a part of a small subset of vehicles subject to a post-manufacturing suspension re-work process that involved a particular service provider removing brake caliper mounting bolts, DTNA inspected all of the other vehicles subject to that process that remained in DTNA’s possession. The inspection identified no other vehicles with an under torqued mounting bolt.
Promptly in April 22, DTNA began an extensive fact-finding investigation, during which the axle assembly supplier shared records indicating good torque values for the one vehicle found to have loose bolts. These records allowed DTNA to narrow down the suspect population to the one vehicle in question and fourteen others, subject to the same suspension re-work process that involved a particular service provider removing brake caliper mounting bolts and to determine that the issue was not systemic within DTNA’s manufacturing process.
On April 28th 22, out of an abundance of caution, DTNA decided to initiate a voluntary safety recall for vehicles identified as re-worked under this process by the particular service provider
3 Affected Products
Vehicles
| MAKE | MODEL | YEAR |
| WESTERN STAR | 47X | 2023 |
| WESTERN STAR | 49X | 2022-2023 |
7 Associated Documents
Recall Acknowledgement
RCAK-22V299-1737.pdf 645.171KB
 Loading...
Defect Notice 573 Report
RCLRPT-22V299-6916.PDF 214.412KB
Loading...
Defect Information Report
RMISC-22V299-9715.pdf 695.811KB
Loading...
ISSUED Owner Notification Letter(Part 577)
RCONL-22V299-1321.pdf 144.02KB
Loading...
Manufacturer Notices(to Dealers,etc)
RCMN-22V299-7801.pdf 147.358KB
Loading...
Recall Quarterly Report #1, 2022-3
RCLQRT-22V299-2262.PDF 211.133KB
Loading...
Recall Quarterly Report #2, 2022-4
RCLQRT-22V299-3315.PDF 211.236KB
Loading...
Latest Recalls Documents
https://www-odi.nhtsa.dot.gov/acms/cs/documentList.xhtml?docId=22V299&docType=RCL
- Durable Ratchet Head: Made from Hardened treated Chrome Vanadium steel alloy (Cr-V) Corrosion-Retardant: Satin Finish. Made in Taiwan
- Easy Storage: A sturdy plastic storage case is included. Non-Slip Grip: Knurled handle
- Easy to Read: High Contrast & Dual Range Scale. Accurate: Pre-Calibrated to ± 4%
- Accessories included: 1/2" Drive 5" long Extension Bar and 1/2" Drive to 3/8" Drive Reducer
- Simple and Reliable: “Click” sound tells the preset torque value is reached. Stop applying force when you hear and feel it.

- PORTABILITY: Torque wrench 1/2 inch drive has a durable case for portability or storage
- ADDED COMFORT: Bi-material handle for comfort and grip of the 1/2 torque wrench
- HASSLE FREE USE: Locking feature adjusts quick and easily for hassle free use
- QUICK IDENTIFICATION: Scales stamped into housing showing inch and metric torque settings
- Meets or Exceeds ASME Specifications

- PRECISION - Ships pre-calibrated to +/- 4% accuracy and ready to use. Include calibration certificate with traceable serial number.
- DURABLE - Reinforced ratchet gear head constructed from hardened, heat treated Chrome Vanadium alloy steel.
- LONG-LASTING - Rust & corrosion protection with our unique and newly invented Electro-Black finish treatment.
- PERFORMANCE - Features an easy-to-read, highlighted yellow print dual-range scale. Identify the markings even in low-light conditions.
- COMFORTABLE - Comes with a reversible ratchet head that drives in both directions and measure torque in a clockwise direction.

- 【High Precision&Quick Reading】: 3/8 torque wrench has high contrast and dual range scale( 5-45 Ft-Lb/6.8-61 Nm),making it clear and easy to read. We have professional torque wrench production technology, and after 20000 tests, the calibration error range of the torque wrench is ± 3%, making it an essential helper for you.
- 【Safe and Reliable Operation】: Equipped with a bidirectional drive ratchet head, torque can be measured clockwise or counterclockwise. When the set torque value is reached, a "click" sound will remind you to stop applying force to prevent damage to the item due to excessive torque.
- 【High Quality and Durable Material】: Made of hardened chromium vanadium steel alloy (Cr-V). At the same time, the bottom buckle tail plug adopts a red anodizing process to improve the product's oxidation resistance during use and enhance surface wear resistance. 72 tooth ratchet head, made of chromium molybdenum steel. High quality materials resist corrosion and are durable.
- 【Quick Torque Setting】: Simple and fast torque setting, pull down the locking knob and hold it down to rotate to the torque you need. Release the hand and the locking knob will automatically rebound to lock the torque value. And the designer referred to the appearance of the flashlight handle and designed a non slip and labor-saving knurled handle, making it more comfortable and easy to hold when using.
- 【Easy to Store and Widely Use】: You will receive the 3/8-inch drive click torque wrench with a sturdy plastic shell storage box, which is very delicate and durable. Torque wrench is suitable nuts and bolts on various occasions, such as bike, motorcycle, car spark, and is the best helper for you🎁. 🔔 And we provide 12 months warranty. If you have any questions, please feel free to contact us.

- 【3Pcs Torque Wrench Set】 The calibration error range is ±3%, each torque wrench has a calibration certificate. The 3-in-1 torque wrench set can meet your different needs. Including 1/4 inch 20-240in.lb, 3/8 inch 5-45ft.lb, 1/2 inch 20-160ft.lb.
- 【Safe & Reliable】 When the 1/2 torque wrench reaches the preset torque value, it makes a clear "click" sound, accompanied by an obvious hand vibration that reminds you no longer to apply force, prevent damage caused. 72-tooth reversible ratchet head, it can be used both clockwise and counterclockwise directions.
- 【Quick Release Button】 This 3/8 torque wrench has a quick release button with which accessories can easily be installed and removed, the accessories can grip and is not easy to fall down. It is more convenient to use. The torque wrench is made of CR-MO with a higher hardness.
- 【Easy to Set】First pull down the locking knob and hold it down and then start setting the desired torque value. Release the hand and the locking knob will automatically rebound to lock the torque value. If you do not use, please set the torque key to the minimal torque value.
- 【Widely Use】The torque wrenches can satisfy you in bicycle, motorcycle, car, truck and wheel screws, wheel nuts and in the device installation, electrical engineering, etc. We provide 12 months warranty. If you have any questions, please feel free to contact us.

- 🔧【𝐌𝐢𝐥𝐢𝐭𝐚𝐫𝐲-𝐠𝐫𝐚𝐝𝐞 𝐒𝐭𝐞𝐞𝐥】ETOOLAB torque wrench utilizes military-grade steel as its base material, coupled with professional surface rust protection methods tailored to usage habits. While ensuring user comfort, it enhances product strength, wear resistance, and rust resistance. offers a more comfortable experience and a longer lifespan!
- 👍【𝐄𝐚𝐬𝐲-𝐭𝐨-𝐑𝐞𝐚𝐝】The scale of this 1/2 drive torque wrench is laser-engraved, using a black background with white markings. dinamometrica de 1/2 ensures clear and easy readability of the scale, even in sunlight. With a dual-scale design, users can conveniently read torque values in two different units according to their preferences, without the need for conversion!
- ⚙️【±𝟑% 𝐏𝐫𝐞𝐜𝐢𝐬𝐢𝐨𝐧 & 𝐒𝐢𝐦𝐩𝐥𝐞 𝐋𝐨𝐜𝐤𝐢𝐧𝐠 𝐑𝐢𝐧𝐠】Our torque wrench 1/2 drive meets the high precision standard of ±3% and comes with a traceable serial certificate. You can use it with confidence! Moreover, its graduation ring is tightly locked, with smaller incremental values, ensuring precise and consistent torque output even after multiple uses. This reduces the hassle of frequent adjustments. It is undoubtedly an excellent tool for your work!
- 🔊【𝐋𝐨𝐮𝐝 𝐂𝐥𝐢𝐜𝐤 𝐒𝐨𝐮𝐧𝐝】This torque wrenches has been upgraded to have a louder "Click" sound. We conducted over 25,000 tests to ensure that each product produces a click sound volume of no less than 45dB when the torque value exceeds 34 lbf·ft. When you hear the distinct click sound, it indicates that the preset torque has been reached, signaling you to stop applying force. You no longer need to worry about damaging your mechanical components.
- 💯【𝐔𝐬𝐞𝐫-𝐅𝐫𝐢𝐞𝐧𝐝𝐥𝐲】Our torque wrench set features a 72-tooth dual-directional ratchet head, allowing for easy operation in both clockwise and counterclockwise directions. It is designed with an adjustable locking ring, making it effortless to adjust the preset torque value. Additionally, it includes a quick-release head design, along with a 1/2" drive 5" long extension bar and 1/2" to 3/8" drive reducer, making it capable of tackling complex repairs even in tight spaces.
- Protective head bumper included
- Bi-Material grip for comfort during use
- Locking trigger to control the torque applied
- Forward and reverse torque capabilities
- Direct Torque trade; Technology on included sockets

- [Cr-V RATCHET HEAD] TICONN torque wrenches are made from hardened Cr-V alloy (Chrome Vanadium Steel) for the best performance and lifespan
- [HIGH ACCURACY] You can count on the inch pound torque wrench for repeated accuracy (±4%). The 45 teeth ratchet wheel is perfect for turning the torque wrench inch pounds in tight spots (8° turn). Choose the right bike torque wrench as you need!
- [EASY TO USE AND STORE] The high-contrast dual unit measurement is easy to read and set your desired torque. The knurled handle will offer non-slip operation. The torque wrench, extension rod, and adapter are well-stored inside the storage case.
- [WIDE APPLICATION] Our torque wrench set can be used in many applications in your daily life such as automobile maintenance, bike & boat repair, firearm assembly, and machinery troubleshooting.
- [TICONN BRAND QUALITY COMMITMENT] We stand behind the quality of our products. If for any reason you are not satisfied with your purchase, please contact us. We provide 30-day money back and 12-month warranty. 100% Satisfaction Guarantee for risk-free shopping!

- 【8-in-1 Torque Wrench Set】 Includes 1/4, 3/8, 1/2 inch drive torque wrenches that meet your different needs. 5Pcs Adapter: 1/4"Extension bar(4''), 3/8"Extension bar(6''), 1/2"Extension bar(5''), 3/8" Universal Joint, 1/2" to 3/8" Adapter with a sturdy plastic case for storage and portability
- 【Dual range scale & High Precision】 1/4 inch 10-220in.lb/1-24.7Nm with 1 in.lb micro-adjustment, 3/8 inch 10-45ft.lb/13.6-61Nm with 0.25 ft.lb micro-adjustment, 1/2 inch 10-160ft.lb/10-227Nm with 1 ft. lb micro-adjustment. Each wrench undergoes strict and specialized instrument testing before leaving the factory to ensure accuracy within ±3% and is provided with a formal calibration certificate
- 【Safe & Reliable】 This torque wrench set has been upgraded to have a louder "Click" sound, ensuring a clear and stronger click sound when the torque value exceeds 5 Nm, subtler click at lower than 5 Nm. The distinct click sound indicates that the preset torque has been reached, signaling you to stop applying force
- 【Releasable & Dual Direction】These torque wrenches has a quick release button with which accessories can easily be installed and removed, the accessories can grip and is not easy to fall down. With 72-tooth reversible ratchet head, it can be used in both clockwise and counterclockwise directions
- 【High Quality and Durable】 The torque wrench ratchet head is made from hardened treated Cr-Mo Steel for longevity. Handle crafted from high-grade aerospace aluminum for durability, and corrosion resistance. All adapters are treated with phosphating, with stronger wear resistance and a longer lifespan

- 50Pcs Master Bike Tool: This kit includes a 1/4" drive torque wrench and comprehensive bit sockets: Hex 2-10, Torx 8-40, 6 Point 4mm-15mm, Pozi PZ0-PZ3, Slotted SL4 SL8, Robertson Square S1 S2 S3. Adapters: 1/4" to 3/8" Adapter, 1/4" Bit Holder, 1/4" Universal Joint, 1/4" Bit Adapter, 1/4" Drill Adapter, and 4-inch Extension Bar. Comes with a protective storage case.
- ± 3% High Precision: Accuracy error within ±3%, dual torque range scale of 10-220 lbf.in/1-24.9 nm, with 1 in.lb (0.1nm) micro-adjustment. Each bike torque wrench includes a calibration certificate with a traceable serial number. This inch pound torque wrench ensures that bolts and nuts are tightened to the correct torque, preventing damage from over-tightening.
- Reliable Click-Stop, No More Guess: Simply listen for the reassuring "Click" or feel it through the wrench handle when you've reached the pre-set torque value. This signals you to stop applying force, ensuring your items are safe and secure.
- 72-Tooth and Quick Release: Featuring a reversible 72 teeth ratchet head, this small torque wrench allows for dual directions with ease. The quick-release button ensures a secure fit and rapid socket swapping. Various bit sockets and 1/4 inch drive adapters provides great compatibility.
- High Quality and Durable: Exceeds ASME & DIN-ISO Standards. Crafted from high-strength Cr-V steel and aerospace Aluminum, ensuring durability, rust resistance, and corrosion resistance. Perfect for bicycle and motorcycle repair, E-bike, home maintenance. Great gift for bicycle enthusiasts or anyone in need of a reliable and durable tool.
Last update on 2024-06-10 / Affiliate links / Images from Amazon Product Advertising API
This product presentation was made with AAWP plugin.
SEOCONTENT-START
Defect Information Report (Section 573.6) FL-930 Date of Submission: May 4, 2022 Manufacturer: Daimler Truck North America LLC P.O. BOX 3849 Portland, Oregon 97208 Type of Report: X Safety Defect Non-Compliance Vehicle Information Model Yr. Start: 2022 Model Yr. End: 2023 Make: Western Star Model: 49X, 47X Production Dates: Begin: 12/06/2021 End: 02/09/2022 Type: Truck/Tractor Descriptive Information: Fifteen vocational trucks that were given post-manufacturing re-work by a certain service provider at one particular DTNA manufacturing plant may have had caliper mounting bolts incorrectly torqued. Number potentially involved: 15 Estimated percentage of involve with defect: 7% Defect / Noncompliance Description For this Defect/Noncompliance: Describe the defect or noncompliance: Potential of improperly installed caliper mounting bolts that may detach over time with vehicle operation. If a noncompliance, provide the applicable FMVSS: N/A Describe the safety risk: Insufficiently torqued bolts may not provide adequate clamping force between the brake caliper and brake anchor plate potentially resulting in reduced brake effectiveness. Reduced brake effectiveness could lead to a vehicle crash. Identify any warning, which can precede or occur: In some cases, loose caliper bolts may result in slight brake pull. Furthermore, loss of required clamp load may cause the brake caliper to come loose, leading to vibration and noise along with braking. If applicable, identify the manufacture of the defective or noncompliant component: N/A Involved Components Component Name: Caliper Mounting Bolts Component Description: Brake Calipers Component Part Number: Multiple Supplier Identification: Component Manufacturer: Name: Meritor Address: 801 Railroad Ave, York, SC 29745 Country: US Chronology of Defect / Noncompliance Determination Provide the chronology of events leading up to the defect decision or test data for the noncompliance decision. On April 14th 2022, while reviewing warranty claims on caliper mounting bolts, DTNA found a claim for one vehicle, which indicated that three caliper mounting bolts of right rear drive axle missing. DTNA notified the axle assembly supplier and promptly began a plant inspection. Recognizing that the vehicle in question was a part of a small subset of vehicles subject to a post-manufacturing suspension re-work process that involved a particular service provider removing brake caliper mounting bolts, DTNA inspected all of the other vehicles subject to that process that remained in DTNA’s possession. The inspection identified no other vehicles with an under torqued mounting bolt. Promptly in April 22, DTNA began an extensive fact-finding investigation, during which the axle assembly supplier shared records indicating good torque values for the one vehicle found to have loose bolts. These records allowed DTNA to narrow down the suspect population to the one vehicle in question and fourteen others, subject to the same suspension re-work process that involved a particular service provider removing brake caliper mounting bolts and to determine that the issue was not systemic within DTNA’s manufacturing process. On April 28th 22, out of an abundance of caution, DTNA decided to initiate a voluntary safety recall for vehicles identified as re-worked under this process by the particular service provider. Identify the Remedy Describe the defect/noncompliance remedy program, including the manufacture’s plan for reimbursement. Suspect units will be inspected for proper torque of caliper mounting bolts and repaired accordingly. Repairs will be performed by Daimler Truck North America authorized service facilities. Daimler Truck North America shall be offering a refund for owner-paid repairs covered by this recall if the repair was performed prior to the date indicated in the reimbursement plan, which will be posted with owner’s notification letter. Owners are directed to seek reimbursement through authorized dealers. Identify the Recall Schedule Describe the recall schedule for notifications: Customer notification will be made by first class mail using Daimler Truck North America records to determine the customers affected. Planned Dealer Notification Begin Date: 07/02/2022 Planned Dealer Notification End Date: 07/02/2022 Planned Owner Notification Begin Date: 07/02/2022 Planned Owner Notification End Date: 07/02/2022 Manufacture’s identification code for this recall (if applicable): FL-930 DTNA Representative; Tiffani Torgeson Manager, Compliance and Regulatory Affairs
**************************************************************************************************************
Daimler Trucks North America LLC IMPORTANT SAFETY RECALL See enclosed VIN list June 2022 FL930AB NHTSA #22V-299 Subject: Western Star Brake Caliper Mounting Bolts This notice is sent to you in accordance with the requirements of the National Traffic and Motor Vehicle Safety Act. Daimler Trucks North America LLC (DTNA), on behalf of its wholly owned subsidiary Western Star Truck Sales, Inc., has decided that a defect which relates to motor vehicle safety exists on specific model year 2022-2023 Western Star 47X and 49X vehicles manufactured December 6, 2021, through February 9, 2022. On certain vehicles, insufficiently torqued rear caliper mounting bolts may not provide adequate clamping force between the brake caliper and brake anchor plate, potentially resulting in reduced brake effectiveness, which could increase the risk of a crash. The caliper mounting bolts will be torqued to specification and replaced as needed. Repairs will be performed by Daimler Trucks North America authorized service facilities. Please contact an authorized Daimler Trucks North America dealer to arrange to have the Recall performed and to ensure that parts are available at the dealership. The Recall will take approximately two hours, depending on the repair, and will be performed at no charge to you. To locate an authorized dealer, search online at Daimler-TrucksNorthAmerica.com/Contact-us. Scroll down to “Locate a Dealer” and select the appropriate brand. You may also confirm your vehicle’s involvement in this recall at this URL: https://dtna-dlrinfo.prd.freightliner.com:48518/VinLookup/vin-module/getVinLookupPage. You may be liable for any progressive damage that results from your failure to complete the Recall within a reasonable time after receiving notification. If you do not own the vehicle that corresponds to the identification number(s) which appears on the Recall Notification, please return the notification to the Warranty Campaigns Department with any information you can furnish that will assist us in locating the present owner. If you have leased this vehicle, Federal law requires that you forward this notice to the lessee within 10 days. If you are a subsequent stage manufacturer, Federal law requires that you forward this notice to your distributors and retail outlets within five working days. If you have paid to have this recall condition corrected prior to this notice, you may be eligible to receive reimbursement. Please see the reverse side of this notice for details. If you have questions about this Recall, please contact the Warranty Campaigns Department at (800) 547-0712, 7:00 a.m. to 4:00 p.m. Pacific Time, Monday through Friday, e-mail address DTNA.Warranty.Campaigns@Daimlertruck.com. For other concerns, you may contact the Customer Assistance Center at (800) 385-4357. If you are not able to have the defect remedied without charge and within a reasonable time, you may wish to submit a complaint to the Administrator, National Highway Traffic Safety Administration, 1200 New Jersey Avenue SE, Washington, DC 20590; or call the Vehicle Safety Hotline at (888) 327-4236 (TTY: 800-424-9153); or go to http://www.nhtsa.gov. We regret any inconvenience this action may cause but feel certain you understand our interest in motor vehicle safety. WARRANTY CAMPAIGNS DEPARTMENT Enclosure Daimler Trucks North America LLC Warranty Campaigns Department P.O. Box 4090 Portland, OR 97208-4090 800.547.0712 Phone Daimler Trucks North America LLC Reimbursement to Customers for Repairs Performed Prior to Recall If you have already paid to have this recall condition corrected you may be eligible to receive reimbursement. Requests for reimbursement may include parts and labor. Reimbursement may be limited to the amount the repair would have cost if completed by an authorized Daimler Trucks North America LLC dealer. The following documentation must be presented to your dealer for consideration for reimbursement. Please provide original or clear copies of all receipts, invoices, and repair orders that show: • The name and address of the person who paid for the repair. • The Vehicle Identification Number (VIN) of the vehicle that was repaired. • What problem occurred, what repair was done, when the repair was done. • Who repaired the vehicle. • The total cost of the repair expense that is being claimed. • Proof of payment for the repair (such as the front and back of a cancelled check or a credit card receipt). Reimbursement will be made by check from your Daimler Trucks North America LLC dealer. Please speak with your Daimler Trucks North America LLC authorized dealer concerning this matter Daimler Trucks North America LLC Warranty Campaigns Department P.O. Box 4090 Portland, OR 97208-4090 800.547.0712 Phone
**************************************************************************************************************
Subject: Western Star Brake Caliper Mounting Bolts Models Affected: Specific model years 2022-2023 Western Star 47X and 49X vehicles manufactured December 6, 2021, through February 9, 2022. General Information Daimler Truck North America LLC (DTNA), on behalf of its wholly owned subsidiary Western Star Truck Sales, Inc., has decided that a defect that relates to motor vehicle safety exists on the vehicles mentioned above. On certain vehicles, insufficiently torqued caliper mounting bolts may not provide adequate clamping force between the brake caliper and brake anchor plate, potentially resulting in reduced brake effectiveness, which could increase the risk of a crash. The caliper mounting bolts will be torqued and replaced as needed. There are approximately 15 vehicles involved in this campaign. Additional Repairs Dealers must complete all outstanding Recall and Field Service campaigns prior to the sale or delivery of a vehicle. A Dealer will be liable for any progressive damage that results from its failure to complete campaigns before sale or delivery of a vehicle. Owners may be liable for any progressive damage that results from failure to complete campaigns within a reasonable time after receiving notification. Work Instructions Please refer to the attached work instructions. Prior to performing the campaign, check the vehicle for a completion sticker (Form WAR260). Replacement Parts Replacement parts are now available and can be obtained by ordering the kit and/or part number(s) listed below from your facing Parts Distribution Center. If our records show your dealership has ordered any vehicle(s) involved in campaign number FL930, a list of the customers and vehicle identification numbers will be available on DTNAConnect. Please refer to this list when ordering parts for this recall. Table 1 – Replacement Parts for FL930 Campaign Number Kit Number Part Description Part Number Qty. per Caliper FL930AB N/A BOLT (M20X2.5X60) N210931 020001 6 ea WASHER-FLAT,STEEL,HARDENED,3/4 IN 23-09114-004 6 ea BLANK COMPLETION STICKER WAR260 1 ea Table 1 Removed Parts U.S. and Canadian Dealers, please follow Warranty Failed Parts Tracking shipping instructions for the disposition of all removed parts. Export distributors, please destroy removed parts unless otherwise advised. Daimler Truck North America LLC Recall Campaign June 2022 FL930AB NHTSA #22V-299 Page 1 Labor Allowance Table 2 – Labor Allowance Campaign Number Procedure Time Allowed (hours) SRT Code Corrective Action FL930AB Inspect torque on both rear axles; replace bolt(s) if needed. 2.0 996-R154A 12-Repair Recall/Campaign Inspect torque on additional rear axles; replace bolt(s) if needed. (Add SRT for additional rear axle) 1.1 996-R154B 12-Repair Recall/Campaign Table 2 IMPORTANT: When the Recall has been completed, locate the base completion label in the appropriate location on the vehicle, and attach the red completion sticker provided in the recall kit (Form WAR260). If the vehicle does not have a base completion label, clean a spot on the appropriate location of the vehicle and first attach the base completion label (Form WAR259). If a recall kit is not required or there is no completion sticker in the kit, write the recall number on a blank sticker and attach it to the base completion label. Claims for Credit You will be reimbursed for your parts, labor, and handling (landed cost for Export Distributors) by submitting your claim through the Warranty system within 30 days of completing this campaign. Please reference the following information in OWL: • Claim type is Recall Campaign. • In the Campaign field, enter the campaign number and appropriate condition code (FL930-A or FL930-B). • In the Primary Failed Part Number field, enter 25-FL930-000. • In the Parts field, enter the appropriate kit or part number(s) as shown in the Replacement Parts Table. • In the Labor field, first enter the appropriate SRT from the Labor Allowance Table. Administrative time will be included automatically as SRT 939-6010A for 0.3 hours. • The VMRS Component Code is F99-999-005 and the Cause Code is A1 – Campaign. • U.S. and Canada — Reimbursement for Prior Repairs. When a customer asks about reimbursement, please do the following: • Accept the documentation of the previous repair. • Make a brief check of the customer’s paperwork to see if the repair may be eligible for reimbursement. (See the “Copy of Owner Letter” section of this bulletin for reimbursement guidelines.) • Submit an OWL Recall Pre-Approval Request for a decision. • Include the approved amount on your claim in the Other Charges section. • Attach the documentation to the pre-approval request. • If approved, submit a based on claim for the pre-approval. • Reimburse the customer the appropriate amount. IMPORTANT: OWL must be viewed prior to performing the recall to ensure the vehicle is involved and the campaign has not been previously completed. Also, check for a completion sticker prior to beginning work. U.S. and Canadian dealers, contact the Warranty Campaigns Department via Web inquiry at DTNAConnect.com/WSC, if you have any questions or need additional information. Export distributors, submit a Web inquiry or contact your International Service Manager. Daimler Truck North America LLC Recall Campaign June 2022 FL930AB NHTSA #22V-299 Page 2 U.S. and Canadian Dealers: To return excess kit inventory related to this campaign, U.S. dealers must submit a Parts Authorization Return (PAR) to the Memphis PDC. Canadian dealers must submit a PAR to their facing PDC. All kits must be in resalable condition. PAR requests must include the original purchase invoice number. Export Distributors: Excess inventory is not returnable. The letter notifying U.S. and Canadian vehicle owners is included for your reference. Please note that the National Traffic and Motor Vehicle Safety Act, as amended (Title 49, United States Code, Chapter 301), requires the owner’s vehicle(s) be corrected within a reasonable time after parts are available to you. The Act states that failure to repair a vehicle within 60 days after tender for repair shall be prima facie evidence of an unreasonable time. However, circumstances of a particular situation may reduce the 60 day period. Failure to repair a vehicle within a reasonable time can result in either the obligation to (a) replace the vehicle with an identical or reasonably equivalent vehicle, without charge, or (b) refund the purchase price in full, less a reasonable allowance for depreciation. The Act further prohibits dealers from selling a vehicle unless all outstanding recalls are performed. Any lessor is required to send a copy of the recall notification to the lessee within 10 days. Any subsequent stage manufacturer is required to forward this notice to its distributors and retail outlets within five working days. Daimler Truck North America LLC Recall Campaign June 2022 FL930AB NHTSA #22V-299 Page 3 Copy of Notice to Owners Subject: Western Star Brake Caliper Mounting Bolts For the Notice to U.S. Customers: This notice is sent to you in accordance with the National Traffic and Motor Vehicle Safety Act. For the Notice to Canadian Customers: This notice is sent to you in accordance with the requirements of the Motor Vehicle Safety Act. This is to inform you that your vehicle may contain a defect that could affect the safety of a person. Daimler Truck North America LLC (DTNA), on behalf of its wholly owned subsidiary Western Star Truck Sales, Inc., has decided that a defect that relates to motor vehicle safety exists on specific model years 2022-2023 Western Star 47X and 49X vehicles manufactured December 6, 2021, through February 9, 2022. On certain vehicles, insufficiently torqued caliper mounting bolts may not provide adequate clamping force between the brake caliper and brake anchor plate, potentially resulting in reduced brake effectiveness, which could increase the risk of a crash. The caliper mounting bolts will be torqued and replaced as needed. Repairs will be performed by Daimler Truck North America authorized service facilities. Please contact an authorized Daimler Truck North America dealer to arrange to have the Recall performed and to ensure that parts are available at the dealership. The Recall will take approximately two hours, depending on the repair, and will be performed at no charge to you. To locate an authorized dealer, search online at https://northamerica.daimlertruck.com/contact-us/. Scroll down to “Locate a Dealer,” and select the appropriate brand. You may also confirm your vehicle’s involvement in this recall at this URL: https:// dtna-dlrinfo.prd.freightliner.com:48518/VinLookup/vin-module/getVinLookupPage. You may be liable for any progressive damage that results from your failure to complete the Recall within a reasonable time after receiving notification. If you do not own the vehicle that corresponds to the identification number(s) which appears on the Recall Notification, please return the notification to the Warranty Campaigns Department in the postage-paid envelope with any information you can furnish that will assist us in locating the present owner. If you have leased this vehicle, Federal law requires that you forward this notice to the lessee within 10 days. If you are a subsequent stage manufacturer, Federal law requires that you forward this notice to your distributors and retail outlets within five working days. If you have paid to have this recall condition corrected prior to this notice, you may be eligible to receive reimbursement. Please see the reverse side of this notice for details. If you have questions about this Recall, please contact the Warranty Campaigns Department at (800) 547-0712, 7:00 a.m. to 4:00 p.m. Pacific Time, Monday through Friday, e-mail address dtna.warranty.campaigns@daimlertruck.com. For the Notice to U.S. Customers: If you are not able to have the defect remedied without charge and within a reasonable time, you may wish to submit a complaint to the Administrator, National Highway Traffic Safety Administration, 1200 New Jersey Avenue, SE., Washington, DC 20590; or call the Vehicle Safety Hotline at (888) 327-4236 (TTY: 800-424-9153); or to http://www.nhtsa.gov. For the Notice to Canadian Customers: If you wish to submit a complaint about this recall, you can contact Transport Canada road safety, 80 rue Noel, Gatineau, Quebec J8Z 0A1 or call (800) 333-0510. We regret any inconvenience this action may cause but feel certain you understand our interest in motor vehicle safety. WARRANTY CAMPAIGNS DEPARTMENT Enclosure Daimler Truck North America LLC Recall Campaign June 2022 FL930AB NHTSA #22V-299 Page 4 Reimbursement to Customers for Repairs Performed Prior to Recall If you have already paid to have this recall condition corrected you may be eligible to receive reimbursement. Requests for reimbursement may include parts and labor. Reimbursement may be limited to the amount the repair would have cost if completed by an authorized Daimler Truck North America LLC dealer. The following documentation must be presented to your dealer for consideration for reimbursement. Please provide original or clear copies of all receipts, invoices, and repair orders that show: • The name and address of the person who paid for the repair • The Vehicle Identification Number (VIN) of the vehicle that was repaired • What problem occurred, what repair was done, when the repair was done • Who repaired the vehicle • The total cost of the repair expense that is being claimed • Proof of payment for the repair (such as the front and back of a cancelled check or a credit card receipt) Reimbursement will be made by check from your Daimler Truck North America LLC dealer. Please speak with your Daimler Truck North America LLC authorized dealer concerning this matter. Daimler Truck North America LLC Recall Campaign June 2022 FL930AB NHTSA #22V-299 Page 5 Work Instructions Subject: Western Star Brake Caliper Mounting Bolts Models Affected: Specific model years 2022-2023 Western Star 47X and 49X vehicles manufactured December 6, 2021, through February 9, 2022. General Information See Table 3 to determine the type of caliper installed on the vehicle and the page number for the instructions. The work instructions shall be carried out on the rear calipers only. Campaign Number Caliper Type Page Number FL930A Bendix Axial 6 FL930B Meritor Axial 11 Table 3, Caliper Type and Instruction Page Number Rear Caliper/Carrier Assembly Torque and Replacement – Bendix Axial Mounted Calipers 1. Check the base label (Form WAR259) for a completion sticker for FL930 (Form WAR260) indicating this work has been done. The base label is usually located on the passenger-side door, about 12 inches (30 cm) below the door latch. If a sticker is present for FL930, no work is needed. If there is no sticker, proceed with the next step. 2. Park the vehicle on a level surface, shut down the engine, and set the parking brake. Chock the tires. WARNING Never work around or under a vehicle that is supported only by a jack. Always support the vehicle with safety stands. Jacks can slip, allowing the vehicle to fall, which could result in serious injury or death. 3. Raise the rear axle and support it on jack stands. For detailed instructions, see Section 00.06 of the 47X & 49X workshop manual. 4. Remove the rear wheel assembly. NOTE: In all steps that require a torque wrench, use a snap-on torque wrench ATECH4RS600, or an equivalent, with a center to handle length of 47 inches (119 cm). 5. Set a torque wrench to 350 lbf·ft (475 N·m) and tighten the caliper mounting bolts. If they do not turn, go to step 13. If they turn, go to step 6. Due to limited caliper bolt access, it may be necessary to use tool DDC DSNCHA018005 referenced in tool letter 18TL18. If the tool is needed, use tool DDC DSNCHA018005 only and no other tools. See Fig. 1 for a 47 in (119 cm) long wrench, see Table 4 for torque specifications. Daimler Truck North America LLC Recall Campaign June 2022 FL930AB NHTSA #22V-299 Page 6 09/28/2018 f580518 Fig. 1, DDC DSNCHA018005 30mm Air Disc Brake Caliper Brake Bolt Torque Adaptor Daimler Truck North America LLC Recall Campaign June 2022 FL930AB NHTSA #22V-299 Page 7 Torque Check with 47 Inch (119 cm) Torque Wrench and Tool DDC DSNCHA018005 Angle View Extension Angle (degrees) Target Torque [lbf·ft (N·m)] Tool Setting [lbf·ft (N·m)] 11/28/2016 f422613 0° 0 350 (475) 296 (401) 11/28/2016 f422614 45° 45 310 (420) 11/06/2018 f422668 60° 60 320 (434) 11/28/2016 f422615 90° 90 350 (475) 11/06/2018 f422669 120° 120 386 (523) 11/28/2016 f422616 135° 135 402 (545) Table 4, Torque Check with 47 Inch (119 cm) Torque Wrench and Tool DDC DSNCHA018005 WARNING When replacing brake pads, shoes, rotors, or drums, always replace components as an axle set. • Always reline both sets of brakes on an axle at the same time. • Always replace both rotors/drums on an axle at the same time. • Always install the same type of linings/pads or drums/rotors on both axle ends of a single axle, and all four axle ends of a tandem axle, at the same time. Do not mix component types. Failure to do so could cause uneven braking and loss of vehicle control, resulting in property damage, personal injury, or death. 6. Remove the retainer pin, cotter pin, and brake pad retainer. Inspect the brake pad hardware to ensure it is in good condition. If it is, reuse the brake pad hardware. If the brake pad hardware is not in good condition, replace brake pad sets on both ends of the axle. 7. Remove the brake pads. 8. Remove caliper bolts. IMPORTANT: The caliper/carrier assemblies are left and right handed. Ensure that the correct assembly (left or right) is installed on each side of the vehicle. 9. Align the caliper/carrier assembly with the rotor by pushing the caliper against the shelf on the torque plate, then install the caliper/carrier assembly using new caliper mounting bolts. See Fig. 2. 10. Tighten the carrier mounting bolts in two steps as follows. 10.1 Start on one side of the caliper and tighten all three bolts 20 to 60 lbf·ft (27 to 81 N·m), beginning with the inner-most bolt and moving to the outer-most bolt. Then tighten the three bolts on the other side of the caliper 20 to 60 lbf·ft (27 to 81 N·m), beginning with the inner-most bolt and moving to the outer-most bolt. See Fig. 3. 10.2 Repeat this process, increasing the torque value to 350 to 400 lbf·ft (475 to 542 N·m). If tool DDC DSNCHA018005 referenced in tool letter 18TL18 is used, see Table 5 for torque specifications. Daimler Truck North America LLC Recall Campaign June 2022 FL930AB NHTSA #22V-299 Page 8 10/01/2018 f422664 1 2 3 2 1. Caliper/Carrier Assembly (showing service actuator) 2. Mounting Bolts and Washers (qty. 6) 3. Anchor Plate/Torque Plate Fig. 2, Bendix Axial Mounted Caliper 03/26/2020 f422665 2 1 4 5 3 6 Fig. 3, Tightening Pattern, Rear Bendix Axial Caliper Daimler Truck North America LLC Recall Campaign June 2022 FL930AB NHTSA #22V-299 Page 9 Bendix/Wabco Installation with a 47 Inch (119 cm) Torque Wrench and Tool DDC DSNCHA018005 Angle View Extension Angle (degrees) Target Torque [lbf·ft (N·m)] Tool Setting [lbf·ft (N·m)] 11/28/2016 f422613 0° 0 375 (508) 317 (430) 11/28/2016 f422614 45° 45 332 (450) 11/06/2018 f422668 60° 60 343 (465) 11/28/2016 f422615 90° 90 375 (508) 11/06/2018 f422669 120° 120 413 (560) 11/28/2016 f422616 135° 135 431 (584) Table 5, Bendix/Wabco Installation with a 47 Inch (119 cm) Torque Wrench and Tool DDC DSNCHA018005 NOTICE Do not use a motor driven tool to tighten the manual brake adjuster nut, or use excessive force to tighten the nut. Doing so could damage the manual brake adjuster nut. 11. Install the brake pads. Provided it is in good condition, use the brake pad hardware removed earlier. 12. Back off the adjuster nut three clicks. 13. Install the rear wheel assembly. 14. Raise the rear axle, remove the jack stands, then lower the rear axle. For detailed instructions, see Section 00.06 of the 47X & 49X workshop manual. Daimler Truck North America LLC Recall Campaign June 2022 FL930AB NHTSA #22V-299 Page 10 15. Charge the air system and check for leaks. WARNING Do not operate the vehicle until the brakes have been adjusted and checked for proper operation. To do so could result in inadequate or no braking ability, which could cause personal injury or death, and property damage. 16. In a safe area, check for proper brake operation, as follows, before putting the vehicle in service. 16.1 Apply and release the brakes several times to check for air leaks and proper operation. 16.2 Perform six low-speed stops to ensure proper parts replacement and full vehicle control. 16.3 Immediately after doing the above stops, check the rotor temperatures. Any rotors that are significantly cooler than others indicate a lack of braking effort on those wheels. Inspect and repair as necessary. For instructions, see Group 40 of the 47X & 49X workshop manual. 17. Clean a spot on the base label (Form WAR259). Write the recall number, FL930, on a completion sticker (Form WAR260), and attach it to the base label to indicate this recall has been completed. Rear Caliper/Carrier Assembly Inspection and Installation – Meritor Axial Mounted Calipers 1. Check the base label (Form WAR259) for a completion sticker for FL930 (Form WAR260) indicating this work has been done. The base label is usually located on the passenger-side door, about 12 inches (30 cm) below the door latch. If a sticker is present for FL930, no work is needed. If there is no sticker, proceed with the next step. 2. Park the vehicle on a level surface, shut down the engine, and set the parking brake. Chock the tires. WARNING Never work around or under a vehicle that is supported only by a jack. Always support the vehicle with safety stands. Jacks can slip, allowing the vehicle to fall, which could result in serious injury or death. 3. Raise the rear axle and support it on jack stands. For detailed instructions, see Section 00.06 of the 47X & 49X workshop manual. 4. Remove the rear wheel assembly. NOTE: In all steps that require a torque wrench, use a snap-on torque wrench ATECH4RS600, or an equivalent, with a center to handle length of 47 inches (119 cm). Daimler Truck North America LLC Recall Campaign June 2022 FL930AB NHTSA #22V-299 Page 11 5. Set a torque wrench to 350 lbf·ft (475 N·m) and tighten the caliper mounting bolts. If they do not turn, go to step 13. If they turn, go to step 6. Due to limited caliper bolt access, it may be necessary to use tool DDC DSNCHA018005 referenced in tool letter 18TL18. If the tool is needed, use tool DDC DSNCHA018005 only and no other tools. See Fig. 1. See Table 4 for torque specifications. WARNING When replacing brake pads, shoes, rotors, or drums, always replace components as an axle set. • Always reline both sets of brakes on an axle at the same time. • Always replace both rotors/drums on an axle at the same time. • Always install the same type of linings/pads or drums/rotors on both axle ends of a single axle, and all four axle ends of a tandem axle, at the same time. Do not mix component types. Failure to do so could cause uneven braking and loss of vehicle control, resulting in property damage, personal injury, or death. 6. Remove the retainer pin, cotter pin, and brake pad retainer. Inspect the brake pad hardware to ensure it is in good condition. If it is, reuse the brake pad hardware. If the brake pad hardware is not in good condition, replace brake pad sets on both ends of the axle. 7. Remove the brake pads. 8. Remove caliper bolts. IMPORTANT: The caliper/carrier assemblies are left and right handed. Ensure that the correct assembly (left or right) is installed on each side of the vehicle. NOTE: The Meritor axial mounted caliper is similar to the Bendix axial mounted caliper shown in Fig. 2. 9. Align the caliper/carrier assembly with the rotor by pushing the caliper against the shelf on the torque plate, then install the caliper/carrier assembly using new caliper mounting bolts. 10. Tighten the carrier mounting bolts in two steps as follows. 10.1 Start on one side of the caliper and tighten all of the bolts 40 to 50 lbf·ft (54 to 68 N·m). Then tighten the bolts on the other side of the caliper 40 to 50 lbf·ft (54 to 68 N·m). See Fig. 3. 10.2 Repeat this process, increasing the torque value to 350 to 450 lbf·ft (475 to 610 N·m). If tool DDC DSNCHA018005 referenced in tool letter 18TL18 is used, see Table 6 for torque specifications. Daimler Truck North America LLC Recall Campaign June 2022 FL930AB NHTSA #22V-299 Page 12 Meritor Installation with a 47 Inch (119 cm) Torque Wrench and Tool DDC DSNCHA018005 Angle View Extension Angle (degrees) Target Torque [lbf·ft (N·m)] Tool Setting [lbf·ft (N·m)] 11/28/2016 f422613 0° 0 400 (542) 338 (458) 11/28/2016 f422614 45° 45 354 (480) 11/06/2018 f422668 60° 60 366 (496) 11/28/2016 f422615 90° 90 400 (542) 11/06/2018 f422669 120° 120 441 (598) 11/28/2016 f422616 135° 135 460 (624) Table 6, Meritor Installation with a 47 Inch (119 cm) Torque Wrench and Tool DDC DSNCHA018005 NOTICE Do not use a motor driven tool to tighten the manual brake adjuster nut, or use excessive force to tighten the nut. Doing so could damage the manual brake adjuster nut. 11. Install the brake pads. Provided it is in good condition, use the brake pad hardware removed earlier. 12. Back off the adjuster nut three clicks. 13. Install the rear wheel assembly. 14. Raise the rear axle, remove the jack stands, then lower the rear axle. Daimler Truck North America LLC Recall Campaign June 2022 FL930AB NHTSA #22V-299 Page 13 15. Charge the air system and check for leaks. WARNING Do not operate the vehicle until the brakes have been adjusted and checked for proper operation. To do so could result in inadequate or no braking ability, which could cause personal injury or death, and property damage. 16. In a safe area, check for proper brake operation, as follows, before putting the vehicle in service. 16.1 Apply and release the brakes several times to check for air leaks and proper operation. 16.2 Perform six low-speed stops to ensure proper parts replacement and full vehicle control. 16.3 Immediately after doing the above stops, check the rotor temperatures. Any rotors that are significantly cooler than others indicate a lack of braking effort on those wheels. Inspect and repair as necessary. For instructions, see Group 40 of the 47X & 49X workshop manual. 17. Clean a spot on the base label (Form WAR259). Write the recall number, FL930, on a completion sticker (Form WAR260), and attach it to the base label to indicate this recall has been completed. Daimler Truck North America LLC Recall Campaign June 2022 FL930AB NHTSA #22V-299 Page 14
**************************************************************************************************************
OMB Control No.: 2127-0004 Part 573 Safety Recall Report 22V-299 The information contained in this report was submitted pursuant to 49 CFR §573 Manufacturer Name : Daimler Trucks North America, LLC Submission Date : MAY 04, 2022 NHTSA Recall No. : 22V-299 Manufacturer Recall No. : FL-930 Manufacturer Information : Manufacturer Name : Daimler Trucks North America, LLC Address : 4747 N. Channel Avenue Portland OR 97217-3849 Company phone : 800-745-8000 Population : Number of potentially involved : 15 Estimated percentage with defect : 7 % Vehicle Information : Vehicle 1 : 2023-2023 Western Star 47X Vehicle Type : Body Style : Power Train : NR Descriptive Information : Fifteen vocational trucks that were given post-manufacturing re-work by a certain service provider at one particular DTNA manufacturing plant may have had caliper mounting bolts incorrectly torqued. Production Dates : FEB 03, 2022 – FEB 03, 2022 VIN Range 1 : Begin : NR End : NR Not sequential Vehicle 2 : 2022-2023 Western Star 49X Vehicle Type : Body Style : Power Train : NR Descriptive Information : Fifteen vocational trucks that were given post-manufacturing re-work by a certain service provider at one particular DTNA manufacturing plant may have had caliper mounting bolts incorrectly torqued. Production Dates : DEC 06, 2021 – FEB 09, 2022 VIN Range 1 : Begin : NR End : NR Not sequential Description of Defect : Description of the Defect : Potential of improperly installed caliper mounting bolts that may detach over time with vehicle operation. FMVSS 1 : NR FMVSS 2 : NR Description of the Safety Risk : Insufficiently torqued bolts may not provide adequate clamping force Part 573 Safety Recall Report 22V-299 Page 2 The information contained in this report was submitted pursuant to 49 CFR §573 Description of the Safety Risk : between the brake caliper and brake anchor plate potentially resulting in reduced brake effectiveness. Reduced brake effectiveness could lead to a vehicle crash. Description of the Cause : NR Identification of Any Warning that can Occur : In some cases, loose caliper bolts may result in slight brake pull. Furthermore, loss of required clamp load may cause the brake caliper to come loose, leading to vibration and noise along with braking. Involved Components : Component Name 1 : Caliper Mounting Bolts Component Description : Brake Calipers Component Part Number : Multiple Supplier Identification : Component Manufacturer Name : Meritor Address : 801 Railroad Ave York Rhode Island 29745 Country : United States Chronology : On April 14th 2022, while reviewing warranty claims on caliper mounting bolts, DTNA found a claim for one vehicle, which indicated that three caliper mounting bolts of right rear drive axle missing. DTNA notified the axle assembly supplier and promptly began a plant inspection. Recognizing that the vehicle in question was a part of a small subset of vehicles subject to a post-manufacturing suspension re-work process that involved a particular service provider removing brake caliper mounting bolts, DTNA inspected all of the other vehicles subject to that process that remained in DTNA’s possession. The inspection identified no other vehicles with an under torqued mounting bolt. Promptly in April 22, DTNA began an extensive fact-finding investigation, during which the axle assembly supplier shared records indicating good torque values for the one vehicle found to have loose bolts. These records allowed DTNA to narrow down the suspect population to the one vehicle in question and fourteen others, subject to the same suspension re-work process that involved a particular service provider removing brake caliper mounting bolts and to determine that the issue was not systemic within DTNA’s manufacturing process. On April 28th 22, out of an abundance of caution, DTNA decided to initiate a voluntary safety recall for vehicles Part 573 Safety Recall Report 22V-299 Page 3 The information contained in this report was submitted pursuant to 49 CFR §573 identified as re-worked under this process by the particular service provider Description of Remedy : Description of Remedy Program : Suspect units will be inspected for proper torque of caliper mounting bolts and repaired accordingly. Repairs will be performed by Daimler Truck North America authorized service facilities. Daimler Truck North America shall be offering a refund for owner-paid repairs covered by this recall if the repair was performed prior to the date indicated in the reimbursement plan, which will be posted with owner’s notification letter. Owners are directed to seek reimbursement through authorized dealers. How Remedy Component Differs from Recalled Component : NR Identify How/When Recall Condition was Corrected in Production : NR Recall Schedule : Description of Recall Schedule : Customer notification will be made by first class mail using Daimler Truck North America records to determine the customers affected. Planned Dealer Notification Date : JUL 02, 2022 – JUL 02, 2022 Planned Owner Notification Date : JUL 02, 2022 – JUL 02, 2022 * NR – Not Reported
SEOCONTENT-END