
| “This site contains affiliate links for which OEMDTC may be compensated” |
NHTSA ID Number: 10108966
Manufacturer Communication Number: 059-547-00 Rev H
Summary
Installation instruction revision – Heavy Duty Suspension Kits for Double Eye Springs
1 Affected Product
Equipment
| BRAND | PART NO. | PRODUCTION DATES |
| DEXTER | DEXTER | |
INSTALLATION INSTRUCTIONS
Heavy Duty Suspension Kits for Double Eye Springs
K71-358-00 for Single Axles
K71-359-00 for Tandem Axles with 33″ Axle Spacing
K71-360-00 for Triple Axles
K71-448-00 for Tandem Axles with 4″ High Equalizer
K71-449-00 for Tandem Axles with 35″ Axle Spacing K71-453-00 for Triple Axles with 35″ Axle Spacing
Safety Precautions:
Before performing any maintenance or repair work requiring the raising of the vehicle, make sure that the vehicle is properly supported on lift stands of sufficient capacity. Follow the vehicle manufacturer’s recommendations for lifting and supporting the unit.
Do not lift with or place supports under any part of the suspension system unless specifically directed to do so during the disassembly and reassembly steps of these instructions.
| CAUTION |
| Never rely on jacks alone to support the vehicle. A vehicle that is not securely supported may fall and cause severe injuries or death. |
| CAUTION |
| Safety glasses should be worn at all times when assembling or disassembling axles and their components. Failure to comply may result in serious eye injury. |
Disassembly:
| CAUTION |
| Axles and suspension components are heavy and must be carefully handled to avoid pinching, straining or crushing injuries to the body. |
- When the vehicle is raised and supported with the tires just clear of the ground, remove the wheel/tire assemblies from their respective hubs.
- Disconnect any electrical wires or hydraulic brake lines from the axles.
- Place small jacks under the equalizers. Gently lift the weight of the assembly until the bolts can be easily removed from the center frame hangers. Lower the partially disconnected assembly until the equalizers are clear of their respective hangers.
- Carefully remove the spring ends from their respective hangers by supporting their weight and removing the bolts.
- Remove the shackle link assemblies that attach the leaf spring ends to the equalizers.
- Slide the axles out from underneath the vehicle.
Inspection:
- Examine the bolt holes in the frame hangers. Holes that have been elongated or worn larger will not provide for a proper fit of the new bolts. The splined section of the bolt, adjacent to the bolt head is designed to create an interference fit in the hanger and prevent bolt rotation.
| CAUTION |
| Loose fitting bolts can result in premature wear and lead to eventual failure. Failure of suspension components may cause loss of vehicle control and result in an accident involving personal property damage, serious injury and/or death. |
- If the bolt holes in the hangers are worn, the hangers should be replaced.
| CAUTION |
| Contact the vehicle manufacturer for specific instructions regarding the removal of old hangers and installation of new hangers. Improper cutting and welding of these components can adversely affect the structural integrity of the vehicle frame. |
Spring Eye Bushing Replacement:
- Remove the old bushings from the spring eyes, driving them out with a suitable drift punch. Make sure the spring eyes are clean and free from excessive wear, burrs and sharp edges before proceeding. Springs that have been damaged in any way must be replaced.
- Drive the new bronze bushings into the spring eyes. The preferred method is to use a piloted punch that closely fits the inside diameter of the bushing. If a punch is not available, a ⁹⁄₁₆” bolt can be substituted. Place the bushing squarely against the spring eye, insert the punch (or bolt) into the bushing and drive it into place by firmly striking the punch (or bolt) with a suitable hammer.
| CAUTION |
| Striking the bronze bushing directly with a hammer may deform the inside diameter and prevent reassembly of the bolts. |
REASSEMBLY
Tandem Axle Suspension:
Note: Some trailer designs or tire sizes may prevent easy access to the grease fittings when assembled in the suggested fashion. The user may choose to assemble the spring attaching bolts and shackle link assemblies from the opposite direction. This will place the grease fittings on the inboard side of the frame, or the standard ¹⁄₄”-28 straight grease fittings can be removed and replaced with an angled fitting. These fittings should be available at most automotive parts stores.
- Slide the front and rear axles into position under the frame hangers. Starting with the front axle, lift the front ends of the springs and position them between the legs of the front hangers with the bolt holes aligned.
- Insert the lubricated spring eye bolts through the outside leg of the hanger, the spring eye and start it through the inside leg of the hanger.
| CAUTION |
| Note the specific radial orientation of the grease holes in the illustrations. Failure to orient the grease holes as shown may restrict the free flow of lubricant and lead to excessive wear. |
| CAUTION |
| DO NOT HAMMER directly on the grease fitting. Striking the fitting will cause damage and render it inoperable |
| CAUTION |
| Attempts to pull the bolt into place with an impact wrench may strip the threads or cause the bolt to spin and damage the hanger hole and/or bolt spline. |
- Read and observe the following cautions before driving the bolts into place.
- Use a suitable hammer to drive the bolts into place. To drive the bolts in, place a small piece of pipe or steel tubing against the head of the bolt. The tube should be approximately ³⁄₈” inside diameter to encircle the grease fitting in the head of the bolt. Strike the end of the tube squarely and firmly. Avoid glancing blows.
- Continue driving the bolts into the hangers until the bolt heads are seated against the hanger surface. Install the flanged locknut onto the bolt threads with the flanged side of the nut toward the hanger. Tighten the nuts to 30-50 Ft. Lbs. The nut should be seated against the shouldered bolt end.
| CAUTION |
| Note the specific radial orientation of the grease holes in the illustrations. Failure to orient the grease holes as shown may restrict the free flow of lubricant and lead to excessive wear. |
- Place the rear ends of the rear axle springs between the legs of the rear hangers. Insert the lubricated spring eye bolts through the outside leg of the hanger, the spring eye and start it through the inside leg of the hanger.
- Repeat steps #4 and 5.
- Install the new equalizers by placing them inside their center hangers, align the center hole of the equalizer to the holes in the hanger and insert the non-lubricated bolt. Install the flanged locknut onto the bolt threads with the flanged side of the nut toward the hanger. Tighten the nuts to 30-50 Ft. Lbs. The nut should be seated against the shouldered bolt end.
- Attach the shackle link/bolt assemblies to the equalizers and spring eyes. The axles must be lifted into their normal operating position with the spring eyes above the lower holes in the equalizers. Insert the shackle link/bolt subassembly into both the equalizer and spring eye at the same time.
- Slide the plain shackle links onto the bolt ends that protrude through the springs and equalizers. Install the flanged lock nuts onto the bolts and tighten to 30-50 Ft. Lbs.
- Check the suspension for freedom of movement by lifting either of the axles. When one axle is lifted, the other should move downward and should return to its normal position when the lifting force is released.
- Lubricate all the grease fittings using a Lithium complex soap grease, NLGI No. 2 such as Mobil Oil Company Mobilgrease HP or equivalent. Pump the grease in until it begins to show at the ends of the bronze bushings. For best results, the suspension should be lubricated every 3,000 miles.
- Reinstall the tire/wheel assemblies, following the instructions provided by the manufacturer.
REASSEMBLY
Triple Axle Suspension:
- Slide the front, center and rear axles into position under the frame hangers. Starting with the front axle, lift the front ends of the springs until they are positioned between the legs of the front hangers and are aligned to the bolt holes.
- Insert the lubricated spring eye bolts through the outside leg of the hanger, the spring eye and start it through the inside leg of the hanger.
| CAUTION |
| Note the specific radial orientation of the grease holes in the illustrations. Failure to orient the grease holes as shown may restrict the free flow of lubricant and lead to excessive wear. |
- Read and observe the following cautions before driving the bolts into place.
| CAUTION |
| DO NOT HAMMER directly on the grease fitting. Striking the fitting will cause damage and render it inoperable. |
| CAUTION |
| Attempts to pull the bolt into place with an impact wrench may strip the treads or cause the bolt to spin and damage the hanger hole and/or bolt spline. |
- Use a suitable hammer to drive the bolts into place. To drive the bolts in, place a small piece of pipe or steel tubing against the head of the bolt. The tube should be approximately ³⁄₈” diameter inside to encircle the grease fitting in the head of the bolt. Strike the end of the tube squarely and firmly. Avoid glancing blows.
- Continue driving the bolts into the hangers until the bolt heads are seated against the hanger surface. Install the flanged locknut onto the bolt threads with the flanged side of the nut toward the hanger. Tighten the nuts to 30-50 Ft. Lbs. The nut should be seated against the shouldered bolt end.
- Install the new front equalizer by placing it inside the center hanger, align the center hole of the equalizer to the holes in the hanger and insert the non-lubricated bolt. The yoke end of the equalizer must be toward the rear of the vehicle.
- Continuing with the center axle, lift the front ends of the springs until they are positioned in the yoke ends of the front equalizers and are aligned to the bolt holes. Insert the lubricated bolts through the holes taking care to orient the grease holes as previously noted. Assemble and tighten the nuts to 30-50 Ft. Lbs. The nuts should be seated against the shouldered bolt ends.
- Place the rear ends of the rear axle springs between the legs of the rear hangers. Insert the lubricated spring eye bolts through the outside leg of the hanger, the spring eye and start it through the inside leg of the hanger. Make sure the grease holes are oriented as previously noted. Assemble and tighten the nuts to 30-50 Ft. Lbs. The nuts should be seated against the shouldered bolt ends.
- Attach the shackle link/bolt assemblies to the equalizers and spring eyes. The axles must be lifted into their normal operating position with the spring eyes above the lower holes in the equalizers. Insert the shackle link/bolt subassembly into both the equalizer and spring eye at the same time.
- Slide the plain shackle links onto the bolt ends that protrude through the springs and equalizers. Install the flanged lock nuts onto the bolts and tighten to 30-50 Ft. Lbs.
- Check the suspension for freedom of movement by lifting any one of the axles. When one axle is lifted, the others should move downward and should return to their normal position when the lifting force is released.
- Lubricate all the grease fittings using a Lithium complex soap grease, NLGI No. 2 such as Mobil Oil Company Mobilgrease HP or equivalent. Pump the grease in until it begins to show at the ends of the bronze bushings. For best results, the suspension should be lubricated every 3,000 miles.
- Reinstall the tire/wheel assemblies, following the instructions provided by the manufacturer.
Hanger Identification:
If Static Bump Clearance is greater than 2.5″, a bump stop should be used to avoid overstressing of leaf springs. Static Bump Clearance of less than 1.5″ may limit full suspension movement and result in possible damage to the frame and/or axles when operating on some rough and uneven road surfaces. Tire clearance should always be greater than bump clearance to help prevent tire contact to underbody surfaces in the event of a suspension component failure.
SEOCONTENT-STARTParts Identification:
Graphic revised 6/13/05
3 paths were hidden so they
would not print.
ELKHART, IND
13-10
13 104
FRONT
13-105
Bronze Bushing
Grease Lubricated
Step Bolt
Non-Grease
Lubricated Step Bolt
Shackle Link Optional End Designs
Shackle Link Assembly
4″ high tandem axle equalizer
included in K71-448-00
Tandem axle equalizer
included in K71-359-00 and
rear equalizer for triple axle
in K71-360-00
Front equalizer
for triple axle running gear
included in K71-360-00
Note: Equalizers not shown are 13-122 included in K71-449-00 & K71-453-00; and 13-126 included in K71-453-00.
© Dexter Axle Company 07/17
-6- www.dexteraxle.com 059-547-00 Rev. H
Single Axle Kit
Bronze Bushings
Axis of
Grease
Cross-Hole
Grease Lubricated
Step Bolts Shackle Link Assemblies
Bronze bushings to be installed in spring eyes
prior to bolt and nut assembly attachment.
Typical Tandem Axle Installation
Axis of
Grease
Cross-Hole
Axis of
Grease
Cross-Hole
Non-Lubricated Step Bolts
Grease Lubricated Step Bolts
Shackle Link Assemblies
Equalizer
Bronze bushings to be installed in spring eyes
prior to bolt and nut assembly attachment.
Typical Triple Axle Installation
Equalizer
Shackle Link Assembly
Equalizer
Axis of Grease
Cross-Hole
Axis of Grease
Non-Lubricated Step Bolts Cross-Hole
Shackle Link Assemblies
Grease Lubricated Step Bolts
Bronze bushings to be installed in spring eyes
prior to bolt and nut assembly attachmentSEOCONTENT-END
059-547-00 Rev H
https://www.nhtsa.gov/recalls?nhtsaId=10108966
https://static.nhtsa.gov/odi/tsbs/2017/MC-10108966-9999.pdf
 Loading...

- 2 x 7-3/4" Long Triangle Equalizer. Easy installation.
- 8 x 9/16" Nylon Bushings, 8 x 2 9/16" Shackle Straps.
- 14 x 9/16"-14 x 3" Long Shackle Bolts & Locking Nuts.
- Made of high-quality materials, durable and corrosion resistant. Suitable for outdoor use.
- Our Tandem Trailer Axle enjoy 6 months warranty. Any questions, please feel free to contact us.

- 【VALUE FOR MONEY KIT】- Equip yourself with a sturdy trailer equalizer shackle kit, includes 2PCS long triangle equalizers, 8PCS shackle straps, 8PCS nylon bushings, 14PCS shackle bolts, 14PCS locking nuts. This kit includes everything you need for smooth installation or replacement, saving you time and effort, you can get back on the road quickly and safely.
- 【SIZE】- OEM design, Equalizer's hole spacing is 7-3/4''. Shackle strap total length is 4.4'', hole spacing is 3-1/8'' (3.12''). Bolt length is 3-3/8''. Nylon Bushing is 9/16'' I.D. and 11/16'' O.D. The thread size of bolts and nuts is 9/16''-18. Please check that your size matches before purchasing.
- 【STURDY & LONG SERVICE LIFE】- Each part in this kit is made of high-quality materials, reliable, sturdy and wear-resistant, can withstand the harsh tests of the road. Black oxidized and painted surface, impact resistant, corrosion and rust resistant, hard to deform. Suitable for outdoor use. ✔Lock nuts, squeezing both ends to protrude the middle thread, locking the nuts through thread deformation.
- 【APPLICATION】- Trailer axle shackle kit for Double-eye Springs Tandem Axle Suspension (3,500 - 5,200 pound Axles). This high quality dual axle trailer kit is essential for any trailer with an equalizer. ✔The equalizers and shackle plates bear the most movement and weight in the suspension, and should be checked frequently.
- 【SATISFACTION GUARANTEE】- For whatever reason, if you are not satisfied, you can contact us for replacement or full refund. Please rest assured purchase.


- SUPERIOR ENGINEERING & DURABILITY — Lippert has been a trusted name in the RV and utility trailer parts industry since 2005. Our trailer axle AP kits are designed to meet the highest standards, ensuring long-lasting performance and reliability
- CRAFTED WITH PRECISION — Each component in Lippert trailer axle AP suspension kits is crafted with precision and quality, giving you peace of mind and confidence in your trailer’s suspension system
- EXACT-MATCH REPLACEMENT COMPONENTS — Lippert AP suspension kits include exact-match components that install just like your original equipment. This ensures a seamless replacement process, allowing you to get your trailer suspension back to optimal operation quickly and efficiently
- OPTIMUM PRODUCT TRACEABILITY — With Lippert’s advanced manufacturing process, every axle assembly and component is traceable down to the exact production run and original lot number. This level of traceability enhances product visibility and serviceability, providing you with superior support and reliability
- QUALITY ASSURANCE — Lippert AP suspension kits are designed for ease of installation, helping you bolt the axle leaf springs to your hangers with minimal effort. By referencing your original equipment label, you can ensure a perfect fit and hassle-free installation
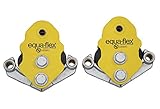
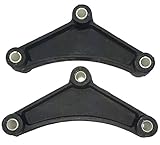
- SUPERIOR COMFORT & REDUCED TRAILER MOVEMENT — The Lippert Equa-Flex equalizer kit is engineered to minimize fore-to-aft trailer movement, also known as chucking. This innovative feature ensures a smoother, more comfortable towing experience
- PATENTED RUBBERIZED DESIGN FOR SHOCK ABSORPTION — Featuring a unique rubberized equalizer, this kit significantly reduces road shock and vibration. This not only enhances the comfort of your ride but also protects your trailer and cargo from potential damage caused by rough roads
- COMPATIBLE WITH TANDEM & TRIPLE AXLE TRAILERS — The Lippert Equa-Flex equalizer is versatile and suitable for both tandem axle and triple axle trailers. This flexibility ensures that no matter your trailer configuration, you can benefit from the superior performance and comfort
- COST-EFFECTIVE UPGRADE — Designed for tandem and triple axle trailers with double-eye leaf springs, this patented equalizer delivers a ride as smooth as torsion axles but at a fraction of the cost
- PRE-INSTALLED BRONZE BUSHINGS — Each of the two Equa-Flex sub-units comes with pre-installed bronze bushings, making installation easier and ensuring long-lasting functionality


- Every trailer needs a spare new trailer shackle kit, one of the most overlooked suspension parts on a trailer, so people rarely replace or maintain the trailer suspension parts. It's time to check your trailer suspension and choose our trailer axle shackle kit to replace the trailer shackle that has been severely worn!
- Trailer Axles 3500lb Kit Includes: 2 x 7-3/4" Long Delta Equalizer, 8 x 9/16" Nylon Bushings, 8 x 2-9/16" Shackle Straps, 14 x 3" Long Shackle Bolts and 14 x 9/16" Lock Nuts. This trailer axle hanger kit includes complete trailer axle accessories for installation or replacement, please measure your old bolts and make sure to order the correct size trailer equalizer kit.
- Main Application: 3500 lb trailer axle kit is mainly suitable for double eye spring tandem axle suspension (3,500 - 5,200 lbs axle). This high-quality trailer leaf spring kit is essential for any trailer with an equalizer, such as campers, racing trailers, boat trailers, etc.
- High-quality materials and easy installation: The trailer suspension kit is made of high-quality materials, hard and wear-resistant, rust-proof and corrosion-resistant, suitable for long-term outdoor use. The trailer axle shackle kit for double eye springs is easy to install and remove, and is a perfect replacement for replacing old shackles and equalizers.
- Tips: If the old trailer parts and accessories is severely worn, it will affect the safety and work efficiency of the trailer. The trailer equalizer and shackle plate bear the greatest movement and weight in the trailer suspension. The trailer leaf spring shackle kit should be checked regularly and replaced as soon as severe wear is found!

- 【SIZE & QUANTITY】8PCS 3-1/8" SHACKLE STRAPS, 2PCS 7-3/4" LONG TRIANGLE EQUALIZERS, 8PCS 9/16" NYLON BUSHINGS, 14PCS 9/16"-3 x 3" LONG SHACKLE BOLTS, 14PCS 9/16"-18 SELF LOCKING NUTS.A whole kit instead of picking it together.
- 【FIT】 Fit for 3,500 lbs-5,200 lbs double eye springs tandem axle suspension.
- 【WITH 14 BOLTS AND NUTS】This kit include 14 bolts and nuts.Every tandem axle trailer with an equalizer needs 14 bolts and nuts.This kit can help you get repairs and replacements done quickly and easily.But others only had 6pcs,it's very inconvenient.
- 【STURDY AND DURABLE】Made of high-quality materials, hard and wear-resistant.Black oxidized surface, rust and corrosion resistant.High machining accuracy, very easy to install.
- 【SATISFACTION GUARANTEE】For whatever reason, if you are not satisfied, you can request a replacement or a full refund. Please do not hesitate to contact us if you have any questions. We will show you our sincere attitude and satisfactory solution. Please rest assured purchase.
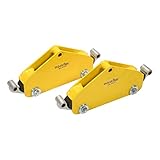
- SUPERIOR COMFORT & REDUCED TRAILER MOVEMENT — The Lippert Equa-Flex equalizer kit is engineered to minimize fore-to-aft trailer movement, also known as chucking. This innovative feature ensures a smoother, more comfortable towing experience
- PATENTED RUBBERIZED DESIGN FOR SHOCK ABSORPTION — Featuring a unique rubberized equalizer, this kit significantly reduces road shock and vibration. This not only enhances the comfort of your ride but also protects your trailer and cargo from potential damage caused by rough roads
- COMPATIBLE WITH TANDEM & TRIPLE AXLE TRAILERS — The Lippert Equa-Flex equalizer is versatile and suitable for both tandem axle and triple axle trailers. This flexibility ensures that no matter your trailer configuration, you can benefit from the superior performance and comfort
- COST-EFFECTIVE UPGRADE — Designed for tandem and triple axle trailers with double-eye leaf springs, this patented equalizer delivers a ride as smooth as torsion axles but at a fraction of the cost
- PRE-INSTALLED BRONZE BUSHINGS — Each of the two Equa-Flex sub-units comes with pre-installed bronze bushings, making installation easier and ensuring long-lasting functionality
Last update on 2024-06-13 / Affiliate links / Images from Amazon Product Advertising API
This product presentation was made with AAWP plugin.