| “This site contains affiliate links for which OEMDTC may be compensated” |
February 17, 2020 NHTSA CAMPAIGN NUMBER: 20V091000
The underrated axles may result in the trailer being overloaded, possibly causing the operator to lose control of vehicle, increasing the risk of a crash.
NHTSA Campaign Number: 20V091
Manufacturer Jayco, Inc.
Components SUSPENSION
Potential Number of Units Affected 146
Summary
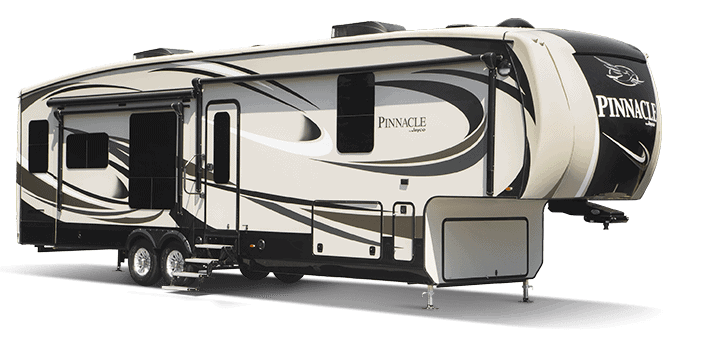
Jayco, Inc. (Jayco) is recalling certain 2013-2015 Fifth Wheel Seismic and 2015 Pinnacle trailers. The trailers were built with 6,000lb capacity axles instead of 7,000lb axles as intended.
Remedy
Jayco will notify owners, and dealers will replace the axles and leaf springs, free of charge. The recall began March 11, 2020. Owners may contact Jayco customer service at 1-800-517-9137. Jayco’s number for this recall is 9901506.
Notes
Owners may also contact the National Highway Traffic Safety Administration Vehicle Safety Hotline at 1-888-327-4236 (TTY 1-800-424-9153), or go to www.safercar.gov.
Underrated Axles/ Leaf Springs
| Bulletin Type: | Recall | Publication Date: | March 2020 |
| Recall #s: | 20V-091 US Units
2020-063 Canadian Units |
Make: | Jayco |
| Job Codes: | Inspect ONLY 9901505
Inspect and Replace 9901506 |
Models: | Seismic 9C Pinnacle |
| Flat Rates: | Inspect .3 hours Replace 2 Hours | Model Years: | 2013-2014 2015 |
| Incident: | Underrated axles installed on frame. 6000lb with 3000# leaf springs, when 7000lb with 3500# leaf springs are specified for the fifth wheel. |
| Affected Units: | 2013-2014 Seismic 9C
D19C0050-0131 E19C0051-0088 2015 Pinnacle F1RB0051-0068 RG0051-0075 RH0050-0066 RK0050 RL0050 |
| Parts Kit: | PARTS KIT
# 20V-091A – Seismic # 20V-091B – Pinnacle |
| Contents:
20V-091A 2 Dexter 7000lbs axle/ 3500 # leaf spring assemblies 1 Dexter Spring Hanger Kit – specific for Seismic 20V-091B 2 Dexter 7000lbs axle/ 3500# leaf spring assemblies 1 Dexter Spring Hanger Kit – specific for Pinnacle
PARTS KITS HAVE LEAD TIME OF 5 BUSINESS DAYS |
INSPECT AXLES
Before proceeding with these repair instructions, check the axle labels on the trailer to verify the axles are 6,000 lb. rated and do indeed require replacement.
Axle label can be located on the rear of the axle beam shown below (A). If the axles are already 7,000 lb. rated, no further action is necessary.
Proceed with the following repair instructions if the axles are 6,000 lb. rated.
REPAIR INSTRUCTIONS (Preliminary Trailer Setup)
FIG 1:
- Use the impact driver with the 3/4 socket and break the lug nuts loose on all wheels. Do NOT remove any lug nuts at this time.
FIG 2:
- Position the unit on a flat level surface in a level condition.
- Retract ALL stabilizer jacks.
FIG 3:
- Support the trailer frame behind the rear wheels, and in front of the front wheels on both sides of the trailer using 6,000 lb. jack stands or wood cribbing.
FIG 4:
REPAIR INSTRUCTIONS (Remove old axles)
FIG 5:
- Remove the rubber protective caps on the wire connections.
FIG 6:
- Use the wire cutters and cut off only the copper crimps on both sets of wires at each axle.
FIG 7:
- Starting with the front axle, place a floor jack under that axle to support it, so once it is freed, it will not fall to the ground.
FIG 8:
- Remove the nut from the spring hanger bracket. DO NOT REMOVE THE BOLT YET.
- Inspect Shackle links for wear. If they are worn,
FIG 9:
- Remove the nut from the bolt holding the spring to the equalizer shackle link.
- Go around to the other side of the trailer and remove the spring hanger nut and equalizer link nut.
FIG 10:
- Make sure the floor jack is under the axle to support it, and drive the bolts out of the equalizer shackle links and the spring hanger brackets from the nut end.
NOTE: if new shackle links are included in the kit, all shackle links should be replaced with new ones.
- Old hardware will not be re-used, discard bolts. Use new hardware from the kit.
- The axle should now be loose, roll it out from under the trailer on the floor jack.
REPAIR INSTRUCTIONS (Install new axles)
Roll the new axle with springs attached, under the trailer on the floor jack and raise into position. Position the axle so it bends upward under the trailer, the middle of the axle should be higher than the ends (See Fig 1 below).
Silver axle ID tag (A) should be located on the backside of the axle tube facing the rear of the trailer.
Black wires from the axle hub should end up on the same side of the trailer as the blue & white wires cut
FIG 11:
- Springs on the new axle should be installed using new hardware from the kit (shackle links, bolts & nuts)
NOTE: in order to drive the new bolts (with grease zerks) into shackles and spring hanger brackets, you will have to place something like a 9/16 socket over the bolt head to cover up and protect the grease zerk so you can drive the bolt head into the link or bracket by striking the socket with the hammer (instead of the bolt head).
NOTE: The grease zerk on the head of the bolt should be toward the outside (nearest the tires). The grease exit hole location on the bolt should face sideways (3 o’clock or 9 o’clock position) to allow for ease of grease flow
FIG 12:
- Drive the bolts into the spring bushings and hanger brackets on both sides of the trailer. (Reference the notes in Fig 11)
- Bolt head MUST be flush with the spring hanger bracket.
- DO NOT TRY TO DRAW IT FLUSH USING THE IMPACT DRIVER FROM THE NUT SIDE.
- USE THE TORQUE WRENCH WITH 11/16 SOCKET AND TORQUE NUTS TO 45 FT/LBS.
- Use 13/16 wrench on the bolt heads.
FIG 13:
- Drive bolts through new shackle links and spring bushing at the equalizer on both sides of the trailer. (Reference notes in Fig 11)
- Bolt head MUST be flush with the shackle link.
- DO NOT TRY TO DRAW IT FLUSH WITH THE IMPACT DRIVER FROM THE NUT SIDE.
- USE THE TORQUE WRENCH WITH 11/16 SOCKET AND TORQUE NUTS TO 45 FT/LBS.
- Use the 13/16 wrench on the bolt heads.
FIG 14:
- When installing nuts on the wet bolts (Fig 12 & 13):
- Make sure at least 2 to 3 threads show beyond the face of the nut.
Repeat Steps 5 through 13 to remove and replace the rear axle. Use the floor jack under the axle to support it during removal and installation.
After replacement of both axles, reconnect the brake wiring.
Brake wires should be on the same side of the trailer for both axles.
Insure wire connectors are a weatherproof type as shown in Figure 5.
Apply electric to the unit and Check the brakes to insure they are working properly.
REPAIR INSTRUCTIONS (Brake Wiring)
FIG 14:
- On the front axle:
- Strip the ends of all the brake wires approximately ½” as shown in the photo. 2 blue wires, 2 white wires, and 2 black wires.
FIG 15:
- Harness brake wires should be approximately 3 inches long
FIG 16:
- On the front axle:
- Then cover the connection with a rubber boot.
- Then cover the connection with a rubber boot.
FIG 17:
- Completed connections for the brake wiring on the front axle.
- Dress wires along the backside of the axle and away from pinch hazards like the springs or the frame (See Fig 18).
NOTE: At the rear axle, there will only be 1 blue, 1 white and 2 black wires.
Strip the blue, white and 2 black wires approximately ½”.
Twist the blue with one of the black wires (does not matter which one) and crimp with a copper sleeve. Twist the white with the remaining black wire and crimp with a copper sleeve. Then cover each connection with a rubber boot.
FIG 18:
- Leave enough slack so the wires can move with the axle and will not get tangled in pinch points, like the frame or the springs.
FIG 19:
- Lower the trailer back on to the ground.
- Torque all the lug nuts to 65 ft/lbs, then final torque them to 120 ft/lbs.
| Jayco’s sole obligation under our limited warranty is to repair or replace defective materials and/or workmanship deemed our responsibility as determined by Jayco in our sole discretion. Jayco reserves the right to use new and/or remanufactured parts or materials of similar quality to complete any work, and to make parts and/or design changes as appropriate without notice to anyone. Jayco designs and/or materials changes are done without obligation to incorporate such changes in previously manufactured product. Jayco makes every reasonable effort to ensure field remedies will not adversely affect performance and/or safety of the unit. This field remedy is not intended to extend to future performance of this RV, or any of its materials, components or parts beyond the standard warranty period. The RV owner’s obligation to notify Jayco, or one of its independent, authorized dealers, of a claimed defect does not modify any obligation placed on the RV owner to contact Jayco directly when attempting to pursue remedies under state or federal law. Jan. 2019. |
| 903 South Main Street • P.O. Box 460 • Middlebury, IN 46540 |
| Safety Recall: 20V-091 2019-063
March 2020 |
IMPORTANT SAFETY RECALL
This Notice Applies to Your Recreational Vehicle «vin»
Dear Valued Customer:
This notice is sent to you in accordance with the National Traffic and Motor Vehicle Safety Act.
Jayco has decided that a defect, which relates to motor vehicle safety, exits in certain Model Year 20132014 Seismic 9C and 2015 Pinnacle fifth wheels.
| Reason for this recall | Due to a part number entry error for axle size and description, the axles installed on the fifth wheel frame are incorrect. The current axles have a load rating of 6,000 lbs. when the design specified axle rating of 7,000 lbs. With underrated axles, there is a risk of overloading your suspension system. Overloading suspensions systems could cause failure of leaf springs and/or bending of axles, which would increase the risk of an accident. |
| Recall Remedy | Remove and replace the current 6,000 lbs. axles with 3,000 lbs. leaf spring with 7,000 lbs. axles with 3,500 lbs. leaf springs. |
| What we need you to do | Please contact a Jayco Dealer as soon as possible to schedule an appointment. The Recall Remedy is free of charge and will take aproxiamtely 3 hours to complete.
Please report changes to your contact information and/or ownership status using the form on the back of this letter. |
If you had this repair completed prior to receipt of this recall notice, you may be eligible to receive reimbursement for the cost of obtaining a pre-notification remedy of the problem associated with this recall.
If you take your recreational vehicle to your dealer on the agreed service date and the dealer does not remedy this condition on that date or within three (3) days, please contact our Customer Service Department at 800-283-8267. If you are unable to get this safety defect remedied without charge and/or within a reasonable amount of time after contacting your dealer and customer service you may want to contact NHTSA. To submit a written complaint contact the Administrator, National Highway Traffic Safety Administration, 1200 New Jersey Avenue, SE., Washington, DC 20590; or call the toll-free Vehicle Safety Hotline at 1-888-327-4236 (TTY: 1-800-424-9153): or go to https://www.safercar.gov.
Federal regulations require that any vehicle lessor receiving this recall notice must forward a copy of this notice to the lessee within ten days.
We certainly regret this inconvenience; however, your safety is our most important priority.
Sincerely,
Jayco Towables
4 Affected Products
Vehicles
| MAKE | MODEL | YEAR |
| JAYCO | PINNACLE | 2015 |
| JAYCO | SEISMIC | 2013-2015 |
9 Associated Documents
Recall Quarterly Report #1, 2020-1
RCLQRT-20V091-9865.PDF 211.109KB
 Loading...
Recall Acknowledgement
RCAK-20V091-3964.pdf 328.706KB
Loading...
Defect Notice 573 Report
RCLRPT-20V091-5987.PDF 213.148KB
Loading...
ISSUED Owner Notification Letter(Part 577)
RCONL-20V091-0318.pdf 51.345KB
Loading...
Miscellaneous Document – Owner Status Form
RMISC-20V091-5110.pdf 554.335KB
Loading...
Remedy Instructions and TSB
RCRIT-20V091-9765.pdf 1037.619KB
Loading...
Recall Quarterly Report #3, 2020-3
RCLQRT-20V091-4095.PDF 211.294KB
Loading...
Recall Quarterly Report #4, 2020-4
RCLQRT-20V091-9481.PDF 211.403KB
Loading...
Recall Quarterly Report #2, 2020-2
RCLQRT-20V091-2744.PDF 211.208KB
Loading...
Latest Recalls Documents
https://www-odi.nhtsa.dot.gov/acms/cs/documentList.xhtml?docId=20V091&docType=RCL
| “This site contains affiliate links for which OEMDTC may be compensated” |

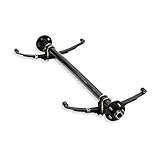
- Specs: 3,500 lbs Idler Trailer Axle (Capacity 3.5K), 5 Lug, Tube: 2 3/8"
- High Strength Straight Steel Axle Tube
- Axle comes fully assembled, so all you'll have to do is attach the springs, the U-bolt kits, and the tire and wheel assemblies.
- Underslung - Spring seats are welded to the bottom of the axle, which allows for a lower ride height.
- Trailer Axle Design for use on Light Duty Trailers

- EZ Lube Design Removable rubber plug on the hub cap with easy access to a grease-able zerk fitting Grease your axle without pulling off your whole entire hub
- Internal Wiring System To ensure seamless design Protect brake wires from wear and tear
- High Strength Straight Steel Axle Tube Construction to ensure Even Tire Wear A better highway experience
- Underslung - Axle is welded with spring seats on the bottom Allows for lower ride height For optimal usage, use with double eye springs
- 72" from Hubface to Hubface and 58" Spring Center to Spring Center.
- Springs are 25 1/4" long and 1 3/4" wide
- 4 Leaf Springs
- 2-3/8" Main Tube
- 5 Lug with a 4 1/2" bolt pattern. 1/2 lug studs.
- Capacity: 2000 lbs, Tube:1-3/4 | 5x4.5 Bolt Pattern
- EZ Lube Design: Removable rubber plug on the hub cap with easy access to a grease-able zerk fitting. Grease your axle without pulling off your whole entire hub.
- Internal Wiring System: To ensure seamless design and protect brake wires from wear and tear.
- High Strength Straight Steel Axle Tube Construction: To ensure even tire wear and a better highway experience.
- Underslung - Axle is welded with spring seats on the bottom: Allows for lower ride height. For optimal usage, use with double eye springs.

- All-in-One Bundle: This 3.5K LD Single Axle trailer kit includes everything you need for a quick and easy installation, such as a 3.5k Idler Axle, double eye hanger kit, 4-Leaf Double Eye Springs, and 2 1.75k U-Bolt Kits
- High Strength Construction - The high strength steel axle tube construction ensures a durable and long-lasting performance for small utility trailers, cargo trailers, ATV trailers, and more
- High-Quality Parts - Made with OEM grade trailer axles and suspension, this kit is packed with high-temp axle grease for reliable performance
- Low Ride Height - With an underslung design, the axle is welded with spring seats on the bottom, allowing for a lower ride height and improved stability
- EZ Lube Design - Removable rubber plug allows for easy access to a grease-able zerk fitting, allowing you to grease your axle without having to remove the entire hub

- Underslung Design - Our trailer axle is underslung and Welded with Spring Seats on the Bottom - Provides a lower ride height for easier loading and unloading of your trailer
- EZ Lube Design - These single trailer axle features a removable rubber plug on the hub cap - allows for easy grease access without the need to remove the entire hub, saving you time and hassle
- Light Duty Trailer Axle - Designed for use on light duty trailers, utility, boat, car haulers, ATV, lawn & landscape, motorcycle, BBQ pit, cargo, enclosed, RV trailers and more
- Internal Wiring System - The trailer axle comes with an internal wiring system that protects brake wires from wear and tear, ensuring a seamless design that is perfect for any trailer type
- 5x4.5 Bolt Pattern - The 5 x 4.5 bolt pattern offers compatibility with a wide range of trailer wheels, providing flexibility and convenience for your trailer setup

- 2,000 lbs capacity
- Stub axles can be bolted (hardware not included) or welded to trailer frame
- 45 degree downward starting angle
- Perfect item to easily build your own custom motorcycle trailer
- Read product description below for more detailed information.

- Complete Rockwell American 3,500 lb Idler Axle - Made in the USA
- 3,500 lb Idler Axle Hubs, Bearings, Lugs & Nuts (2 Year MFG Warranty) & (1) 32 oz Johnson Trailer Parts Insulated Mug
- This Axle Comes with a Superior Powder Coated Finish and Posi-Lube Spindles that Provide Continuous Bearing Protection
- 5 Lug on 4.5 Bolt Pattern (other bolt patterns available - Contact Johnson Trailer Parts)
- Replaces Dexter, Al-ko & TK Trailer Axles. This Axle Kit is Available in the Sizes Shown in the 3rd Picture - Search "Johnson Trailer Parts or Rockwell American" in Amazon Search Bar for more Trailer Parts

- Specs: 3,500 lbs Idler Trailer Axle (Capacity 3.5K), 5 Lug, Tube: 2 3/8"
- High Strength Straight Steel Axle Tube
- Axle comes fully assembled, so all you'll have to do is attach the springs, the U-bolt kits, and the tire and wheel assemblies.
- Underslung - Spring seats are welded to the bottom of the axle, which allows for a lower ride height.
- Trailer Axle Design for use on Light Duty Trailers
Last update on 2024-06-11 / Affiliate links / Images from Amazon Product Advertising API
This product presentation was made with AAWP plugin.