
NHTSA ID Number: 10171577
Manufacturer Communication Number: C2128
TSB/Document Date: 2020-02-24
Summary
Certain B6.7 CM2350 B121B engines were shipped without a fuel heater; a plug was installed in place of a fuel heater. This Campaign authorizes certified repair locations to install a fuel heater in place of the plug, change the fuel heater wiring harness polarity by switching wiring terminal locations within the fuel heater connector, and to replace or install a new fuse in the fuel heater circuit. This field action is a commercial (non-safety) action to properly re-enable the fuel heater functionality that was removed to correct a recall condition as described in the recall report for NHTSA recall 19E-020.
1/28/2020
B6.7 CM2350 B121B Fuel Heater Campaign
Warranty Field Campaign
Campaign Number: c2128
Revision:
B6.7 CM2350 B121B Fuel Heater Campaign
Released Date: 24-Jan2020
Expiration Date (U.S. and
Canada): 24-Jul-2021
Expiration Date
(International ): 24-Jul-2021
Attention
Worldwide distr./ branches and Div./Reg Offices
U.S. / Canadian Distr./Branches and Div. Offices
U.S. / Canadian Dealers (Automotive)
If additional information is required, please contact your Cummins Warranty Operations
Group Leader.
Description
Certain B6.7 CM2350 B121B engines were shipped without a fuel heater; a plug was installed in
place of a fuel heater. This Campaign authorizes certified repair locations to install a fuel heater in
place of the plug, change the fuel heater wiring harness polarity by switching wiring terminal
locations within the fuel heater connector, and to replace or install a new fuse in the fuel heater
circuit.
Action
In order to qualify for repair under this field action, an engine:
1. will be covered Regardless of coverage status, and
2. must show as OPEN on QuickServe® Online for this field action.
Note : The ESN list is attached for reference.
After verifying that the engine meets the above requirements, perform the following actions:
1. Complete all of the repair instructions included within Attachment B.
2. Verify the current status of the fuel heater supply circuit wire locations within the fuel heater
connector. If there is no white dot on the fuel heater connector, and/or the polarity has NOT
been reversed, please refer to Attachment B for further instruction on the verification and/or
https://quickserve.cummins.com/qs3/pubsys2/xml/en/campaign/2021/c2128.html
1/4
1/28/2020
3.
4.
5.
6.
B6.7 CM2350 B121B Fuel Heater Campaign
correction of the fuel heater supply circuit. If there is a white dot and the polarity has already
been reversed, continue with the remaining repair instructions.
Remove the fuel heater plug currently installed in the fuel filter module. Install the new fuel
heater included within the fuel heater kit necessary for the appropriate application the engine
is installed. Please refer to Attachment B for further instruction on fuel heater or plug removal
and fuel heater installation.
Confirm the correct wiring harness polarity. Please refer to Attachment B for further instruction
on verification of the correct terminal locations within the connector that indicate a correctly
wired fuel heater circuit.
Install the new fuse included in the fuel heater kit necessary for the appropriate application the
engine is installed. Please refer to Attachment B for further instruction on fuse location and
installation within the appropriate application.
Connect the engine fuel heater wiring harness connector to the fuel heater and mark the
connector to confirm that the fix has been completed. Place the sticker included within the kit
into the fuse box and place the insert included within the kit into the owner's manual. Please
refer to Attachment B for further instructions on how to make the proper indication on the
connector that the fix has been completed and where to place the appropriate sticker and
manual insert.
Material Disposition
Materials removed as a result of this field action must be scrapped.
Reimbursements
Parts
Note : Refer to Attachment B for application specific information on the proper fuel
heater kit part numbers to order.
The following parts are covered under this field action:
Part Number
Quantity
Description
563336200
1
KIT, FUEL HEATER
(OPTIONAL)
563336300
1
KIT, FUEL HEATER
(OPTIONAL)
Note : SRTs to gain access that are required to complete the repair, that are sufficiently
explained in the claim narrative, may also be claimed on this action.
Labor Using Applicable Access Code and Time
SRT Code
00-90X
Description
Time (hrs)
Administrative time
https://quickserve.cummins.com/qs3/pubsys2/xml/en/campaign/2021/c2128.html
2/4
1/28/2020
B6.7 CM2350 B121B Fuel Heater Campaign
SRT Code
Description
19-0PB
Wire Connector - Replace,
Each Connector (EPA 2017)
99-902
FUSE INSTALLATION, FUEL
HEATER REMOVE AND
INSTALL, AND MANUAL
UPDATES (QTY 1 )
Time (hrs)
Travel
Travel is covered under this field action. Towing is covered under this field action.
Other Claimables
Consumables are covered under this field action.
Note : Please consolidate all consumables and claim them as one item in Other
Claimables titled "CAMPAIGN SUPPLIES".
Claim Instructions
For Cummins Dealers, claims for this Field Campaign must be filed via RAPIDSERVE™ Web
(rsw.cummins.com). For information regarding RAPIDSERVE™ Web, please reference the
"Warranty" tab in QuickServe® Online. If there are additional questions, please contact your local
Cummins Distributor.
Claim Codes
Description
Code
Account Code:
65
Pay Code:
Distributor = X
Pay Code:
Dealer = D
Pay Code:
International = I
Failure Code:
WFEHTD
Attachments
Click here to see c2128_esn-list.xlsx
(/service/english/attachments/c2128_esn-list.xlsx)
Click here to
see c2128_fuel_heater_campaign_attachment_b.pdf
(/service/english/attachments/c2128_fuel_heater_campaign_attachment_b.pdf)
https://quickserve.cummins.com/qs3/pubsys2/xml/en/campaign/2021/c2128.html
3/4
1/28/2020
B6.7 CM2350 B121B Fuel Heater Campaign
Engine Family
ISBe4 (6 Cylinder) QSB6.7 ISB ISDe, ISD4.5,
ISD6.7 ISBe, ISB4.5, ISB6.7
Design Application
Automotive
Market Application
All
Document History
Date
Details
Document Created; 24-Jan-2020
Last Modified: 24-Jan-2020
https://quickserve.cummins.com/qs3/pubsys2/xml/en/campaign/2021/c2128.html
4/4
C2128, B6.7 CM2350 B121B Fuel Heater Campaign – Attachment B
Verification/Confirmation
Verify engine has Cummins supplied priming pump fuel filter head installed.
o Option FS90301
o Option FS90453
Locate Stage 1 fuel filter head on engine. The engine fuel heater or plug and harness connection is
located on the top right side of the fuel filter head. The unit may have either a heater or plug installed.
If the unit has a plug, the wiring for the heater may be zip tied in an out of the way location.
Ensure the fuel heater connecter and fuel heater have no white paint marks. See Figure 1 below.
Make sure the OEM harness wires are installed with the white wire on the right (terminal 2) and the red
wire on the left (terminal 1) using the orientation shown in Figure 1 below.
o If the unit has a plug, hold the connector up to the filter head as if it were plugged into the heater
and verify the wire installation.
1
2
3
Fix not complete
Fix complete
Figure 1
1. No white paint mark on the connector
2. White wire is on the right (terminal 2)
3. Red wire is on the left (terminal 1)
Resolution
Install parts in Kit and swap the fuel heater connector wires if required. See Service Instructions below.
Service Instructions
Use correct Kit by referring to Attachment A.
Install Fuel Heater provided in Kit
1. Unlock connector by moving red tab to the right and disconnect from engine fuel heater if plug has not
already been installed.
2. Remove and discard two allen screws securing engine fuel heater, or plug, to the fuel filter head with a
5mm hex driver. See Figure 2 below.
3. Pull the engine fuel heater, or plug, straight out of the fuel filter head and discard. Capture any fuel that
may leak from the fuel filter, or plug. See Figure 3 below.
Figure 2
Figure 3
4. Clean face of engine fuel heater port with a lint free cloth and inspect for any sharp edges and/or
contaminants. Clean if needed.
5. Lubricate the O‐ring on the new fuel heater supplied in kit with clean diesel fuel and carefully install into
the engine fuel heater port, making sure to properly align before installing.
6. Use the two allen screws supplied to secure the fuel heater to the fuel filter head and tighten to 11 N‐m
[6.6 ft‐lb].
Swap the heater wiring polarity if required.
1. Disconnect vehicle battery.
2. Pull plastic guide piece from connector with needle nose plyers. See Figure 4 below.
Figure 4
3. Use PN4918921 Terminal Removal Tool to remove wires from connector. See Figure 5 below.
Figure 5
4. Swap the wire positions so that the white wire is in the number 1 terminal and the red wire is in the
number 2 terminal. Please use orientation shown in the figures below.
Figure 6: Number 1 Terminal Marking
5.
6.
7.
8.
9.
Figure 7: Number 2 Terminal Marking
Figure 8, Not OK
Figure 9, OK
Insert the wire back into the back of the connector in the same orientation that it was removed
When correctly installed, you will hear the wire click and lock into the connector
Lightly tug on the wires to ensure they are secure
Ensure connector seal on the back of the connector is in place after wires are re‐installed
Once both wires are connected back in, re‐install plastic guide piece
Install Fuse
Application
Corresponding Kit Part Number
Configuration
Navistar® CE Bus and 1300
See Attachment A for needed kit
Configuration 1
Navistar® MV, HV and TC
Commercial Bus
See Attachment A for needed kit
Configuration 2
Table 1
Configuration 1. Navistar® CE Bus and 1300 Fuse Instructions
1. Disconnect vehicle battery.
2. Locate fuel heater fuse location on dash panel. See Figure 10 below.
3. Remove fuse cap and install 30amp Maxi Fuse provided in Kit Part Number 5633362. If a fuse is
already installed in the cavity replace it with the fuse provided in the kit.
4. Reinstall fuse cap.
Figure 10
Configuration 2. Navistar® MV / HV / TC Commercial Bus Fuse and some DuraStar (4300) / WorkStar
(7300) HC Bus Fuse Instructions
1. Disconnect vehicle battery
2. Remove cover of fuse box, located on passenger side dashboard. See Figure 11 below.
3. If it is a DuraStar/WorkStar/HC Bus, check to see if a 5 amp fuse is present in cavity F4-D. See
Figure 14 below.
a) If there is a 5 amp fuse in cavity F4-D, leave the fuse and DO NOT replace with the 20
amp fuse provided in the kit.
b) If there is not a fuse in cavity F4-D, source Navistar Part Number 3534208C1 and install
the 5 amp fuse in cavity F4-D.
c) If applicable, discard 20 amp fuse that came with the kit. (For DuraStar/WorkStar/HC Bus
only)
4. If the unit is a MV/HV or TC Commercial bus, install 20-amp fuse supplied in Kit Part Number
5633363 at the B8-J cavity 17-21.
5. For all units of configuration 2, based on kit purchased, install 30-amp fuse located at 2C cavity. If
a fuse is already installed at the 2C cavity replace it with the fuse provided in the kit. See Figure
12 below.
Figure 11, Location of 20A Fuse on Navistar MV/HV/TC
Figure 12, Location of 40A Fuse on Navistar MV/HV/TC and some DuraStar / WorkStar / HC Commercial Bus
Reconnect engine fuel heater and mark that the fix has been completed
1. After the fuse or fuses have been installed, connect the fuel heater OEM harness branch to the engine
fuel heater.
2. Zip tie the excess harness to the heater as seen below in figure 15. Make sure there is no tension on the
wires going into the connector.
Figure 15
3. Mark that the fix has been completed by placing a white paint mark on the connector of the engine fuel
heater. See Figure 16 below.
Figure 16
4. For CE Bus applications please place the fuse sticker provided in the kit in the appropriate spot to update
the unit for future service
5. For MV/HV applications please place the provided manual sticker into the manual to update the fuse size
for future service.
Service Parts Availability
There are 2 different kits to accommodate the 2‐different fuse types
Service parts are available. See Table below for part numbers.
Part Description
New Part Number
5633362
Kit 1 for Navistar® CE Bus and 1300
Kit 2 for Navistar® MV, HV and TC Commercial Bus, and
some Navistar® DuraStar (4300) / WorkStar (7300) / HC
Commercial Bus
5633363
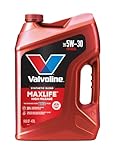


- Advanced protection against the four main causes of engine...
- Delivers 40% stronger wear protection than industry...
- Provides 15% better deposit defense vs. industry standards...
- Up to 2.5X better heat protection vs. industry standards to...
- Engineered for excellent low-temperature flow, reducing...
If the PDF is very large, it may not load in the preview below.
Some older TSBs had multiple PDFs — visit the NHTSA Website to view all PDFs.
If the TSB PDF does not show, download or view it on the NHTSA Website.
Click on the (+) Plus Sign
Then Click on Associated Document(s)
Search NHTSA Database for Recalls
Search NHTSA Database for Vehicle Investigations
View Latest Vehicle Investigations
Search NHTSA Database for Vehicle Complaints
View Latest Vehicle Complaints
TSB/Document ID: C2128
Replacement Service Bulletin Number:
MFR Communication Date: 2020-01-24
MFR Internal Campaign ID/Software Version:
Communication Type: Service Bulletin/Repair Instructions
NHTSA Components: EQUIPMENT
MFR Component System:
MFR Component Subsystem:
Previous TSB | Next TSB |

- [Notice] When you receive a used device, it may be a customer return resold by Amazon without inspection. You can exchange it for a new one through Amazon. As this situation is unavoidable, we sincerely apologize. For any issues, contacting us via Amazon's "Messages" is the best way. THINKSCAN 689BT Bidirectional Scan Tool Can Be Used Immediately After It is Turned On, Without Complicated Registration Process, Which is More Convenient & Quick.
- Full Bi-Directional Control & 3000+ Active Tests: Take control and test components like actuators, fuel injectors, relays, and cooling fans in real time. You’ll quickly see if the problem is in the part itself or the control module — saving you hours of guesswork and frustrating trial-and-error.
- Advanced ECU Coding Capabilities: Handle module matching and hidden feature activation with confidence. When you replace an ECU or want to customize settings, this obd2 scanner diagnostic bi directional tool gives you the professional-level capabilities you need without the dealership price tag.
- 34+ Useful Reset and Maintenance Functions: Complete everyday service tasks smoothly with a wide range of helpful reset and maintenance functions. Whether you’re keeping up with regular upkeep or tackling a specific job, this scanner makes maintenance simpler and less stressful for both DIYers and pros.
- Comprehensive Full System Diagnostics: Diagnose every major system — Engine, Transmission, ABS, SRS, TPMS, and more — all in one place. Finally stop wondering if you’re missing something important; get the full picture and clear codes with ease.

- Top Reasons to Choose the D7S OBD2 Scanner: XTOOL D7S car scan tool, an upgrade of XTOOL D7, offers comprehensive features for automotive technicians, workshops, and DIY enthusiasts 1. Upgraded Hardware: 2+64GB memory, rear camera, intuitive interface, foldable bracket 2. Complete Diagnostics: FCA
 Autoauth, OE-level all system scan, 39+ maintenance services, 4K+ bidirectional, CANFD/DoIP protocol 3. Advanced Capabilities: ECU coding, PMI functions 4. Wide Compatibility: Support 10,000+ models, covering 99% vehicle brands 5. Multi-language: Available in 22+ languages, No IP Restrictions 6. 3-Year Updates: Save 300 bucks on software updates for the latest features and optimizations
 - 2026 Upgraded D7S Car Scanner Features: The newly 2026 D7S V2.0 scanner for car brings exciting features for advanced vehicle diagnostics and enhanced user experience 1. FCA AutoAuth: Now supports FCA SGW module for Chrysler, for Jeep, for Dodge (2018+), for Fiat (2017+), enabling faster vehicle communication without gateway restrictions 2. PMI (Offline ECU Programming): Allows for Ford, for Lincoln, and for Mazda ECU programming for new modules 3. Optimized Diagnostic Report 2.0: Personalized reports with logos and customer info for auto shops. Note: Compatibility varies by cars, please check before order
- Cost-effective ECU Coding Scan Tool for Specific Brands: Enhance your vehicle's performance with XTOOL D7S! This obd2 scanner all systems bidirectional offers advanced capabilities at an affordable price, supports online for BMW, for Benz and offline for BENZ, for MIT, along with PMI functions for Ford, for Mazda, and for Lincoln. Ideal for technicians and DIY enthusiasts, this automotive scanner diagnostic tool optimizes vehicle performance and enhances the driving experience. Note: Not for all cars and modules, please send car VIN to check the compatibility before purchase
- OE All System Diagnostic & 8 Pids Graphing: XTOOL D7S is a comprehensive all system bi directional obd2 scanner that delivers dealer-level diagnostics, completely controlling over your vehicle’s performance and health. This automotive scan tool can read and clear DTCs, view live data and ECU information, retrieve freeze frames, and perform active tests and full obd2 functions. This bi-directional scan tool can can identify your vehicle's make, model, and year information with just one click and show up to 8 PIDs live data with options for CSV viewing, playback, and recording for in-depth analysis. It is easy-to-use for both professionals and beginners, helping pinpoint issues efficiently
- 3 Years Software Update, Value for Money: With 3 years of software updates and 22+ languages(no IP restrictions), XTOOL D7S auto scanner code scanner ensures ongoing compatibility for the latest car models and improved diagnostic functions. This all system vehicle diagnostic scanner comes with a 30-day return policy and a 24-month repair for dependable performance. XTOOL are dedicated to your satisfaction, so enjoy seamless support and lifetime expert assistance. Should you encounter any issues or concerns, don’t hesitate to reach out XTOOL. D7S with newest update with 22 languages freely transfer without authorization, check details from setting-language or from XTOOL

- 🔥 Historical lowest pr-ice now on sa-le--hot se-lling.
- 【🎈𝗜𝗙𝟳𝟰𝟱 𝗽𝗲𝗿𝗳𝗼𝗿𝗺𝘀 𝟲 𝗲𝘀𝘀𝗲𝗻𝘁𝗶𝗮𝗹 𝗿𝗲𝘀𝗲𝘁 𝗳𝘂𝗻𝗰𝘁𝗶𝗼𝗻𝘀—𝗔𝗕𝗦 𝗕𝗹𝗲𝗲𝗱𝗶𝗻𝗴, 𝗢𝗶𝗹 𝗥𝗲𝘀𝗲𝘁, 𝗘𝗣𝗕, 𝗦𝗔𝗦, 𝗧𝗵𝗿𝗼𝘁𝘁𝗹𝗲 𝗥𝗲𝗹𝗲𝗮𝗿𝗻, 𝗮𝗻𝗱 𝗕𝗠𝗦—𝗽𝘂𝘁𝘁𝗶𝗻𝗴 𝗽𝗿𝗼𝗳𝗲𝘀𝘀𝗶𝗼𝗻𝗮𝗹-𝗴𝗿𝗮𝗱𝗲 𝗺𝗮𝗶𝗻𝘁𝗲𝗻𝗮𝗻𝗰𝗲 𝗯𝗮𝗰𝗸 𝗶𝗻 𝘆𝗼𝘂𝗿 𝗵𝗮𝗻𝗱𝘀.】Spongy brakes? Stuck oil light? Parking brake won't release? Off-center steering? Rough idle after battery disconnect? Draining battery? IF745 handles all with a few taps. One tool covers six dealer-level resets, saving hundreds in labor costs. ❗ NOTE: Does NOT support bidirectional control, coding, or programming.
- 【✨ 𝗜𝗙𝟳𝟰𝟱 𝗴𝗼𝗲𝘀 𝗯𝗲𝘆𝗼𝗻𝗱 𝗯𝗮𝘀𝗶𝗰 𝗰𝗼𝗱𝗲 𝗿𝗲𝗮𝗱𝗶𝗻𝗴 𝘄𝗶𝘁𝗵 𝟭𝟬 𝗶𝗻𝘁𝗲𝗴𝗿𝗮𝘁𝗲𝗱 𝗳𝘂𝗻𝗰𝘁𝗶𝗼𝗻𝘀—𝗗𝗧𝗖 𝗟𝗼𝗼𝗸𝘂𝗽, 𝗜/𝗠 𝗥𝗲𝗮𝗱𝗶𝗻𝗲𝘀𝘀, 𝗙𝗿𝗲𝗲𝘇𝗲 𝗙𝗿𝗮𝗺𝗲, 𝗟𝗶𝘃𝗲 𝗗𝗮𝘁𝗮, 𝗢𝟮𝗦, 𝗢𝗕𝗠, 𝗘𝗩𝗔𝗣, 𝗮𝗻𝗱 𝗺𝗼𝗿𝗲. 】Pulling a code tells you something is wrong. IF745 tells you what the code means, when the fault happened, and what data surrounds it. Pass emissions with one I/M Readiness tap. Freeze the fault moment with Freeze Frame. Monitor live sensor data in real time. Turn cryptic codes into clear answers.
- 【🛒 𝗜𝗙𝟳𝟰𝟱 𝗽𝗲𝗿𝗳𝗼𝗿𝗺𝘀 𝗳𝘂𝗹𝗹-𝘀𝘆𝘀𝘁𝗲𝗺 𝗱𝗶𝗮𝗴𝗻𝗼𝘀𝘁𝗶𝗰𝘀 𝗮𝗰𝗿𝗼𝘀𝘀 𝗮𝗹𝗹 𝗺𝗼𝗱𝘂𝗹𝗲𝘀—𝗲𝗻𝗴𝗶𝗻𝗲, 𝗔𝗕𝗦, 𝗮𝗶𝗿𝗯𝗮𝗴, 𝘁𝗿𝗮𝗻𝘀𝗺𝗶𝘀𝘀𝗶𝗼𝗻, 𝘀𝘁𝗲𝗲𝗿𝗶𝗻𝗴, 𝘀𝘂𝘀𝗽𝗲𝗻𝘀𝗶𝗼𝗻, 𝗯𝗼𝗱𝘆 𝗲𝗹𝗲𝗰𝘁𝗿𝗼𝗻𝗶𝗰𝘀, 𝗮𝗻𝗱 𝗺𝗼𝗿𝗲. 】Warning lights on but you don't know why? Skip the $100+ diagnostic fee at the shop. Run a complete self-check from your driveway. IF745 reads and clears fault codes, retrieves ECU info, and displays live data from every accessible module—delivering a full vehicle health report in minutes, without leaving home.
- 【✅𝗜𝗙𝟳𝟰𝟱 𝗳𝗲𝗮𝘁𝘂𝗿𝗲𝘀 𝗮 𝟳-𝗶𝗻𝗰𝗵 𝗱𝗶𝘀𝗽𝗹𝗮𝘆, 𝗲𝗿𝗴𝗼𝗻𝗼𝗺𝗶𝗰 𝗱𝗲𝘀𝗶𝗴𝗻, 𝗪𝗶-𝗙𝗶 𝘂𝗽𝗱𝗮𝘁𝗲𝘀, 𝗮𝗻𝗱 𝘇𝗲𝗿𝗼 𝘀𝘂𝗯𝘀𝗰𝗿𝗶𝗽𝘁𝗶𝗼𝗻 𝗳𝗲𝗲𝘀 𝗳𝗼𝗿 𝗵𝗮𝘀𝘀𝗹𝗲-𝗳𝗿𝗲𝗲 𝗱𝗶𝗮𝗴𝗻𝗼𝘀𝘁𝗶𝗰𝘀.】Large screen means no squinting. Intuitive navigation and customizable data displays put key info at your fingertips. Wi-Fi delivers lifetime free updates without a computer. No recurring fees. No hidden costs. Just a reliable tool that works as hard as you do.
This product presentation was made with AAWP plugin.