
NHTSA ID Number: 10162714
Manufacturer Communication Number: 17730-319 Rev A
TSB/Document Date: 2019-07-15
Summary
Operation Name: Hendrickson Truck Commercial Vehicle Systems Document Name: Technical Procedure - AIRTEK Front Air Suspension System for Tiffin Motorhome Chassis Summary: This document provides preventive maintenance, service, repair and rebuild instructions for Hendrickson AIRTEK front suspension and axle systems equipped on Tiffin Motorhome Chassis vehicles.
11. Raise the bottle jack until there is NO
CLEARANCE between the knuckle assembly and the bottom of the axle, slightly
lifting the axle.
12. Check the reading on the dial indicator. The
specification for vertical travel on the steering knuckle during assembly is 0.008" to 0.011".
13. If the clearance is above 0.011", loosen the socket head cap screws and push down on the
knuckle assembly until the proper vertical end play is achieved.
If the clearance is below 0.008", loosen the socket head cap screws and pull up on the
knuckle assembly until the proper vertical end play is achieved.
NOTE
The socket head cap screw comes with a pre-applied Loctite compound.
PRIOR TO INSTALLATION ENSURE THAT ALL RESIDUAL LOCTITE MATERIAL IS REMOVED FROM THE
MOUNTING BOLTS AND THE THREAD BORES IN THE UPPER STEERING KNUCKLE, AND NEW LOCTITE
277 OR EQUIVALENT IS APPLIED TO HELP ENSURE THAT THE BOLTS SUSTAIN THE PROPER TORQUE
REQUIREMENT. FAILURE TO DO SO CAN CAUSE LOSS OF VEHICLE CONTROL RESULTING IN PERSONAL
INJURY OR PROPERTY DAMAGE.
14. Remove one old socket head cap screw and replace with new socket head cap screw.
15. Remove second socket head cap screw and replace with new socket head cap screw. Tighten
both socket head cap screws to 188 ± 12 foot pounds torque.
16. Recheck the vertical end play with the dial indicator or a 0.010" feeler gauge, see Figure 9‑43.
17730-319
53
Component Replacement
AIRTEK® for Tiffin Motorhome Chassis
17. Remove the brake spider bolts, they should thread out freely.
18. Remove the bottle jack and continue assembling the wheel ends.
IMPORTANT NOTE
It is critical to apply Loctite to the three brake spider bolts to ensure that these bolts sustain the
proper torque requirement of steering knuckle assembly.
19. Apply Loctite to the three brake spider bolts prior to installation into the brake spider. Tighten
bolts to 188 ± 12 foot pounds torque.
DO NOT GREASE KNUCKLES WITHOUT THE BRAKE SPIDER INSTALLED AND TIGHTENED TO PROPER
TORQUE. FAILURE TO DO SO CAN CAUSE COMPONENT DAMAGE RESULTING IN FAILURE AND LOSS OF
VEHICLE CONTROL, POSSIBLY CAUSING PERSONAL INJURY OR PROPERTY DAMAGE.
20. Install the tie rod end into the lower steering knuckle arm.
21. Tighten the castle nuts to 185 foot pounds torque then rotate the castle nut to the next
castle slot and install cotter pin.
22. Install the drag link into the steering arm and tighten to the vehicle manufacturer’s
specifications.
23. Install new O-rings on the grease caps and lubricate O-rings with grease.
24. Install new grease caps. Note the grease caps on the STEERTEK NXT axle are threaded, tighten
to 60 ± 10 foot pounds torque. Allow 30 minutes for thread sealant to cure before greasing.
Install new grease zerk and tighten to a minimum of 15 foot pounds, see Figure 9-44.
FIGURE 9-44
Grease Zerk
Tightening Torque
minimum of 15 ft. lbs.
(20 Nm)
Grease Cap Threads
Tightening Torque
60 ± 10 ft. lbs.
(81 ± 14 Nm)
Grease Cap Threads
Tightening Torque
60 ± 10 ft. lbs.
(81 ± 14 Nm).
25. Install brakes, drums, wheels and tires.
26. Remove jack and safety stands.
27. Grease steering knuckles with the vehicle on the floor.
28. Remove the wheel chocks.
Component Replacement
54
17730-319
AIRTEK® for Tiffin Motorhome Chassis
TIE ROD END AND CROSS TUBE
NOTE
Hendrickson supplies different tie rod configurations. Prior to ordering find the part number on the
tie rod tube, refer to Hendrickson Technical Bulletin Literature No. SEU-0223 for additional information or contact Hendrickson Truck Parts (e‑mail: truckparts@hendrickson‑intl.com).
DISASSEMBLY
FIGURE 9-45
1. Chock the wheels.
2. Position the steer axle tires straight ahead.
3. Remove the cotter pin and castle nut.
4. Lightly tap the side of the Ackermann arm to
loosen the tie rod end from the Ackermann
arm, see Figure 9-45.
Lightly tap the side
of Ackermann arm to
loosen the tie rod end
5. Repeat Steps 3 and 4 to remove the other tie rod end.
6. Remove the cross tube and tie rod ends from the vehicle.
7. Mount the cross tube in a soft jaw vice.
8. Remove the hardware from the clamp on the cross tube.
9. Count the exposed threads on the tie rod end being replaced.
10. Remove the tie rod end from the cross tube.
DO NOT HEAT THE CROSS TUBE WITH A TORCH TO FACILITATE THE REMOVAL OF THE TIE ROD END. THE
USE OF SUCH HEAT CAN ADVERSELY AFFECT THE STRENGTH OF THE CROSS TUBE. A COMPONENT
DAMAGED IN THIS MANNER WILL RESULT IN LOSS OF WARRANTY, AND CAN RESULT IN THE AND LOSS
OF VEHICLE CONTROL, AND POSSIBLE PERSONAL INJURY OR PROPERTY DAMAGE.
11. If the opposing tie rod end is being replaced repeat Steps 8 through 10.
12. Inspect the cross tube for dents, cracks, or thread damage. Replace the cross tube if needed.
ASSEMBLY
1. Lubricate the new tie rod end threads with Anti-Seize.
NOTE
When installing the cross tube the thread direction of the tie rod ends are as follows:
■ A right hand threaded tie rod end will be installed into the right side Ackermann arm.
■ A left hand threaded tie rod end will be installed into the left side Ackermann arm.
2. Install the new tie rod end into the cross tube, leaving the same amount of threads exposed
that were counted on the failed tie rod end prior to removal.
THE THREADED PORTION OF THE TIE ROD END MUST EXTEND PAST THE SLOTS INTO THE TIE ROD
CROSS TUBE, SEE FIGURE 9-46. FAILURE TO DO SO CAN CAUSE COMPONENT DAMAGE, LOSS OF
VEHICLE CONTROL AND POSSIBLE PERSONAL INJURY OR PROPERTY DAMAGE.
IT IS CRITICAL TO CHECK THE 5⁄ 8" TIE ROD CLAMP BOLT HEAD LOCATION TO VERIFY THE CLAMP
FASTENERS HAVE SUFFICIENT CLEARANCE AWAY FROM THE LOWER SHOCK MOUNT AT FULL WHEEL
CUT. THE FASTENERS MUST NOT CONTACT THE LOWER SHOCK MOUNT. FAILURE TO DO SO CAN
CAUSE ONE OR MORE COMPONENTS TO FAIL CAUSING LOSS OF VEHICLE CONTROL AND POSSIBLE
PERSONAL INJURY OR PROPERTY DAMAGE.
17730-319
55
Component Replacement
AIRTEK® for Tiffin Motorhome Chassis
FIGURE 9-46
5/8"
Tie Rod Clamp Bolt
It is critical to check the 5/8" tie rod clamp bolt head
location to verify the clamp fasteners have sufficient
clearance away from the lower shock mount at full
wheel cut. The fasteners must not contact the
lower shock mount.
Tie Rod Cross Tube Slots
It is critical to have the threaded portion of the tie
rod end extend past the slots in the tie rod cross tube.
Threaded Portion
of the Tie Rod End
5/8" Tie
Rod Clamp Locknut
Tightening Torque 68 ± 7 ft. lbs. (92 ± 9 Nm)
3. Replace the opposing tie rod end if necessary by repeating Steps 1 and 2.
DO NOT HEAT THE CROSS TUBE WITH A TORCH TO ROTATE THE CROSS TUBE IN THE TIE ROD END.THE USE
OF SUCH HEAT CAN ADVERSELY AFFECT THE STRENGTH OF THE CROSS TUBE. A COMPONENT DAMAGED
IN THIS MANNER WILL RESULT IN LOSS OF WARRANTY, AND CAN RESULT IN THE LOSS OF VEHICLE
CONTROL, AND POSSIBLE LOWER STEERING KNUCKLE PERSONAL INJURY OR PROPERTY DAMAGE.
4. If replacing opposing tie rod end is not necessary it is critical that the cross tube will rotate in
the opposing tie rod end.
5. Install the cross tube into the Ackermann arms.
6. Tighten the castle nuts to 185 foot pounds torque then rotate the castle nut to the next
castle slot and install cotter pin.
7. Grease tie rod ends. See Lubrication Chart for required lubricant in the Preventive Maintenance
Section of this publication.
8. Set the toe, see Toe Adjustment Procedure in the Alignment & Adjustments Section of this
publication.
9. Remove the wheel chocks.
Component Replacement
56
17730-319
AIRTEK® for Tiffin Motorhome Chassis
SECTION 10
Front Wheel Alignment Specifications
AIRTEK FOR TIFFIN MOTORHOME CHASSIS
FRONT AIR MODULE SUSPENSION ALIGNMENT SPECIFICATION
CAMBER1
RANGE
DESIGN SPECIFICATION
MINIMUM
MAXIMUM
LEFT
0.00º ± 1.0º
-1.0º
+1.0º
RIGHT
- 0.25º ± 1.0º
-1.25º
+0.75º
CROSS
Max 2.0º
—
—
CAMBER NOTES:
1
The camber angle is not adjustable. Do not bend axle or otherwise try to adjust camber. If found out of specification, notify
Hendrickson Tech Services for further information.
CASTER1,2
RANGE
DESIGN SPECIFICATION
MINIMUM
MAXIMUM
LEFT
5º ± 1º
+4º
+6º
RIGHT
5º ± 1º
+4º
+6º
Max 1.0º
—
—
CROSS3
CASTER NOTES:
1
Caster is determined with the vehicle at specified ride height for air suspension or at rated load for mechanical suspension systems.
It is critical that the vehicle front and rear ride height is within specifications prior to performing a caster measurement or adjustment.
Refer to vehicle manufacturer’s ride height specifications and procedure.
2
In most cases actual vehicle caster is defined with the frame rails at zero slope. Refer to the vehicle manufacturer’s specifications
for correct frame rail slope. (Both the alignment surface and the vehicle’s frame rails should be level during execution of alignment
procedures). For vehicles with a positive frame rake (higher in rear) add the frame slope (in degrees) to the caster reading to
determine true vehicle caster.
3
The cross caster angle is not adjustable – Do not bend axle or otherwise try to adjust cross caster. If found out of specifications
notify Hendrickson Tech Services for further information. Changes to caster can be attained by using caster shims as p rovided by
the vehicle manufacturer or chassis and body manufacturer. Caster shims must match, side to side, to reduce uneven loading to the
suspension components. The use of two different angle caster shims will not correct cross caster.
4
Example of caster adjustment: 2.5º RH / 3º left hand, would require one, 1.0 shim on each side to increase caster and achieve
3.5° RH / 4.0° left hand, which is in specification. Do not attempt to use uneven shims.
Hendrickson recommends following TMC2 practices:
RANGE
DESIGN SPECIFICATION¹
TOTAL TOE2
1/16"
± 1/32" (0.06" ± 0.03")
MINIMUM
MAXIMUM
1/32"
3/32"
(0.03")
(0.09")
TOE-IN NOTES:
1
Toe-in is to be set and adjusted in the normal vehicle unladed configuration. Actual vehicle curb weight on the ground. Toe should be
checked at the tires front and rear tread center, at a distance above ground equal to the tire’s rolling radius.
2
In most instances total toe is set by the vehicle manufacturer or body builder. Consult the vehicle manufacturer for specifications.
17730-319
57
Component Replacement
AIRTEK® for Tiffin Motorhome Chassis
SECTION 11
Troubleshooting Guide
AIRTEK with STEERTEK NXT Axle for Tiffin Motorhome Chassis
TROUBLESHOOTING GUIDE
CONDITION
Worn or damaged kingpins
and kingpin bushings
Vibration or shimmy of front
axle during operation
Excessive wear on tires or
uneven tire tread wear
Vehicle is hard to steer
Tie rod ends are worn and
require replacement
Troubleshooting Guide
POSSIBLE CAUSE
CORRECTION
Dirt in system– contaminated lubricant
Polish and inspect kingpin, replace bushing and seals,
then follow specified lubrication procedures
Incorrect lubricant
Lubricate axle with specified lubricant
Axle not lubricated at scheduled frequency
Lubricant axle at scheduled frequency
Incorrect lubrication procedures
Use correct lubrication procedures
Lubrication interval not compatible with
operating conditions
Change lubrication interval to match operating
conditions
Worn or missing seals
Replace worn or missing seals
Caster out of specification
Set proper ride height then adjust caster to specification
Wheels and / or tires out of balance
Balance or replace wheels and / or tires
Worn shock absorbers
Replace shock absorbers
Broken engine mount
Replace engine mount
Wheel bearing adjustment
Adjust wheel bearing to the vehicle manufacturers
specifications.
Tires have incorrect air pressure
Adjust tire pressure to manufacturer’s specification.
Tires out of balance
Balance or replace tires
Incorrect tandem axle alignment
Align tandem axles
Incorrect toe setting
Adjust toe-in to manufacturer’s specification
Incorrect steering arm geometry
Repair steering system as necessary
Worn kingpin bushings
Replace kingpin bushings
Excessive wheel bearing end play
Check specified wheel nut torque, replace worn or
damaged wheel bearings
Wheel bearing adjustment
Adjust wheel bearing to the vehicle manufacturers
specifications.
Low pressure in the power steering system
Repair power steering system
Steering linkage needs lubrication
Lubricate steering linkage
Steering knuckles are binding
Check vertical clearance
Incorrect steering arm geometry
Repair steering system as necessary
Caster out of specification
Set proper ride height per the vehicle manufacturer’s
instructions,then adjust caster to specification
Tie rod ends hard to move
Replace tie rod ends
Worn thrust bearing
Replace thrust bearing
Steering gear box internal problem
Perform steering gear trouble shooting procedures per
steering gear manufacturing guidelines.
Tie rod ends need lubrication
Lubricate tie rod end. Make sure lubrication schedule is
followed.
Severe operating conditions
Increase frequency of inspection and lubrication
intervals
Damaged boot on tie rod end
Replace tie rod end
58
17730-319
AIRTEK® for Tiffin Motorhome Chassis
AIRTEK with STEERTEK NXT Axle for Tiffin Motorhome Chassis
TROUBLESHOOTING GUIDE
CONDITION
Bent or broken tie rod cross
tube, tie rod end ball stud or
tie rod end
NOTE:
Damaged components
require replacement
Worn or broken steering ball
stud
Suspension has harsh or
bumpy ride
Restricted steering radius
Vehicle leans
Vehicle wanders
17730-319
POSSIBLE CAUSE
CORRECTION
Pump / gear relief valve pressure setting exceeds
system specifications
Adjust power steering system to manufacturer’s
specified pressure
Steering gear poppets improperly set or
malfunctioning
Check for proper operation or adjust poppets to OEM
specifications
Axle stops improperly set
Set axle stops to OEM specifications
Severe duty cycle service
Increase frequency of inspection and lubrication
intervals

- rv toilet brush: Engineered specifically for RVs, this brush...
- Compact Wall-Mounted Toilet Brush: With its space-saving...
- silicone toilet brush: This brush is designed for thorough...
- Wall-Mounted Toilet Brush for RV Travel: The brush head is...
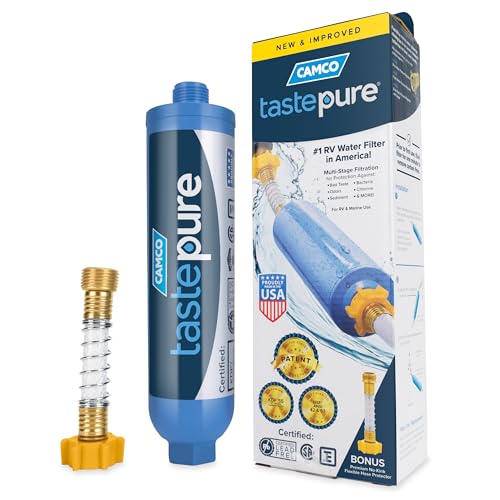
- Advanced 6-Step Filtration Technology: Discover the...
- Certified Lead-Free: This camping water filter is...
- Access to Pure, Great-Tasting Water: Enjoy clean water...
- Patented Technology & Made in the USA: This in-line water...
- Versatile Applications: Easily attach this multi-purpose...

If the PDF is very large, it may not load in the preview below.
Some older TSBs had multiple PDFs — visit the NHTSA Website to view all PDFs.
If the TSB PDF does not show, download or view it on the NHTSA Website.
Click on the (+) Plus Sign
Then Click on Associated Document(s)
Search NHTSA Database for Recalls
Search NHTSA Database for Vehicle Investigations
View Latest Vehicle Investigations
Search NHTSA Database for Vehicle Complaints
View Latest Vehicle Complaints
TSB/Document ID: 17730-319 Rev A
Replacement Service Bulletin Number:
MFR Communication Date: 2019-03-01
MFR Internal Campaign ID/Software Version:
Communication Type: Service Bulletin/Repair Instructions
NHTSA Components: SUSPENSION
MFR Component System:
MFR Component Subsystem:
Previous TSB | Next TSB |

- [Notice] When you receive a used device, it may be a customer return resold by Amazon without inspection. You can exchange it for a new one through Amazon. As this situation is unavoidable, we sincerely apologize. For any issues, contacting us via Amazon's "Messages" is the best way. THINKSCAN 689BT Bidirectional Scan Tool Can Be Used Immediately After It is Turned On, Without Complicated Registration Process, Which is More Convenient & Quick.
- Full Bi-Directional Control & 3000+ Active Tests: Take control and test components like actuators, fuel injectors, relays, and cooling fans in real time. You’ll quickly see if the problem is in the part itself or the control module — saving you hours of guesswork and frustrating trial-and-error.
- Advanced ECU Coding Capabilities: Handle module matching and hidden feature activation with confidence. When you replace an ECU or want to customize settings, this obd2 scanner diagnostic bi directional tool gives you the professional-level capabilities you need without the dealership price tag.
- 34+ Useful Reset and Maintenance Functions: Complete everyday service tasks smoothly with a wide range of helpful reset and maintenance functions. Whether you’re keeping up with regular upkeep or tackling a specific job, this scanner makes maintenance simpler and less stressful for both DIYers and pros.
- Comprehensive Full System Diagnostics: Diagnose every major system — Engine, Transmission, ABS, SRS, TPMS, and more — all in one place. Finally stop wondering if you’re missing something important; get the full picture and clear codes with ease.

- Top Reasons to Choose the D7S OBD2 Scanner: XTOOL D7S car scan tool, an upgrade of XTOOL D7, offers comprehensive features for automotive technicians, workshops, and DIY enthusiasts 1. Upgraded Hardware: 2+64GB memory, rear camera, intuitive interface, foldable bracket 2. Complete Diagnostics: FCA
 Autoauth, OE-level all system scan, 39+ maintenance services, 4K+ bidirectional, CANFD/DoIP protocol 3. Advanced Capabilities: ECU coding, PMI functions 4. Wide Compatibility: Support 10,000+ models, covering 99% vehicle brands 5. Multi-language: Available in 22+ languages, No IP Restrictions 6. 3-Year Updates: Save 300 bucks on software updates for the latest features and optimizations
 - 2026 Upgraded D7S Car Scanner Features: The newly 2026 D7S V2.0 scanner for car brings exciting features for advanced vehicle diagnostics and enhanced user experience 1. FCA AutoAuth: Now supports FCA SGW module for Chrysler, for Jeep, for Dodge (2018+), for Fiat (2017+), enabling faster vehicle communication without gateway restrictions 2. PMI (Offline ECU Programming): Allows for Ford, for Lincoln, and for Mazda ECU programming for new modules 3. Optimized Diagnostic Report 2.0: Personalized reports with logos and customer info for auto shops. Note: Compatibility varies by cars, please check before order
- Cost-effective ECU Coding Scan Tool for Specific Brands: Enhance your vehicle's performance with XTOOL D7S! This obd2 scanner all systems bidirectional offers advanced capabilities at an affordable price, supports online for BMW, for Benz and offline for BENZ, for MIT, along with PMI functions for Ford, for Mazda, and for Lincoln. Ideal for technicians and DIY enthusiasts, this automotive scanner diagnostic tool optimizes vehicle performance and enhances the driving experience. Note: Not for all cars and modules, please send car VIN to check the compatibility before purchase
- OE All System Diagnostic & 8 Pids Graphing: XTOOL D7S is a comprehensive all system bi directional obd2 scanner that delivers dealer-level diagnostics, completely controlling over your vehicle’s performance and health. This automotive scan tool can read and clear DTCs, view live data and ECU information, retrieve freeze frames, and perform active tests and full obd2 functions. This bi-directional scan tool can can identify your vehicle's make, model, and year information with just one click and show up to 8 PIDs live data with options for CSV viewing, playback, and recording for in-depth analysis. It is easy-to-use for both professionals and beginners, helping pinpoint issues efficiently
- 3 Years Software Update, Value for Money: With 3 years of software updates and 22+ languages(no IP restrictions), XTOOL D7S auto scanner code scanner ensures ongoing compatibility for the latest car models and improved diagnostic functions. This all system vehicle diagnostic scanner comes with a 30-day return policy and a 24-month repair for dependable performance. XTOOL are dedicated to your satisfaction, so enjoy seamless support and lifetime expert assistance. Should you encounter any issues or concerns, don’t hesitate to reach out XTOOL. D7S with newest update with 22 languages freely transfer without authorization, check details from setting-language or from XTOOL

- 【✅Compared to BOSSCOMM IF742, IF745 Offers Full-System Diagnostics】The BOSSCOMM IF745 car diagnostic scanner is an upgraded model of IF742. In addition to supporting all OBD2 Code Reader functions and 6 reset options (ABS/EPB/SAS/BMS/Oil/Throttle), it expands diagnostics from 4 systems (Check Engine/ABS/SRS/Transmission) to vehicle All systems, including Steering, Suspension, and Body Electronics. This provides deeper, more comprehensive diagnostic capabilities.
- 【✨10 OBD2 Functions】The BOSSCOMM IF745 scan tool’s DTC Lookup instantly translates fault codes into user-friendly explanations, its I/M Readiness feature streamlines emissions testing with a single tap, and Freeze Frame lets you pinpoint the exact moment of a fault for in-depth root-cause diagnosis. Combined with a live data dashboard and advanced diagnostics (O2S, OBMon, EVAP), it delivers comprehensive insights for confident troubleshooting.
- 【✨Deep Diagnostics for All Vehicle System Modules】Beyond code reading/clearing and ECU information retrieval, our all-in-one data stream feature lets you inspect all current fault codes and their locations across the vehicle’s systems. This vehicle code reader helps you turn off dashboard warning lights and perform a comprehensive self-check of your car at home—no more back-and-forth trips to the repair shop or hefty inspection fees.
- 【✨6 Essential Resets: ABS Bleeding, Oil, EPB, SAS, Throttle, BMS】The BOSSCOMM IF745 obd2 scanner diagnostic tool swiftly purges air from brake lines to restore braking sensitivity, fine-tunes maintenance cycles to eliminate false alerts, resolves parking brake issues with one-click control, recalibrates steering sensors for stability, optimizes engine idling/acceleration for smoother performance, and deeply resets battery systems to extend lifespan and range via precise parameter adjustments.❗NOTE: Does NOT support bidirectional control, coding, or programming.
- 【✨10,000+ Car Models, AutoVIN, 13 Languages】The BOSSCOMM IF745 vehicle scanner diagnostic tool covers 73+ global car brands and offers support in 13 languages, making it perfect for DIYers, auto mechanics, or as a thoughtful gift. With a single-click AutoVIN feature, it instantly retrieves vehicle serial numbers, streamlining diagnostics for users globally. This adaptable tool balances user-friendliness with precision, catering to both personal and professional requirements.✅Unsure about compatibility? Compatibility will vary on vehicles' model and year, pls reach us via 📧 [email protected] 📧 before purchase.
This product presentation was made with AAWP plugin.