
NHTSA ID Number: 10225246
Manufacturer Communication Number: R28R29
TSB/Document Date: 2022-10-31
Summary
Customer Satisfaction Notification R28/R29 Engine Oil Contamination and Consumption
7. Transfer idler pulley from the original engine block to the NEW engine long
block. Tighten the mounting nut to 40 ft. lbs. (54 N·m).
8. Transfer A/C compressor from the original engine block to the NEW engine
long block. Tighten the bolts that secure the A/C compressor to the cylinder
block to 17 ft. lbs. (23 N·m).
Customer Satisfaction Notification R28/R29
Engine Oil Contamination and Consumption
Page 41
Service Procedure (Continued)
9. Transfer the clutch disc and the pressure plate assembly from the original
engine block to the NEW engine long block.
a. Insert Clutch Alignment Tool 10018 into pilot bearing.
b. Install the clutch disc over the clutch alignment tool and up against flywheel.
c. Install the pressure plate assembly over the clutch alignment tool and up
against the flywheel with index marks aligned and onto the dowel pins next
to each bolt location. Assure all clutch component alignment paint marks are
lined up before being bolted down.
NOTE: If a new clutch or flywheel is being installed, align the cover
balance spot as close as possible to the flywheel balance orange spot.
NOTE: Do Not reuse the original bolts when installing the clutch cover.
Replace the bolts whenever the clutch is removed.
d. Install the NEW bolts to hold the clutch cover plate to the flywheel.
e. A few turns at a time, tighten
the bolts (1 through 6) to hold
the clutch cover plate to the
flywheel in the pattern
illustrated until bolts are
seated. Verify that the tool
10018 slides smoothly out and
back into the pilot bearing. If
not, loosen the cover plate
bolts and reposition the clutch
discs and tighten the bolts
again in the same fashion.
NOTE: If the tool 10018 does
not slide out and in smoothly
the transmission will not seat
against the bellhousing
during installation.
Figure 49 – Bellhousing Torque Sequence
Customer Satisfaction Notification R28/R29
Engine Oil Contamination and Consumption
Page 42
Service Procedure (Continued)
f. Then tighten the bolts in the same pattern to 55 ft. lbs. (75 N·m).
g. Remove the clutch disc alignment tool 10018.
10. Transfer the flywheel inspection/dust cover from the original engine block to
the NEW engine long block.
11. Transfer the throttle bodies from the original engine block to the NEW engine
long block. Tighten the throttle body bolts in a mandatory torque criss - cross
pattern sequence to 71 in. lbs. (8 N·m).
12. Transfer the motor mount brackets, heat shields and the engine ground strap
(right side only) from the original engine block to the NEW engine long block.
Tighten the motor mount bracket nuts to 45 ft. lbs. (61 N·m).
13. Transfer the coolant line for the oil cooler from the original engine block to the
NEW engine long block.
14. Install the NEW engine oil cooler lines to the NEW engine long block
15. Attach the NEW engine oil cooler to the NEW engine oil cooler lines.
16. Continue with Section E. Install Engine Long Block.
Customer Satisfaction Notification R28/R29
Engine Oil Contamination and Consumption
Page 43
Service Procedure (Continued)
E. Install Engine Long Block
1. Install the Engine Lifting Bracket, Rear 10034-2 to the right rear cylinder head
boss of the NEW engine long block (Figure 48).
2. Install the Engine Lifting Bracket, Front 10034-1 to the left front cylinder head
boss of the NEW engine long block (Figure 47).
3. Attach an appropriate chain to the engine lifting brackets. Attach an engine
hoist and lower the NEW engine long block into the engine compartment.
4. Install the engine mount isolator nuts and tighten to 45 ft. lbs. (61 N·m)
(Figure 46).
5. Remove the engine lift brackets from the engine and remove the engine hoist
6. Raise the vehicle on hoist.
7. Install a suitable jack stand to support the engine.
8. Install the ground strap to the right side frame rail and tighten securely
(Figure 45).
9. Position the harness to the bellhousing and connect the oxygen sensor electrical
connectors.
10. Install the bellhousing to the NEW engine long block. Tighten the bolts to
40 ft. lbs. (54 N·m) (Figure 44).
Customer Satisfaction Notification R28/R29
Engine Oil Contamination and Consumption
Page 44
Service Procedure (Continued)
11. Use the following steps to install the transmission.
a. While guiding the transmission around obstacles, lift the transmission into
the underbody tunnel until it aligns with the opening in the bellhousing.
b. Slide transmission into the clutch until it is seated against the bellhousing.
c. Install the eight transmission bolts and tighten to 40 ft. lbs. (54 N·m).
d. Connect the reverse lamp switch, reverse lockout solenoid and skip shift
solenoid harness connectors to the transmission.
e. Using a crowfoot wrench, install the shift handle on the shift tower.
f. Place the rear crossmember in position under the rear transmission mount
(Figure 43).
g. Loosely install the two bolts to hold the crossmember to the rear
transmission mount (Figure 43).
h. Install the four bolts to hold the crossmember to the frame. Tighten the bolts
to 24 ft. lbs. (33 N·m) (Figure 43).
i. Tighten the crossmember adjustment nuts to 24 ft. lbs. (33 N·m) (Figure 43).
j. Tighten the crossmember the transmission mount bolts to 29 ft. lbs.
(40 N·m) (Figure 43).
k. Connect the hydraulic clutch quick connector to the clutch release bearing
(Figure 42).
l. Install the propeller shaft using the NEW universal joint bolts and straps.
Tighten the NEW bolts to 28 ft. lbs. (38 N·m) (Figure 41).
Customer Satisfaction Notification R28/R29
Engine Oil Contamination and Consumption
Page 45
Service Procedure (Continued)
12. Install the bolts securing A/C line to oil pan. Tighten the bolts to 80 in. lbs.
(9 N·m) (Figure 40).
13. Install the starter. Tighten the bolts to 40 ft. lbs. (54 N·m) (Figure 39).
14. Position the positive cables onto the starter solenoid post. Tighten the nut to
124 in. lbs. (14 N·m) (Figure 39).
15. Connect the starter solenoid electrical connector (Figure 39).
16. Connect exhaust system at left and right exhaust manifolds using NEW V-Band
clamps. Tighten V-Band clamps to 97 in. lbs. (11 N·m).
17. Install the left and right catalytic converter support hanger bracket bolts.
Tighten the bolts to 21 ft. lbs. (28 N·m).
18. Use the following steps to install the left and right side sill panels.
a. With the help of an assistant, slide the sill trim panel inward into position on
the sill panel.
b. Loosely install the front sill panel fasteners (Figure 38).
c. Align the front sill panel fasteners to the marks made during removal and
tighten securely (Figure 38).
d. Install the fastener into the hood stabilizer bumper and tighten securely
(Figure 38).
Customer Satisfaction Notification R28/R29
Engine Oil Contamination and Consumption
Page 46
Service Procedure (Continued)
e. Install the front wheelhouse splash shield to sill fasteners and tighten to
15 ft. lbs. (20 N·m) (Figure 38).
f. Install the fasteners into the bottom of the sill trim panel and tighten securely
(Figure 37).
g. Install the fasteners securing the sill trim panel to the quarter panel and
tighten securely (Figure 36).
h. Position the rear wheelhouse splash shield to the vehicle
i. Route the rear brake air duct into the opening in the rear wheelhouse splash
shield.
j. Position the rear wheelhouse splash shield into the wheelhouse fully.
k. Install the fasteners securing the rear wheelhouse splash shield and tighten
securely (Figure 35).
l. Install the three rear belly pan fasteners (Figure 34).
m. Install the upper fastener to the rear wheelhouse splash shield (Figure 34).
n. Install the two sill trim panel fasteners (Figure 34).
o. Install the two fasteners to the trunk pan (Figure 34).
p. Install the under body belly pan (Figure 13). Tighten the bolts to 18 ft. lbs.
(25 N·m).
q. Install the rear tire and wheel assemblies. Tighten to 107 ft. lbs. (145 N·m).
r. Close the radiator draincock and install the front extension belly pan
(Figure 12).
s. Lower the vehicle.
t. Open the door and install the fasteners to the sill trim panel (Figure 33).
Customer Satisfaction Notification R28/R29
Engine Oil Contamination and Consumption
Page 47
Service Procedure (Continued)
19. Connect the brake booster vacuum supply hose to the intake manifold.
20. Connect the fuel line (Figure 32).
21. Position the HVAC air inlet duct and install the four screws securing the HVAC
air inlet duct. Tighten securely (Figure 31).
22. Connect the headlamp and dash wire harness connector to the wiper motor
pigtail wire connector.
23. Position the wiper motor assembly and install the three wiper motor assembly
mounting fasteners. Tighten to 7 ft. lbs. (10 N·m) (Figure 30).
24. Install the cowl cover and cowl screens. Tighten the screws securely
(Figure 29).
25. Install the windshield wiper arms (Figure 28).
26. Connect the A/C clutch electrical connector (Figure 27).
27. Connect the A/C lines to A/C compressor. Tighten the bolts to 17 ft. lbs.
(23 N·m) (Figure 27).
28. Install the Make Up Air (MUA) hose (Figure 26).
29. Install the foam block over the fuel rail (Figure 26).
30. Connect the engine wiring harness connector and the ground wire to the stud at
the left side frame rail. Tighten the nut to 124 in. lbs. (14 N·m) (Figure 25).
31. Connect the wire harness retaining clips to the body and position the Powertrain
Control Module (PCM) connectors to the PCM.
32. Connect the three PCM connectors (Figure 24).
33. Install the PCM electrical connector cover.
Customer Satisfaction Notification R28/R29
Engine Oil Contamination and Consumption
Page 48
Service Procedure (Continued)
34. Install the three bolts securing the engine oil cooler to the oil cooler mounting
bracket and tighten securely (Figure 23).
35. Connect the two heater hoses to the engine oil cooler (Figure 23).
36. Connect the coolant reservoir inlet hose to the coolant reservoir (Figure 22).
37. Connect the body side heater hose to the engine (Figure 22).
38. Install the generator. Tighten the bolts to 35 ft. lbs. (47 N·m) (Figure 21).
39. Connect the battery positive eyelet to the generator (Figure 21).
40. Connect the generator electrical connector (Figure 21).
41. Install the power steering pump. Tighten the three bolts to 18 ft. lbs. (24 N·m)
(Figure 20).
42. Install the accessory drive belt (Figure 19).
43. Install the upper radiator hose (Figure 18).
44. Install the front strut tower brace and install strut tower brace retaining bolts
then tighten securely (Figure 18).
45. Attach all wire harness and hose retaining clips to the front strut tower brace.
46. Install the two bolts securing the power steering reservoir bracket and tighten
securely (Figure 17).
47. Install the bolt securing the power steering reservoir to the bracket and tighten
securely (Figure 16).
48. Connect the purge solenoid electrical connector, vapor line and vacuum hose
(Figure 15).
49. Install the right and left side ignition coil covers (Figure 14).
Customer Satisfaction Notification R28/R29
Engine Oil Contamination and Consumption
Page 49
Service Procedure (Continued)
50. Install the cross brace. Tighten bolts to 15 ft. lbs. (20 N·m) (Figure 14).
51. Install the air cleaner housing assembly (Figure 11).
52. Evacuate and recharge air conditioning system using the manufacturer’s
instructions.
53. Fill the engine cooling system.
54. Check the engine crankcase for the proper oil fill level.
NOTE: The engine long block is delivered with the proper oil fill level.
55. Install the hood. Tighten nuts to 12 ft. lbs. (16 N·m) (Figure 10).
56. Install the headlamp assemblies (Figure 10).
57. Install the shift boot and shift lever.
58. Use the following steps to bleed the hydraulic clutch system.
a. Check the brake master cylinder reservoir fluid level, if necessary, add
D.O.T. 4 brake fluid.
CAUTION: Use only D.O.T. 4 brake fluid. Other fluids are not
compatible.
b. Release the retaining clip at the slave cylinder coupling.
c. Separate the line from the slave cylinder enough to create a leak.
d. Slowly actuate the clutch pedal until fluid flows from the open coupling.
e. Snap the slave cylinder coupling together until the retaining clip locks in
place.
Customer Satisfaction Notification R28/R29
Engine Oil Contamination and Consumption
Page 50
Service Procedure (Continued)
f. Actuate the clutch pedal several cycles until the slave cylinder releases and
applies the clutch.
g. Allow the clutch to rest for a count of 20 to allow the fluid to stabilize.
h. Actuate the clutch to verify proper operation.
i. If necessary, top off the fluid level in the reservoir.
59. Connect the battery negative cable. Tighten the nut to 15 ft. lbs. (16 N·m).
NOTE: The Learn Mis-Fire Adaptive Numerator MUST be performed
after the engine has been replaced. Follow the instructions on the wiTECH
scan tool.
60. Start the engine and check for leaks.
61. Using the wiTECH scan tool perform the “Pedal and Throttle Learn”
procedure. The command is “Learn ETC” and is found under the
“Miscellaneous Functions” menu, which in turn is under “PCM”.
62. Using the wiTECH scan tool perform the “Learn Mis-Fire Adaptive
Numerator” procedure.
63. Return the vehicle to the customer.
Customer Satisfaction Notification R28/R29
Engine Oil Contamination and Consumption
Page 51
Complete Proof of Correction Form for California Residents
The R29 portion of this notice, labor operation number 09-R2-91-82, is subject to
the State of California Registration Renewal/Emissions Recall Enforcement
Program. Complete a Vehicle Emission Recall Proof of Correction Form (Form
No. 81-016-1053) and supply it to vehicle owners residing in the state of
California for proof that this recall has been performed when they renew the
vehicle registration.
Completion Reporting and Reimbursement
Claims for vehicles that have been serviced must be submitted on the
DealerCONNECT Claim Entry Screen located on the Service tab. Claims
submitted will be used by Chrysler to record Customer Satisfaction Notification
service completions and provide dealer payments.
Use the following labor operation numbers and time allowances:
Labor Operation
Number
Time
Allowance
Change Engine Oil and Install
Engine Oil Consumption Kit
09-R2-91-82
1.4 hours
Notify Owner and Close R28
09-R2-81-82
0.2 hours
Notify Owner, Remove and Install
Engine Long Block and Close R28
09-R2-81-83
10.9 hours
Add the cost of the parts package plus applicable dealer allowance to your claim.
NOTE: See the Warranty Administration Manual, Recall Claim Processing
Section, for complete claim processing instructions.
Dealer Notification
To view this notification on DealerCONNECT, select “Global Recall System” on
the Service tab, then click on the description of this notification.
Customer Satisfaction Notification R28/R29
Engine Oil Contamination and Consumption
Page 52
Owner Notification and Service Scheduling
All involved vehicle owners known to Chrysler are being notified of the service
requirement by mail. They are requested to schedule appointments for this service
with their dealers. A generic copy of the owner letter is attached.
Enclosed with each owner letter is an Owner Notification postcard to allow owners
to update our records if applicable.
Vehicle Lists, Global Recall System, VIP and Dealer Follow Up
All involved vehicles have been entered into the DealerCONNECT Global Recall
System (GRS) and Vehicle Information Plus (VIP) for dealer inquiry as needed.
GRS provides involved dealers with an updated VIN list of their incomplete
vehicles. The owner’s name, address and phone number are listed if known.
Completed vehicles are removed from GRS within several days of repair claim
submission.
To use this system, click on the “Service” tab and then click on “Global Recall
System.” Your dealer’s VIN list for each recall displayed can be sorted by: those
vehicles that were unsold at recall launch, those with a phone number, city, zip
code, or VIN sequence.
Dealers should perform this repair on all unsold vehicles before retail
delivery. Dealers should also use the VIN list to follow up with all owners to
schedule appointments for this repair.
VIN lists may contain confidential, restricted owner name and address information that was
obtained from the Department of Motor Vehicles of various states. Use of this information is
permitted for this notification only and is strictly prohibited from all other use.
Additional Information
If you have any questions or need assistance in completing this action, please
contact your Service and Parts District Manager.
Customer Service / Field Operations
FCA US LLC
ENGINE OIL CONTAMINATION AND CONSUMPTION
____________________________________________________________________________________
CUSTOMER SATISFACTION NOTIFICATION
R28/R29
This notice applies to your vehicle (VIN: xxxxxxxxxxxxxxxxx).
Dear: (Name)
At FCA US LLC, we are constantly monitoring the quality of our products and looking for opportunities to improve our
vehicles even after they are sold. Since our customers’ long-term satisfaction is of the utmost importance to us, we are
contacting you on important improvements we would like to make to your vehicle. This will be done at no charge to you.
We are recommending the following improvements be performed on certain 2013 through 2014 model year Dodge Viper
vehicles.
The problem is...
The engine cylinder block on your vehicle may have been contaminated with abrasive debris.
Under rare conditions during high-speed right-hand cornering when the engine is at light
throttle and high RPM, engine oil can be forced into the Make Up Air hose, resulting in
unintended oil consumption.
Both of these conditions may compromise engine durability.
What your
will do…
dealer
FCA will repair your vehicle free of charge. To address R28, the oil contamination issue, your
dealer will complete a free engine oil & filter change and send the used oil filter to FCA for analysis.
If FCA’s analysis of the oil filter is positive for debris, the dealer will contact you to schedule
replacement of the engine and related oil cooler components. If a new engine is not required, the
dealer will contact you to inform you that you do not need to return to the dealership.
To address R29, the oil consumption issue, your dealer will install an updated oil management
system which includes a new valve cover assembly with a relocated make up air (MUA) fitting and
new baffle.
The work will take about 1½ hours to complete if an engine replacement is not required. If an
engine replacement is required, the additional work will take about 11 hours to complete. However,
additional time may be necessary depending on service schedules.
What you should
do…
Please call the SRT Information Center at 855-778 8326 to schedule service at a certified Dodge
Viper dealer. If you have questions or concerns which your dealer is unable to resolve, please
contact the SRT Information Center at either fcarecalls.com or 1-855-778 8326.
California
residents…
For the R29 portion of this notice, the State of California requires the completion of emission recall
repairs prior to vehicle registration renewal. Your dealer will provide you with a Vehicle Emission
Recall Proof of Correction Form after the recall service is performed. Be sure to save this form since
the California Department of Motor Vehicles may require that you supply it as proof that the recall
has been performed.
Please help us update our records by filling out the attached prepaid postcard, if any of the conditions listed on the card apply
to your vehicle. If you have further questions go to fcarecalls.com.
If you have already experienced this specific condition and have paid to have it repaired, you may visit
www.fcarecallreimbursement.com to submit your reimbursement request online or you can mail your original receipts and
proof of payment to the following address for reimbursement consideration: FCA Customer Assistance, P.O. Box 21-8004,
Auburn Hills, MI 48321-8007, Attention: Recall Reimbursement. Once we receive and verify the required documents,
reimbursement will be sent to you within 60 days. If you’ve had previous repairs and/or reimbursement you may still need to
have the recall repair performed on your vehicle.
We apologize for any inconvenience this service may cause to your schedule. FCA is committed to providing our customers
with world class quality products, ensuring that you have a positive dealership experience and following up on any issues and
concerns that you may have in a timely manner through our Customer Assistance Center. Thank you for being our customer.
Sincerely,
Customer Service / Field Operations
FCA US LLC
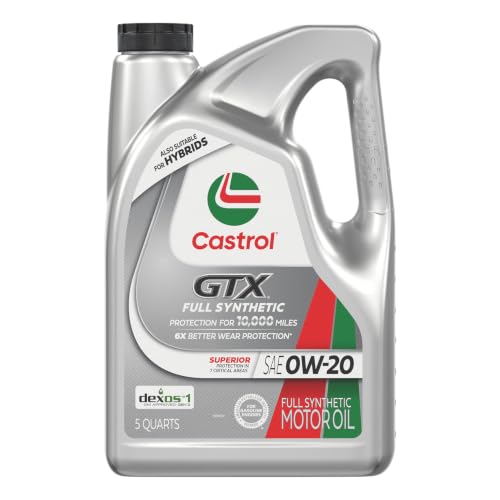
- 6X better wear protection on critical engine parts than...
- 1.3X better sludge protection than industry standards*
- 3X Stronger against viscosity breakdown than leading full...
- Protection for 10,000 miles between oil changes
- Meets or exceeds the following specifications: API SP/SN...

If the PDF is very large, it may not load in the preview below.
Some older TSBs had multiple PDFs — visit the NHTSA Website to view all PDFs.
If the TSB PDF does not show, download or view it on the NHTSA Website.
Click on the (+) Plus Sign
Then Click on Associated Document(s)
Search NHTSA Database for Recalls
Search NHTSA Database for Vehicle Investigations
View Latest Vehicle Investigations
Search NHTSA Database for Vehicle Complaints
View Latest Vehicle Complaints
TSB/Document ID: R28R29
Replacement Service Bulletin Number:
MFR Communication Date: 2022-08-25
MFR Internal Campaign ID/Software Version:
Communication Type: Service Bulletin/Repair Instructions
NHTSA Components: ENGINE AND ENGINE COOLING
MFR Component System:
MFR Component Subsystem:
Previous TSB | Next TSB |

- [Notice] When you receive a used device, it may be a customer return resold by Amazon without inspection. You can exchange it for a new one through Amazon. As this situation is unavoidable, we sincerely apologize. For any issues, contacting us via Amazon's "Messages" is the best way. THINKSCAN 689BT Bidirectional Scan Tool Can Be Used Immediately After It is Turned On, Without Complicated Registration Process, Which is More Convenient & Quick.
- Full Bi-Directional Control & 3000+ Active Tests: Take control and test components like actuators, fuel injectors, relays, and cooling fans in real time. You’ll quickly see if the problem is in the part itself or the control module — saving you hours of guesswork and frustrating trial-and-error.
- Advanced ECU Coding Capabilities: Handle module matching and hidden feature activation with confidence. When you replace an ECU or want to customize settings, this obd2 scanner diagnostic bi directional tool gives you the professional-level capabilities you need without the dealership price tag.
- 34+ Useful Reset and Maintenance Functions: Complete everyday service tasks smoothly with a wide range of helpful reset and maintenance functions. Whether you’re keeping up with regular upkeep or tackling a specific job, this scanner makes maintenance simpler and less stressful for both DIYers and pros.
- Comprehensive Full System Diagnostics: Diagnose every major system — Engine, Transmission, ABS, SRS, TPMS, and more — all in one place. Finally stop wondering if you’re missing something important; get the full picture and clear codes with ease.

- Top Reasons to Choose the D7S OBD2 Scanner: XTOOL D7S car scan tool, an upgrade of XTOOL D7, offers comprehensive features for automotive technicians, workshops, and DIY enthusiasts 1. Upgraded Hardware: 2+64GB memory, rear camera, intuitive interface, foldable bracket 2. Complete Diagnostics: FCA Autoauth, OE-level all system scan, 39+ maintenance services, 4K+ bidirectional, CANFD/DoIP protocol 3. Advanced Capabilities: ECU c0ding, PMI functions 4. Wide Compatibility: Support 10,000+ models, covering 99% vehicle brands 5. Multi-language: Available in 22+ languages, No IP Restrictions 6. 3-Year Updates: Save 300 bucks on software updates for the latest features and optimizations
- 2026 Upgraded D7S Car Scanner Features: The newly 2026 D7S V2.0 scanner for car brings exciting features for advanced vehicle diagnostics and enhanced user experience 1. FCA AutoAuth: Now supports FCA SGW module for Chrysler
 , for Jeep, for Dodge (2018+), for Fiat (2017+), enabling faster vehicle communication without gateway restrictions 2. PMI (Offline ECU Pr0gramming): Allows for Ford, for Lincoln, and for Mazda ECU pr0gramming for new modules 3. Optimized Diagnostic Report 2.0: Personalized reports with logos and customer info for auto shops. Note: Compatibility varies by cars, please check before order
 - 39+ Services/Resets/Adaptations/Relearns/Calibrations: XTOOL D7S full system car scanner diagnostic tool tackles 99% of common car issues through its 36+ special functions, including Oil Reset, EPB, SAS, BMS, Throttle Reset, Injector C0ding, ABS Bleed, TPMS Reset, Power Balance, etc and also covers specific-vehicle functions like Crank Sensor Relearn, ABS Initialization, Cylinder Power Balance, Fuel Trim Reset, Idle Relearn etc. This car diagnostic scanner enhances efficiency, making repairs and maintenance hassle-free. Tip: DO NOT for All vehicles, please check compatibility first
- Cost-effective ECU C0ding Scan Tool for Specific Brands: Enhance your vehicle's performance with XTOOL D7S! This obd2 scanner all systems bidirectional offers advanced capabilities at an affordable price, supports online for BMW, for Benz and offline for BENZ, for MIT, along with PMI functions for Ford, for Mazda, and for Lincoln. Ideal for technicians and DIY enthusiasts, this automotive scanner diagnostic tool optimizes vehicle performance and enhances the driving experience. Note: Not for all cars and modules, please send car VIN to check the compatibility before purchase
- OE All System Diagnostic & 8 Pids Graphing: XTOOL D7S is a comprehensive all system bi directional obd2 scanner that delivers dealer-level diagnostics, completely controlling over your vehicle’s performance and health. This automotive scan tool can read and clear DTCs, view live data and ECU information, retrieve freeze frames, and perform active tests and full obd2 functions. This bi-directional scan tool can can identify your vehicle's make, model, and year information with just one click and show up to 8 PIDs live data with options for CSV viewing, playback, and recording for in-depth analysis. It is easy-to-use for both professionals and beginners, helping pinpoint issues efficiently

- 【✅Compared to BOSSCOMM IF742, IF745 Offers Full-System Diagnostics】The BOSSCOMM IF745 car diagnostic scanner is an upgraded model of IF742. In addition to supporting all OBD2 Code Reader functions and 6 reset options (ABS/EPB/SAS/BMS/Oil/Throttle), it expands diagnostics from 4 systems (Check Engine/ABS/SRS/Transmission) to vehicle All systems, including Steering, Suspension, and Body Electronics. This provides deeper, more comprehensive diagnostic capabilities.
- 【✨10 OBD2 Functions】The BOSSCOMM IF745 scan tool’s DTC Lookup instantly translates fault codes into user-friendly explanations, its I/M Readiness feature streamlines emissions testing with a single tap, and Freeze Frame lets you pinpoint the exact moment of a fault for in-depth root-cause diagnosis. Combined with a live data dashboard and advanced diagnostics (O2S, OBMon, EVAP), it delivers comprehensive insights for confident troubleshooting.
- 【✨Deep Diagnostics for All Vehicle System Modules】Beyond code reading/clearing and ECU information retrieval, our all-in-one data stream feature lets you inspect all current fault codes and their locations across the vehicle’s systems. This vehicle code reader helps you turn off dashboard warning lights and perform a comprehensive self-check of your car at home—no more back-and-forth trips to the repair shop or hefty inspection fees.
- 【✨6 Essential Resets: ABS Bleeding, Oil, EPB, SAS, Throttle, BMS】The BOSSCOMM IF745 obd2 scanner diagnostic tool swiftly purges air from brake lines to restore braking sensitivity, fine-tunes maintenance cycles to eliminate false alerts, resolves parking brake issues with one-click control, recalibrates steering sensors for stability, optimizes engine idling/acceleration for smoother performance, and deeply resets battery systems to extend lifespan and range via precise parameter adjustments.❗NOTE: Does NOT support bidirectional control, coding, or programming.
- 【✨10,000+ Car Models, AutoVIN, 13 Languages】The BOSSCOMM IF745 vehicle scanner diagnostic tool covers 73+ global car brands and offers support in 13 languages, making it perfect for DIYers, auto mechanics, or as a thoughtful gift. With a single-click AutoVIN feature, it instantly retrieves vehicle serial numbers, streamlining diagnostics for users globally. This adaptable tool balances user-friendliness with precision, catering to both personal and professional requirements.✅Unsure about compatibility? Compatibility will vary on vehicles' model and year, pls reach us via 📧 [email protected] 📧 before purchase.
This product presentation was made with AAWP plugin.