
NHTSA ID Number: 10115467
Manufacturer Communication Number: IK1201243
TSB/Document Date: 2017-08-16
Summary
Internal Coolant Leak Diagnostics and Repair
REPAIR PROCEDURE:
Figure 4: Coolant Management Tool Pressure Module
1. Install coolant management tool Cap Adapter (KL5004NAV), Pressure Module (KL5006NAV), and 20 Gallon Tank/Cart Assembly
(KL5003NAV). Attach shop air to the Pressure Module. (If necessary change out the drain cock to the quick coupler)
Figure 5: Coolant Management Container Valve
2. Position the valve to "DRAIN VEHICLE" on the coolant cart and open the valve on the Pressure Module allowing the pressure to force
the coolant to fully drain, shut off the pressure, allow the pressure to finish releasing, and close the coolant cart valve. Inspect the drained
coolant for heavy oil contamination, if contaminated return to diagnostic STEP 6. Trace amounts of oil are ok.
https://evalue.internationaldelivers.com/service_kb/DocTool/ArticleViewer.aspx?ControlID... 4/2/2015
IK1201243 MaxxForce 7 Internal Coolant Leak Diagnostics and Repair
Page 8 of 23
Figure 6: Power Steering Pump Bolts
3. If on the passenger side of the engine remove the Power Steering Pump (20072009 MaxxForce 7 Power Steering/Fuel Pump). If on
the drivers side on the engine remove the starter and wiring from the repair area.
NOTE: 2010-2013 MaxxForce 7: Do not drain the power steering system, it is not required.
Figure 7: Power Steering Line Support Brackets
4. Remove the Power Steering Line Support Brackets to free the pump.
https://evalue.internationaldelivers.com/service_kb/DocTool/ArticleViewer.aspx?ControlID... 4/2/2015
IK1201243 MaxxForce 7 Internal Coolant Leak Diagnostics and Repair
Page 9 of 23
Figure 8: Move Power Steering Pump Away from Working Area
5. Swing the Power Steering Pump out of the repair area.
https://evalue.internationaldelivers.com/service_kb/DocTool/ArticleViewer.aspx?ControlID... 4/2/2015
IK1201243 MaxxForce 7 Internal Coolant Leak Diagnostics and Repair
Page 10 of 23
Figure 9: 16 mm Hex Plug Location
6. Using a 8mm Hex Bit Socket remove the 16mm Hex Plug from the engine block .
.
https://evalue.internationaldelivers.com/service_kb/DocTool/ArticleViewer.aspx?ControlID... 4/2/2015
IK1201243 MaxxForce 7 Internal Coolant Leak Diagnostics and Repair
Page 11 of 23
Figure 10: 38mm Plug Location
Figure 11: Freeze Plug Removal
7. Using a small hammer and punch remove the 38mm Freeze Plug from the block. Strike the plug near one of the edges, the freeze plug
should spin sideways allowing for removal with pliers. (Note: In some instances the plug may push all the way into the block. To retrieve,
fetch by hand and pull to the opening, grasp with the pliers and pull it out.) After pulling the 16mm Hex plug and the 38mm freeze plug, if
oil/coolant mixture pours out of the plug attempt an initial flush of the area, if oil and coolant continues to pour into the repair area return to
diagnostic STEP 6.
https://evalue.internationaldelivers.com/service_kb/DocTool/ArticleViewer.aspx?ControlID... 4/2/2015
IK1201243 MaxxForce 7 Internal Coolant Leak Diagnostics and Repair
Page 12 of 23
Figure 12: Front Cover Heater Supply Line
8. Using a catch pan, remove the coolant supply tube next to the thermostat housing from the bottom passenger side of the front cover to
allow further coolant drainage.
Figure 13: Coolant Management Tool Pressure Module
9. Using the CMT pressure regulator, reopen the valve to blow air through the entire block. Allow the air to continue flowing during the
entire block preparation portion of this repair.
https://evalue.internationaldelivers.com/service_kb/DocTool/ArticleViewer.aspx?ControlID... 4/2/2015
IK1201243 MaxxForce 7 Internal Coolant Leak Diagnostics and Repair
Page 13 of 23
Figure 14: Metal Debris Removal
10. Going through the 38mm freeze plug opening, clear any debris in the galley by pushing, flushing, and blowing it out of the 16mm hole
(Using your hand will be required to clear the area of debris).
Figure 15: Brake Cleaner Straw
11. Use aerosol powered brake cleaner to flush galley and remove any oily deposits. Bending the provided Brake Cleaner straw in an
arc may be required to blow downward into the cavity when going through the 38mm freeze plug opening. It is also necessary to spray
upward (Left right and middle) in the block to draw down any coolant resting above the galley.
https://evalue.internationaldelivers.com/service_kb/DocTool/ArticleViewer.aspx?ControlID... 4/2/2015
IK1201243 MaxxForce 7 Internal Coolant Leak Diagnostics and Repair
Page 14 of 23
Figure 16: Using ZTSE4391 to scrub the cavity
12. Using ZTSE4391 scrub the cavity (If necessary degrease and clean the brush before using). Spray a small amount of WD-40 into the
cavity to further break down the corrosion build-up and aid in the scrubbing process.
Figure 17: Wiping the cavity clean
13. Using a clean rag or a clean paper towel wipe the inside of the cavity to remove deposits that could not be flushed. Repeat steps 12
and 13 until no more debris can be removed. Once acceptable, degrease the cavity again with brake cleaner to remove the WD40
deposits, make sure to wipe it dry several times, preferable with a non-shedding rag.
https://evalue.internationaldelivers.com/service_kb/DocTool/ArticleViewer.aspx?ControlID... 4/2/2015
IK1201243 MaxxForce 7 Internal Coolant Leak Diagnostics and Repair
Page 15 of 23
Figure 18: Corrosion Location
Figure 19: (LEFT) Coolant Galley with Moisture and Missed Debris (RIGHT) Coolant Galley After Cleaning and Drying
14. REQUIRED: Use a bore scope to visually inspect for remaining debris and fluids. If a notable amount of rust or corrosion deposits are
remaining on the galley walls use a pick, or if possible an abrasive pad to clear as much as possible off the walls, rinse and inspect
again. If no bore scope is available one must be borrowed or purchased for inspection of the galley. Once the galley is acceptable
please take a picture with the bore scope for documentation. Failure to do so may result in this repair failing; causing excessive down
time for the customer. This step is REQUIRED.
RECOMMENDATION
SNAP-ON Bore scope Item BK6500 has a forward and side viewing camera which allows for easy viewing of the affected area.
ATTENTION
THIS AREA MUST BE COMPLETELY CLEAN, DRY AND REMAIN DRY BEFORE APPLYING THE EPOXY. ANY MOISTURE THAT
COMES INTO CONTACT WITH THE EPOXY WILL INHIBIT THE CURING EFFECT. SEE FIGURE 16 ABOVE.
ATTENTION
IN MANY CASES A SMALL AMOUNT OF COOLANT MAY LEAK BACK INTO THE CAVITY IF THE EPOXY IS INJECTED OVER A
TRAIL OF COOLANT, THIS TRAIL WILL CREATE A GAP BETWEEN THE EPOXY AND BLOCK SURFACE ALLOWING THE
COOLANT TO LEAK BACK INTO THE CAVITY
https://evalue.internationaldelivers.com/service_kb/DocTool/ArticleViewer.aspx?ControlID... 4/2/2015
IK1201243 MaxxForce 7 Internal Coolant Leak Diagnostics and Repair
Page 16 of 23
15. Shut off the valve on the CMT tool to cease air flow through block. If coolant is stirred back into the cavity Brake Cleaner will need to
be used again to remove coolant residue. A heat gun may also be used to assist with drying the area cycling it between both
openings. Wait 10 minutes, scope the area again for signs of moisture. Another method of drying is to use a very clean shop rag and stuff
it in the area to absorb moisture. If coolant continues to run into the pocket, stuffing a rag above, to the left, and to the right of the cavity
should prevent coolant runback long enough for epoxy injection and preliminary curing. (NOTE: If repairing an external coolant leak blow
through the perforation to clear any moisture out of the hole).
WARNING
DO NOT LET THE RAG SIT IN THE AREA TO BE EPOXIED. THE RAG SHOULD BE STUFFED AROUND THE CAVITY,
SURROUNDING IT TO SOAK UP MOISTURE. IF RAGS ARE USED, REMOVE ALL OF THEM FROM THE BLOCK ONCE THE
EPOXY HAS CURED.
Figure 20: Install and Torque New Hex Plug
16. Install the new 16mm Hex Plug provided in the repair kit and torque to 20 ft-lb.
ATTENTION
https://evalue.internationaldelivers.com/service_kb/DocTool/ArticleViewer.aspx?ControlID... 4/2/2015
IK1201243 MaxxForce 7 Internal Coolant Leak Diagnostics and Repair
Page 17 of 23
Figure 21: Belzona 1391 Epoxy Mixing Supplies
17. Gather the kit 2514509C91 for mixing the Epoxy (Belzona 1391 Base and Solidifier, Gloves, Mixing Cup, Mixing Stick, and 1
Tablespoon (Obtained Locally)).
WARNING
READ THE ENTIRE MIXING AND INJECTION SECTION BEFORE MIXING THE EPOXY. ONCE THE EPOXY HAS BEEN MIXED IT
MUST BE INJECTED INTO THE BLOCK IMMEDIATLEY. FAILURE TO DO SO WILL RESULT IN THE EPOXY NOT SETTLING
PROPERLY AND FAILURE OF THIS REPAIR.
ATTENTION
Figure 22: Belzona 1391 Solidifier (0.6 of a Tablespoon)
https://evalue.internationaldelivers.com/service_kb/DocTool/ArticleViewer.aspx?ControlID... 4/2/2015
IK1201243 MaxxForce 7 Internal Coolant Leak Diagnostics and Repair
Page 18 of 23
18. Measure out 0.6 of a Tablespoon (Just over half of the tablespoon) of the blue solidifier and pour it into the mixing cup. If measuring
by weight this is equivalent to 9.1 grams of the solidifier.
Figure 23: Clean Tablespoon to Measure Epoxy Base (3 Tablespoons)
19. Clean the tablespoon so it does not mix the Solidifier into the bulk Epoxy Base container. Failure to do so will result in curing and
waste of the epoxy base.
Figure 24: Scrape Epoxy Base into Mixing Cup
20. Measure out 3 tablespoons of the epoxy base and add to the cup with the solidifier, scrape out as much from the spoon as possible. If
measuring by weight this is equivalent to 119 grams of the base or a combined weight of 128 grams. You must discard the measuring
spoon if it cannot be fully cleaned. DO NOT REUSE A DIRTY SPOON OR A SPOON WITH EPOXY RESIDUE.
https://evalue.internationaldelivers.com/service_kb/DocTool/ArticleViewer.aspx?ControlID... 4/2/2015
IK1201243 MaxxForce 7 Internal Coolant Leak Diagnostics and Repair
Page 19 of 23
Figure 25: Fully Mixed Belzona 1391 Ceramic Epoxy
21. Using the provided mixing stick; thoroughly mix the epoxy until the blue solidifier is no longer visible and the epoxy has become a
consistent color. Scraping the bottom and sides of the mixing cup will be required to fully mix the epoxy.
Figure 26: Pouring/Scraping Epoxy into Syringe
22. Pour and scrape as much of the freshly mixed epoxy into the back of the clean syringe (You will be mixing more epoxy than
necessary for this repair). Request assistance with this step if needed, the cup used will be different than displayed, the provided cup rim
can be slightly bent into a spout for ease of pouring. This repair will require the usage of a nearly full syringe. (NOTE: If repairing an
external coolant leak you will need to save the epoxy in the cup for later use, do not throw away or contaminate, if epoxy becomes
contaminated mix another small batch 5:1 by volume).
https://evalue.internationaldelivers.com/service_kb/DocTool/ArticleViewer.aspx?ControlID... 4/2/2015
IK1201243 MaxxForce 7 Internal Coolant Leak Diagnostics and Repair
Page 20 of 23
Figure 27: Injecting the Epoxy into the Block
ATTENTION
IF INJECTED WITHIN A REASONABLE AMOUNT OF TIME OF MIXINGTHE EPOXY IS SELF-LEVELING AND WILL RUN INTO
THE OPEN CAVITIES OF THE CORRODED AREA. THE EPOXY MUST BE INJECTED INTO THE BLOCK SLOWLY TO ALLOW
AMPLE SETTLING TIME.
23. Insert the opened end of the syringe into the 38mm opening facing downward as much as possible to the corroded area. Begin very
slowly injecting the epoxy into the cavity allowing ample settling time. Inject the epoxy in a sweeping motion back and forth (left to right)
and fill the entire cavity. A majority of the epoxy should be injected to the right of the opening. Fill the cavity all the way up to the freeze
plug opening. If it does not fill all the way up, quickly mix more epoxy and inject it into the block.
24. Once injected, clean off the 38mm opening of any residual epoxy to prevent hardening and inability to install the new freeze plug.
Depending on the volume of epoxy injected the opening may require multiple wipe downs. The use of a bore scope to inspect the epoxy
settlement is recommended. If the epoxy has not settled fully in the cavity, using a clean glove gently work the epoxy down into the galley
to the left and right, limit touching the epoxy as much as possible to avoid contamination.
Figure 28: Use a Heat gun to Cure the Epoxy
https://evalue.internationaldelivers.com/service_kb/DocTool/ArticleViewer.aspx?ControlID... 4/2/2015
IK1201243 MaxxForce 7 Internal Coolant Leak Diagnostics and Repair
Page 21 of 23
ATTENTION
TEMPERATURE HAS A LARGE EFFECT ON EPOXY CURING. IF ALLOWED TO DROP BELOW 50°F THE EPOXY WILL NOT
CURE PROPERLY. USE A HEAT GUN TO KEEP THE AREA HOT DURING CURE TIME (PERFERRABLY ABOVE 100°F). THE
USE OF A HEAT GUN IS REQUIRED TO MEET THE SRT CURING TIME OF 3 HOURS. IF A HEAT GUN IS NOT USED THE
EPOXY MUST CURE FOR 8 HOURS ABOVE 60°F.
WARNING
WHEN DEALING WITH HEAT SOURCES USE PROPER PRECAUTIONS TO PREVENT DAMAGE TO VEHICLE, COMPONENTS,
OR PERSONAL INJURY.
25. Allow the epoxy to cure with the heat gun continuously applying heat for 3 hours (Warranty will pay for the 3 hours of bay usage), if
curing is in question feel the epoxy for rigidity in the mixing container and in the block. If no heat gun is available cure time will take a
minimum of 8 hours and temperatures must remain above 60°F.
Figure 29: Completed Repair
Figure 30: Flap Disc
26. Once cured, clean off the freeze plug opening with a flap disc to remove any residual epoxy and rust. Once cleaned, install the new
38mm freeze plug using ZTSE4509. A 24mm socket may be used in substitution if unavailable.
https://evalue.internationaldelivers.com/service_kb/DocTool/ArticleViewer.aspx?ControlID... 4/2/2015
IK1201243 MaxxForce 7 Internal Coolant Leak Diagnostics and Repair
Page 22 of 23
27. Pressure test the cooling system, use soapy water to confirm the freeze plug does not leak. If it passes, continue to the next step. If
the engine fails the pressure test, fill with water and check for leakage from the repair location, if found in the same location remove the
freeze plug and take a bore scope image of the epoxy. Return to diagnostic STEP 6 and attach the image of the cleaned galley and of the
epoxy in the galley for warranty purposes. If no leak is found, search for the source of pressure loss.
WARNING
IN SOME INSTANCE OIL MAY HAVE EXITED THE ENGINE COVERING COMPONENTS AND MANIFOLDS IN OIL. THIS OIL
MUST BE CLEANED OFF BEFORE ENGINE OPERATION, FAILURE TO DO SO MAY RESULT IN FUME IGNITION RESULTING
IN SEVERE PERSONAL INJURY, DEATH, AND/OR EQUIPMENT DAMAGE.
28. Upon passing the pressure test, the cooling and oil system may require flushing with a cleaner for contamination. These two systems
can be flushed at the same time. Use Restore Plus or other preferred solvent for the cooling system, once complete drain and vacuum fill
with new coolant. Only flush the oil system if required, mix by volume kerosene OR diesel fuel (5 Quarts or 1.25 Gallons) with 15 Quarts
of oil. Run the engine at 1500 rpms for 20 minutes to flush both systems.
29. If this repair was an external coolant leak, paint the external epoxy black to match the block and for an added layer of protection from
the elements.
30. Once complete 2007-2009 MaxxForce 7 release to customer; 2010-2013 MaxxForce 7 return to diagnostic STEP 4.
https://evalue.internationaldelivers.com/service_kb/DocTool/ArticleViewer.aspx?ControlID... 4/2/2015
IK1201243 MaxxForce 7 Internal Coolant Leak Diagnostics and Repair
Page 23 of 23
WARRANTY INFORMATION
Warranty Claim Coding:
Group: 12000 - Engine
Noun: 051 - Crankcase
Standard Repair Time(s):
Step
Description
ELECTRONIC ENGINE
Visual inspections (Performance diagnostics)
PERFORMANCE, DIAGNOSE
OIL PAN AND/OR GASKET REPLACE See manual for proper coding
Engine
SRT
Hours
All
MANUAL
0.2
All
MANUAL
2.2
INTERNAL BELZONA REPAIR
PROCESS
Power steering pump, cooling system drain, Block
prep, injection, and curing
All
T-TIME
4.3
COOLING SYSTEM, FLUSH
Flushing the cooling system
All
A09-280
1.0
CRANKCASE BREATHER HOUSING
ASSEMBLY, REPLACE
See manual for proper coding
EPA10 MF7
MANUAL
0.6
ENGINE OIL AND FILTER, CHANGE
Claim twice for flushing
All
A12-1889A
0.4
OIL SYSTEM, FLUSH
Time for flushing
All
T-TIME
0.3
CRANKCASE PRESSURE TEST
Crankcase pressure
EPA10 MF7
MANUAL
0.2
BLOW-BY TEST
Engine blow-by
EPA10 MF7
MANUAL
0.3
Special Requirements:
Engine Replacement Requires an iApproval
OTHER RESOURCES
Master Service Information Site
Belzona Reforming and Protective Materials for Engines and Castings (Testimonials)
Belzona 1391 Product Data
Belzona 1391 Instructions for Use
Belzona 1391 Product Specification Sheet
Hide Details
Feedback Information
Viewed:
919
Helpful:
6
Not Helpful: 3
No Feedback Found
Copyright © 2015 Navistar, Inc.
https://evalue.internationaldelivers.com/service_kb/DocTool/ArticleViewer.aspx?ControlID... 4/2/2015
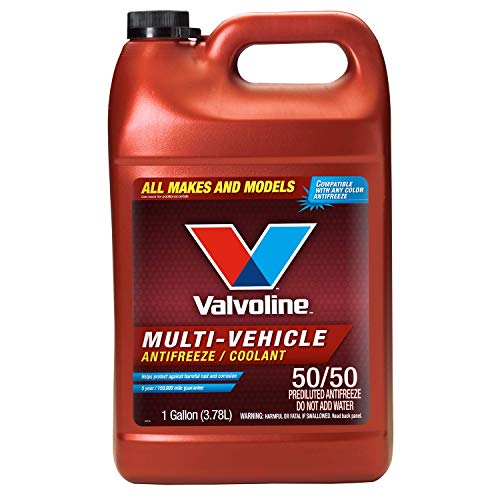
- Contains Alugard Plus for compatibility with all ethylene...
- Fights corrosion, scaling and rust while protecting all...
- High-quality additives protect against leaks and won’t...
- Pre-mixed yellow formula is ready-to-use in a 50/50 ratio...
- Contains 30 – 50 ppm of denatonium benzoate as a bittering...


- 5 year/150, 000 mile . Silicate-free, long-life, phosphate...
- Formulated to replace the OEM fluid in Asian make vehicles...
- The long life formula provides protection for all cooling...
- Meets the following OEM and industry specifications...
- Contains 30 – 50 ppm of denatonium benzoate as a bittering...
If the PDF is very large, it may not load in the preview below.
Some older TSBs had multiple PDFs — visit the NHTSA Website to view all PDFs.
If the TSB PDF does not show, download or view it on the NHTSA Website.
Click on the (+) Plus Sign
Then Click on Associated Document(s)
Search NHTSA Database for Recalls
Search NHTSA Database for Vehicle Investigations
View Latest Vehicle Investigations
Search NHTSA Database for Vehicle Complaints
View Latest Vehicle Complaints
TSB/Document ID: IK1201243
Replacement Service Bulletin Number:
MFR Communication Date: 2015-03-25
MFR Internal Campaign ID/Software Version:
Communication Type: Service Bulletin/Repair Instructions
NHTSA Components: ENGINE AND ENGINE COOLING
MFR Component System:
MFR Component Subsystem:
Previous TSB | Next TSB |

- [Notice] When you receive a used device, it may be a customer return resold by Amazon without inspection. You can exchange it for a new one through Amazon. As this situation is unavoidable, we sincerely apologize. For any issues, contacting us via Amazon's "Messages" is the best way. THINKSCAN 689BT Bidirectional Scan Tool Can Be Used Immediately After It is Turned On, Without Complicated Registration Process, Which is More Convenient & Quick.
- Full Bi-Directional Control & 3000+ Active Tests: Take control and test components like actuators, fuel injectors, relays, and cooling fans in real time. You’ll quickly see if the problem is in the part itself or the control module — saving you hours of guesswork and frustrating trial-and-error.
- Advanced ECU Coding Capabilities: Handle module matching and hidden feature activation with confidence. When you replace an ECU or want to customize settings, this obd2 scanner diagnostic bi directional tool gives you the professional-level capabilities you need without the dealership price tag.
- 34+ Useful Reset and Maintenance Functions: Complete everyday service tasks smoothly with a wide range of helpful reset and maintenance functions. Whether you’re keeping up with regular upkeep or tackling a specific job, this scanner makes maintenance simpler and less stressful for both DIYers and pros.
- Comprehensive Full System Diagnostics: Diagnose every major system — Engine, Transmission
 , ABS, SRS, TPMS, and more — all in one place. Finally stop wondering if you’re missing something important; get the full picture and clear codes with ease.

- Top Reasons to Choose the D7S OBD2 Scanner: XTOOL D7S car scan tool, an upgrade of XTOOL D7, offers comprehensive features for automotive technicians, workshops, and DIY enthusiasts 1. Upgraded Hardware: 2+64GB memory, rear camera, intuitive interface, foldable bracket 2. Complete Diagnostics: FCA Autoauth, OE-level all system scan, 39+ maintenance services, 4K+ bidirectional, CANFD/DoIP protocol 3. Advanced Capabilities: ECU coding, PMI functions 4. Wide Compatibility: Support 10,000+ models, covering 99% vehicle brands 5. Multi-language: Available in 22+ languages, No IP Restrictions 6. 3-Year Updates: Save 300 bucks on software updates for the latest features and optimizations
- 2026 Upgraded D7S Car Scanner Features: The newly 2026 D7S V2.0 scanner for car brings exciting features for advanced vehicle diagnostics and enhanced user experience 1. FCA AutoAuth: Now supports FCA SGW module for Chrysler, for Jeep, for Dodge (2018+), for Fiat (2017+), enabling faster vehicle communication without gateway restrictions 2. PMI (Offline ECU Programming): Allows for Ford, for Lincoln, and for Mazda ECU programming for new modules 3. Optimized Diagnostic Report 2.0: Personalized reports with logos and customer info for auto shops. Note: Compatibility varies by cars, please check before order
- Cost-effective ECU Coding Scan Tool for Specific Brands: Enhance your vehicle's performance with XTOOL D7S! This obd2 scanner all systems bidirectional offers advanced capabilities at an affordable price, supports online for BMW, for Benz and offline for BENZ, for MIT, along with PMI functions for Ford, for Mazda, and for Lincoln. Ideal for technicians and DIY enthusiasts, this automotive scanner diagnostic tool optimizes vehicle performance and enhances the driving experience. Note: Not for all cars and modules, please send car VIN to check the compatibility before purchase
- OE All System Diagnostic & 8 Pids Graphing: XTOOL D7S is a comprehensive all system bi directional obd2 scanner that delivers dealer-level diagnostics, completely controlling over your vehicle’s performance and health. This automotive scan tool can read and clear DTCs, view live data and ECU information, retrieve freeze frames, and perform active tests and full obd2 functions. This bi-directional scan tool can can identify your vehicle's make, model, and year information with just one click and show up to 8 PIDs live data with options for CSV viewing, playback, and recording for in-depth analysis. It is easy-to-use for both professionals and beginners, helping pinpoint issues efficiently
- 3 Years Software Update, Value for Money: With 3 years of software updates and 22+ languages(no IP restrictions), XTOOL D7S auto scanner code scanner ensures ongoing compatibility for the latest car models and improved diagnostic functions. This all system vehicle diagnostic scanner comes with a 30-day return policy and a 24-month repair for dependable performance. XTOOL are dedicated to your satisfaction, so enjoy seamless support and lifetime expert assistance. Should you encounter any issues or concerns, don’t hesitate to reach out XTOOL. D7S with newest update with 22 languages freely transfer without authorization, check details from setting-language or from XTOOL

- 【✅Compared to BOSSCOMM IF742, IF745 Offers Full-System Diagnostics】The BOSSCOMM IF745 car diagnostic scanner is an upgraded model of IF742. In addition to supporting all OBD2 Code Reader functions and 6 reset options (ABS/EPB/SAS/BMS/Oil/Throttle), it expands diagnostics from 4 systems (Check Engine/ABS/SRS/Transmission) to vehicle All systems, including Steering, Suspension, and Body Electronics. This provides deeper, more comprehensive diagnostic capabilities.
- 【✨10 OBD2 Functions】The BOSSCOMM IF745 scan tool’s DTC Lookup instantly translates fault codes into user-friendly explanations, its I/M Readiness feature streamlines emissions testing with a single tap, and Freeze Frame lets you pinpoint the exact moment of a fault for in-depth root-cause diagnosis. Combined with a live data dashboard and advanced diagnostics (O2S, OBMon, EVAP), it delivers comprehensive insights for confident troubleshooting.
- 【✨Deep Diagnostics for All Vehicle System Modules】Beyond code reading/clearing and ECU information retrieval, our all-in-one data stream feature lets you inspect all current fault codes and their locations across the vehicle’s systems. This vehicle code reader helps you turn off dashboard warning lights and perform a comprehensive self-check of your car at home—no more back-and-forth trips to the repair shop or hefty inspection fees.
- 【✨6 Essential Resets: ABS Bleeding, Oil, EPB, SAS, Throttle, BMS】The BOSSCOMM IF745 obd2 scanner diagnostic tool swiftly purges air from brake lines to restore braking sensitivity, fine-tunes maintenance cycles to eliminate false alerts, resolves parking brake issues with one-click control, recalibrates steering sensors for stability, optimizes engine idling/acceleration for smoother performance, and deeply resets battery systems to extend lifespan and range via precise parameter adjustments.❗NOTE: Does NOT support bidirectional control, coding, or programming.
- 【✨10,000+ Car Models, AutoVIN, 13 Languages】The BOSSCOMM IF745 vehicle scanner diagnostic tool covers 73+ global car brands and offers support in 13 languages, making it perfect for DIYers, auto mechanics, or as a thoughtful gift. With a single-click AutoVIN feature, it instantly retrieves vehicle serial numbers, streamlining diagnostics for users globally. This adaptable tool balances user-friendliness with precision, catering to both personal and professional requirements.✅Unsure about compatibility? Compatibility will vary on vehicles' model and year, pls reach us via 📧 [email protected] 📧 before purchase.
This product presentation was made with AAWP plugin.