
NHTSA ID Number: 11030577
Manufacturer Communication Number: WRA-26
TSB/Document Date: 2026-04-02
Summary
In the interest of customer satisfaction, Subaru of America, Inc. (Subaru) is initiating a new voluntary emissions recall for certain 2018 model year WRX and Forester vehicles and certain 2019 MY WRX equipped with a 2.0L turbo engine.
and not penetrate effectively.
STEP 12: CAREFULLY loosen both nuts.
NOTE: When encountering cases of the nut becoming tight while loosening, slightly turn the nut in the
clockwise direction, re-apply WD-40 lubricant, and loosen the nut. PATIENCE IS KEY!
Continued...
Bulletin Number: WRA-26; Date: 03/16/26
Page 9 of 22
CAUTION: When encountering cases of the stud becoming excessively damaged during removal,
replacement of the affected stud will be required. Refer to the service procedure outlined in the
APPENDIX B section of this bulletin and then proceed to Step 14.
STEP 13: Remove the rear flange mounting bolts and
nuts and separate the exhaust.
NOTE: If needed, WD-40 and the wire brush can be used
to aid in removal.
STEP 14: Remove the mounting bolt holding the center
pipe to the hanging bracket.
NOTE: If needed, WD-40 and the wire brush can be used
to aid in removal.
STEP 15: Remove the center exhaust pipe from the
vehicle.
IMPORTANT: If excessive stud damage has occurred,
refer to the APPENDIX B section of this bulletin.
Once the additional service procedure is completed,
continue to Step 15 below.
STEP 16: Clean and degrease the mounting studs.
STEP 17: Install the new exhaust gaskets supplied in the part kit.
Continued...
Bulletin Number: WRA-26; Date: 03/16/26
Page 10 of 22
STEP 18: Install the new exhaust pipe. Secure the pipe to the hanger bracket with the mounting bolt
and torque to 35Nm (26ft-lbs).
STEP 19: Install the flange bolts, springs and new nuts. Torque to 18Nm (13ft-lbs).
STEP 20: Install the new mounting nuts to the front studs. Torque the nuts to 42Nm (31ft-lbs).
STEP 21: Remove the heat shield from the original center exhaust pipe.
STEP 22: Cut the catalytic converter into a 11 inch
section. Refer to the image below.
STEP 23: Prepare the catalytic converter for shipment
using the 16in x 8in x 8in cardboard box provided with
the replacement center exhaust pipe.
IMPORTANT: ONLY the box provided in the
service kit PN is to be used for return shipping to
the PCC. If the included return box is not available,
a suitable replacement box not to exceed 18 in x10
in x10 in may be used. The retailer’s AR statement
will be charged shipping costs for all other returned
packaging types exceeding the dimensions listed
above. A $100 dollar processing fee will also be billed to the retailer’s AR statement for WRA26 shipments exceeding these dimensions beginning March 16th, 2026. See TSB 09-51-08R for
general converter return procedures.
STEP 24: Ship the catalytic converter section to the
Parts Collection Center (PCC): 3701 David Howarth
Drive Lafayette IN 47909 using only the specifically
designated catalytic converter shipping account in the
returns shipping portal. As is standard practice, a RO
copy and a copy of the return request must accompany
the part to avoid a potential debit of the claim.
STEP 25: The heat shield and flanged ends can be discarded.
CALIFORNIA “VEHICLE EMISSION RECALL - PROOF OF CORRECTION”
CERTIFICATE
The California Air Resources Board and the Department of Motor Vehicles Registration/Recall
Program requires that all emission related Recall/Campaign or Service Program repairs be completed
before a vehicle registration is renewed. Please provide owners of vehicles registered in the state of
California a completed “Vehicle Emission Recall - Proof of Correction” certificate. Vehicle owners
Continued...
Bulletin Number: WRA-26; Date: 03/16/26
Page 11 of 22
should be advised to retain this certificate because the California Department of Motor Vehicles may
require they provide proof this service program repair has been completed. Additional certificates
are available through normal parts ordering channels using part number MSA6P1301. Quantity 1 = 1
booklet of 50 certificates.
SERVICE PROGRAM IDENTIFICATION LABEL:
Type or print the necessary information on a Campaign Identification Label. The completed label
should be attached to the vehicle’s upper radiator support. Additional labels are available through
normal parts ordering channels. The part number is MSA6P1302, which comes as one sheet of 20
labels.
Part Number
MSA6P1302
Applicability
Description
Order Quantity
ALL MODELS
CAMPAIGN COMPLETION LABELS (CONTAINS ONE
SHEET OF 20 LABELS)
1
Continued...
Bulletin Number: WRA-26; Date: 03/16/26
Page 12 of 22
CLAIM REIMBURSEMENT AND ENTRY PROCEDURES:
Credit to perform this recall will be based on properly completed repair order information. Retailers
may submit claims through Subarunet.com.
Labor Description
REAR CATALYST NON-COMPLIANCE - CVT
REAR CATALYST NON-COMPLIANCE – MT
(INCLUDES ECM REPROGRAMMING)
Labor Operation #
B106-301
Labor Time
0.7H
B106-302
1.0H
Fail Code
WRA-26
IMPORTANT REMINDERS:
•
SOA strongly discourages the printing and/or local storage of service information as previously
released information and electronic publications may be updated at any time.
•
Always check for any open recalls or campaigns anytime a vehicle is in for servicing.
•
Always refer to STIS for the latest service information before performing any repairs.
APPENDIX A
BATTERY CHARGING INFORMATION: Subaru of America, Inc. (SOA) highly recommends
utilizing either the Subaru Midtronics DCA-8000 Dynamic Diagnostic Charging System or the
Subaru Midtronics GR8-1100 Diagnostic Battery Charger to the vehicle in the Power Supply Mode
feature anytime a vehicle control module is being reprogrammed. Once the Midtronics charger is
connected to the vehicle, if the battery is fully charged, it will take less than three (3) minutes to bootup the charger, select the Power Supply Mode, and have the battery voltage stabilized and ready for
reprogramming.
NOTES:
•
For instructions on using the Power Supply Mode, reference the applicable User Manual for
the Midtronics DCA-8000 Dynamic Diagnostic Charging System and the Midtronics GR81100 Diagnostic Battery Charger on STIS.
•
Confirm all electrical loads such as lights, audio, HVAC, seat heaters, and rear defroster are all
switched OFF before setting up the charger for Power Supply Mode.
•
Select the correct battery type (Enhanced Flooded, Flooded, Gel, AGM or AGM Spiral).
•
Input the CCA which matches the vehicle’s battery. NOTE: OE and replacement batteries have
different CCA ratings. Always confirm the battery’s CCA rating before proceeding.
•
If using a DCA-8000 Dynamic Diagnostic Charging System, set the power supply voltage to
13.5 Volts.
•
DO NOT connect the DST-i or DST-010 until the Power Supply mode function has completed
its battery test mode and the Charging Voltage has dropped to and shows a steady 13.5 Volts on
the display.
•
Once Power Supply Mode reaches a steady 13.5 Volts, connect the DST-i or DST-010 to the
OBD connector and proceed with initiating the normal FlashWrite reprogramming process.
•
Amperage will fluctuate based upon the vehicle’s demand for power. NOTE: If the voltage
rises beyond 14 Volts while programming is in process, the procedure will abort. This can
indicate a need to test or charge the vehicle battery before any further attempt at programming
Continued...
Bulletin Number: WRA-26; Date: 03/16/26
Page 13 of 22
is made.
•
ALWAYS set the power supply voltage to 13.5 Volts when using Power Supply Mode. NEVER
turn the ignition switch on when charging at voltages 15 Volts or higher.
REMINDER: If the DCA-8000 or GR8-1100 indicates the vehicle’s battery must be charged, charge
the battery fully before proceeding to reprogram the vehicle while using the Power Supply Mode.
NOTE: Control module failures resulting from battery discharge during reprogramming are not a
matter for warranty. Should any DTCs reset after the reprogramming update is performed, diagnose
per the procedure outlined in the applicable Service Manual.
VERY IMPORTANT: This information is applicable to the Subaru Midtronics DCA-8000 Dynamic
Diagnostic Charging System and the Subaru Midtronics GR8-1100 Diagnostic Battery Charger
ONLY. It does not apply to any other brand / type of “generic” battery charger whatsoever. ONLY
the DCA-8000 and the GR8-1100 and their Power Supply Mode feature have been tested and
approved by SOA.
APPENDIX B
ADDITIONAL SERVICE PROCEDURES FOR STUD REMOVAL:
The following service procedures are to be applied when encountering difficulties removing the
exhaust hardware resulting in damage to the stud(s). The procedures were developed to provide assist
when removing seized hardware. Depending on the available equipment two different penetrate oil
application methods have been outlined.
Additional Required Tools & Materials
Tool Description
Image
Details
Option A)
A
Vacuum brake bleeder (Option
Required for pulling lubricant through
threads
Air hose nipple (Option A)
Required for pulling lubricant through
threads
Diameter: 9/16-7/8 inch
Rubber hose (Option A)
14mm deep socket (Option B)
Length: 3 inch
Required for pulling lubricant through
threadS
Required for appliying
lubricant using pressure
Continued...
Bulletin Number: WRA-26; Date: 03/16/26
Page 14 of 22
Cushion tape (Option B)
Required for appliying
lubricant using pressure
Required for flange heat
application
Pipe wrench or stud bolt remover
Required for turning stud
STEP 1: Prepare the coil attachment supplied in the MINI-DUCTOR VENOM tool by winding the
coil five rotations around a 27mm socket. This will provide the needed width for the heat application
to the exhaust components.
Continued...
Bulletin Number: WRA-26; Date: 03/16/26
Page 15 of 22
STEP 2: Remove the center exhaust pipe (service procedure Steps 12-14 reference). This will allow
sufficient workspace.
STEP 3: Using a heat gun, apply heat to the flange area for 3 MINUTES. Once completed, apply heat
for 2 MINUTES using the MINI-DUCTOR VENOM.
CAUTION: DO NOT exceed heat application with the MINI-DUCTOR VENOM for more than 2
MINUTES.
STEP 4: CAREFULLY loosen the heated stud using a stud remover or pipe wrench. Once the stud
starts to turn, proceed to the next Step.
CAUTION: DO NOT fully remove the affected stud.
Continued...
Bulletin Number: WRA-26; Date: 03/16/26
Page 16 of 22
IMPORTANT: When encountering cases of the stud being unable to loosen, slightly tighten the stud,
reapply heat, and re-attempt to loosen.
STEP 5: Using an air gun, apply air to the affected area for 1 MINUTE.
STEP 6: Depending on the available equipment, two methods have been provided for applying
lubricant to the affected area. Option A requires the use of a vacuum brake bleeder and option B uses
a socket and an air gun to apply the lubricant.
OPTION A:
1. Assemble the brake bleed hose tip, air hose nipple, and a hose cut with an outside diameter of
9/16-7/8 (15-21mm) and length of 3 inch (80mm).
Continued...
Bulletin Number: WRA-26; Date: 03/16/26
Page 17 of 22
2. Apply vacuum to the affected stud. Maintain flush contact with the hose and flange to ensure
sufficient vacuum.
3. Spray the lubricant (WD-40) on the opposite side of the flange to the stud threads. Once the
lubricant has fully penetrated the threads, proceed to Step 7:
OPTION B:
Prepare the socket and tap by applying the tape to face of the socket. Ensure the tape is fully wrapped
to ensure a sufficient seal.
Continued...
Bulletin Number: WRA-26; Date: 03/16/26
Page 18 of 22
Apply lubrication (WD-40) to the exposed threads on the connection side of the flange.
Install the pre-prepared socket over the stud. Insert the air gun in the back of the socket and close all
air gaps with a cloth or rag. While pressing the socket against the flange, Apply air to the socket. This
pressure will allow the lubricant to penetrate the threads.
Repeat the lubrication process until lubrication is detected on the opposite side of the flange. Once
sufficient lubrication has been confirmed, proceed to Step 7.
STEP 7: Using a stud remover or pipe wrench, CAREFULLY remove the affected stud.
CAUTION: If the stud becomes tight while removing, apply additional lubricant and continue
removal.
STEP 8: Install the new stud (p.n. 44154AA000). Proceed to Step 15 of the original service procedure.
IMPORTANT NOTE: If damage occurs to the front catalyst refer to part ordering/release information provided
on the next page.
PART RELEASE PROCESS:
In rare instances when the technician follows the repair procedure outlined in this bulletin and the
front pipe requires replacement, the retailer should submit an order for the kit part number below and
include the last eight characters of the VIN in the PO field. This kit includes a front converter, heat
shields, an exhaust gasket, and 4 self-locking nuts.
Part Number
Description
X4461AB070
PIPE AY GSKT KIT FR
This part is on hold and all orders will be reviewed prior to the part being released.
NOTE: Failure to order to part correctly and not include the last 8 characters of the VIN in the PO
field will directly result in your order being cancelled.
Once the appropriate part is received and the vehicle has been repaired, please submit a claim using
the labor operations in the Claim Reimbursement and Entry Procedures section of this bulletin.
Continued...
Bulletin Number: WRA-26; Date: 03/16/26
Page 19 of 22
This notice applies to the VIN identified in
the adress section printed below.
Subaru of America, Inc
PO Box 9103
Camden, NJ 08101-9877
844-373-6614
www.subaru.com
Subaru Service Program WRA-26
Voluntary Emissions Recall
March 2026
Dear Subaru Owner:
We would like to thank you for your selection of a Subaru vehicle. We take pride in our products and
are committed to your continued satisfaction.
Subaru of America, Inc. (Subaru) is initiating a new voluntary emissions recall for certain 2018
model year WRX and Forester vehicles and certain 2019 model year WRX vehicles equipped with a
2.0L turbo engine. You have received this notice because our records indicate that you currently own
one of these vehicles.
REASON FOR THIS VOLUNTARY EMISSIONS RECALL
The performance of the rear catalyst may cause your vehicle to exceed exhaust emission standards.
REMEDY
Subaru will replace the rear catalyst with an improved one on all affected vehicles. Subaru will
also reprogram the Electronic Control Unit (ECU) on affected vehicles equipped with a manual
transmission. This repair will be performed at no cost to you.
HOW LONG WILL THE REPAIR TAKE?
The actual time to replace the rear catalyst is approximately 45 minutes. For vehicles equipped with a
manual transmission, an additional 20 minutes will be required to reprogram the ECU. Your retailer
can provide you with a better estimate of the overall time for this service visit, as it may be necessary
to make your vehicle available for a longer period of time for scheduling purposes.
Continued...
Bulletin Number: WRA-26; Date: 03/16/26
Page 20 of 22
CALIFORNIA REGISTERED OWNERS
The California Air Resources Board requires that emission-related campaigns be completed prior to
California’s vehicle registration renewal process; without this repair, you will not be able to register
your vehicle during your next annual registration. Upon completion of this campaign, your California
dealer will complete and provide you a “Proof of Correction Certificate.”
If required, present the certificate to the California Department of Motor Vehicles (the “DMV”) when
renewing your California registration as proof of campaign completion. If the DMV does not request
the certificate, we recommend that you keep it for your records.
In addition, the State of California requires that every vehicle must pass an emission test (SMOG
Check) every two years and before it is sold. Without the service we are providing at no charge, your
vehicle may not pass this test. In order to ensure your full protection under the emission warranty
provisions, it is recommended that you have your vehicle serviced as soon as possible. Failure to do
so could be determined as lack of proper maintenance of your vehicle.
CHANGED YOUR ADDRESS OR SOLD YOUR SUBARU?
If you have moved or sold your vehicle, please go to https://www.subaru.com/support/customersupport.html to send us your information.
IF YOU NEED FURTHER ASSISTANCE:
To locate the nearest Subaru retailer, you can access our website at www.subaru.com and select ‘Find
a Retailer’.
For additional information, please go to: http://www.wra26.service-campaign.com.
If you need additional assistance, please contact us directly:
•
By e-mail: Go to www.subaru.com, Customer Support and select ‘Contact Us’
•
By telephone: 1-844-373-6614.
Monday through Friday between 8:00 a.m. and 7:00 p.m. ET
•
By U.S. Postal mail: Write us at Subaru of America, Inc.,
Attn: Customer Advocacy Department,
P.O. Box 9103, Camden, NJ 08101-9877
Please contact us immediately if the Subaru retailer fails or is unable to make the necessary repairs
free of charge.
Your continued satisfaction with your Subaru is important to us. Please understand that we have
taken this action in the interest of your vehicle’s proper operation. We sincerely apologize for any
inconvenience this matter may cause and urge you to schedule an appointment as soon as possible to
have this repair performed.
Continued...
Bulletin Number: WRA-26; Date: 03/16/26
Page 21 of 22
Please contact us immediately if the Subaru retailer fails or is unable to make the necessary repairs
free of charge.
Your continued satisfaction with your Subaru is important to us. Please understand that we have
taken this action in the interest of your vehicle’s proper operation. We sincerely apologize for any
inconvenience this matter may cause and urge you to schedule an appointment as soon as possible to
have this repair performed.
Sincerely,
Subaru of America, Inc.
A subsidiary of SUBARU CORPORATION
Bulletin Number: WRA-26; Date: 03/16/26
Page 22 of 22
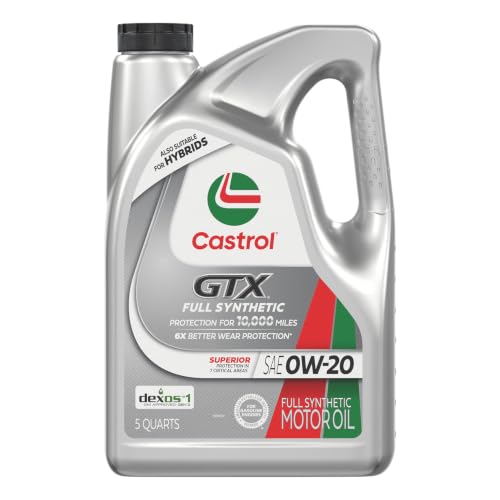

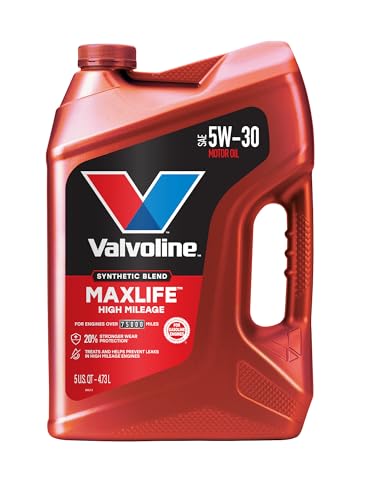
- Formulated for engines with 75,000 miles or more, Valvoline...
- Delivers 20% better wear protection and 15% better sludge...
- Extra detergents safeguard against friction, corrosion and...
- Advanced friction-fighting additives help maximize...
- Provides performance benefits for high mileage, new and...
If the PDF is very large, it may not load in the preview below.
Some older TSBs had multiple PDFs — visit the NHTSA Website to view all PDFs.
If the TSB PDF does not show, download or view it on the NHTSA Website.
Click on the (+) Plus Sign
Then Click on Associated Document(s)
Search NHTSA Database for Recalls
Search NHTSA Database for Vehicle Investigations
View Latest Vehicle Investigations
Search NHTSA Database for Vehicle Complaints
View Latest Vehicle Complaints
TSB/Document ID: WRA-26
Replacement Service Bulletin Number:
MFR Communication Date: 2026-03-16
MFR Internal Campaign ID/Software Version:
Communication Type: Service Bulletin/Repair Instructions
NHTSA Components: ENGINE
MFR Component System:
MFR Component Subsystem:
Previous TSB | Next TSB |

- [Notice] When you receive a used device, it may be a customer return resold by Amazon without inspection. You can exchange it for a new one through Amazon. As this situation is unavoidable, we sincerely apologize. For any issues, contacting us via Amazon's "Messages" is the best way. THINKSCAN 689BT Bidirectional Scan Tool Can Be Used Immediately After It is Turned On, Without Complicated Registration Process, Which is More Convenient & Quick.
- Full Bi-Directional Control & 3000+ Active Tests: Take control and test components like actuators, fuel injectors, relays, and cooling fans in real time. You’ll quickly see if the problem is in the part itself or the control module — saving you hours of guesswork and frustrating trial-and-error.
- Advanced ECU Coding Capabilities: Handle module matching and hidden feature activation with confidence. When you replace an ECU or want to customize settings, this obd2 scanner diagnostic bi directional tool gives you the professional-level capabilities you need without the dealership price tag.
- 34+ Useful Reset and Maintenance Functions: Complete everyday service tasks smoothly with a wide range of helpful reset and maintenance functions. Whether you’re keeping up with regular upkeep or tackling a specific job, this scanner makes maintenance simpler and less stressful for both DIYers and pros.
- Comprehensive Full System Diagnostics: Diagnose every major system — Engine, Transmission, ABS, SRS, TPMS, and more — all in one place. Finally stop wondering if you’re missing something important; get the full picture and clear codes with ease.

- Top Reasons to Choose the D7S OBD2 Scanner: XTOOL D7S car scan tool, an upgrade of XTOOL D7, offers comprehensive features for automotive technicians, workshops, and DIY enthusiasts 1. Upgraded Hardware: 2+64GB memory, rear camera, intuitive interface, foldable bracket 2. Complete Diagnostics: FCA
 Autoauth, OE-level all system scan, 39+ maintenance services, 4K+ bidirectional, CANFD/DoIP protocol 3. Advanced Capabilities: ECU c0ding, PMI functions 4. Wide Compatibility: Support 10,000+ models, covering 99% vehicle brands 5. Multi-language: Available in 22+ languages, No IP Restrictions 6. 3-Year Updates: Save 300 bucks on software updates for the latest features and optimizations
 - 2026 Upgraded D7S Car Scanner Features: The newly 2026 D7S V2.0 scanner for car brings exciting features for advanced vehicle diagnostics and enhanced user experience 1. FCA AutoAuth: Now supports FCA SGW module for Chrysler, for Jeep, for Dodge (2018+), for Fiat (2017+), enabling faster vehicle communication without gateway restrictions 2. PMI (Offline ECU Pr0gramming): Allows for Ford, for Lincoln, and for Mazda ECU pr0gramming for new modules 3. Optimized Diagnostic Report 2.0: Personalized reports with logos and customer info for auto shops. Note: Compatibility varies by cars, please check before order
- 39+ Services/Resets/Adaptations/Relearns/Calibrations: XTOOL D7S full system car scanner diagnostic tool tackles 99% of common car issues through its 36+ special functions, including Oil Reset, EPB, SAS, BMS, Throttle Reset, Injector C0ding, ABS Bleed, TPMS Reset, Power Balance, etc and also covers specific-vehicle functions like Crank Sensor Relearn, ABS Initialization, Cylinder Power Balance, Fuel Trim Reset, Idle Relearn etc. This car diagnostic scanner enhances efficiency, making repairs and maintenance hassle-free. Tip: DO NOT for All vehicles, please check compatibility first
- Cost-effective ECU C0ding Scan Tool for Specific Brands: Enhance your vehicle's performance with XTOOL D7S! This obd2 scanner all systems bidirectional offers advanced capabilities at an affordable price, supports online for BMW, for Benz and offline for BENZ, for MIT, along with PMI functions for Ford, for Mazda, and for Lincoln. Ideal for technicians and DIY enthusiasts, this automotive scanner diagnostic tool optimizes vehicle performance and enhances the driving experience. Note: Not for all cars and modules, please send car VIN to check the compatibility before purchase
- OE All System Diagnostic & 8 Pids Graphing: XTOOL D7S is a comprehensive all system bi directional obd2 scanner that delivers dealer-level diagnostics, completely controlling over your vehicle’s performance and health. This automotive scan tool can read and clear DTCs, view live data and ECU information, retrieve freeze frames, and perform active tests and full obd2 functions. This bi-directional scan tool can can identify your vehicle's make, model, and year information with just one click and show up to 8 PIDs live data with options for CSV viewing, playback, and recording for in-depth analysis. It is easy-to-use for both professionals and beginners, helping pinpoint issues efficiently

- 【✅Compared to BOSSCOMM IF742, IF745 Offers Full-System Diagnostics】The BOSSCOMM IF745 car diagnostic scanner is an upgraded model of IF742. In addition to supporting all OBD2 Code Reader functions and 6 reset options (ABS/EPB/SAS/BMS/Oil/Throttle), it expands diagnostics from 4 systems (Check Engine/ABS/SRS/Transmission) to vehicle All systems, including Steering, Suspension, and Body Electronics. This provides deeper, more comprehensive diagnostic capabilities.
- 【✨10 OBD2 Functions】The BOSSCOMM IF745 scan tool’s DTC Lookup instantly translates fault codes into user-friendly explanations, its I/M Readiness feature streamlines emissions testing with a single tap, and Freeze Frame lets you pinpoint the exact moment of a fault for in-depth root-cause diagnosis. Combined with a live data dashboard and advanced diagnostics (O2S, OBMon, EVAP), it delivers comprehensive insights for confident troubleshooting.
- 【✨Deep Diagnostics for All Vehicle System Modules】Beyond code reading/clearing and ECU information retrieval, our all-in-one data stream feature lets you inspect all current fault codes and their locations across the vehicle’s systems. This vehicle code reader helps you turn off dashboard warning lights and perform a comprehensive self-check of your car at home—no more back-and-forth trips to the repair shop or hefty inspection fees.
- 【✨6 Essential Resets: ABS Bleeding, Oil, EPB, SAS, Throttle, BMS】The BOSSCOMM IF745 obd2 scanner diagnostic tool swiftly purges air from brake lines to restore braking sensitivity, fine-tunes maintenance cycles to eliminate false alerts, resolves parking brake issues with one-click control, recalibrates steering sensors for stability, optimizes engine idling/acceleration for smoother performance, and deeply resets battery systems to extend lifespan and range via precise parameter adjustments.❗NOTE: Does NOT support bidirectional control, coding, or programming.
- 【✨10,000+ Car Models, AutoVIN, 13 Languages】The BOSSCOMM IF745 vehicle scanner diagnostic tool covers 73+ global car brands and offers support in 13 languages, making it perfect for DIYers, auto mechanics, or as a thoughtful gift. With a single-click AutoVIN feature, it instantly retrieves vehicle serial numbers, streamlining diagnostics for users globally. This adaptable tool balances user-friendliness with precision, catering to both personal and professional requirements.✅Unsure about compatibility? Compatibility will vary on vehicles' model and year, pls reach us via 📧 [email protected] 📧 before purchase.
This product presentation was made with AAWP plugin.