
NHTSA ID Number: 11016523
Manufacturer Communication Number: TSB_2071343_2
TSB/Document Date: 2025-04-04
Summary
This bulletin provides information when the charging door does not open when the button is pressed; DTCs B1A8FF0, B1A89F0, B1A8AF3, B1A88F3.
AX connection offiine
Technical Service Bulletin
93 Charging door does not open when button pressed - B1A8FFO, B1A89F0, B1A8AF3, B1A88F3
United States 444 Volkswagen of America, Inc. (6444)
[Status _[Released for publishing
New customer code
Object of complaint Complaint type
body attachments and installations -> doors, lids operation -> open fuel filler door functionality -> cannot be opened [|
body attachments and installations -> doors, lids operation > open high-voltage charging port | tionality -> no function ||
body attachments and installations -> lids functionality [|
power vehicle electrical system, data transfer > power supply -> high-voltage battery charging | nctionalty -> cannot be released ||
power, vehicle electrical system, data transfer > battery management > charging high-voltage | ssctionaity -> no function ||
power, vehicle electrical system, data transfer > battery management -> charging high-voltage _|functionality -> operation sequence
battery incorrect
power, vehicle electrical system, data transfer -> power supply -> high-voltage battery charging [component, automotive fluids ->
socket cap damaged
body attachments and installations -> doors, lids operation -> close high-voltage charging port | .ctignalty -> no function ||
body attachments and installations -> doors, lids operation -> close fuel filler flap functionality -> cannot be closed [|
New workshop code
Object of complaint Complaint type [Position]
body attachments and installations -> lids -> charging port door|component, automotive fluids -> damaged] __—|
Vehicle data
e-tron
Sales types
aoa PT
aaa [of
Chassis numbers
[Manufacturr[Fiter|ype[ Fier] Factory [From [To [Pred fom [Prod to
lat > Joe [Fe [5 Jooooofoooaao_ |_|
Documents
A Connection offline
Technical Service Bulletin Transaction No.: 2071343/2
93 Charging door does not open when button pressed - B1A8FFO, B1A89F0, B1A8AF3, B1A88F3 Release date: Mar 31, 2025
Condition
REVISION HISTORY
revision ono lpupore
| 09/13/2023 | Initial publication
Customer states:
The charging door does not open when the button is pressed.
Workshop findings:
+ Left and right or only left/right charging door can no longer be opened by pressing the button
+ Itcan only be opened using the manual release mechanism
One or more of the following DTCs are stored in the -J1050- High Voltage Battery Charger (address word 00C6):
+ B1A8FFO: LED module charging socket door 1 communication maifunction.
+ B1A89F0: LED module charging socket door 2 communication malfunction.
+ B1A8AF3: Charge door 1 LIN actuator communication malfunction
+ B1A88F3: Charge door 2 LIN actuator communication malfunction
Technical Background
Quality issues in the production process may lead to a crack in the connector point of the charging indicator (Figure 1). Moisture can reach the contact
pins in the charging indicator connector via this crack. As a result, a bypass can occur between the ground contact pin and the LIN contact pin. This
leads to a communication fault between the components of the charging door and the charging unit for high-voltage battery. In this circumstance, the
electric operation of the charging door does not work.
"4 we, ce 7,
eX iK a Fs
, \ 4 3
ee - “i
= “ OS ,
. wr %
\
S > L
a
Figure 1: Crack in the connector point of the charging indicator. Figure 2: Evidence of water intrusion in the charging indicator connector.
Figure 3: Evidence of water intrusion in the connector housing.
Production Solution
After July 2020, the charging indicator connector and the connector housing are sealed during production to prevent moisture ingress.
Service
Try to reproduce the customer complaint (based on the description/cause of the issue) so that it can be clearly assigned to this TSB. The
following repair must only be carried out if all of the criteria (model/type, chassis number, engine/motor code, gearbox code, PR number(s),
part number, software version, code, etc.) apply exactly. Otherwise, this solution will not eliminate the problem and repeat repairs may be
necessary. In such a case, claims for replaced parts will be subject to review.
Please take photos of the complaint and upload them into DOC-IT with the repair order. Photos should:
+ Have a date stamp and VIN reference.
+ Be taken in focus and with sufficient light.
Measure:
For vehicles with one charging door (driver side): Remove wheel and wheel housing liner.
For vehicles with two charging doors: Remove both wheels and wheel housing liners.
Follow the instructions in Elsa to complete the repair at Repair Manual >> General body repairs, exterior >> Rep. gr. 66 Exterior equipment >> Wheel
housing liners >> Assembly overview - wheel housing liner (front).
High voltage increases the risk of fatal injury. Severe bodily injury or death by electrocution or electric arcs is possible.
— Have an Audi high-voltage technician or an Audi high-voltage expert de-energize the high-voltage system.
1. Unplug the connector from the charging indicator (Figure 4). er:
Check the contacts and connector of the charging indicator(s). a
a
—_—
1 =
— |
e \ ce?
we 1
Figure 4: The connector has been unplugged.
2. Check the contacts on the connector housing and on the
charging indicator for oxidation. 7
Figure 5: Oxidation on the connector housing.
h => -—
a “4 a
~ JpP— “ eo
‘= a A
h aie
N DY a
on ~% ‘
e %
Figure 6: Use inspection mirror to carefully examine the charging indicator
connector.
3. Check the connector point on the charging indicator for cracks y ii ch 7,
(Figure 1). 4, ‘ae eA
If the connector point is cracked or the pins are oxidized (Figure r =
7), replace the damaged charging door unit as described under J =
the heading “Removing and installing charging door unit” a |
below, & ;
CG .
< \
.
Figure 7: Oxidation of the pins on the charging indicator connector.
4. To avoid the need for repeat repairs, check whether the charging door supplied by the parts department already has a sealed charging indicator
connector. This can be identified on the basis of the QR code sticker and the red line on the connector (Figure 8)
If this is not the case, seal the charging indicator connector on the new charging door unit with 1-component adhesive sealant (Part number D
469101A3) as described under the heading “Sealing charging indicator connector”.
This can be performed both when the component has been removed, and when itis fitted in the vehicle.
If the connector point, and contacts of the charging indicator on one of the charging doors are undamaged, the charging door can remain in the
vehicle.
a. 9 as
=I a wae. ‘i,
\ a
Ao ‘ \ a
|
] ‘ i , ‘
, ee c : : 4. i
ee
& ae Ps
= ad
Figure 8: The charging indicator connector pictured is the updated part.
5. After replacing the damaged charging door unit, check that the charging doors open and close when the button is pressed.
Ifa charging door unit can remain in the vehicle, the charging indicator connector on it must also be sealed with 1-component adhesive sealant
(part number D 4691013) as described under the header “Sealing charging indicator connector”.
Removing and installing the charging door unit:
7. Unplug the electrical connector inside of the wheel well (1), al
release the catch (3), remove the bulb (2), and unplug the a
electrical connector in the back of the bulb (4) (Figure 14). s
aia
QO <
S
¢ ‘ e
5 \ Fame a
G-trdn
N ‘
\ we \
A \
\ \ - )
\ ew)
\ =a
Figure 14: Overview of the position of the charging door (installed).
© NOTICE
The wheel arch extension must be pressed away carefully at the same time to enable the charging door to be removed.
8. Use hook 3438 (Figure 15) or a screwdriver to release the
remaining catches (1, 2, 3, and 4) (Figure 16). 3438
Carefully take the charging door unit out of the wing. -*
Figure 15: Hook 3438.
i \
a J
a
(]
ay
Mii +} ||
2 BN | —
a >) _ \
iy. SS
y os 5 —
N 3 Yeo
Figure 16: Charge door retaining tabs.
9. Follow the instructions in Elsa to remove the trim for the = 4 .
charging door unit and install a new unit at Repair Manual >> fit &
Body >> Body Exterior >> 55 Hoods Lids >> Charge Door y A \
Unit >> Charge Door Unit Trim, Removing and Installing. - ts 4 \ \ ]
2\\_4 Ps
~ i)
.) er
"a
4
ar
eae,
= =,
Figure 17: Charge door exterior cover.
Installing the charging door unit (without removing the driver door and wheel arch extension):
© notice
To avoid paintwork damage, mask off the area around the charging door in advance using adhesive tape (Figure 18). The adhesive tape
can be removed when the charging door has been installed.
1. Unplug the Baca
connector from the e
charging indicator
(Figure 20) a :
ui
Se wae
( ee
ee
8
) ee
iL} {—~ Be
ff = Fe eae cS ;
“ ® SS ee eee
—— Be eset scat ¢!
“ Lee oe,
@ AB ees
e as Ee
Cy F
Ll b .
Figure 20: The connector is unplugged from the charging indicator.
2. Screw the i aa
application hose : = ie ad — oe
(2) (order number: fe a ae.
ASE33522600000) TA ER es os. Xn
onto the cartridge Me areas
of the component me aie eis
adhesive sealant ee ae
(1) (Part number D . ogi
469101A3) (Figure ——— a € od
21) — faa
ie 3
ci ea i
ee i 3a
aha bes
Se lea
| BK ae _—_
, eet
me : age
Pi -. Ree
- US 7
A é -_ mn 3
i r me ere
ts lee © f —
Pm TBNIEE ili Hats ° ia
Te AMMO SIOL Te ai
i
Re Mi ee cs
1 Se eat ihey
eee ke B87: 4 BS ¥
. FF f. oer: es
+ Ana i ve ae
Be Ae es #
iri eee
Figure 21: Component adhesive sealant and tool.
The application hose (order number: ASE33522600000) can be left on the cartridge of the component adhesive sealant (part number: D 469101A3)
after use and can be reused as the adhesive sealant (butyl) does not harden.
3. Inorder to ensure that the adhesive a: we
sealant has the same consistency at each pit
use after it has not been used for a longer BB
period (several days) use cartridge (3, 1:8 ARNG
Figure 21) to press out a sealant bead cure oe
with a length of approximately 5 cm Soe
(Figure 22) before each use of the eee eg
component adhesive sealant. Beas
ore Som,
~~ ee j / Z
—a . -
gk eae d wea
4 baa : oe ane rem erate |
* ESSE ais daa
Figure 22: Clearing the component adhesive sealant after prolonged storage.
4. Apply a sealant bead (at least 8 mm . el
thick) all around at the beginning of the :
connector point of the charging indicator a
(Figure 23). | a
a
j
\ wi ae
a gic:
SS"
é —— tm . rs y
a a ’ *
vy i
A a \ »y
nN a ; 7
P : a -
. A ww
, Ci .
Figure 23: Sealant bead applied at the connector.
5. Plug the connector into the charging B ae
indicator and press it into the adhesive =
sealant. Press in the release tab on the = \m@ - a a
connector to ensure it is fully engaged *) s 4
Plug the connector into the charging fz = é
indicator The connector should then be f. > N
completely surrounded by the adhesive = Be ee = >
lant (Figure 24). Q wn (are
sealant (Figure 24). | . We ee \
TM o\aee
ae ee
3 UN + \ A‘ ¥ nes F
vi - aap} _
] e r) Sy
— ‘ oa a
: e. A oo
h ee ;
Figure 24: The connector should be completely surrounded by the adhesive sealant.
The entire connector and connector point of the charging indicator and parts of the charging indicator must be covered with adhesive
sealant to ensure protection against moisture ingress (Figure 25).
ote LS
; i Lee ae
eh BRE once GORE
Bi ORR ESRC
‘Ss RPI EAC ROMS =
Se ‘ SAAR eS eM
a : ee
S Ge. aoe i
Kw Wis 2 a
|g ez S ' a
lly 4 yA NI Be ch? Oe) ta
< te se ia
, u \. PR ys eu es
W, f BS ere aa We ae
J 4 y a . j Pe oy
a S PY Bee
7) bh ro wage j 7 d
el BZ Pe”
e ? Ps
8 a
we f
Figure 25: The entire connector and the connector point of the charging indicator must be covered with adhesive sealant.
The adhesive sealant is very soft and flows into itself immediately after application.
— Some of the adhesive sealant may run off shortly after application. This does not affect the sealing function; instead, it is a sign that
sufficient adhesive sealant has been applied.
— The adhesive sealant hardens and reaches its final elastic consistency over time.
— The vehicle can then be reassembled and returned to the customer.
— No waiting time is necessary as the initial strength of the adhesive sealant can withstand everyday use.
Warranty
Claim Type: + If the vehicle is outside of any warranty, this Technical Service Bulletin is informational only.
Damage Code: 0033
Labor Operations: Seal charging indicator 9355 5199 60 TU
Seal 2 charging indicators 9355 5299 100 TU
Replace charging door unit 9353 5599 90 TU
Replace 2 charging door units 9353 5699 140 TU
Seal charging indicator (one side) and replace charging door | 9355 5699 130 TU
unit (other side)
GFF 0150 0000 Time stated on the diagnostic
protocol
Charge Battery 2706 8950 See SRT with associated
operations
Claim Comment: As per TSB 2071343/2
All warranty claims submitted for payment must be in accordance with the Audi Warranty Policies and Procedures Manual. Claims are subject to review
or audit by Audi Warranty.
Required Parts and Tools
Always check with your Parts Department and/or ETKA for the latest information and parts bulletins.
[pannumber |pantoescipion enti |
4KE810001 Charging door
4KE810002 Charging door 2
4KE8536013Q7 _| Lettering
D469101A3 Adhesive sealant
ASE33522600000 | Application hose Shop Supply
Tool Number | Tool Description
Additional Information
All parts and service references provided in this TSB (2071343) are subject to change and/or removal
©2025 Audi of America, Inc. All rights reserved. The information contained in this document is based on the latest information available at the time of
printing and is subject to the copyright and other intellectual property rights of Audi of America, Inc., its affiliated companies, and its licensors. All rights
are reserved to make changes at any time without notice. No part of this document may be reproduced, stored in a retrieval system, or transmitted in
any form or by any means, electronic, mechanical, photocopying, recording, or otherwise, nor may these materials be modified or reposted to other sites
without the prior expressed written permission of the publisher.
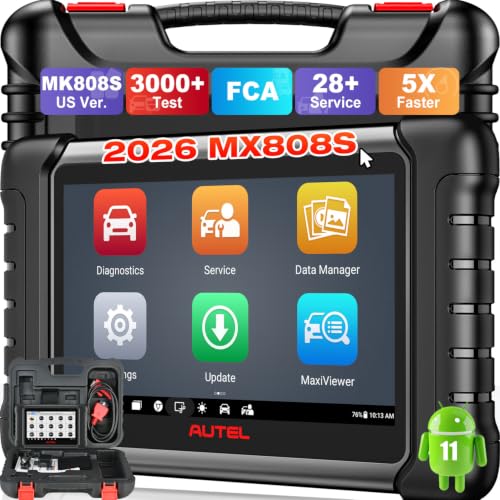
- 📌【We are Here for You】Dear valued customer, please be...
- 🚀【5X Faster Next-Level Hardware, Same as MK900/ MX...
- 🔥【3000+ Active Tests = MK900/MK900BT but...
- 📢【2026 U.S. Version, All-in-One as MK808S/ MK808Z...
- 🔥【28+ Hot Services for 150+ Brands】Same as MaxiCOM...

- 【TURN OFF CEL】 This AL319 car scanner diagnostic tool...
- 【EXTENSIVE APPLICATION】 Autel AL319 Compatible with...
- 【FOR END USER & DIYERS】 This error code reader AL319 is...
- 【USER-FRIENDLY DESIGN】 This OBD2 scanner and check...
- 【HIGH-QUALITY SERVICES】 12 months war.ranty from the...
If the PDF is very large, it may not load in the preview below.
Some older TSBs had multiple PDFs — visit the NHTSA Website to view all PDFs.
If the TSB PDF does not show, download or view it on the NHTSA Website.
Click on the (+) Plus Sign
Then Click on Associated Document(s)
Search NHTSA Database for Recalls
Search NHTSA Database for Vehicle Investigations
View Latest Vehicle Investigations
Search NHTSA Database for Vehicle Complaints
View Latest Vehicle Complaints
TSB/Document ID: TSB_2071343_2
Replacement Service Bulletin Number:
MFR Communication Date: 2025-03-31
MFR Internal Campaign ID/Software Version:
Communication Type: Service Bulletin/Repair Instructions
NHTSA Components: ELECTRICAL SYSTEM
MFR Component System:
MFR Component Subsystem:
Previous TSB | Next TSB |

- [Notice] When you receive a used device, it may be a customer return resold by Amazon without inspection. You can exchange it for a new one through Amazon. As this situation is unavoidable, we sincerely apologize. For any issues, contacting us via Amazon's "Messages" is the best way. THINKSCAN 689BT Bidirectional Scan Tool Can Be Used Immediately After It is Turned On, Without Complicated Registration Process, Which is More Convenient & Quick.
- Full Bi-Directional Control & 3000+ Active Tests: Take control and test components like actuators, fuel injectors, relays, and cooling fans in real time. You’ll quickly see if the problem is in the part itself or the control module — saving you hours of guesswork and frustrating trial-and-error.
- Advanced ECU Coding Capabilities: Handle module matching and hidden feature activation with confidence. When you replace an ECU or want to customize settings, this obd2 scanner diagnostic bi directional tool gives you the professional-level capabilities you need without the dealership price tag.
- 34+ Useful Reset and Maintenance Functions: Complete everyday service tasks smoothly with a wide range of helpful reset and maintenance functions. Whether you’re keeping up with regular upkeep or tackling a specific job, this scanner makes maintenance simpler and less stressful for both DIYers and pros.
- Comprehensive Full System Diagnostics: Diagnose every major system — Engine, Transmission, ABS, SRS, TPMS, and more — all in one place. Finally stop wondering if you’re missing something important; get the full picture and clear codes with ease.

- Top Reasons to Choose the D7S OBD2 Scanner: XTOOL D7S car scan tool, an upgrade of XTOOL D7, offers comprehensive features for automotive technicians, workshops, and DIY enthusiasts 1. Upgraded Hardware: 2+64GB memory, rear camera, intuitive interface, foldable bracket 2. Complete Diagnostics: FCA
 Autoauth, OE-level all system scan, 39+ maintenance services, 4K+ bidirectional, CANFD/DoIP protocol 3. Advanced Capabilities: ECU coding, PMI functions 4. Wide Compatibility: Support 10,000+ models, covering 99% vehicle brands 5. Multi-language: Available in 22+ languages, No IP Restrictions 6. 3-Year Updates: Save 300 bucks on software updates for the latest features and optimizations
 - 2026 Upgraded D7S Car Scanner Features: The newly 2026 D7S V2.0 scanner for car brings exciting features for advanced vehicle diagnostics and enhanced user experience 1. FCA AutoAuth: Now supports FCA SGW module for Chrysler, for Jeep, for Dodge (2018+), for Fiat (2017+), enabling faster vehicle communication without gateway restrictions 2. PMI (Offline ECU Programming): Allows for Ford, for Lincoln, and for Mazda ECU programming for new modules 3. Optimized Diagnostic Report 2.0: Personalized reports with logos and customer info for auto shops. Note: Compatibility varies by cars, please check before order
- Cost-effective ECU Coding Scan Tool for Specific Brands: Enhance your vehicle's performance with XTOOL D7S! This obd2 scanner all systems bidirectional offers advanced capabilities at an affordable price, supports online for BMW, for Benz and offline for BENZ, for MIT, along with PMI functions for Ford, for Mazda, and for Lincoln. Ideal for technicians and DIY enthusiasts, this automotive scanner diagnostic tool optimizes vehicle performance and enhances the driving experience. Note: Not for all cars and modules, please send car VIN to check the compatibility before purchase
- OE All System Diagnostic & 8 Pids Graphing: XTOOL D7S is a comprehensive all system bi directional obd2 scanner that delivers dealer-level diagnostics, completely controlling over your vehicle’s performance and health. This automotive scan tool can read and clear DTCs, view live data and ECU information, retrieve freeze frames, and perform active tests and full obd2 functions. This bi-directional scan tool can can identify your vehicle's make, model, and year information with just one click and show up to 8 PIDs live data with options for CSV viewing, playback, and recording for in-depth analysis. It is easy-to-use for both professionals and beginners, helping pinpoint issues efficiently
- 3 Years Software Update, Value for Money: With 3 years of software updates and 22+ languages(no IP restrictions), XTOOL D7S auto scanner code scanner ensures ongoing compatibility for the latest car models and improved diagnostic functions. This all system vehicle diagnostic scanner comes with a 30-day return policy and a 24-month repair for dependable performance. XTOOL are dedicated to your satisfaction, so enjoy seamless support and lifetime expert assistance. Should you encounter any issues or concerns, don’t hesitate to reach out XTOOL. D7S with newest update with 22 languages freely transfer without authorization, check details from setting-language or from XTOOL

- 🔥 Historical lowest pr-ice now on sa-le--hot se-lling.
- 【🎈𝗜𝗙𝟳𝟰𝟱 𝗽𝗲𝗿𝗳𝗼𝗿𝗺𝘀 𝟲 𝗲𝘀𝘀𝗲𝗻𝘁𝗶𝗮𝗹 𝗿𝗲𝘀𝗲𝘁 𝗳𝘂𝗻𝗰𝘁𝗶𝗼𝗻𝘀—𝗔𝗕𝗦 𝗕𝗹𝗲𝗲𝗱𝗶𝗻𝗴, 𝗢𝗶𝗹 𝗥𝗲𝘀𝗲𝘁, 𝗘𝗣𝗕, 𝗦𝗔𝗦, 𝗧𝗵𝗿𝗼𝘁𝘁𝗹𝗲 𝗥𝗲𝗹𝗲𝗮𝗿𝗻, 𝗮𝗻𝗱 𝗕𝗠𝗦—𝗽𝘂𝘁𝘁𝗶𝗻𝗴 𝗽𝗿𝗼𝗳𝗲𝘀𝘀𝗶𝗼𝗻𝗮𝗹-𝗴𝗿𝗮𝗱𝗲 𝗺𝗮𝗶𝗻𝘁𝗲𝗻𝗮𝗻𝗰𝗲 𝗯𝗮𝗰𝗸 𝗶𝗻 𝘆𝗼𝘂𝗿 𝗵𝗮𝗻𝗱𝘀.】Spongy brakes? Stuck oil light? Parking brake won't release? Off-center steering? Rough idle after battery disconnect? Draining battery? IF745 handles all with a few taps. One tool covers six dealer-level resets, saving hundreds in labor costs. ❗ NOTE: Does NOT support bidirectional control, coding, or programming.
- 【✨ 𝗜𝗙𝟳𝟰𝟱 𝗴𝗼𝗲𝘀 𝗯𝗲𝘆𝗼𝗻𝗱 𝗯𝗮𝘀𝗶𝗰 𝗰𝗼𝗱𝗲 𝗿𝗲𝗮𝗱𝗶𝗻𝗴 𝘄𝗶𝘁𝗵 𝟭𝟬 𝗶𝗻𝘁𝗲𝗴𝗿𝗮𝘁𝗲𝗱 𝗳𝘂𝗻𝗰𝘁𝗶𝗼𝗻𝘀—𝗗𝗧𝗖 𝗟𝗼𝗼𝗸𝘂𝗽, 𝗜/𝗠 𝗥𝗲𝗮𝗱𝗶𝗻𝗲𝘀𝘀, 𝗙𝗿𝗲𝗲𝘇𝗲 𝗙𝗿𝗮𝗺𝗲, 𝗟𝗶𝘃𝗲 𝗗𝗮𝘁𝗮, 𝗢𝟮𝗦, 𝗢𝗕𝗠, 𝗘𝗩𝗔𝗣, 𝗮𝗻𝗱 𝗺𝗼𝗿𝗲. 】Pulling a code tells you something is wrong. IF745 tells you what the code means, when the fault happened, and what data surrounds it. Pass emissions with one I/M Readiness tap. Freeze the fault moment with Freeze Frame. Monitor live sensor data in real time. Turn cryptic codes into clear answers.
- 【🛒 𝗜𝗙𝟳𝟰𝟱 𝗽𝗲𝗿𝗳𝗼𝗿𝗺𝘀 𝗳𝘂𝗹𝗹-𝘀𝘆𝘀𝘁𝗲𝗺 𝗱𝗶𝗮𝗴𝗻𝗼𝘀𝘁𝗶𝗰𝘀 𝗮𝗰𝗿𝗼𝘀𝘀 𝗮𝗹𝗹 𝗺𝗼𝗱𝘂𝗹𝗲𝘀—𝗲𝗻𝗴𝗶𝗻𝗲, 𝗔𝗕𝗦, 𝗮𝗶𝗿𝗯𝗮𝗴, 𝘁𝗿𝗮𝗻𝘀𝗺𝗶𝘀𝘀𝗶𝗼𝗻, 𝘀𝘁𝗲𝗲𝗿𝗶𝗻𝗴, 𝘀𝘂𝘀𝗽𝗲𝗻𝘀𝗶𝗼𝗻, 𝗯𝗼𝗱𝘆 𝗲𝗹𝗲𝗰𝘁𝗿𝗼𝗻𝗶𝗰𝘀, 𝗮𝗻𝗱 𝗺𝗼𝗿𝗲. 】Warning lights on but you don't know why? Skip the $100+ diagnostic fee at the shop. Run a complete self-check from your driveway. IF745 reads and clears fault codes, retrieves ECU info, and displays live data from every accessible module—delivering a full vehicle health report in minutes, without leaving home.
- 【✅𝗜𝗙𝟳𝟰𝟱 𝗳𝗲𝗮𝘁𝘂𝗿𝗲𝘀 𝗮 𝟳-𝗶𝗻𝗰𝗵 𝗱𝗶𝘀𝗽𝗹𝗮𝘆, 𝗲𝗿𝗴𝗼𝗻𝗼𝗺𝗶𝗰 𝗱𝗲𝘀𝗶𝗴𝗻, 𝗪𝗶-𝗙𝗶 𝘂𝗽𝗱𝗮𝘁𝗲𝘀, 𝗮𝗻𝗱 𝘇𝗲𝗿𝗼 𝘀𝘂𝗯𝘀𝗰𝗿𝗶𝗽𝘁𝗶𝗼𝗻 𝗳𝗲𝗲𝘀 𝗳𝗼𝗿 𝗵𝗮𝘀𝘀𝗹𝗲-𝗳𝗿𝗲𝗲 𝗱𝗶𝗮𝗴𝗻𝗼𝘀𝘁𝗶𝗰𝘀.】Large screen means no squinting. Intuitive navigation and customizable data displays put key info at your fingertips. Wi-Fi delivers lifetime free updates without a computer. No recurring fees. No hidden costs. Just a reliable tool that works as hard as you do.
This product presentation was made with AAWP plugin.