
NHTSA ID Number: 11015568
Manufacturer Communication Number: 75-06
TSB/Document Date: 2025-03-12
Summary
Service Campaign sent to dealers and customers advising of the need to correct the wiring installation of the run relay and battery mode control relay which may be improperly wired causing chassis battery drain.
SERVICE CAMPAIGN 75-06 T36B CHASSIS BATTERY DRAIN
AFFECTED MODELS: 2024 SOLIS T36B
«DEALER»
«ADDRESS»
«CITY» «STATE» «ZIP»
«COUNTRY»
PLEASE FORWARD THIS INFORMATION TO YOUR RV SERVICE MANAGER
Winnebago Motorhomes is conducting a Field Service Campaign on certain 2024 Solis T36B
models. This campaign will correct the wiring installation of the run relay and the battery mode
control relay which may be improperly wired causing chassis battery drain.
Affected Vehicles and Owner Notification
Attached to this letter is a list of subject vehicles which were shipped to your dealership.
Customers with affected vehicles are being sent a letter notifying them of the service campaign.
Customers are directed to contact a Winnebago Motorhome dealer for the service campaign to
be performed at no cost to them. A copy of the customer notice is provided for your information.
Repair Procedure:
Refer to instruction sheet provided with parts kit or posted on WinPortal.
Parts Information:
The part order should be placed as an R: Recall type order. You will need the campaign dealer
number and the Winnebago serial number for the affected vehicle to place the order. Multiple
serial numbers may be placed on a single order.
Campaign Dealer Number: 7852
Quantity
Part Description
Winnebago Industries Part Number
1
SOLIS T36B B-POST HARNESS
SC7852-25-706
Reimbursement
When the service has been completed, submit a warranty claim using the operation number and
TIC code listed below.
DESCRIPTION
T36B Chassis Battery Drain
OPERATION
NUMBER
08750699
TIME
ALLOWANCE
1.2
TIC
CODE
7506SB
If the vehicle is out of warranty, use service authorization 93G7506T when filing your claim.
605 W. Crystal Lake Road ▪ Forest City, IA 50436
Ph: 641-585-3535 ▪ Fax: 641-585-6966
FINAL CLAIMS NEED TO BE SUBMITTED BY SEPTEMBER 30, 2025.
Perform this procedure on all subject vehicles currently in your inventory. DO NOT DELIVER ANY
SUBJECT UNITS TO A CUSTOMER UNTIL THIS CORRECTIVE ACTION HAS BEEN TAKEN.
If You Need Assistance
If dealer technical assistance is needed, please contact the Winnebago Motorhome Technical
Service Department at (866) 653-4329 from 8:00 a.m. to 4:00 p.m. Central Time or by e-mail at:
[email protected].
Thank you for your cooperation.
Winnebago Motorhomes
RE:
BODY SERIAL NUMBER
CHASSIS SERIAL NUMBER
Dear Winnebago RV Owner:
When you purchased your new Winnebago RV, you also received our commitment to provide you with a
quality product and our dedication to continuing customer satisfaction. In keeping with this commitment,
we are notifying you of a service campaign that may affect your Winnebago RV.
Winnebago is conducting a Field Service Campaign on certain 2024 Solis T36B models. This campaign
will correct the wiring installation of the run relay and the battery mode control relay which may be
improperly wired causing chassis battery drain.
Our records indicate that you have purchased a vehicle with the serial number which appears above.
What We Will Do
Your Winnebago dealer will correct the wiring installation of the run relay and battery mode control relay.
What You Should Do
Contact your Winnebago dealer to arrange for a service appointment. Please allow sufficient time for your
dealer to process your vehicle on the date of the appointment. The actual repair will take approximately
one hour however your dealer may require additional time to process your coach.
Important
This campaign and offer to provide service is at NO COST TO YOU and is valid until September 30, 2025,
at which time the campaign will be closed.
If You Need Assistance
If you have questions or need assistance, please contact Winnebago Motorhome Customer Care at (800)
537-1885 Monday through Friday from 8:00 a.m. to 4:00 p.m. Central Time or by email:
[email protected].
We are sorry to cause you this inconvenience. We have taken this action in the interest of your continued
satisfaction with our products. This letter does not constitute an acknowledgement of legal liability.
Thank you for choosing a Winnebago RV.
Winnebago Motorhomes
Forest City, IA 50436
T36B Chassis Battery Drain
Classification
Field Service Campaign
Model
Model Year
T36B – Solis
2024
Disclaimer: Read the entire instructions carefully before starting the procedure. If you have any questions, please contact the
Winnebago Industries Technical Service Department by calling 1-866-653-4329 or by email: [email protected] . This document
is confidential and is intended for dealer use only.
Condition
Run relay and battery mode control relay in B-post may be improperly wired causing chassis battery drain on T36B
units built on September 19, 2024 – October 18, 2024.
Correction
Correct the Wiring Installation for the run relay and the battery mode control relay.
Part Number
Description
Part Required
SC7852-25-706
Solis T36B B-Post Harness
Tools & Supplies
Required
Quantity
1
Wire Strippers
Crimping Tool
Wire Splicing Tool
Revision 8
Page 1 of 10
Parts Kit Image Reference
“Y” Yellow Harness
(360977-01-000)
“Y” White Harness
(361030-01-000)
For feedback on the accuracy of this document, email [email protected].
Page 2 of 10
Steps & Procedures
Figure 1
Step 1 – Locate the B-Post Cover and remove safely using
a Drill and drill bit #2.
Objective: Locate the 2 B-Post Wiring Relays
1. Ensure the vehicle is Turned OFF.
2. Open the Passenger door to locate the B-Post Cover.
(See Figure 1 for Reference – Green Dashes)
3. Using a drill & a #2 drill bit, remove the 2 Screws on
the B-Post Side Cover. (See Figure 1 for Reference – 2
Red Circles)
4. Remove the B-Post Cover and locate the 2 Relays.
(See Figure 1 – White Call-Out)
Note: If the 2 Relays are NOT visible after removing B-Post
Cover, Proceed to Step 2. (Disregard Step 2 if Relays were
found in Step 1)
For feedback on the accuracy of this document, email [email protected].
Page 3 of 10
Figure 2
Step 2 – Locate the Step Cover & the Passenger side Kick Panel and remove
safely using a Drill and drill bit #2.
Objective: Locate the 2 B-Post Wiring Relays
1. Using a drill & a #2 drill bit, begin removing the 3 screws on the Passenger
side’s Kick Panel and remove the kick panel. (See Figure 2 for reference of
location of the 3 Screws)
2. Locate the 4 Screw Caps found in the higher surface of the Step Cover. (See
Figure 3 for Screw Cap reference). 3 Screw caps are on the right side and 1 is
under the fire extinguisher (Figure 5). Remove the screw caps to access and
remove the 4 screws found under the caps. (See Figure 4 & 5 – 4 Blue Circles)
3. Using a drill & a #2 drill bit, remove the 3 Screws on the
Figure 4
Figure 5
Passenger Step’s cover floor. (See Figure 4 for Reference
– 3 Red Circles)
4. Remove the Kick Panel and the Step cover after removing all
10 screws and locate the 2 Relays.
Note: Total of 10 Screws and 4 Screw caps need to be removed.
Figure 3
For feedback on the accuracy of this document, email [email protected].
Page 4 of 10
Step 3 – Cut and strip wire TD8, ensuring that there are 2 inches of wire
Figure 6
remaining from Cavity 85 of the Run Only Relay (H97).
Objective: Safely cut and strip wire TD8 from Cavity 85 of the Run Only
Relay.
1. Using the Circuit ID key wire identifier, locate the Run Only Relay
H97.
2. Identify cavity 85 where wire TD8 is connected. (See Figure 6,
Highlighted in Green)
3. Cut and strip the wire, leaving at least 2 inches from cavity it is in.
Figure 7
Step 4: Cut and Strip Wire DDE1, ensuring that there are 2 inches of
wire remaining from Cavity 87 of the Battery Mode Control Relay (H31)
Objective: Safely cut and strip wire DDE1 from cavity 87 of the Battery
Mode Control Relay
1. Using the Circuit ID key wire identifier, locate the Battery Mode
Control Relay H31.
2. Identify cavity 87 where wire DDE1 is connected.
(See Figure 7, Highlighted in Green)
3. Cut and strip the wire, leaving at least 2 inches from cavity it is in.
Strip the other end of the DDE1 wire (the one still connected to the rest of the wire harness) for the following step.
For feedback on the accuracy of this document, email [email protected].
Page 5 of 10
Step 4: Install the Yellow “Y” Harness - (Figure 8)
Objective: Connect the Butt splices from the 3 ends of the ‘Y’ harness into the
Figure 8
DDE1
DDE1
2 spliced wires on the relay’s cavities & other end of wire DDE1
1. Locate the stripped wire DDE1 from Cavity 87 of the Run Only Relay and
connect one of the 2 wires that are joined by the ultrasonic weld on the
“Y” harness. (Highlighted in Red)
2. Locate the other stripped wire DDE1 from Cavity 87 of the Battery Mode
Control Relay and connect the other wire that is joined by the
ultrasonic weld on the “Y” harness. (Highlighted in Red)
3. Locate the TD8 wire stripped end. Ensure the wire is stripped so that
you can connect the splice butt of the single bottom wire of the “Y’
harness. (Highlighted in Blue)
4. Use a crimping tool to ensure all three of the wire connections are
joined together properly.
TD8
Note: A poorly crimped connection can lead to a weak electrical joint, potential overheating, and even a
safety hazard due to loose wires or potential sparks.
For feedback on the accuracy of this document, email [email protected].
Page 6 of 10
Step 5: Insulate wire TD8
Objective: Locate the other end of the cut TD8 wire (the end that is Not on the relay) & Insulate
1. Take electrical insulation tape and wrap it around the exposed wire end thoroughly. Ensure that no copper is
exposed.
2. Alternatively, if preferred, slide a heat-shrink tubing over the cut end and apply heat to secure it.
Note: Insulating exposed wires is crucial to prevent electrical shock by creating a protective barrier between
the live conductor and its surroundings, minimizing the risk of accidental contact with the wire and
potential injuries or fatalities from electricity passing through the body if touched.
Step 6 – Cut wire ZZJ1, ensuring that there are at least 2 inches of wire remaining
from Cavity 2 of the 15-Pin Connector
Objective: Safely cut wire ZZJ1 from Cavity 2 of the 15-Pin Connector
1. Using the Circuit ID key wire identifier, locate the Chassis Coach Builder
Connection (15-Pin Connector)
2. Locate the ZZJ1 wire that comes from Cavity 2 of the 15 Pin Connector. ZZJ1 wire is the color White.
3. Cut the wire, leaving at least 2 inches from cavity it is in.
For feedback on the accuracy of this document, email [email protected].
Page 7 of 10
Step 7: Locate the 2-Pin Connector to Cut and Strip wire FM10
Objective: Locate wire FM10 cut and strip the wire leaving at least 2 inches of the FM10
inside Cavity 1 of the 2-pin connector.
1. Using the Circuit ID Wire Identifier, locate the wire labeled FM10 and track it back
to the connector.
a. Cut and strip the wire leaving at least 2 inches from the Connector Cavity 1.
b. Strip the other end of the FM10 wire (the one still connected to the rest of the wire harness) for the
following step.
Figure 9
Step 8: Install the White “Y” Harness – (Figure 8)
Objective: Connect the Butt splices from the 3 ends of the ‘Y’ harness into the 2 spliced
FM!0
FM!0
wires on the 2-pin Connector FM10 wire & other end of wire ZZJ1
1. Locate one of the stripped wires of FM10 from Cavity 1 of the 2-Pin Connector and
connect 1 of the 2 wires that are joined by the ultrasonic weld on the “Y” harness.
(Highlighted in Red)
2. Locate the other stripped wire FM10 from Cavity 1 of the 2-Pin Connector and connect
the other wire that is joined by the ultrasonic weld on the “Y” harness. (Highlighted in
Red)
3. Locate the ZZJ1 wire’s other end (still connected to the rest of the wire harness). Ensure
the wire is stripped so that you can connect the splice butt of the single bottom wire of
ZZJ1
the “Y’ harness. (Highlighted in Blue)
4. Use a crimping tool to ensure all three of the wire connections are joined together
properly.
For feedback on the accuracy of this document, email [email protected].
Page 8 of 10
Step 9: Insulate wire TD8
Objective: Locate the other end of the cut ZZJ1 wire (the end that is on the 15-Pin Connector) & Insulate
1. Take electrical insulation tape and wrap it around the exposed wire end thoroughly. Ensure that no copper is
exposed.
2. Alternatively, if preferred, slide a heat-shrink tubing over the cut end and apply heat to secure it.
Note: Insulating exposed wires is crucial to prevent electrical shock by creating a protective barrier between
the live conductor and its surroundings, minimizing the risk of accidental contact with the wire and
potential injuries or fatalities from electricity passing through the body if touched.
Step 10: Testing Fix
Figure 10
Objective: Verify the fix was Successful
1. Turn On the vehicle.
2. Unlock the Dinette Seat. Move the dinette seat out of its
locked position. (See Figure 10 - The 2 Magnetic White
detector pieces should not be touching, indicating the seat is
unlocked)
3. Verify Buzzer Activation. Listen for the Alarm sound. If the
buzzer sounds, the fix is working properly.
4. If the buzzer does NOT sound, please contact Tech Service by
calling 1-866-653-4329.
For feedback on the accuracy of this document, email [email protected].
Page 9 of 10
Reference Wire Harness Assembly
Part #: 361030-01-000
WHITE “Y” HARNESS
Part #: 360997-01-000
YELLOW “Y” HARNESS
For feedback on the accuracy of this document, email [email protected].
Page 10 of 10
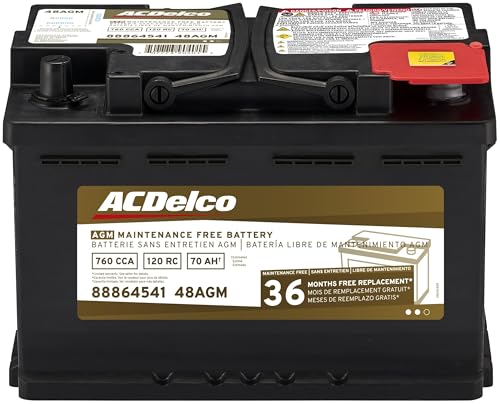
- High density negative paste, improves performance and...
- Enhanced life alloy or Silver Calcium stamped alloy...
- Calcium lead positive grid, maximizes conductivity and...
- Robust envelope separator with puncture resistant back...
- Vent cap design that resists acid leakage

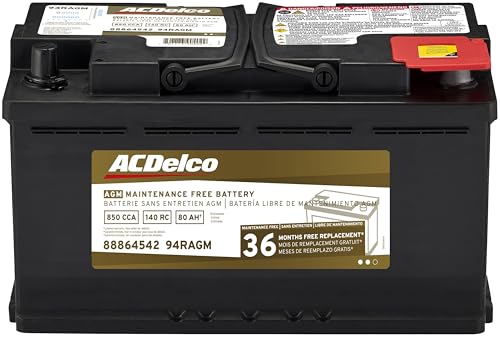
- High density negative paste, improves performance and...
- Enhanced life alloy or Silver Calcium stamped alloy...
- Calcium Lead positive grid, maximizes conductivity and...
- Robust Envelope Separator with puncture-resistant back...
- Vent cap design that resists acid leakage
If the PDF is very large, it may not load in the preview below.
Some older TSBs had multiple PDFs — visit the NHTSA Website to view all PDFs.
If the TSB PDF does not show, download or view it on the NHTSA Website.
Click on the (+) Plus Sign
Then Click on Associated Document(s)
Search NHTSA Database for Recalls
Search NHTSA Database for Vehicle Investigations
View Latest Vehicle Investigations
Search NHTSA Database for Vehicle Complaints
View Latest Vehicle Complaints
TSB/Document ID: 75-06
Replacement Service Bulletin Number:
MFR Communication Date: 2025-02-28
MFR Internal Campaign ID/Software Version: 75-06
Communication Type: Service Campaign
NHTSA Components: ELECTRICAL SYSTEM
MFR Component System:
MFR Component Subsystem:
Previous TSB | Next TSB |

- [Notice] When you receive a used device, it may be a customer return resold by Amazon without inspection. You can exchange it for a new one through Amazon. As this situation is unavoidable, we sincerely apologize. For any issues, contacting us via Amazon's "Messages" is the best way. THINKSCAN 689BT Bidirectional Scan Tool Can Be Used Immediately After It is Turned On, Without Complicated Registration Process, Which is More Convenient & Quick.
- Full Bi-Directional Control & 3000+ Active Tests: Take control and test components like actuators, fuel injectors, relays, and cooling fans in real time. You’ll quickly see if the problem is in the part itself or the control module — saving you hours of guesswork and frustrating trial-and-error.
- Advanced ECU Coding Capabilities: Handle module matching and hidden feature activation with confidence. When you replace an ECU or want to customize settings, this obd2 scanner diagnostic bi directional tool gives you the professional-level capabilities you need without the dealership price tag.
- 34+ Useful Reset and Maintenance Functions: Complete everyday service tasks smoothly with a wide range of helpful reset and maintenance functions. Whether you’re keeping up with regular upkeep or tackling a specific job, this scanner makes maintenance simpler and less stressful for both DIYers and pros.
- Comprehensive Full System Diagnostics: Diagnose every major system — Engine, Transmission
 , ABS, SRS, TPMS, and more — all in one place. Finally stop wondering if you’re missing something important; get the full picture and clear codes with ease.

- Top Reasons to Choose the D7S OBD2 Scanner: XTOOL D7S car scan tool, an upgrade of XTOOL D7, offers comprehensive features for automotive technicians, workshops, and DIY enthusiasts 1. Upgraded Hardware: 2+64GB memory, rear camera, intuitive interface, foldable bracket 2. Complete Diagnostics: FCA Autoauth, OE-level all system scan, 39+ maintenance services, 4K+ bidirectional, CANFD/DoIP protocol 3. Advanced Capabilities: ECU coding, PMI functions 4. Wide Compatibility: Support 10,000+ models, covering 99% vehicle brands 5. Multi-language: Available in 22+ languages, No IP Restrictions 6. 3-Year Updates: Save 300 bucks on software updates for the latest features and optimizations
- 2026 Upgraded D7S Car Scanner Features: The newly 2026 D7S V2.0 scanner for car brings exciting features for advanced vehicle diagnostics and enhanced user experience 1. FCA AutoAuth: Now supports FCA SGW module for Chrysler, for Jeep, for Dodge (2018+), for Fiat (2017+), enabling faster vehicle communication without gateway restrictions 2. PMI (Offline ECU Programming): Allows for Ford, for Lincoln, and for Mazda ECU programming for new modules 3. Optimized Diagnostic Report 2.0: Personalized reports with logos and customer info for auto shops. Note: Compatibility varies by cars, please check before order
- Cost-effective ECU Coding Scan Tool for Specific Brands: Enhance your vehicle's performance with XTOOL D7S! This obd2 scanner all systems bidirectional offers advanced capabilities at an affordable price, supports online for BMW, for Benz and offline for BENZ, for MIT, along with PMI functions for Ford, for Mazda, and for Lincoln. Ideal for technicians and DIY enthusiasts, this automotive scanner diagnostic tool optimizes vehicle performance and enhances the driving experience. Note: Not for all cars and modules, please send car VIN to check the compatibility before purchase
- OE All System Diagnostic & 8 Pids Graphing: XTOOL D7S is a comprehensive all system bi directional obd2 scanner that delivers dealer-level diagnostics, completely controlling over your vehicle’s performance and health. This automotive scan tool can read and clear DTCs, view live data and ECU information, retrieve freeze frames, and perform active tests and full obd2 functions. This bi-directional scan tool can can identify your vehicle's make, model, and year information with just one click and show up to 8 PIDs live data with options for CSV viewing, playback, and recording for in-depth analysis. It is easy-to-use for both professionals and beginners, helping pinpoint issues efficiently
- 3 Years Software Update, Value for Money: With 3 years of software updates and 22+ languages(no IP restrictions), XTOOL D7S auto scanner code scanner ensures ongoing compatibility for the latest car models and improved diagnostic functions. This all system vehicle diagnostic scanner comes with a 30-day return policy and a 24-month repair for dependable performance. XTOOL are dedicated to your satisfaction, so enjoy seamless support and lifetime expert assistance. Should you encounter any issues or concerns, don’t hesitate to reach out XTOOL. D7S with newest update with 22 languages freely transfer without authorization, check details from setting-language or from XTOOL

- 【✅Compared to BOSSCOMM IF742, IF745 Offers Full-System Diagnostics】The BOSSCOMM IF745 car diagnostic scanner is an upgraded model of IF742. In addition to supporting all OBD2 Code Reader functions and 6 reset options (ABS/EPB/SAS/BMS/Oil/Throttle), it expands diagnostics from 4 systems (Check Engine/ABS/SRS/Transmission) to vehicle All systems, including Steering, Suspension, and Body Electronics. This provides deeper, more comprehensive diagnostic capabilities.
- 【✨6 Essential Resets: ABS Bleeding, Oil, EPB, SAS, Throttle, BMS】The BOSSCOMM IF745 obd2 scanner diagnostic tool swiftly purges air from brake lines to restore braking sensitivity, fine-tunes maintenance cycles to eliminate false alerts, resolves parking brake issues with one-click control, recalibrates steering sensors for stability, optimizes engine idling/acceleration for smoother performance, and deeply resets battery systems to extend lifespan and range via precise parameter adjustments.❗NOTE: Does NOT support bidirectional control, coding, or programming.
- 【✨Deep Diagnostics for All Vehicle System Modules】Beyond code reading/clearing and ECU information retrieval, our all-in-one data stream feature lets you inspect all current fault codes and their locations across the vehicle’s systems. This vehicle code reader helps you turn off dashboard warning lights and perform a comprehensive self-check of your car at home—no more back-and-forth trips to the repair shop or hefty inspection fees.
- 【✨10 OBD2 Functions】The BOSSCOMM IF745 scan tool’s DTC Lookup instantly translates fault codes into user-friendly explanations, its I/M Readiness feature streamlines emissions testing with a single tap, and Freeze Frame lets you pinpoint the exact moment of a fault for in-depth root-cause diagnosis. Combined with a live data dashboard and advanced diagnostics (O2S, OBMon, EVAP), it delivers comprehensive insights for confident troubleshooting.
- 【✨10,000+ Car Models, AutoVIN, 13 Languages】The BOSSCOMM IF745 vehicle scanner diagnostic tool covers 73+ global car brands and offers support in 13 languages, making it perfect for DIYers, auto mechanics, or as a thoughtful gift. With a single-click AutoVIN feature, it instantly retrieves vehicle serial numbers, streamlining diagnostics for users globally. This adaptable tool balances user-friendliness with precision, catering to both personal and professional requirements.✅Unsure about compatibility? Compatibility will vary on vehicles' model and year, pls reach us via 📧 [email protected] 📧 before purchase.
This product presentation was made with AAWP plugin.