
NHTSA ID Number: 10239614
Manufacturer Communication Number: B640821
TSB/Document Date: 2023-07-24
Summary
The air conditioning cycles from cold to warm air while driving or while at a stand still. The vent outlet temperatures vary by 25 degrees Fahrenheit or more (38 F to 60 F +) without changing any climate control settings.
6/29/23, 3:18 PM
64 08 21_AC Temperature Fluctuation or Loss of Cooling N63 S63 N74
SIB 64 08 21
AC Temperature Fluctuation or Loss of Cooling N63 S63 N74
2023-06-21
This Service Information Bulletin (Revision 2) replaces B64 08 21 dated June 2022
Whats New:
Procedure moved to Attachment for path to Test Plan correction
Attachment added
MODEL
F90 (M5 Sedan)
F95 (X5 M)
F91 (M8 Convertible)
F96 (X6 M)
F92 (M8 Coupe)
G05 (X5 SAV)
G07 (X7 SAV)
G12 (7 Series Sedan)
G14 (8 Series Coupe)
F93 (M8 Coupe)
G05 (X6 SAC)
G15 (8 Series
Convertible)
G16 (8 Series Gran
G32 (6 Series Gran
G30 (5 Series Sedan)
Coupe)
Turismo)
Vehicles equipped with N63, S63 V8 engines or N74 V12 engine.
SITUATION
The air conditioning cycles from cold to warm air while driving or while at a stand still.
The vent outlet temperatures vary by 25 degrees Fahrenheit or more (38 F to 60 F +) without changing any
climate control settings.
In some cases the air conditioning may have stopped blowing cold air altogether.
CAUSE
The control valve within the air conditioning compressor is obstructed by debris (fine particles).
CORRECTION
Perform the following checks in order to identify one or more of the following root causes.
Locate and repair leaks
Recharge system
For information on R-1234yf refrigerant refer to SI B64 03 16
For information servicing vehicles with R-1234yf refrigerant refer to SI B04 02 16.
Replace air conditioning compressor
Flush/Rinse air conditioning system to clean out debris
Use ‘Rinse’ instead of ‘Flush’ when searching in ISTA
When blowing thru lines to remove foreign particles it is recommended to use refrigerant
with the AC flushing system. If the AC flushing system is not available then the lines can be
blown thru using compressed Nitrogen (preferred due to low moisture content) or
compressed air that has gone thru a water filter/separator (acceptable)
PROCEDURE
Refer to Attachment.
PARTS INFORMATION
Obtain and confirm the part numbers for your specific vehicle by entering the chassis number in either ETK
or AIR which takes into account specific equipment and/or options.
Copyright ©2023 BMW of North America, Inc.
about:blank
1/3
6/29/23, 3:18 PM
64 08 21_AC Temperature Fluctuation or Loss of Cooling N63 S63 N74
CLAIM INFORMATION
This Service Information Bulletin provides technical, diagnostic, and repair-related information.
Damage and/or issues caused by outside influences are not covered under the BMW limited warranties.
Eligible and Covered Work/Repairs
When used to repair a verified defect in materials or workmanship, the repair procedure information
provided in this bulletin is covered under the terms of the BMW New Vehicle Limited Warranty for
Passenger Cars and Light Trucks.
To submit a claim, please follow the established and applicable warranty policy and procedures
(Labor/Part/Sublet) that apply to the repair being performed.
Refer to AIR for the corresponding Defect Code, flat rate labor operations (including diagnosis) and the flat
rate unit (FRU) allowances.
Only one Main labor operation code can be claimed per repair visit.
Based on which one applies to your center, please refer to SI B01 01 20 or B01 07 20 for claiming your
diagnosis work time, job/repair work time (WT), RO/Claim WT and/or repair explanation procedures, unless
otherwise required by State law.
FEEDBACK REGARDING THIS BULLETIN
Technical Feedback
Warranty Feedback
Parts Feedback
To submit feedback for the technical topics of this bulletin: Submit your
feedback in the rating box at the top of this bulletin
To submit feedback for the CLAIMS section of this bulletin: Submit an IDS
ticket to the Warranty Department, or use the chat available in the
Warranty Documentation Portal
To submit feedback for the PARTS section of this bulletin: Submit an IDS
ticket to the Parts Department
Supporting Materials
picture_as_pdf B640821_REV02_attachment.pdf
Copyright ©2023 BMW of North America, Inc.
about:blank
2/3
6/29/23, 3:18 PM
64 08 21_AC Temperature Fluctuation or Loss of Cooling N63 S63 N74
Copyright ©2023 BMW of North America, Inc.
about:blank
3/3
Attachment to B64 08 21
June 2023
AC TEMPERATURE FLUCTUATION OR LOSS OF COOLING N63
S63 N74
PROCEDURE
Perform the following checks to identify the root cause:
1. Reproduce the situation described above.
For maximum AC operation with minimal outside humidity influence test system with the
following settings:
• Windows and sunroof closed.
• Fresh air on Recirc (recirculation) mode.
• Stratified air set between middle and maximum cold (blue).
• Climate set to AUTO
• MAX AC
2. Check the drive belt of the compressor.
3. If drive belt is okay then check if the pulley of the air conditioning compressor is able to spin
freely when not energized.
• If the belt pulley is not moving freely the air conditioning compressor is faulty and
should be replaced. Replace the air conditioning compressor according to the repair
instructions.
• If belt pulley is moving freely then connect the diagnosis tester and perform a vehicle
test. Follow test plans for any stored climate control related fault codes.
4. Read out the temperature value of the evaporator temperature sensor via ISTA. The path in
ISTA is as follows:
Function Structure -> Heating and air conditioning functions -> Temperature sensors -> Test
module for heating and air conditioning functions: Run temperature sensors. If the temperature
value is plausible: the air conditioning compressor is not faulty. Continue diagnosis.
If temperature value is implausible (Never gets cold or goes below freezing):
Check AC system pressures.
Check if there is sufficient refrigerant in the AC system.
Carry out leak detection, locate and repair leak.
5. If there is sufficient refrigerant in the refrigerant circuit then the control valve in the air
conditioning compressor is likely obstructed.
Proceed with
• step 6 Procedure if flushing equipment is available for the refrigerant circuit
or
• step 23 Procedure if NO flushing equipment is available for the refrigerant circuit
6. Procedure if flushing equipment is available for the refrigerant circuit- Observe repair
instructions
• 64 50 770 "Flush refrigerant circuit"
• Important: Follow Repair Instructions 64 50 775
• Evacuate refrigerant circuit (if not done already)
7. Remove and then bypass the air
conditioning compressor with two
flushing adapters.
• Mount the special tool 2 286
732 onto the high-pressure line
(2) of the air conditioning
compressor and secure with the
M8 screw (1) that is on the
vehicle.
• Mount the special tool 2 286
730 onto the low-pressure line
(4) of the air conditioning
compressor and secure with the
M8 screw (5) that is on the
vehicle.
• M8 Bolts Torque 19 Nm. Two
persons, one holding the
adapter and the other tightening
to torque simplifies the process.
• These adapters are connected
via a jumper hose such as 83
30 2 285 575
These two special tools are part of the
BMW i basic adapter set 83 30 2 413
236.
If servicing a G05 hybrid vehicle a
second special tool 83 30 2 286 732
is also required so you will need two
83 30 2 413 236 kits. Refer to Repair
Instructions
NOTE:These pictures are for example
purposes. Some parts may differ in
certain details depending on model.
8. Remove and then bypass the
expansion valve with flushing adapter
83 30 2 412 530.
• The flushing adapter will have a
hole on both inlet and outlet as
seen on the left.
• There are identical shaped
block off plates available for
pressure testing which have no
holes and will not allow for
flushing. Do not use a solid
adapter such as part number 2
420 896 if the evaporator is to
be flushed!
• Fasten with the M5 screws (1)
of the expansion valve that has
been previously removed.
• M5 Bolts Torque 5.5 Nm
• Attach the refrigerant lines to the
special tool and secure with the
M6 screw that has been
previously removed.
• M6 Bolts Torque 13 Nm
• To reach the expansion valve by
laying across the engine
compartment you could use the
padded board special i8 Tool 81
49 2 288 435 and foam pad
fender covers 81 47 2 409 091
9. The condenser must be bypassed
since it is a non-flushable component.
Disconnect condenser hoses and
bypass with flushing adapter
83 30 2 286 732 or 83 30 2 412 932
based on thread size
and
83 30 2 414 998
Connect the two adapters with
connecting hose
83 30 2 285 575
This step may not yet be included in all
ISTA repair instructions. This adds one
additional vehicle AC hose to the flush
circuit
10. There are plastic push tabs that must
be depressed to release the AC
condenser from the cooling module.
This is on the driver’s side.
11. There are plastic push tabs that must
be depressed to release the AC
condenser from the cooling module.
This is on the passenger’s side.
12. The flush machine (Robinair or Mahle
manufactured) will come with hoses,
filter, and hardware. Pictures are of the
Mahle flush kit as received.
The adapters to connect to the AC
machine come with the flushing
machine.
There are adapters for both R134a and
Y1234a.
13. Only the R134a adapters fit the quick
disconnects of the AC machine.
The Y1234a adapter fits the low side
quick disconnect of the AC machine,
however the high side must have the
quick disconnect fitting removed
(left) in order to install the brass
adapter for connection. The O-ring
seen in the picture, removed from the
high side quick disconnect, must not be
installed onto the brass adapter. This
additional O-ring will not allow for full
compression of the fittings when
tightening resulting in a leak from the
brass adapter.
14. High side brass swivel fitting adapter
for Y1234a high side connection.
15. Y1234a high side adapter installed in
place of the quick disconnect
AC Flush circuit yellow hose (top), brass
swivel adapter, and AC Flush machine high
side red hose (bottom).
16. Connect the air conditioning service
device (AC Recycling machine and
flushing adapter) to the cable
connections. Follow instructions from
the flushing adapter instruction manual
on proper hose connections to the
vehicle.
It is best to leave the yellow hose loose
at the flush machine, make your
connection to the vehicle, then tighten
the hose at the flush machine.
17. Once all hoses are connected, mark
one or both of the hoses to ensure
proper connection of the flushing
equipment. (i.e. Red hi side, Blue low
side) You cannot flush the system
backwards due to the orifice sizes on
inlet/outlet of the expansion valve
bypass.
18. The filter on the flushing cannister must
be replaced on a regular basis to
ensure no contamination entering the
AC machine.
•
•
•
This filter should be replaced
after flushing 5 vehicles
maximum.
TIP: To track filter usage a
permanent marker or a paint
line can be placed on the filter
every flush. After 5 lines it’s
time to replace.
If the filter is plugged some AC
machines (Robinair) will display
an error message “System
Flush not possible clogged
flush filter’
19. The flush procedure requires 4+ kg of
refrigerant in the Internal Storage
Vessel (ISV) tank within the AC flush
machine. If there is an insufficient
amount of refrigerant in the ISV the
flush procedure will not start and will
prompt an error message “Insufficient
Refrigerant”. The amount of refrigerant
allowed in the ISV when the AC flush
machine transfers from the external
tank is set in the machines settings
menu. You may have to go into the
menu of the AC machine to set the ISV
amount. Follow instructions of the AC
flush machine manufacturer.
20. For example on the Robinair AC12346 machine to change the amount of
stored refrigerant in the ISV go to
UNIT SETUP
TANK FILL ADJUSTMENT
enter the amount required.
NOTE: On this Robinair AC machine
there is 0.9 kg of refrigerant within the
system that is not displayed in the ISV
tank level. So to get an actual 4 kg of
refrigerant you would need to set the
tank level to at least 4.9 kg for the flush
procedure to run.
21. A 30-minute flush is recommended.
The default value on the AC flush
machine may only be 10 minutes. You
won’t see an option to extend this flush
time until AFTER the machine has
performed its vacuum and pressure
tests.
Observe the sight glass on the flush
machine at beginning and end of
flushing. There should be no debris
visible at the end of flushing.
22. After flushing
• Install a new air conditioning
compressor, expansion valve
and air conditioning condenser.
according to the repair
instructions.
NOTE: if the refrigerant circuit
has been flushed it is not
necessary to adjust the amount
of refrigerant oil when a new air
conditioning compressor is
installed due to the ‘factory oil
fill’ being sufficient for the entire
system.
• Contact Teileclearing for
compressors that are on the TC
list.
• Remove flushing adapter and
replace expansion valve.
• Replace all O-rings where the
system was opened.
• Fill the air conditioning system
with refrigerant.
• Dye may be added to the fill to
allow for expedited leak
identification in case of a
problem. Only use a minimal
amount of dye concentrate per
the manufacturer’s
•
•
recommendation (typical 2-3
drops)
Make sure compressor run in
test plan is completed with
ISTA.
Reassess the vehicles AC
operation.
Repair is complete.
23. Procedure if no flushing equipment is available for the refrigerant circuit.
Evacuate refrigerant circuit (if not done already).
Then replace the air conditioning compressor, expansion valve and air conditioning
condenser.
Observe oil fill capacity for replaced parts. The oil capacity for the compressor is
printed either on a separate tag that comes in the parts box, or directly on the label
on the compressor.
• See Repair instructions for 'opening and part exchange in refrigerant circuit' for oil to
be added for additional parts that are to be replaced.
• Contact Teileclearing for compressors that are on the TC list.
• use compressed Nitrogen/air to blow out the lines/evaporator.
• Replace all O-rings where the system was opened.
• Evacuate and fill the air conditioning system
• Dye may be added to the fill to allow for expedited leak identification in case of a
problem. Only use a minimal amount of dye concentrate per the manufacturer’s
recommendation (typical 2-3 drops)
• Make sure compressor run in test plan is completed with ISTA
• Reassess the vehicles AC operation.
Repair is complete.
24. If you want to document time spent on
this repair please submit an INFO
ONLY TSARA case
If you require further technical support please
submit a REPLY REQUESTED TSARA case.

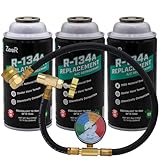
- R134a Replacement - Hydrocarbon blend that is 100% natural...
- 6oz (11.7 fl oz) Cans - Compressed gas is measured by...
- SSV Cans - Self Sealing Valve allows for the storage of...
- Disclosures - Product is flammable like many other modern...
If the PDF is very large, it may not load in the preview below.
Some older TSBs had multiple PDFs — visit the NHTSA Website to view all PDFs.
If the TSB PDF does not show, download or view it on the NHTSA Website.
Click on the (+) Plus Sign
Then Click on Associated Document(s)
Search NHTSA Database for Recalls
Search NHTSA Database for Vehicle Investigations
View Latest Vehicle Investigations
Search NHTSA Database for Vehicle Complaints
View Latest Vehicle Complaints
TSB/Document ID: B640821
Replacement Service Bulletin Number:
MFR Communication Date: 2023-06-01
MFR Internal Campaign ID/Software Version:
Communication Type: Service Bulletin/Repair Instructions
NHTSA Components: VISIBILITY:DEFROSTER/DEFOGGER/HVAC SYSTEM
MFR Component System:
MFR Component Subsystem:
Previous TSB | Next TSB |

- [Notice] When you receive a used device, it may be a customer return resold by Amazon without inspection. You can exchange it for a new one through Amazon. As this situation is unavoidable, we sincerely apologize. For any issues, contacting us via Amazon's "Messages" is the best way. THINKSCAN 689BT Bidirectional Scan Tool Can Be Used Immediately After It is Turned On, Without Complicated Registration Process, Which is More Convenient & Quick.
- Full Bi-Directional Control & 3000+ Active Tests: Take control and test components like actuators, fuel injectors, relays, and cooling fans in real time. You’ll quickly see if the problem is in the part itself or the control module — saving you hours of guesswork and frustrating trial-and-error.
- Advanced ECU Coding Capabilities: Handle module matching and hidden feature activation with confidence. When you replace an ECU or want to customize settings, this obd2 scanner diagnostic bi directional tool gives you the professional-level capabilities you need without the dealership price tag.
- 34+ Useful Reset and Maintenance Functions: Complete everyday service tasks smoothly with a wide range of helpful reset and maintenance functions. Whether you’re keeping up with regular upkeep or tackling a specific job, this scanner makes maintenance simpler and less stressful for both DIYers and pros.
- Comprehensive Full System Diagnostics: Diagnose every major system — Engine, Transmission, ABS, SRS, TPMS, and more — all in one place. Finally stop wondering if you’re missing something important; get the full picture and clear codes with ease.

- Top Reasons to Choose the D7S OBD2 Scanner: XTOOL D7S car scan tool, an upgrade of XTOOL D7, offers comprehensive features for automotive technicians, workshops, and DIY enthusiasts 1. Upgraded Hardware: 2+64GB memory, rear camera, intuitive interface, foldable bracket 2. Complete Diagnostics: FCA
 Autoauth, OE-level all system scan, 39+ maintenance services, 4K+ bidirectional, CANFD/DoIP protocol 3. Advanced Capabilities: ECU coding, PMI functions 4. Wide Compatibility: Support 10,000+ models, covering 99% vehicle brands 5. Multi-language: Available in 22+ languages, No IP Restrictions 6. 3-Year Updates: Save 300 bucks on software updates for the latest features and optimizations
 - 2026 Upgraded D7S Car Scanner Features: The newly 2026 D7S V2.0 scanner for car brings exciting features for advanced vehicle diagnostics and enhanced user experience 1. FCA AutoAuth: Now supports FCA SGW module for Chrysler, for Jeep, for Dodge (2018+), for Fiat (2017+), enabling faster vehicle communication without gateway restrictions 2. PMI (Offline ECU Programming): Allows for Ford, for Lincoln, and for Mazda ECU programming for new modules 3. Optimized Diagnostic Report 2.0: Personalized reports with logos and customer info for auto shops. Note: Compatibility varies by cars, please check before order
- Cost-effective ECU Coding Scan Tool for Specific Brands: Enhance your vehicle's performance with XTOOL D7S! This obd2 scanner all systems bidirectional offers advanced capabilities at an affordable price, supports online for BMW, for Benz and offline for BENZ, for MIT, along with PMI functions for Ford, for Mazda, and for Lincoln. Ideal for technicians and DIY enthusiasts, this automotive scanner diagnostic tool optimizes vehicle performance and enhances the driving experience. Note: Not for all cars and modules, please send car VIN to check the compatibility before purchase
- OE All System Diagnostic & 8 Pids Graphing: XTOOL D7S is a comprehensive all system bi directional obd2 scanner that delivers dealer-level diagnostics, completely controlling over your vehicle’s performance and health. This automotive scan tool can read and clear DTCs, view live data and ECU information, retrieve freeze frames, and perform active tests and full obd2 functions. This bi-directional scan tool can can identify your vehicle's make, model, and year information with just one click and show up to 8 PIDs live data with options for CSV viewing, playback, and recording for in-depth analysis. It is easy-to-use for both professionals and beginners, helping pinpoint issues efficiently
- 3 Years Software Update, Value for Money: With 3 years of software updates and 22+ languages(no IP restrictions), XTOOL D7S auto scanner code scanner ensures ongoing compatibility for the latest car models and improved diagnostic functions. This all system vehicle diagnostic scanner comes with a 30-day return policy and a 24-month repair for dependable performance. XTOOL are dedicated to your satisfaction, so enjoy seamless support and lifetime expert assistance. Should you encounter any issues or concerns, don’t hesitate to reach out XTOOL. D7S with newest update with 22 languages freely transfer without authorization, check details from setting-language or from XTOOL

- 🔥 Historical lowest pr-ice now on sa-le--hot se-lling.
- 【🎈𝗜𝗙𝟳𝟰𝟱 𝗽𝗲𝗿𝗳𝗼𝗿𝗺𝘀 𝟲 𝗲𝘀𝘀𝗲𝗻𝘁𝗶𝗮𝗹 𝗿𝗲𝘀𝗲𝘁 𝗳𝘂𝗻𝗰𝘁𝗶𝗼𝗻𝘀—𝗔𝗕𝗦 𝗕𝗹𝗲𝗲𝗱𝗶𝗻𝗴, 𝗢𝗶𝗹 𝗥𝗲𝘀𝗲𝘁, 𝗘𝗣𝗕, 𝗦𝗔𝗦, 𝗧𝗵𝗿𝗼𝘁𝘁𝗹𝗲 𝗥𝗲𝗹𝗲𝗮𝗿𝗻, 𝗮𝗻𝗱 𝗕𝗠𝗦—𝗽𝘂𝘁𝘁𝗶𝗻𝗴 𝗽𝗿𝗼𝗳𝗲𝘀𝘀𝗶𝗼𝗻𝗮𝗹-𝗴𝗿𝗮𝗱𝗲 𝗺𝗮𝗶𝗻𝘁𝗲𝗻𝗮𝗻𝗰𝗲 𝗯𝗮𝗰𝗸 𝗶𝗻 𝘆𝗼𝘂𝗿 𝗵𝗮𝗻𝗱𝘀.】Spongy brakes? Stuck oil light? Parking brake won't release? Off-center steering? Rough idle after battery disconnect? Draining battery? IF745 handles all with a few taps. One tool covers six dealer-level resets, saving hundreds in labor costs. ❗ NOTE: Does NOT support bidirectional control, coding, or programming.
- 【✨ 𝗜𝗙𝟳𝟰𝟱 𝗴𝗼𝗲𝘀 𝗯𝗲𝘆𝗼𝗻𝗱 𝗯𝗮𝘀𝗶𝗰 𝗰𝗼𝗱𝗲 𝗿𝗲𝗮𝗱𝗶𝗻𝗴 𝘄𝗶𝘁𝗵 𝟭𝟬 𝗶𝗻𝘁𝗲𝗴𝗿𝗮𝘁𝗲𝗱 𝗳𝘂𝗻𝗰𝘁𝗶𝗼𝗻𝘀—𝗗𝗧𝗖 𝗟𝗼𝗼𝗸𝘂𝗽, 𝗜/𝗠 𝗥𝗲𝗮𝗱𝗶𝗻𝗲𝘀𝘀, 𝗙𝗿𝗲𝗲𝘇𝗲 𝗙𝗿𝗮𝗺𝗲, 𝗟𝗶𝘃𝗲 𝗗𝗮𝘁𝗮, 𝗢𝟮𝗦, 𝗢𝗕𝗠, 𝗘𝗩𝗔𝗣, 𝗮𝗻𝗱 𝗺𝗼𝗿𝗲. 】Pulling a code tells you something is wrong. IF745 tells you what the code means, when the fault happened, and what data surrounds it. Pass emissions with one I/M Readiness tap. Freeze the fault moment with Freeze Frame. Monitor live sensor data in real time. Turn cryptic codes into clear answers.
- 【🛒 𝗜𝗙𝟳𝟰𝟱 𝗽𝗲𝗿𝗳𝗼𝗿𝗺𝘀 𝗳𝘂𝗹𝗹-𝘀𝘆𝘀𝘁𝗲𝗺 𝗱𝗶𝗮𝗴𝗻𝗼𝘀𝘁𝗶𝗰𝘀 𝗮𝗰𝗿𝗼𝘀𝘀 𝗮𝗹𝗹 𝗺𝗼𝗱𝘂𝗹𝗲𝘀—𝗲𝗻𝗴𝗶𝗻𝗲, 𝗔𝗕𝗦, 𝗮𝗶𝗿𝗯𝗮𝗴, 𝘁𝗿𝗮𝗻𝘀𝗺𝗶𝘀𝘀𝗶𝗼𝗻, 𝘀𝘁𝗲𝗲𝗿𝗶𝗻𝗴, 𝘀𝘂𝘀𝗽𝗲𝗻𝘀𝗶𝗼𝗻, 𝗯𝗼𝗱𝘆 𝗲𝗹𝗲𝗰𝘁𝗿𝗼𝗻𝗶𝗰𝘀, 𝗮𝗻𝗱 𝗺𝗼𝗿𝗲. 】Warning lights on but you don't know why? Skip the $100+ diagnostic fee at the shop. Run a complete self-check from your driveway. IF745 reads and clears fault codes, retrieves ECU info, and displays live data from every accessible module—delivering a full vehicle health report in minutes, without leaving home.
- 【✅𝗜𝗙𝟳𝟰𝟱 𝗳𝗲𝗮𝘁𝘂𝗿𝗲𝘀 𝗮 𝟳-𝗶𝗻𝗰𝗵 𝗱𝗶𝘀𝗽𝗹𝗮𝘆, 𝗲𝗿𝗴𝗼𝗻𝗼𝗺𝗶𝗰 𝗱𝗲𝘀𝗶𝗴𝗻, 𝗪𝗶-𝗙𝗶 𝘂𝗽𝗱𝗮𝘁𝗲𝘀, 𝗮𝗻𝗱 𝘇𝗲𝗿𝗼 𝘀𝘂𝗯𝘀𝗰𝗿𝗶𝗽𝘁𝗶𝗼𝗻 𝗳𝗲𝗲𝘀 𝗳𝗼𝗿 𝗵𝗮𝘀𝘀𝗹𝗲-𝗳𝗿𝗲𝗲 𝗱𝗶𝗮𝗴𝗻𝗼𝘀𝘁𝗶𝗰𝘀.】Large screen means no squinting. Intuitive navigation and customizable data displays put key info at your fingertips. Wi-Fi delivers lifetime free updates without a computer. No recurring fees. No hidden costs. Just a reliable tool that works as hard as you do.
This product presentation was made with AAWP plugin.