
NHTSA ID Number: 10235881
Manufacturer Communication Number: WQE41
TSB/Document Date: 2023-05-08
Summary
Preliminary Inspection and Repair Procedure for Puddle Light Campaign WQE-41
ATTENTION:
GENERAL MANAGER
PARTS MANAGER
CLAIMS PERSONNEL
SERVICE MANAGER
q
q
q
q
IMPORTANT - All
Service Personnel
Should Read and
Initial in the boxes
provided, right.
REPAIR PROCEDURE
APPLICABILITY: 2009-2012MY Forester
2010-2011MY Legacy and Outback
2006-2012MY Tribeca
DATE:
January 2013
SUBJECT: Preliminary Inspection and Repair Procedure
for Puddle Light Campaign WQE-41
INTRODUCTION
Subaru has determined that affected vehicles equipped with optional Genuine Subaru
Puddle Lights may develop a short circuit and cause the related components to overheat and
potentially melt. A short circuit can develop when either the puddle lights or their connectors
are exposed to an electrolytic moisture source (i.e. salt water) and it penetrates the circuit
board of the puddle light or the pins of the puddle light connector(s). If the puddle lights or
connectors were to overheat, they could melt and pose a risk of a fire.
To correct this condition, dealers will inspect and, if necessary, repair the puddle lights. As a
precautionary measure, it will be necessary to add in-line fuses for both the left and right side
puddle lights to those vehicles that do not already have fuses contained in the wire harnesses.
AFFECTED VEHICLES
The following vehicles equipped with puddle lights are affected:
• 2010 and 2011MY Subaru Legacy and Outback
• 2006 through 2012MY Tribeca vehicles sold before January 2012
• 2009 through 2012MY Forester vehicles sold before January 2012
OWNER NOTIFICATION
Subaru expects to notify affected vehicle owners by first class mail beginning on or around
February 18, 2013.
PARTS INFORMATION
Subaru is in the process of acquiring an adequate supply of in-line fuse kits needed to remedy the condition. When available, Subaru will notify potentially affected vehicle owners by
First Class mail. In the meantime, there are a very limited number of parts available to assist
customers who express an immediate need for a remedy. In cases where the vehicle does not
already have inline fuses, dealers should enter a VOR order for the parts. It will then be necessary to contact the Parts Information Coordinators (PICs) Help Desk to arrange release of the
parts. The current owner’s name, their ZIP Code, VOR order number, and VIN for the vehicle
the parts are being ordered for.
•
H001SSC300 Fused Mini-Harness Packaged Individually (2 needed per vehicle)
The goal of this procedure is to ensure the vehicle has an in-line mini fuse installed in series
with the puddle light harness on both sides of the vehicle and that the puddle light system operates as designed. This inspection / repair procedure will be accomplished by accessing the
puddle light harness to body harness connection. This is achieved with removal of the front
accessory splash guard/ mud flap (if equipped) and a partial removal of the fender’s inner
splash shield/ fender liner for each front wheel. Regardless of the findings of the inspection of
one side, both sides must be inspected/ repaired to complete this campaign.
Continued...
Bulletin Number: WQE-41; Date: January 2013
Page 1
NOTES:
•
See Appendix C for a summary flow chart of the following procedure. Be sure to follow
the detailed written procedure below in its entirety. The flow chart only provides a summary. In addition, a Post-Repair Diagnosis flow chart is provided for reference if needed.
•
Read through and understand this complete procedure before beginning any repairs.
1. Confirm the vehicle is equipped with optional Genuine Subaru puddle lights. If the
vehicle is not equipped, no correction is required. Return the vehicle to the Customer.
If the vehicle IS equipped with Genuine Subaru puddle lights:
2. Verify the operation of all 4 puddle lights (2 lights per side, 2 LED bulbs per light). The lights
may be activated by opening the driver’s door. Inspect both sides at this time.
3. Complete the next steps starting with the driver’s side of the vehicle and then repeat on the
passenger side. Both sides must be completed for this campaign. All current replacement
puddle light harnesses include an in-line mini fuse.
NOTE: If any puddle lights are found inoperative, whether there is an in-line fuse installed
or not, replace the puddle light harness and both light assemblies on that side of the vehicle.
Refer to the Accessory Installation Guide available on STIS for specific accessory component
installation procedures. Search STIS using the keyword “puddle”. Not all model years and
models are shown, so refer to the instructions for the model year and model you are working
on. If your model year is not shown, use the next latest model year.
4. If both puddle lights were operational on each side, determine if the puddle light
harnesses on both sides are fitted with in-line fuses (detailed instructions are provided
in Appendix A).
NOTE: The in-line fuse may be either part of the existing harness itself, or a separately fused
mini-harness.
Continued...
Bulletin Number: WQE-41; Date: January 2013
Page 2
5. If an in-line fuse is verified in the puddle light harnesses on both sides of the vehicle, and the
lights function normally, no further action is necessary. Re-assemble the splash shields and
return the vehicle to the customer completing the campaign procedure.
6. If there is no in-line fuse present on either side puddle light harness, a fused mini-harness
must be installed. Record the customer’s radio station presets (and navigation Favorites) then
disconnect vehicle battery before installing the Fused Mini- Harness.
NOTE: If there is any corrosion or damage to the puddle light harness side connection,
replace the harness and both lights. If there is any corrosion or damage to the body harness
side where the puddle light harness connects, repair or replace the body harness as necessary.
7. Once both sides have had in-line fuses either installed or verified, reconnect the battery and
confirm that the puddle lights are operational. Leave the driver’s door open with the puddle
lights on for at least 5 minutes before reinstalling the splash shields. If the lights do not
operate, and the in-line fuse becomes open, replace the harness and both light assemblies on
the affected side of the vehicle.
Appendix A - Harness Access and Inspection Process
1. Raise the vehicle as necessary to access the inner fender splash shields. Wheel removal is
generally not required.
2. Remove the accessory splash guard (if equipped) and the retaining clips at the rear portion
of the front wheel opening. Move just enough of the splash shield to expose the puddle light
wiring and body harness connectors
Continued...
Bulletin Number: WQE-41; Date: January 2013
Page 3
NOTES:
•
A Forester is shown in the photo on pg. 4 for illustration only.
•
Splash guard removal may also be required for access to the splash shield retaining
clips.
•
Retaining clip locations will vary by model.
•
See Appendix B for samples of retaining clip locations by model.
•
The photos below show a puddle light harness without the in-line mini-fuse on the left
and the current replacement harness with the with the in-line mini-fuse on the right.
No mini-fuse installed
.
With mini-fuse installed
CAUTION:
On Legacy, Outback and Forester models, locate the two metal tabs along the inside edge of
the front fender. Use caution and support these small painted fender tabs inside the wheel arch
when removing the splash shield. These tabs are painted body color and cracking of the paint
is likely if the tabs are bent. Place one hand on the tab to secure it while pushing the splash
shield up and over the tab with your other hand. Use the same method when you reinstall the
splash shield. Touch-up any damaged tabs to minimize any future possibility of rust.
Continued...
Bulletin Number: WQE-41; Date: January 2013
Page 4
•
On Legacy and Outback models, use caution when moving the splash shield as the
body harness for the puddle lights is secured to it at two points as shown below. It is
not required to drop the entire splash shield. Simply move enough of the shield to gain
access to the connection which is located at the rear of the wheel opening. This information and photo are provided as a reference only.
3. Once the splash shield has been moved enough for access, inspect the puddle light
harnesses.
a. I f the vehicle already has an in-line fuse in the red power wire within a few
inches of the vehicle connector as shown in the photo below and both lights
(all 4 LED bulbs) operate, no further action is required on that side.
Vehicle Body
Harness Connector
In-Line Fuse
Continued...
Bulletin Number: WQE-41; Date: January 2013
Page 5
b. Proceed to check the other side of the vehicle starting again at Step 2. Once
inspection of both sides of the vehicle is complete, proceed to Step 5.
c. If no in-line fuse or Fused Mini-Harness is present, unplug the puddle light
harness connector from the vehicle body harness connector and install the Fused
Mini-Harness as shown in the reference photos below.
Vehicle
pre-arranged
connector
Fused
Mini-Harness
Puddle
lamp
harness
Fused Mini-Harness
Route the completed harness behind the splash shield. Use electrical tape to secure any
excess harness out of the way avoiding any areas where it may be exposed to sharp edges
or become pinched. Do not reassemble yet. Once both sides of the vehicle have been
completed, proceed to the next step.
Continued...
Bulletin Number: WQE-41; Date: January 2013
Page 6
4. After completing installation of the Fused Mini-Harness on both sides of the vehicle,
reconnect the battery and confirm that all the puddle lights operate normally by leaving the
driver’s door open with the puddle lights on for at least 5 minutes.
a. If any of the lights fail to operate as designed, review all connections to ensure
they are secure.
b. If the mini-fuse in the Fused Mini-Harness or puddle light harness has become
open, replace the puddle light harness and both lights on that side of the vehicle.
Refer to applicable accessory installation guide for detailed instructions for
harness and light installation. NOTE: All current replacement puddle light
harnesses include an in-line fuse. In this case, installation of the Fused MiniHarness would not be required.
c. If not resolved, by a and / or b, see the Post-Repair Diagnostic Flow Chart in
Appendix C.
IMPORTANT: At no time should two mini fuses be placed in series on the same side/ same
circuit.
5. Once proper operation is confirmed, reinstall the splash shields, retaining clips and splash
guards (if equipped).
6. Perform one final check to confirm all 4 puddle lights operate properly to complete the
procedure before releasing the vehicle.
NOTE: If additional parts are necessary to repair the vehicle, a listing by model is supplied
below
2010-2012 Legacy and Outback Models
• H471SAJ010
LED Lamp Assy.
(2 per side)
• H471SAJ020
Puddle Light Harness
(1 per side)
• H471SAJ030
Hardware Kit
(1 per vehicle)
2006-2012 Tribeca Models
• H471SXA010
LED Lamp Assy.
(2 per side)
• H471SXA020
Hardware Cap
(2 per lamp)
• H471SXA030
Puddle Light Harness
(1 per side)
• H471SXA040
Hardware Kit
(1 per vehicle)
2009-2012 Forester Models
• H471SSC010
LED Lamp Assy.
(2 per side)
• H471SSC020
Puddle Light Harness
(1 per side)
• H471SSC030
Hardware Kit
(1 per vehicle)
Continued...
Bulletin Number: WQE-41; Date: January 2013
Page 7
Appendix B - Retaining Clip Locations
Reminder: Splash guard /mud flap removal may also be required in some cases to access
the retaining clips. Splash guards vary by model, but most involve removal of one horizontal
clip, two horizontal screws, and one vertical screw. Tip: When reinstalling splash guards
install the screws loosely and lift up lightly on the splash guard while giving the screws a final
tightening. This will help reduce the possibility of a gap forming between the splash guard
and the fender.
2006-2007 B9 Tribeca (5 clips)
2008-2012 Tribeca (5 clips)
Continued...
Bulletin Number: WQE-41; Date: January 2013
Page 8
2010-2011 Legacy and Outback (8 screw clips and 1 push clip)
2009-2012 Forester (3 clips)
Bulletin Number: WQE-41; Date: January 2013
Page 9
Appendix C - Summary and Post-Repair Flow Charts
Check Puddle Light
Operation by opening
Driver door
NOTE: CHECK BOTH SIDES & ALL LIGHTS
The following procedures must be performed on
EACH SIDE
Disconnect Battery
Disassemble and access Puddle Light harness connection
Were all lights
working on this
side?
YES
Is an in-line fuse
installed?
NO
Replace Puddle Light
harness and both lights
on affected side
NO
YES
Both sides of vehicle
completed?
Install Fused MiniHarness
NO
YES
NO
Both Sides of vehicle
Completed?
YES
Reconnect Battery
YES
Confirm all lights
on both sides now
operate correctly for
at least 5 minutes
Reassemble &
complete claim
NO
See Post-Repair Diagnosis
Procedures
YES
Corrected?
NO
Continued...
Bulletin Number: WQE-41; Date: January 2013
Page 10
Post-Repair Diagnosis
Procedures
Check Mini Fuse
Check Fused Mini -Harness
connections
Is fuse
open?
NO
NO
Corrected?
YES
Replace Puddle Light
harness and both lights
on affected side
YES
Corrected?
Check and repair body side
harness and/or fuse
NO
Corrected?
YES
YES
Reassemble &
complete claim
NO
Contact
Techline
WARRANTY / CLAIM INFORMATION
Until the Recall Campaign is in force in mid-February, 2013, these repairs must be claimed
under Warranty or PAR depending upon age and mileage of the vehicle. Contact the Subaru
Claims Team for prior authorization when beyond 7 years/ 80,000 miles.
LABOR DESCRIPTION
LABOR
OPERATION #
Vehicle Inspection for WQE-41, BOTH SIDES
A115-908
0.4
A115-921
0.5
A115-904
0.5
Inspection BOTH SIDES with Installation of
Fused Mini-Harness- ONE SIDE
Inspection BOTH SIDES with Installation of
Fused Mini-Harness- BOTH SIDES
Inspection BOTH SIDES with Puddle Light
R&R- ONE SIDE
Inspection BOTH SIDES with Puddle Light
R&R- BOTH SIDES
Inspection BOTH SIDES with 1 Fused Mini-Harness
and 1 Puddle Light R&R- ONE SIDE
Bulletin Number: WQE-41; Date: January 2013
A115-911
FAIL
CODE
ZOY-38
LABOR
TIME
0.7
A115-914
0.9
A115-923
0.7
Page 11

- 💯【Conta.ct us for Support Directly】If you met any...
- 🔥🔥🔥【2026 AUTEL FLAGSHIP MK900BT MK900-BT, NEW...
- 🚗【3000+ ACTIVE TESTS (50➡3000+), SAME AS MS...
- 🚗【40+ HOT SERVICES FOR 150 MAKES (28+➡40+)】Full...
- 🚗【OE ALL SYSTEM DIAGNOSE, AUTO SCAN 2.0: SCAN LICENSE...

- 📌【We are Here for You】Dear valued customer, please be...
- 🚀【5X Faster Next-Level Hardware, Same as MK900/ MX...
- 🔥【3000+ Active Tests = MK900/MK900BT but...
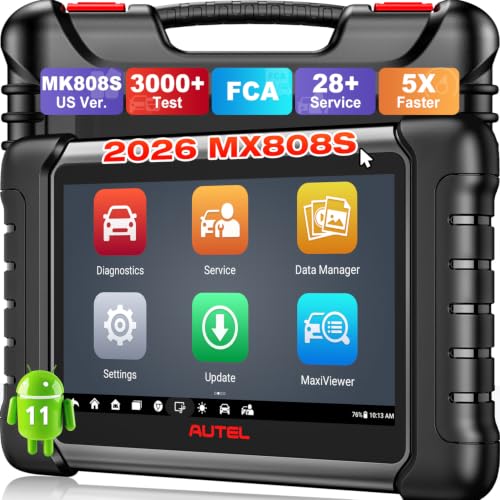
- 📢【2026 U.S. Version, All-in-One as MK808S/ MK808Z...
- 🔥【28+ Hot Services for 150+ Brands】Same as MaxiCOM...
If the PDF is very large, it may not load in the preview below.
Some older TSBs had multiple PDFs — visit the NHTSA Website to view all PDFs.
If the TSB PDF does not show, download or view it on the NHTSA Website.
Click on the (+) Plus Sign
Then Click on Associated Document(s)
Search NHTSA Database for Recalls
Search NHTSA Database for Vehicle Investigations
View Latest Vehicle Investigations
Search NHTSA Database for Vehicle Complaints
View Latest Vehicle Complaints
TSB/Document ID: WQE41
Replacement Service Bulletin Number:
MFR Communication Date: 2013-01-01
MFR Internal Campaign ID/Software Version:
Communication Type: Service Bulletin/Repair Instructions
NHTSA Components: ELECTRICAL SYSTEM
MFR Component System:
MFR Component Subsystem:
Previous TSB | Next TSB |

- [Notice] When you receive a used device, it may be a customer return resold by Amazon without inspection. You can exchange it for a new one through Amazon. As this situation is unavoidable, we sincerely apologize. For any issues, contacting us via Amazon's "Messages" is the best way. THINKSCAN 689BT Bidirectional Scan Tool Can Be Used Immediately After It is Turned On, Without Complicated Registration Process, Which is More Convenient & Quick.
- Full Bi-Directional Control & 3000+ Active Tests: Take control and test components like actuators, fuel injectors, relays, and cooling fans in real time. You’ll quickly see if the problem is in the part itself or the control module — saving you hours of guesswork and frustrating trial-and-error.
- Advanced ECU Coding Capabilities: Handle module matching and hidden feature activation with confidence. When you replace an ECU or want to customize settings, this obd2 scanner diagnostic bi directional tool gives you the professional-level capabilities you need without the dealership price tag.
- 34+ Useful Reset and Maintenance Functions: Complete everyday service tasks smoothly with a wide range of helpful reset and maintenance functions. Whether you’re keeping up with regular upkeep or tackling a specific job, this scanner makes maintenance simpler and less stressful for both DIYers and pros.
- Comprehensive Full System Diagnostics: Diagnose every major system — Engine, Transmission
 , ABS, SRS, TPMS, and more — all in one place. Finally stop wondering if you’re missing something important; get the full picture and clear codes with ease.

- Top Reasons to Choose the D7S OBD2 Scanner: XTOOL D7S car scan tool, an upgrade of XTOOL D7, offers comprehensive features for automotive technicians, workshops, and DIY enthusiasts 1. Upgraded Hardware: 2+64GB memory, rear camera, intuitive interface, foldable bracket 2. Complete Diagnostics: FCA Autoauth, OE-level all system scan, 39+ maintenance services, 4K+ bidirectional, CANFD/DoIP protocol 3. Advanced Capabilities: ECU coding, PMI functions 4. Wide Compatibility: Support 10,000+ models, covering 99% vehicle brands 5. Multi-language: Available in 22+ languages, No IP Restrictions 6. 3-Year Updates: Save 300 bucks on software updates for the latest features and optimizations
- 2026 Upgraded D7S Car Scanner Features: The newly 2026 D7S V2.0 scanner for car brings exciting features for advanced vehicle diagnostics and enhanced user experience 1. FCA AutoAuth: Now supports FCA SGW module for Chrysler, for Jeep, for Dodge (2018+), for Fiat (2017+), enabling faster vehicle communication without gateway restrictions 2. PMI (Offline ECU Programming): Allows for Ford, for Lincoln, and for Mazda ECU programming for new modules 3. Optimized Diagnostic Report 2.0: Personalized reports with logos and customer info for auto shops. Note: Compatibility varies by cars, please check before order
- Cost-effective ECU Coding Scan Tool for Specific Brands: Enhance your vehicle's performance with XTOOL D7S! This obd2 scanner all systems bidirectional offers advanced capabilities at an affordable price, supports online for BMW, for Benz and offline for BENZ, for MIT, along with PMI functions for Ford, for Mazda, and for Lincoln. Ideal for technicians and DIY enthusiasts, this automotive scanner diagnostic tool optimizes vehicle performance and enhances the driving experience. Note: Not for all cars and modules, please send car VIN to check the compatibility before purchase
- OE All System Diagnostic & 8 Pids Graphing: XTOOL D7S is a comprehensive all system bi directional obd2 scanner that delivers dealer-level diagnostics, completely controlling over your vehicle’s performance and health. This automotive scan tool can read and clear DTCs, view live data and ECU information, retrieve freeze frames, and perform active tests and full obd2 functions. This bi-directional scan tool can can identify your vehicle's make, model, and year information with just one click and show up to 8 PIDs live data with options for CSV viewing, playback, and recording for in-depth analysis. It is easy-to-use for both professionals and beginners, helping pinpoint issues efficiently
- 3 Years Software Update, Value for Money: With 3 years of software updates and 22+ languages(no IP restrictions), XTOOL D7S auto scanner code scanner ensures ongoing compatibility for the latest car models and improved diagnostic functions. This all system vehicle diagnostic scanner comes with a 30-day return policy and a 24-month repair for dependable performance. XTOOL are dedicated to your satisfaction, so enjoy seamless support and lifetime expert assistance. Should you encounter any issues or concerns, don’t hesitate to reach out XTOOL. D7S with newest update with 22 languages freely transfer without authorization, check details from setting-language or from XTOOL

- 【✅Compared to BOSSCOMM IF742, IF745 Offers Full-System Diagnostics】The BOSSCOMM IF745 car diagnostic scanner is an upgraded model of IF742. In addition to supporting all OBD2 Code Reader functions and 6 reset options (ABS/EPB/SAS/BMS/Oil/Throttle), it expands diagnostics from 4 systems (Check Engine/ABS/SRS/Transmission) to vehicle All systems, including Steering, Suspension, and Body Electronics. This provides deeper, more comprehensive diagnostic capabilities.
- 【✨6 Essential Resets: ABS Bleeding, Oil, EPB, SAS, Throttle, BMS】The BOSSCOMM IF745 obd2 scanner diagnostic tool swiftly purges air from brake lines to restore braking sensitivity, fine-tunes maintenance cycles to eliminate false alerts, resolves parking brake issues with one-click control, recalibrates steering sensors for stability, optimizes engine idling/acceleration for smoother performance, and deeply resets battery systems to extend lifespan and range via precise parameter adjustments.❗NOTE: Does NOT support bidirectional control, coding, or programming.
- 【✨Deep Diagnostics for All Vehicle System Modules】Beyond code reading/clearing and ECU information retrieval, our all-in-one data stream feature lets you inspect all current fault codes and their locations across the vehicle’s systems. This vehicle code reader helps you turn off dashboard warning lights and perform a comprehensive self-check of your car at home—no more back-and-forth trips to the repair shop or hefty inspection fees.
- 【✨10 OBD2 Functions】The BOSSCOMM IF745 scan tool’s DTC Lookup instantly translates fault codes into user-friendly explanations, its I/M Readiness feature streamlines emissions testing with a single tap, and Freeze Frame lets you pinpoint the exact moment of a fault for in-depth root-cause diagnosis. Combined with a live data dashboard and advanced diagnostics (O2S, OBMon, EVAP), it delivers comprehensive insights for confident troubleshooting.
- 【✨10,000+ Car Models, AutoVIN, 13 Languages】The BOSSCOMM IF745 vehicle scanner diagnostic tool covers 73+ global car brands and offers support in 13 languages, making it perfect for DIYers, auto mechanics, or as a thoughtful gift. With a single-click AutoVIN feature, it instantly retrieves vehicle serial numbers, streamlining diagnostics for users globally. This adaptable tool balances user-friendliness with precision, catering to both personal and professional requirements.✅Unsure about compatibility? Compatibility will vary on vehicles' model and year, pls reach us via 📧 [email protected] 📧 before purchase.
This product presentation was made with AAWP plugin.