
NHTSA ID Number: 10201080
Manufacturer Communication Number: 21B05
TSB/Document Date: 2021-09-05
Summary
After extended idling, the high-speed cooling fan relay may fail in some of the affected vehicles. A failure will cause the fan to either continuously run or never turn on. A continuously running fan will increase the temperature of the relay’s connections (terminals) to beyond their design maximum. This may eventually create an electrical arc which heats and damages the relay terminals. Customers may experience a drained battery and a non-functional or even a melted/burned high-speed cooling fan relay inside the battery junction box (BJB). A damaged non-functional relay causing the fan to never turn on, may lead to engine overheating at idle.
ATTACHMENT III
PAGE 6 OF 13
CUSTOMER SATISFACTION PROGRAM 21B05
7. Using a terminal removal tool, remove the wire terminal from the R11 relay cavity 11-3 (blue/red wire).
See Figure 9.
- From the top side of the BJB, insert the tip of the terminal removal tool into the terminal cavity
until it stops.
- Holding the release tool in place, gently push the wire of the terminal to be removed toward the
housing until it stops.
- Rotate the release tool toward the terminal to unlock the latch beam from the terminal. While
holding the tool in position, gently pull the wire until the terminal is released, then pull it straight
out from the bottom side of the BJB.
NOTE: Refer to the Workshop Manual (WSM) procedure in Section 100-00 - General Procedures for
additional terminal removal information.
11-2
11-1
11-5
11-3
2039L
FIGURE 9
CPR © 2021 FORD MOTOR COMPANY
DEARBORN, MICHIGAN 48121
08/2021
STUD FOR
MISSING NUT
STUD FOR
MISSING NUT
STUD FOR
MISSING NUT
ATTACHMENT III
PAGE 7 OF 13
CUSTOMER SATISFACTION PROGRAM 21B05
8. Using the terminal removal tool, remove the remaining three (3) wire terminals (noted below) from the
R11 relay cavities, in the same manner as the previous Step, and position the wire terminals out from
under the BJB. See Figure 10.
- Cavity 11-1 gray wire.
- Cavity 11-2 brown wire.
- Cavity 11-5 green/orange wire.
NOTE: Refer to the Workshop Manual (WSM) procedure in Section 100-00 - General Procedures for
additional terminal removal information.
11-1
11-2
11-5
2039M
FIGURE 10
STUD FOR
MISSING NUT
STUD FOR
MISSING NUT
CPR © 2021 FORD MOTOR COMPANY
DEARBORN, MICHIGAN 48121
08/2021
STUD FOR
MISSING NUT
PLACE COPY HERE
PLACE COPY HERE
ATTACHMENT III
PAGE 8 OF 13
CUSTOMER SATISFACTION PROGRAM 21B05
9. Replace the terminal ends on the four (4) R11 wire terminals that were removed in Steps 7 and 8 using
the directions below:
NOTE: The pigtail terminals supplied in the designated repair kits are of like wire gauge but are different
colors and have larger terminals ends.
NOTE: There are two (2) different gauge wires for this repair. The two (2) smaller gauge wires will use the
pigtail terminals supplied in the repair kit Part Number KU2Z-14474-EA. The two (2) larger
gauge wires will use the pigtail terminals, supplied in the repair kit Part Number JU2Z-14474-BA.
a. Cut off and discard the four (4) wire terminal ends, terminals just removed from the R11
cavities, at the base of the terminal (where the wire meets the metal terminal end).
b. Size and cut the new wires to the length of approximately 6 in. (150 mm) including the female
terminal end:
1. Two (2) of the new smaller gauge pigtail terminals (Part Number KU2Z-14474-EA).
2. Two (2) of the new larger gauge pigtail terminals (Part Number JU2Z-14474-BA).
c. Strip 0.38 in (9.53 mm) of the insulation from the two (2), in vehicle, smaller gauge wires of the
terminals just removed (from the grey and the brown wires) and two (2) new smaller gauge wires
that were just cut to length (Part Number KU2Z-14474-EA).
d. Strip 0.5 in (12.7 mm) of the insulation from the two (2), in vehicle, larger gauge wires of the
terminals just removed (from the blue/red and the green/orange) and the two (2) new
larger gauge wires that were just cut to length (Part Number JU2Z-14474-BA).
e. Install heat shrink with lined adhesive:
1. On the harness side, install a piece of two inch long, 0.38 in. (9.53 mm) diameter, heat
shrink tubing over both larger 8 AWG wires.
2.Then, install a piece of heat shrink tubing, supplied with Part Number KU2Z-14474-EA,
over both smaller 10-12 AWG wires.
3. Slide all four (4) heat shrink tubes away from the heat while soldering. See Figure 11.
f. Crimp - Blue/Red and Green/Orange Wires:
1. Make 4 crimps using the Rotunda/Motorcraft Wiring Pro - NAIAT-RACT-NI or
equivalent to crimp the 8 AWG crimp tubes per the kit.
2. Crimp one (1) of the new 8 AWG 6 inch pigtail terminals with an 8 AWG crimp tube.
3. Then, crimp the other side to the Blue/Red wire where the terminal was removed from
in the BJB.
4. Repeat this step for the Green/Orange wire. See Figure 12.
g. Crimp - Gray and Brown Wires:
1. Make 4 crimps using the Rotunda/Motorcraft Wiring Pro - NAIAT-RACT-NI or equivalent
to crimp the 10-12 AWG crimp tubes per the kit.
2. Crimp one (1) of the new 10-12 AWG 6 inch pigtail terminals with an 10-12 AWG crimp
tube.
3. Then, crimp the other side to the Gray wire where the terminal was removed from in
the BJB.
4. Repeat this step for the Brown wire. See Figure 12.
h. NOTE: Use Rosin Mildly Activated (RMA) solder. Do Not use acid core solder.
• Using the solder hole in the center of the crimp, solder the wires together.
i. Slide the piece of heat shrink tubing evenly over the soldered repair on all four (4) repaired wires.
j. Use a suitable heat gun, such as Rotunda Shielded Flameless Heat Gun with Heat Deflector
(NAIAT-R5902) that is equipped with a shrink tubing attachment, to heat the heat shrink tubing
until the adhesive comes out of both ends on all four (4) repaired wires. See Figure 13.
CPR © 2021 FORD MOTOR COMPANY
DEARBORN, MICHIGAN 48121
08/2021
ATTACHMENT III
PAGE 9 OF 13
CUSTOMER SATISFACTION PROGRAM 21B05
USE 3/8 INCH
DIAMETER HEAT SHRINK
FOR THE LARGER
8 AWG WIRES
USE THE HEAT SHRINK
SUPPLIED IN PART KIT
KU2Z-14474-EA
FOR THE SMALLER
10-12 AWG WIRES
2039V
FIGURE 11
10-12 AWG WIRE CRIMPED TO
THE GRAY AND THE
BROWN WIRES
STUD FOR
MISSING NUT
8 AWG WIRE CRIMPED TO THE
BLUE/RED AND THE
STUD FOR
GREEN/ORANGE WIRES
MISSING NUT
2039W
FIGURE 12
STUD FOR
MISSING NUT
PLACE COPY HERE
PLACE COPY HERE
PLACE COPY HERE
CPR © 2021 FORD MOTOR COMPANY
DEARBORN, MICHIGAN 48121
08/2021
STUD FOR
MISSING NUT
ATTACHMENT III
PAGE 10 OF 13
CUSTOMER SATISFACTION PROGRAM 21B05
HEAT SHRINK TUBES
CENTERED OVER SOLDERED CRIMP
2039Y
FIGURE 13
STUD FOR
MISSING NUT
STUD FOR
MISSING NUT
STUD FOR
MISSING NUT
PLACE COPY HERE
PLACE COPY HERE
PLACE COPY HERE
CPR © 2021 FORD MOTOR COMPANY
DEARBORN, MICHIGAN 48121
08/2021
ATTACHMENT III
PAGE 11 OF 13
CUSTOMER SATISFACTION PROGRAM 21B05
10. Install the four (4) wires, removed from the original relay with new terminal ends, into the new relay
R24 cavities as noted below. See Figures 14 and 15.
- Install what was the original gray wire into cavity 24-1.
- Install what was the original brown wire into cavity 24-2.
- Install what was the original blue/red wire into cavity 24-3.
- Install what was the original green/orange wire into cavity 24-5.
NOTE: When installing the terminal, gently insert the terminal end straight into the cavity until you hear,
or feel, a click. When the terminal end is fully inserted, softly pull on the terminated lead to insure
the terminal is locked into place.
BLUE/RED WIRE
24-3
BROWN WIRE
24-2
GRAY WIRE
24-1
24-5
GREEN/ORANGE WIRE
TOP VIEW OF BJB
2039T
FIGURE 14
PREVIOUS WIRE COLOR
PREVIOUS WIRE COLOR
GRAY WIRE - 24-1
BLUE/RED WIRE - 24-3
BROWN WIRE - 24-2
GREEN/ORANGE WIRE - 24-5
STUD FOR
MISSING NUT
BOTTOM VIEW OF BJB
FIGURE 15
CPR © 2021 FORD MOTOR COMPANY
DEARBORN, MICHIGAN 48121
08/2021
STUD FOR
MISSING NUT
2039S
STUD FOR
MISSING NUT
PLACE COPY HERE
PLACE COPY HERE
PLACE COPY HERE
ATTACHMENT III
PAGE 12 OF 13
CUSTOMER SATISFACTION PROGRAM 21B05
11. Position all wiring into the lower BJB half. Then, align the upper BJB half with the lower BJB half.
Push straight down to seat the clips on the side. Audible clicks can be heard as the clips correctly
seat.
12. Reinstall the TPA plastic lock by aligning all of the male terminals in the BJB with the TPA lock and
gently push straight down. As the TPA is installed, it can be felt as it passes by the lobes and properly
seats. See Figure 6.
- Inspect all four (4) corners of the TPA insert to ensure it is flush with the BJB housing.
13. Install the new larger high speed cooling fan relay into the new location, R24. See Figures 1 and 16.
14. Install the remaining fuses and relays with the exception of the original cooling fan relay R11 location,
which should have been discarded. The original relay location (R11) will stay empty. See Figure 16.
R11
NEW RELAY LOCATION
2039X
FIGURE 16
CPR © 2021 FORD MOTOR COMPANY
DEARBORN, MICHIGAN 48121
08/2021
STUD FOR
MISSING NUT
STUD FOR
MISSING NUT
ATTACHMENT III
PAGE 13 OF 13
CUSTOMER SATISFACTION PROGRAM 21B05
15. Position back both of the BJB's power feed cables and install the nuts. See Figure 17.
• Tighten to 80 lb in (9 Nm).
x2
2039D
E202332
FIGURE 17
16. Install the BJB cover. See Figure 3.
17. Position back the battery cable harness and connect the positive and negitive battery cables. Please
follow the WSM procedures in Section 414-01.
18. Ensure the high speed cooling fan motor is operational.
IMPORTANT NOTE: Federal law prohibits selling motor vehicle parts or components that are
under safety, compliance, or emissions recall. Unless a part is requested to be returned to Ford, all
parts replaced under this FSA must be scrapped in accordance with all applicable local, state and
federal environmental protection and hazardous material regulations. Refer to the Parts Retention,
Return, & Scrapping section of the FSA dealer bulletin for further information.
STUD FOR
MISSING NUT
STUD FOR
MISSING NUT
STUD FOR
MISSING NUT
PLACE COPY HERE
PLACE COPY HERE
PLACE COPY HERE
CPR © 2021 FORD MOTOR COMPANY
DEARBORN, MICHIGAN 48121
08/2021
Ford Motor Company
Ford Customer Service Division
P. O. Box 1904
Dearborn, Michigan 48121
September 2021
Customer Satisfaction Program 21B05
Mr. John Sample
123 Main Street
Anywhere, USA 12345
Your Vehicle Identification Number (VIN): 12345678901234567
At Ford Motor Company, we are committed not only to building high quality, dependable products, but
also to building a community of happy, satisfied customers. To demonstrate that commitment, we are
providing a no-charge Customer Satisfaction Program for your vehicle with the VIN shown above.
Why are you receiving
this notice?
Your vehicle is equipped with a high-speed engine compartment cooling fan
that is designed to turn on during long periods of idling to cool the engine. It
may be possible the engine cooling fan relay may fail after extended idling. A
relay failure may cause the fan to remain on even when the engine is turned
off or the fan may never turn on.
What is the effect?
If you experience an engine compartment fan that is always on, it may result
in a drained battery, or in rare circumstances a melted/burned relay inside
the fuse box. An engine compartment fan that will not turn on may lead to
engine overheating at idle.
What will Ford and
your dealer do?
In the interest of customer satisfaction, Ford Motor Company has authorized
your dealer to upgrade the current high-speed cooling fan relay with a larger
more effective relay and the related wiring connections free of charge (parts
and labor) under the terms of this program.
This Customer Satisfaction Program will be in effect until August 31, 2022
regardless of mileage. Coverage is automatically transferred to subsequent
owners.
How long will it take?
The time needed for this repair is less than one-half day. However, due to
service scheduling requirements, your dealer may need your vehicle for a
longer period of time. In addition, your vehicle may require an inspection to
determine if parts need to be ordered.
What should you do?
Please call your dealer without delay to schedule a service appointment for
Customer Satisfaction Program 21B05. Provide the dealer with your VIN,
which is printed near your name at the beginning of this letter.
© Copyright 2020 Ford Motor Company
What should you do?
(continued)
If you do not already have a servicing dealer, you can access
www.owner.Ford.com for dealer addresses, maps, and driving instructions.
Ford Motor Company wants you to have this service action completed on
your vehicle. The vehicle owner is responsible for making arrangements to
have the work completed.
Ford Motor Company can deny coverage for any vehicle damage that may
result from the failure to have this service action performed on a timely
basis. Therefore, please have this service action performed as soon as
possible.
NOTE: You can receive information about Recalls and Customer
Satisfaction Programs through our FordPass App. The app can be
downloaded through the App Store or Google Play. In addition there are
other features such as reserving and paying for parking in certain locations
and controlling certain functions on your vehicle (lock or unlock doors,
remote start) if it is equipped to allow control.
COVID-19
(CORONAVIRUS)
Ford dealerships have implemented enhanced protocols to ensure both your
safety and the safety of dealership employees. This includes specific
procedures for cleaning and disinfecting customer vehicles before and after
each vehicle is serviced. In most places, vehicle service has been deemed a
critical service. Please contact your local dealer to confirm current service
hours. For more information on how Ford and your local dealer are working
hard to keep you on the road during these challenging times, please visit
www.owner.Ford.com.
Have you previously
paid for this repair?
If you have previously paid for a repair that addresses the issue described in
this letter, you still need to have this service action performed to ensure the
correct parts and procedures were used.
If the previously paid for repair was performed before the date of this letter,
you may be eligible for a refund. Refunds will only be provided for service
related to a high-speed cooling fan relay issue. To verify eligibility and
expedite reimbursement, give your paid original receipt to your dealer before
March 31, 2022. To avoid delays, do not send receipts to Ford Motor
Company.
What if you no longer
own this vehicle?
If you no longer own this vehicle, and have an address for the current owner,
please forward this letter to the new owner.
You received this notice because our records, which are based primarily on
state registration and title data, indicate that you are the current owner.
Can we assist you
further?
If you have difficulties getting your vehicle repaired promptly and without
charge, please contact your dealership's Service Manager for assistance.
RETAIL OWNERS: If you have questions or concerns, please contact our
Ford Customer Relationship Center at 1-866-436-7332 and one of our
representatives will be happy to assist you. If you wish to contact us through
the Internet, our address is: www.owner.Ford.com
For the hearing impaired call 1-800-232-5952 (TDD). Representatives are
available Monday through Friday: 8:00AM – 8:00PM (Eastern Time).
© Copyright 2020 Ford Motor Company
Can we assist you
further?
(continued)
FLEET OWNERS: If you have questions or concerns, please contact our
Fleet Customer Information Center at 1-800-34-FLEET, choose Option
#3, and one of our representatives will be happy to assist you. If you wish to
contact us through the Internet, our address is: www.fleet.Ford.com.
Representatives are available Monday through Friday: 8:00AM - 8:00PM
(Eastern Time).
Thank you for your attention to this important matter.
Ford Customer Service Division
© Copyright 2020 Ford Motor Company
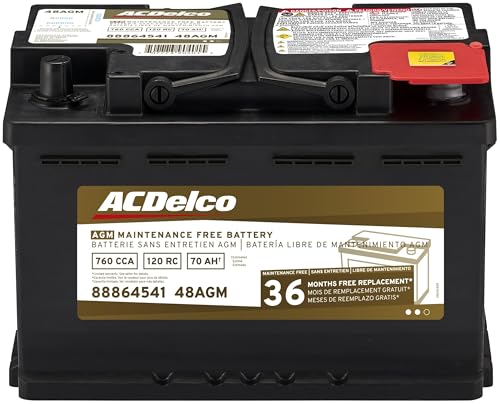
- High density negative paste, improves performance and...
- Enhanced life alloy or Silver Calcium stamped alloy...
- Calcium lead positive grid, maximizes conductivity and...
- Robust envelope separator with puncture resistant back...
- Vent cap design that resists acid leakage

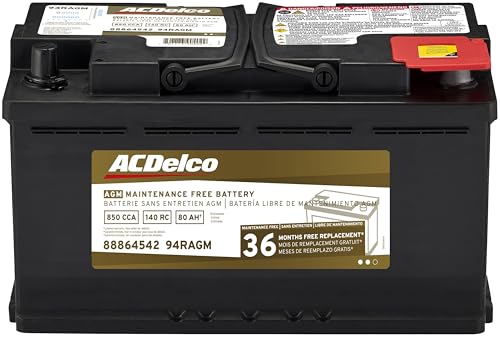
- High density negative paste, improves performance and...
- Enhanced life alloy or Silver Calcium stamped alloy...
- Calcium Lead positive grid, maximizes conductivity and...
- Robust Envelope Separator with puncture-resistant back...
- Vent cap design that resists acid leakage
If the PDF is very large, it may not load in the preview below.
Some older TSBs had multiple PDFs — visit the NHTSA Website to view all PDFs.
If the TSB PDF does not show, download or view it on the NHTSA Website.
Click on the (+) Plus Sign
Then Click on Associated Document(s)
Search NHTSA Database for Recalls
Search NHTSA Database for Vehicle Investigations
View Latest Vehicle Investigations
Search NHTSA Database for Vehicle Complaints
View Latest Vehicle Complaints
TSB/Document ID: 21B05
Replacement Service Bulletin Number:
MFR Communication Date: 2021-08-19
MFR Internal Campaign ID/Software Version:
Communication Type: Service Bulletin/Repair Instructions
NHTSA Components: ENGINE AND ENGINE COOLING
MFR Component System:
MFR Component Subsystem:
Previous TSB | Next TSB |

- [Notice] When you receive a used device, it may be a customer return resold by Amazon without inspection. You can exchange it for a new one through Amazon. As this situation is unavoidable, we sincerely apologize. For any issues, contacting us via Amazon's "Messages" is the best way. THINKSCAN 689BT Bidirectional Scan Tool Can Be Used Immediately After It is Turned On, Without Complicated Registration Process, Which is More Convenient & Quick.
- Full Bi-Directional Control & 3000+ Active Tests: Take control and test components like actuators, fuel injectors, relays, and cooling fans in real time. You’ll quickly see if the problem is in the part itself or the control module — saving you hours of guesswork and frustrating trial-and-error.
- Advanced ECU Coding Capabilities: Handle module matching and hidden feature activation with confidence. When you replace an ECU or want to customize settings, this obd2 scanner diagnostic bi directional tool gives you the professional-level capabilities you need without the dealership price tag.
- 34+ Useful Reset and Maintenance Functions: Complete everyday service tasks smoothly with a wide range of helpful reset and maintenance functions. Whether you’re keeping up with regular upkeep or tackling a specific job, this scanner makes maintenance simpler and less stressful for both DIYers and pros.
- Comprehensive Full System Diagnostics: Diagnose every major system — Engine, Transmission, ABS, SRS, TPMS, and more — all in one place. Finally stop wondering if you’re missing something important; get the full picture and clear codes with ease.

- Top Reasons to Choose the D7S OBD2 Scanner: XTOOL D7S car scan tool, an upgrade of XTOOL D7, offers comprehensive features for automotive technicians, workshops, and DIY enthusiasts 1. Upgraded Hardware: 2+64GB memory, rear camera, intuitive interface, foldable bracket 2. Complete Diagnostics: FCA
 Autoauth, OE-level all system scan, 39+ maintenance services, 4K+ bidirectional, CANFD/DoIP protocol 3. Advanced Capabilities: ECU c0ding, PMI functions 4. Wide Compatibility: Support 10,000+ models, covering 99% vehicle brands 5. Multi-language: Available in 22+ languages, No IP Restrictions 6. 3-Year Updates: Save 300 bucks on software updates for the latest features and optimizations
 - 2026 Upgraded D7S Car Scanner Features: The newly 2026 D7S V2.0 scanner for car brings exciting features for advanced vehicle diagnostics and enhanced user experience 1. FCA AutoAuth: Now supports FCA SGW module for Chrysler, for Jeep, for Dodge (2018+), for Fiat (2017+), enabling faster vehicle communication without gateway restrictions 2. PMI (Offline ECU Pr0gramming): Allows for Ford, for Lincoln, and for Mazda ECU pr0gramming for new modules 3. Optimized Diagnostic Report 2.0: Personalized reports with logos and customer info for auto shops. Note: Compatibility varies by cars, please check before order
- 39+ Services/Resets/Adaptations/Relearns/Calibrations: XTOOL D7S full system car scanner diagnostic tool tackles 99% of common car issues through its 36+ special functions, including Oil Reset, EPB, SAS, BMS, Throttle Reset, Injector C0ding, ABS Bleed, TPMS Reset, Power Balance, etc and also covers specific-vehicle functions like Crank Sensor Relearn, ABS Initialization, Cylinder Power Balance, Fuel Trim Reset, Idle Relearn etc. This car diagnostic scanner enhances efficiency, making repairs and maintenance hassle-free. Tip: DO NOT for All vehicles, please check compatibility first
- Cost-effective ECU C0ding Scan Tool for Specific Brands: Enhance your vehicle's performance with XTOOL D7S! This obd2 scanner all systems bidirectional offers advanced capabilities at an affordable price, supports online for BMW, for Benz and offline for BENZ, for MIT, along with PMI functions for Ford, for Mazda, and for Lincoln. Ideal for technicians and DIY enthusiasts, this automotive scanner diagnostic tool optimizes vehicle performance and enhances the driving experience. Note: Not for all cars and modules, please send car VIN to check the compatibility before purchase
- OE All System Diagnostic & 8 Pids Graphing: XTOOL D7S is a comprehensive all system bi directional obd2 scanner that delivers dealer-level diagnostics, completely controlling over your vehicle’s performance and health. This automotive scan tool can read and clear DTCs, view live data and ECU information, retrieve freeze frames, and perform active tests and full obd2 functions. This bi-directional scan tool can can identify your vehicle's make, model, and year information with just one click and show up to 8 PIDs live data with options for CSV viewing, playback, and recording for in-depth analysis. It is easy-to-use for both professionals and beginners, helping pinpoint issues efficiently

- 【✅Compared to BOSSCOMM IF742, IF745 Offers Full-System Diagnostics】The BOSSCOMM IF745 car diagnostic scanner is an upgraded model of IF742. In addition to supporting all OBD2 Code Reader functions and 6 reset options (ABS/EPB/SAS/BMS/Oil/Throttle), it expands diagnostics from 4 systems (Check Engine/ABS/SRS/Transmission) to vehicle All systems, including Steering, Suspension, and Body Electronics. This provides deeper, more comprehensive diagnostic capabilities.
- 【✨10 OBD2 Functions】The BOSSCOMM IF745 scan tool’s DTC Lookup instantly translates fault codes into user-friendly explanations, its I/M Readiness feature streamlines emissions testing with a single tap, and Freeze Frame lets you pinpoint the exact moment of a fault for in-depth root-cause diagnosis. Combined with a live data dashboard and advanced diagnostics (O2S, OBMon, EVAP), it delivers comprehensive insights for confident troubleshooting.
- 【✨Deep Diagnostics for All Vehicle System Modules】Beyond code reading/clearing and ECU information retrieval, our all-in-one data stream feature lets you inspect all current fault codes and their locations across the vehicle’s systems. This vehicle code reader helps you turn off dashboard warning lights and perform a comprehensive self-check of your car at home—no more back-and-forth trips to the repair shop or hefty inspection fees.
- 【✨6 Essential Resets: ABS Bleeding, Oil, EPB, SAS, Throttle, BMS】The BOSSCOMM IF745 obd2 scanner diagnostic tool swiftly purges air from brake lines to restore braking sensitivity, fine-tunes maintenance cycles to eliminate false alerts, resolves parking brake issues with one-click control, recalibrates steering sensors for stability, optimizes engine idling/acceleration for smoother performance, and deeply resets battery systems to extend lifespan and range via precise parameter adjustments.❗NOTE: Does NOT support bidirectional control, coding, or programming.
- 【✨10,000+ Car Models, AutoVIN, 13 Languages】The BOSSCOMM IF745 vehicle scanner diagnostic tool covers 73+ global car brands and offers support in 13 languages, making it perfect for DIYers, auto mechanics, or as a thoughtful gift. With a single-click AutoVIN feature, it instantly retrieves vehicle serial numbers, streamlining diagnostics for users globally. This adaptable tool balances user-friendliness with precision, catering to both personal and professional requirements.✅Unsure about compatibility? Compatibility will vary on vehicles' model and year, pls reach us via 📧 [email protected] 📧 before purchase.
This product presentation was made with AAWP plugin.