
NHTSA ID Number: 10173212
Manufacturer Communication Number: 34-085
TSB/Document Date: 2020-04-03
Summary
Information Only – Vehicles may have the connector seals on the wheel speed sensor incorrectly installed, which may lead to water intrusion and corrosion in some vehicles.
Bendix ® WS-24™
Speed Sensors
Exciter
Ring
Front Wheels
Rear Wheels
Figure 5 – Typical Antilock System
2. Use a volt-ohm meter to measure the resistance across
the connector terminals, at an ambient temperature
range of 0°F to 100°F (-18°C to 38°C) sensor resistance
range can be 1200 to 2700 ohms. Record your
measurements.
OK - between 1200 and 2700 ohms.
Not OK - less than 1200 or more than 2700 ohms.
Resistance measurement = _______________.
If OK, continue to Step 3.
If Not OK, replace the sensor and clamping sleeve.
3. Confirm that wheel chocks are in place on the vehicle.
Raise the wheel off the ground to test the suspect wheel
speed sensor.
4. Release the parking brakes.
5. By hand, slowly rotate the wheel at a rate of at least ½
revolution per second. Using an AC rms voltage meter,
measure the voltage at the ECU across the sensor
terminals and record your measurement.
OK - Output voltage is 0.25 Volt AC minimum.
Not OK - Output voltage is less than 0.25 Volt AC.
AC voltage measurement = _______________.
6. If voltage is not OK, reposition the sensor by gently
pushing it closer toward the wheel until it touches the
exciter ring. Repeat the voltage measurement.
AC voltage measurement = _______________.
If still not OK, replace the sensor and the clamping sleeve.
Speed Sensor
Mounting Block
100 Tooth (typical)
Speed Sensor
Exciter Ring
Mounting
Block
Brake Drum
Max. Gap
(Sensor to Exciter)
.015 Inches
WS-24 Wheel
Speed Sensor
100 Tooth
Exciter
Ring
Bendix® WS-24™
Wheel Speed Sensor
(90°)
Hub
Assembly
Figure 6 – WS-24 Wheel Speed Sensor Installation
7. If the resistance and voltage readings are OK, the sensor
itself is not the cause of the Diagnostic Trouble Code
(DTC). Reconnect the sensor and examine the wiring
harness and ECU connector for causes of failure, such
as pinched wires, loose pins, abrasions, exposed wires,
etc.
3. Install the new clamping sleeve fully into the block, with
the retaining tabs toward the inside of the vehicle.
8. After repair, re-check the system before returning the
vehicle to service. If necessary, drive the vehicle to
confirm the system is functioning correctly.
5. Apply a moderate amount of dielectric non-conductive
grease to both the sensor connector and the harness
connector.
SENSOR REMOVAL
Before disconnecting any electrical connections at the wheel
end, remove as much contamination from the connector as
possible to preserve the sealing integrity of the connection.
1. Unplug the cable assembly connector from its lead. Lift
the lock tab and pull on the connector until it disengages.
2. Gently pry the sensor and clamping sleeve from the
mounting block.
4. Gently push (DO NOT STRIKE) the sensor into the
mounting block hole until it bottoms out on the face of
the tone ring. Secure the cable lead wire to the knuckle/
axle housing 3-6 inches from the sensor.
6. Engage the connectors, and push together until the lock
tab snaps into place.
NOTE: It is important for the wheel bearings to be
adjusted per the manufacturer’s recommendations.
Excessive wheel end play can result in excessive air gap
where the sensor is pushed too far away from the tone
ring leading to loss of ABS or Stability Control systems.
SENSOR INSTALLATION
1. When using clamping sleeve – Bendix® part number
5012878 – it is recommend a high-temperature rated
silicon- or lithium-based grease be applied to the interior
of the mounting block for better corrosion protection.
2. When using stainless steel clamping sleeve – Bendix®
part number K152407 – it is required to apply a hightemperature rated silicon- or lithium-based grease
to the sensor body. This lubrication will keep the
movement between the sensor and the clamping sleeve
independent from one another.
5
OPERATIONAL TESTING
There are multiple ways to verify the wheel speed sensor
has been installed properly.
Prior to connecting the sensor to its mating connector, raise
the vehicle wheel so it rotates easily. Connect a volt-ohm
meter to the sensor leads, set the meter to AC volts, spin
the wheel (approximately 0.5 revolutions per second). The
output voltage should read greater than 0.250 V.
Test Drive: it is recommended to test drive the vehicle to
verify the repair in a dynamic state. Test drive the vehicle
in a safe area to a minimum speed of 15 mph. Be sure to
make multiple right and left hand turns while driving, start
and stop the vehicle with the brakes several times. Observe
the following:
1. ABS dash lamp should not be illuminated after the test
drive.
2. The Light Emitting Diode (LED) display on the Bendix
controller, if so equipped, should only have the green
LED illuminated.
3
If Bendix® ACom® diagnostic software is available: During
the drive, wheel sensor output can be monitored and
recorded in the ACom diagnostic wheel speed window.
All sensors should record speeds.
If the sensor fails to operate as described, check the wiring
from the controller to the sensor. Make sure all connectors are
properly, and tightly, installed. Check for frayed or damaged
wires. For additional troubleshooting information reference
Bendix® Wheel Speed Sensor Checklist (BW2453 available
for download on bendix.com), or see the troubleshooting
procedure for the specific ABS system in use.
Log-on and Learn from the Best
On-line training that's available when you are
Visit brake-school.com.
6
24/7/365.
SD-13-4860 Rev. 002 © 2019 Bendix Commercial Vehicle Systems LLC, a member of the Knorr-Bremse Group • 04/19 • All Rights Reserved
INSPECTION PROCEDURE
ABS Wheel Speed Sensor Water Intrusion
34-085
Wheel Speed Sensor Inspection
1. Cut the cable ties securing the connector to the harness as shown in Figure 1.
Figure 1
2. Remove the back shell of the connector as shown in Figure 2.
Figure 2
2/13/2020
34-085
Page 1 of 2
Title of bulletin
3. Visually inspect the rubber seals to make sure they are flush with the back of the connector as
illustrated in Figure 3. If necessary, slide the seal(s) into place with your fingers.
Figure 3
4. If the seal was not correctly installed, carefully open the connector (Figure 4) and visually inspect
for signs of corrosion. If any corrosion is found, replace the sensor and/or harness as necessary.
Verify the O-ring is installed on the connector and undamaged.
Figure 4
5. Reassemble the connector as it was found, with cable ties securing the connector together.
6. Secure the harness bundle in the original location with cable ties.
7. Using the same method, check all other wheel speed sensor connectors.
2/13/2020
34-085
Page 2 of 2
TIB 34-085 - ABS Wheel Speed Sensor Corrosion
Page 1 of 3
Technical Information Bulletin
34-085
Section
Wiring and Lighting - 34
Subject
ABS Wheel Speed Sensor Corrosion
Release Date
3/3/2020
Condition
Wheel speed sensor related fault codes might be present in the ABS system.
Chassis Affected
Chassis built from 09/14/2004 through 08/07/2018 with ABS.
Action
Information Only
This bulletin is to inform dealers of possible repair paths for incorrectly installed wheel speed sensor connector seals.
Warranty
Through Standard Warranty or any applicable active Extended Warranty, Kenworth will pay for parts at dealer net plus applicable mark-up and
labor.
For repairs made while the chassis is covered by Kenworth Warranty, refer to Kenworth Warranty bulletin Wire Harness Warranty and Claim Filing
Requirements C-C-065 for claim filing instructions.
For visual defects and repairs, provide photos clearly showing the defect and the repair with your warranty claim. Providing the photos
https://eportal.paccar.com/dealer/uskw/en/service/vehiclebulletins/vehiclefieldservice/Page... 3/31/2020
TIB 34-085 - ABS Wheel Speed Sensor Corrosion
Page 2 of 3
greatly expedites the claim processing.
0.8 hours of labor to inspect all wheel speed sensors and connectors, and reseat the connector seals if necessary (SRT 013-199).
0.4 hours to R&R each front wheel speed sensor if corrosion is found on the sensor (SRT 013-200).
0.7 hours to R&R each rear wheel speed sensor if corrosion is found on the sensor (SRT 013-203).
3.7 hours of labor, which includes 0.8 hours for inspection, to remove and replace the ABS harness if corrosion is found on the
connector (SRT 013-212).
If multiple sensors are to be replaced, a picture for each sensor is required.
File a long claim form referencing 34-085.
Take-Off Parts Disposition: Destroy take-off parts after claim is paid
CLAIM CODING
Failure Location:
013-011-002
Work Accomplished:
Failure Type:
145
Responsibility Code:
SRT Code:
SRT 013-199
Claim Type:
0.8 hours
To inspect the
seals on the wheel
speed sensor
connector, and
reseat the seals if
necessary.
SRT 013-200
0.4 hours
To R&R each front
wheel speed
sensor. Includes
completing
diagnostic
checklist, attach to
packing tag, and
adjustment.
SRT 013-203
0.7 hour
To R&R each rear
wheel speed
sensor. Includes
adjustment.
SRT 013-212
2.9 hours
To remove and
replace ABS
Chassis Harness
as needed.
Includes wheel
speed sensor
inspection. For
MX-13 add SRT
032-050 for starter
R&R. For 6S/6M
ABS add 1.9
hours.
35
01
N/E
Parts
Parts are available from PACCAR Parts.
Quantity
Part Number
Description
1 as needed Varies – Refer to Web Ecat if
harness replacement is
necessary
ABS Harness
Up to 4 as
needed
Varies – Refer to Web Ecat if
Wheel Speed Sensor
replacement is necessary
Wheel Speed Sensor
As Needed
Source Locally
As Needed
V46-1003-1750200
Nylon Abrasion Shield
https://eportal.paccar.com/dealer/uskw/en/service/vehiclebulletins/vehiclefieldservice/Page... 3/31/2020
TIB 34-085 - ABS Wheel Speed Sensor Corrosion
Page 3 of 3
Procedure
Follow the proper troubleshooting steps for any fault code as usual. If upon visual inspection the connectors are not properly installed, correctly
seat the seals if needed and check for corrosion.
1.
2.
3.
4.
5.
Consult the Inspection Procedure in the Attachments section to perform the wheel speed sensor inspection.
Properly seat any seals that are outside of the connector, as shown in the Inspection Procedure.
As stated in the Inspection Procedure, if any corrosion is present on the harness or wheel speed sensor, refer the attached Removal and
Replacement Procedure to replace the ABS harness. Refer to bulletin 34-081 for additional information on how to proceed if a harness is
corroded or damaged.
If corrosion is found on the Wheel Speed Sensor side of the connection, refer to the Bendix SD-13-4860 Wheel Speed Sensor Service Data
manual for replacement.
If corrosion is found, provide photos clearly showing the corrosion; refer to Kenworth Warranty bulletin Wire Harness Warranty and
Claim Filing Requirements C-C-065 for details.
Attachments
Inspection Procedure
Replacement Procedure
SD-13-4860 Wheel Speed Sensor Service Data
Authored by: OF
Access to PACCAR’s Enterprise Portal is provided as a benefit of doing business with PACCAR. All applications and content accessed through this
system are confidential and proprietary and the property of PACCAR Inc and its suppliers, and must be kept strictly confidential pursuant to the
contract licensing such access. Disclosure, publication, release or distribution of any material found on PACCAR systems to any person other
than employees with a need to know such information is strictly prohibited. All activity on this system is monitored. If PACCAR suspects or
discovers any unauthorized activity, access may be immediately terminated without prior notification. Violators may be subject to legal action.
© Copyright 2020 PACCAR Inc. All rights reserved. We welcome your feedback on this page. For technical questions or concerns about this
page, please contact the DealerNet Webmaster.
https://eportal.paccar.com/dealer/uskw/en/service/vehiclebulletins/vehiclefieldservice/Page... 3/31/2020
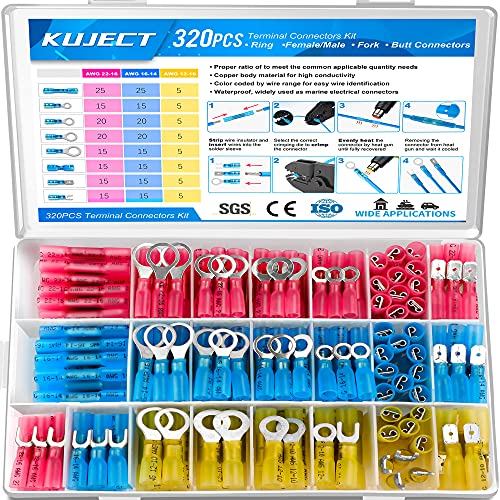
- Multiple Choices: Proper ratio of various types to meet the...
- Stronghold and Durability: We adopt premium copper core to...
- Waterproof: With the adhesive melted when heated, the heat...
- Straightforward Visual Inspection: Translucent...
- Wide Applications: Good electrical conductivity and water...
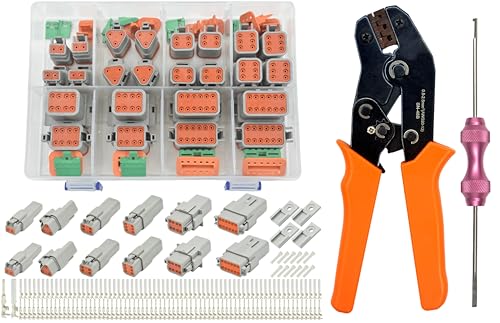
- 🔧217PCS Deutsch DT Connector Kit with Professional Tools...
- ⚡Premium Ratcheting Crimper Tool - Features self-adjusting...
- 🛡️IP68 Waterproof & Heavy-Duty Construction - Made of...
- ✔️High-Conductivity Stamped Terminals - 75 pairs of...
- 🚗Universal Vehicle Compatibility & Warranty - Perfect fit...
If the PDF is very large, it may not load in the preview below.
Some older TSBs had multiple PDFs — visit the NHTSA Website to view all PDFs.
If the TSB PDF does not show, download or view it on the NHTSA Website.
Click on the (+) Plus Sign
Then Click on Associated Document(s)
Search NHTSA Database for Recalls
Search NHTSA Database for Vehicle Investigations
View Latest Vehicle Investigations
Search NHTSA Database for Vehicle Complaints
View Latest Vehicle Complaints
TSB/Document ID: 34-085
Replacement Service Bulletin Number:
MFR Communication Date: 2020-03-03
MFR Internal Campaign ID/Software Version:
Communication Type: Service Bulletin/Repair Instructions
NHTSA Components: ELECTRICAL SYSTEM
MFR Component System:
MFR Component Subsystem:
Previous TSB | Next TSB |

- [Notice] When you receive a used device, it may be a customer return resold by Amazon without inspection. You can exchange it for a new one through Amazon. As this situation is unavoidable, we sincerely apologize. For any issues, contacting us via Amazon's "Messages" is the best way. THINKSCAN 689BT Bidirectional Scan Tool Can Be Used Immediately After It is Turned On, Without Complicated Registration Process, Which is More Convenient & Quick.
- Full Bi-Directional Control & 3000+ Active Tests: Take control and test components like actuators, fuel injectors, relays, and cooling fans in real time. You’ll quickly see if the problem is in the part itself or the control module — saving you hours of guesswork and frustrating trial-and-error.
- Advanced ECU Coding Capabilities: Handle module matching and hidden feature activation with confidence. When you replace an ECU or want to customize settings, this obd2 scanner diagnostic bi directional tool gives you the professional-level capabilities you need without the dealership price tag.
- 34+ Useful Reset and Maintenance Functions: Complete everyday service tasks smoothly with a wide range of helpful reset and maintenance functions. Whether you’re keeping up with regular upkeep or tackling a specific job, this scanner makes maintenance simpler and less stressful for both DIYers and pros.
- Comprehensive Full System Diagnostics: Diagnose every major system — Engine, Transmission
 , ABS, SRS, TPMS, and more — all in one place. Finally stop wondering if you’re missing something important; get the full picture and clear codes with ease.

- Top Reasons to Choose the D7S OBD2 Scanner: XTOOL D7S car scan tool, an upgrade of XTOOL D7, offers comprehensive features for automotive technicians, workshops, and DIY enthusiasts 1. Upgraded Hardware: 2+64GB memory, rear camera, intuitive interface, foldable bracket 2. Complete Diagnostics: FCA Autoauth, OE-level all system scan, 39+ maintenance services, 4K+ bidirectional, CANFD/DoIP protocol 3. Advanced Capabilities: ECU coding, PMI functions 4. Wide Compatibility: Support 10,000+ models, covering 99% vehicle brands 5. Multi-language: Available in 22+ languages, No IP Restrictions 6. 3-Year Updates: Save 300 bucks on software updates for the latest features and optimizations
- 2026 Upgraded D7S Car Scanner Features: The newly 2026 D7S V2.0 scanner for car brings exciting features for advanced vehicle diagnostics and enhanced user experience 1. FCA AutoAuth: Now supports FCA SGW module for Chrysler, for Jeep, for Dodge (2018+), for Fiat (2017+), enabling faster vehicle communication without gateway restrictions 2. PMI (Offline ECU Programming): Allows for Ford, for Lincoln, and for Mazda ECU programming for new modules 3. Optimized Diagnostic Report 2.0: Personalized reports with logos and customer info for auto shops. Note: Compatibility varies by cars, please check before order
- Cost-effective ECU Coding Scan Tool for Specific Brands: Enhance your vehicle's performance with XTOOL D7S! This obd2 scanner all systems bidirectional offers advanced capabilities at an affordable price, supports online for BMW, for Benz and offline for BENZ, for MIT, along with PMI functions for Ford, for Mazda, and for Lincoln. Ideal for technicians and DIY enthusiasts, this automotive scanner diagnostic tool optimizes vehicle performance and enhances the driving experience. Note: Not for all cars and modules, please send car VIN to check the compatibility before purchase
- OE All System Diagnostic & 8 Pids Graphing: XTOOL D7S is a comprehensive all system bi directional obd2 scanner that delivers dealer-level diagnostics, completely controlling over your vehicle’s performance and health. This automotive scan tool can read and clear DTCs, view live data and ECU information, retrieve freeze frames, and perform active tests and full obd2 functions. This bi-directional scan tool can can identify your vehicle's make, model, and year information with just one click and show up to 8 PIDs live data with options for CSV viewing, playback, and recording for in-depth analysis. It is easy-to-use for both professionals and beginners, helping pinpoint issues efficiently
- 3 Years Software Update, Value for Money: With 3 years of software updates and 22+ languages(no IP restrictions), XTOOL D7S auto scanner code scanner ensures ongoing compatibility for the latest car models and improved diagnostic functions. This all system vehicle diagnostic scanner comes with a 30-day return policy and a 24-month repair for dependable performance. XTOOL are dedicated to your satisfaction, so enjoy seamless support and lifetime expert assistance. Should you encounter any issues or concerns, don’t hesitate to reach out XTOOL. D7S with newest update with 22 languages freely transfer without authorization, check details from setting-language or from XTOOL

- 【✅Compared to BOSSCOMM IF742, IF745 Offers Full-System Diagnostics】The BOSSCOMM IF745 car diagnostic scanner is an upgraded model of IF742. In addition to supporting all OBD2 Code Reader functions and 6 reset options (ABS/EPB/SAS/BMS/Oil/Throttle), it expands diagnostics from 4 systems (Check Engine/ABS/SRS/Transmission) to vehicle All systems, including Steering, Suspension, and Body Electronics. This provides deeper, more comprehensive diagnostic capabilities.
- 【✨6 Essential Resets: ABS Bleeding, Oil, EPB, SAS, Throttle, BMS】The BOSSCOMM IF745 obd2 scanner diagnostic tool swiftly purges air from brake lines to restore braking sensitivity, fine-tunes maintenance cycles to eliminate false alerts, resolves parking brake issues with one-click control, recalibrates steering sensors for stability, optimizes engine idling/acceleration for smoother performance, and deeply resets battery systems to extend lifespan and range via precise parameter adjustments.❗NOTE: Does NOT support bidirectional control, coding, or programming.
- 【✨Deep Diagnostics for All Vehicle System Modules】Beyond code reading/clearing and ECU information retrieval, our all-in-one data stream feature lets you inspect all current fault codes and their locations across the vehicle’s systems. This vehicle code reader helps you turn off dashboard warning lights and perform a comprehensive self-check of your car at home—no more back-and-forth trips to the repair shop or hefty inspection fees.
- 【✨10 OBD2 Functions】The BOSSCOMM IF745 scan tool’s DTC Lookup instantly translates fault codes into user-friendly explanations, its I/M Readiness feature streamlines emissions testing with a single tap, and Freeze Frame lets you pinpoint the exact moment of a fault for in-depth root-cause diagnosis. Combined with a live data dashboard and advanced diagnostics (O2S, OBMon, EVAP), it delivers comprehensive insights for confident troubleshooting.
- 【✨10,000+ Car Models, AutoVIN, 13 Languages】The BOSSCOMM IF745 vehicle scanner diagnostic tool covers 73+ global car brands and offers support in 13 languages, making it perfect for DIYers, auto mechanics, or as a thoughtful gift. With a single-click AutoVIN feature, it instantly retrieves vehicle serial numbers, streamlining diagnostics for users globally. This adaptable tool balances user-friendliness with precision, catering to both personal and professional requirements.✅Unsure about compatibility? Compatibility will vary on vehicles' model and year, pls reach us via 📧 [email protected] 📧 before purchase.
This product presentation was made with AAWP plugin.