
NHTSA ID Number: 10169659
Manufacturer Communication Number: 191010REV_SB
TSB/Document Date: 2019-12-31
Summary
The purpose of this Product Upgrade Service Bulletin is to inform all REV Recreation Group dealers about the need to shim the microwave+?+?+?s rear mounting bracket to allow adequate ventilation on certain 2016-2019 American Coach Eagle Class A diesel motorhomes, equipped with foil cabinetry (Option 455). NOTE: Model 45 T is not affected by this campaign. CONDITION: On motorhomes affected by this Product Upgrade, the microwave, mounted below a cabinet, has insufficient venting. This can allow moisture to collect and condense on the cabinet front.
Product Upgrade Bulletin 191010REV
UPGRADE
BULLETIN:
191010REV
The purpose of this Product Upgrade Service Bulletin is to inform all REV
Recreation Group dealers about the need to shim the microwave’s mounting
to allow adequate ventilation on certain 2016-2019 American Coach Eagle
Class A motorhomes.
YEAR(S)
AFFECTED:
A list of affected vehicles appears at the end of this Bulletin.
NOTE: Model 45 T is not affected by this campaign.
2016-2019
CONDITION:
PRODUCT(S)
AFFECTED:
American Eagle,
equipped with Option
455, Foil Cabinetry
and having the
microwave installed
below a cabinet
On motorhomes affected by this Product Upgrade, the microwave, mounted
below a cabinet, has insufficient venting. This can allow moisture to collect
and condense on the cabinet front.
PROCEDURES:
Dealers are required to obtain Prior Authorization using the
A.D.N. warranty portal. Dealers must also call REV Dealer
Technical Support before beginning any work and after the
unit is in the repair bay. You will receive instructions and
any other necessary information.
MODEL(S)
AFFECTED:
45 A, 45 C, 45 N
SUBJECT:
American Coach Technical Support: (800) 417-6413
• READ THIS ENTIRE BULLETIN CAREFULLY BEFORE PROCEEDING AND
FOLLOW ALL SAFETY PRECAUTIONS.
• Review the list of affected units at the end of this bulletin to ensure the
motorhome you are inspecting is part of this campaign.
• Take a copy of this bulletin with you when servicing the unit.
• PHOTOS WILL BE REQUIRED FOR THE FOLLOWING
PROCEDURES. READ PHOTO REQUIREMENTS CAREFULLY.
INSUFFICIENT PHOTO DOCUMENTATION MAY RESULT IN CLAIM
DENIAL.
• If there are any questions after reviewing the entire procedure,
contact REV Dealer Technical Support.
Shimming the
Microwave
Mounting
to Improve
Ventilation
KEYWORDS:
Cabinet,
Cabinetry,
Microwave
ISSUE DATE:
December 2019
1.
Park the motorhome on dry, level pavement. Place the transmission
into NEUTRAL and set the parking brake.
2.
Turn off the ignition and remove the ignition key. Maintain control
of ignition keys while work is performed. Attach a notice “DO NOT
USE” to the ignition switch in order to prevent activation of the
systems or starting of the motorhome.
3.
Block wheels to prevent movement.
4.
Open the door of the cabinet mounted above the microwave.
© 2019 REV Recreation Group Inc.
This bulletin is supplied for technical information only and is not an authorization for repairs.
“It is impossible to know, evaluate and advise the service trade of all conceivable ways in which service might be done or of the possible hazardous consequences of each way. Accordingly, anyone
who uses a service procedure or tool must first assure that neither personal safety nor vehicle safety will be jeopardized by the selected service methods.”
Product Upgrade Bulletin 191010REV page 1 of 7
5.
With the cabinet door open, measure the distance
between the front face of the cabinet (above the
microwave) and the front face of the microwave’s
door. If it is less than 3”, the microwave’s rear
mounting bracket should be shimmed with
plywood to allow clearance for proper venting.
Refer to the photos in Figures 1 and 2 for
examples of a microwave that needs shims added
to its rear bracket mounting surface to allow its
proper ventilation.
If shimming the microwave’s rear
mounting bracket is necessary to achieve
clearance for proper ventilation, take
several clear photos of the installation
and attach them to a draft claim in the
dealer warranty portal (A.D.N.). Also, call
American Coach dealer technical support
for confirmation to proceed with repairs.
Open the cabinet door
before measuring (Step 5)
Figure 1
Measure with cabinet
door open (Step 5)
CORRECTION
6.
Remove any materials (e.g., rack, turntable, etc.)
from the inside of the microwave and set them
aside in an area where they won’t get damaged
while repairs are performed.
7.
Ensure the cooktop is turned OFF and the
microwave’s power cord is UNPLUGGED.
Figure 2
Important: Proceed with care, as the face of the
cabinet can easily scratch or become
dented.
8.
9.
Place a thick piece of cardboard over the cooktop
to protect it while repairs are performed.
Figure 3
Open the door of the upper cabinet to the left
of the microwave. Move the grommet aside to
expose the hole for the microwave cord and plug.
See Figures 3 and 4.
Figure 4
This bulletin is supplied for technical information only and is not an authorization for repairs.
“It is impossible to know, evaluate and advise the service trade of all conceivable ways in which service might be done or of the possible hazardous consequences of each way. Accordingly, anyone
who uses a service procedure or tool must first assure that neither personal safety nor vehicle safety will be jeopardized by the selected service methods.”
Product Upgrade Bulletin 191010REV page 2 of 7
10. Remove the panels from inside the cabinet
over the microwave by removing the panel
screws. Retain screws for reinstallation.
The microwave mounting screws should
now be visible - do not remove them yet.
See Figure 5.
11. Have an assistant help hold the
microwave while it is being uninstalled
to avoid dropping it or causing damage.
First, remove its mounting fasteners.
Referencing the photo in Figure 3 on the
previous page, remove one screw on the
side of the microwave (access this screw
by opening the cabinet at left). Remove
the 3 additional screws from the top of the
microwave. Next, carefully remove the
microwave from its mounting bracket. Set
the bracket and mounting screws aside for
later reinstallation.
remove
panels
Figure 5
Install black laminate to cover bottom
edges of plywood on one long side.
12. Uninstall the microwave’s mounting
bracket from the plywood backing attached
to the wall by removing its screws. Set the
bracket and mounting screws aside for
later reinstallation.
13. Obtain two pieces of 16” high x 30 ½” wide
x 3/4” thick plywood. Apply wood glue or
construction adhesive to the face of one
piece, then stack the second piece directly
over it. Secure the two pieces together
using 1” long self-tapping screws.
Figure 6
14. Obtain a new piece of black laminate and
use contact cement to affix it to one of
the long edges of the newly joined pieces
of plywood. Use a roller to ensure the
laminate properly adheres to the plywood.
See Figure 6.
NOTE: Do not use any adhesive other
than contact cement to apply the
laminate.
Figure 7
15. Use 2” long self-tapping screws to mount the new plywood pieces directly over the
original plywood backing for the microwave, creating a 1 ½” shim that will position
the microwave outward, allowing it to properly vent. Refer to Figure 7.
This bulletin is supplied for technical information only and is not an authorization for repairs.
“It is impossible to know, evaluate and advise the service trade of all conceivable ways in which service might be done or of the possible hazardous consequences of each way. Accordingly, anyone
who uses a service procedure or tool must first assure that neither personal safety nor vehicle safety will be jeopardized by the selected service methods.”
Product Upgrade Bulletin 191010REV page 3 of 7
16. Reinstall the microwave mounting bracket
using the original screws. The bracket should
be aligned with the bottom of the plywood and
centered horizontally, as shown in Figure 8.
17. Reinstall the microwave onto its mounting
bracket using the original screws. Ensure the
power cord is routed through the opening in
the side of the cabinet when reinstalling the
microwave.
18. Cover the opening for microwave’s power cord
using the original grommet. Plug the power
cord back into the electrical outlet. Refer to
Figure 8.
Install plywood positioned
with black laminate covered
edge facing down.
Figure 8
19. Reinstall the panels (removed in Step 10) in
the cabinet above the microwave.
20. Return any contents removed from the
microwave back into place and close its door.
21. Clean up the area and close the doors for the
cabinets.
Grommet
Figure 9
22. Take several photos of the microwave from angles that clearly show its rear mounting
bracket has been shimmed. Attach the photos when filing the repair claim.
This bulletin is supplied for technical information only and is not an authorization for repairs.
“It is impossible to know, evaluate and advise the service trade of all conceivable ways in which service might be done or of the possible hazardous consequences of each way. Accordingly, anyone
who uses a service procedure or tool must first assure that neither personal safety nor vehicle safety will be jeopardized by the selected service methods.”
Product Upgrade Bulletin 191010REV page 4 of 7
TOOLS
Driver with bits
Measuring tape
Pencil
Caulk gun
Laminate Roller
PARTS - Obtain Locally
Description
Plywood - 16” high x 30 ½” wide x 3/4” thick
Self-tapping wood screws , #10 x 1” long
Self-tapping wood screws , #10 x 2” long
Black laminate, 1 3/8 x 30 ½”
Wood glue or construction adhesive
Contact cement
Qty
2
As required (approximately 6)
As required (approximately 12)
1
As required
As required
WARRANTY LABOR ALLOWANCE:
Upgrade 191010REV, Install Shim for Microwave Mounting
Use flat rate codes:
6089 - 11
6088 - 12
Inspected/Not Defective
Inspected/Defective/Repaired
0.1 hr.
1.0 hr.
Prior Authorization Required
Prior Authorization Required
If you have any questions concerning this bulletin, contact
American Coach Technical Support: (800) 417-6413
Service Literature is available at: http://www.revrvdealers.com
This bulletin is supplied for technical information only and is not an authorization for repairs.
“It is impossible to know, evaluate and advise the service trade of all conceivable ways in which service might be done or of the possible hazardous consequences of each way. Accordingly, anyone
who uses a service procedure or tool must first assure that neither personal safety nor vehicle safety will be jeopardized by the selected service methods.”
Product Upgrade Bulletin 191010REV page 5 of 7
Product Upgrade Bulletin 191010REV - Affected Unit Serial Numbers
2016 American Coach Eagle
719AG4420742
719AG4420808
719NG4421440
719CG4422012
4UZFCGBG0GCHG1506
4UZFCGBG9GCHD7012
4UZFCGBG2GCHH5715
4UZFCGBG2GCHP4035
719CG4422356
719CG4422859
719CG4422924
4UZFCGBG1GCHR9718
4UZFCGBG6GCHU9249
4UZFCGBG0GCHT5573
719CH4425809
719AH4425887
719CH4425953
719CH4426022
719CH4426090
719NH4426156
719AH4426218
719CH4426220
719CH4426347
719AH4426421
719AH4426495
719CH4426642
4UZFCGBG3HCJE2929
4UZFCGBG1HCJE4405
4UZFCGBG3HCJE4406
4UZFCGBG5HCJE4407
4UZFCGBG5HCJE7307
4UZFCGBG7HCJE7308
4UZFCGBG9HCJE7309
4UZFCGBG7HCJE9916
4UZFCGFG9JCJD3099
4UZFCGBG9HCJE9917
4UZFCGBGXHCJF1269
4UZFCGBG2HCJK8380
719AJ4428359
719AJ4428591
719CJ4428752
719AJ4428835
719CJ4429009
719CJ4429017
719AJ4429171
719CJ4429480
719AJ4429620
719AJ4429791
719AJ4429852
719AJ4430042
4UZFCGFG7JCJU5224
4UZFCGFG0JCJV8932
4UZFCGFGXJCJW3751
4UZFCGFG6JCJW8753
4UZFCGFG8JCJW8754
4UZFCGFG3JCJW1288
4UZFCGFG3JCJX6535
4UZFCGFG6JCJY6427
4UZFCGFG5JCKA5836
4UZFCGFG7JCKA8740
4UZFCGFG9JCKA8741
4UZFCGFG1JCKC1645
2017 American Coach Eagle
719CH4423233
719CH4423612
719CH4423637
719AH4424453
719AH4424525
719CH4424581
719CH4424646
719AH4425184
719CH4425325
719CH4425397
719CH4425648
719CH4425697
719CH4425747
4UZFCGBGXGCHW7494
4UZFCGBGXGCHY0200
4UZFCGBG2HCHZ3413
4UZFCGBG1HCJB7432
4UZFCGBG9HCJC5861
4UZFCGBG3HCJC7637
4UZFCGBG5HCJC7638
4UZFCGBG8HCJE1730
4UZFCGBG1HCJE1732
4UZFCGBG3HCJE1733
4UZFCGBG1HCJC3053
4UZFCGBGXHCJE2927
4UZFCGBG1HCJE2928
2018 American Coach Eagle
719CJ4426809
719AJ4426924
719AJ4427080
719AJ4427379
719AJ4427454
719CJ4427527
719CJ4427602
719AJ4427676
719CJ4427751
719CJ4427908
719AJ4427983
719CJ4428059
4UZFCGBG2HCJM2165
4UZFCGBG4HCJM2166
4UZFCGFG4JCJM8758
4UZFCGFG1JCJP4086
4UZFCGFG1JCJP6632
4UZFCGFG9JCJR3257
4UZFCGFG4JCJR6793
4UZFCGFGXJCJR6796
4UZFCGFG2JCJS3924
4UZFCGFGXJCJT7330
4UZFCGFGXJCJT9904
4UZFCGFG5JCJU5223
This bulletin is supplied for technical information only and is not an authorization for repairs.
“It is impossible to know, evaluate and advise the service trade of all conceivable ways in which service might be done or of the possible hazardous consequences of each way. Accordingly, anyone
who uses a service procedure or tool must first assure that neither personal safety nor vehicle safety will be jeopardized by the selected service methods.”
Product Upgrade Bulletin 191010REV page 6 of 7
Product Upgrade Bulletin 191010REV - Affected Unit Serial Numbers
2019 American Coach Eagle
719AK4430104
719CK4430166
719CK4430234
719AK4430371
719CK4430509
719CK4430581
719AK4430653
719AK4430799
719CK4430869
719AK4430942
719AK4431015
719CK4431077
719AK4431165
719AK4431366
719CK4431500
719CK4431549
719CK4431608
719AK4431705
4UZFCGFG7JCKC4257
4UZFCGFG2JCKD1956
4UZFCGFG9JCKD8676
4UZFCGFG7JCKF2687
4UZFCGFG2JCKF9997
4UZFCGFG4JCKF9998
4UZFCGFG9JCKJ5998
4UZFCGFG0JCKK9076
4UZFCGFG8KCKL5192
4UZFCGFG1KCKM0475
4UZFCGFG7KCKN2355
4UZFCGFG0KCKM6767
4UZFCGFG9KCKN2356
4UZFCGFG4KCKR9147
4UZFCGFG6KCKT4168
4UZFCGFG4KCKU3919
4UZFCGFG6KCKV1875
4UZFCGFG8KCKW0786
719AK4431984
719AK4432040
719AK4432092
719CK4432241
719CK4432286
719AK4432506
719AK4432571
719AK4432737
719AK4432910
719AK4432935
719CK4433062
719AK4433167
719AK4433256
719CK4433484
719AK4433541
719CK4433555
719AK4433695
719CK4433726
4UZFCGFG3KCKY3991
4UZFCGFG5KCKY3992
4UZFCGFG9KCLD4356
4UZFCGFG2KCLH6481
4UZFCGFG7KCLJ0271
4UZFCGFG0KCLL3083
4UZFCGFGXKCLL6010
4UZFCGFGXKCLJ4170
4UZFCGFG3KCLP7627
4UZFCGFG9KCLR3931
4UZFCGFG7KCLR3930
4UZFCGFG1KCLS7891
4UZFCGFG7KCLS1237
4UZFCGFG2KCLW0690
4UZFCGFG4KCLW0691
4UZFCGFG6KCLW0692
4UZFCGFG3KCLW3162
4UZFCGFG5KCLW3163
This bulletin is supplied for technical information only and is not an authorization for repairs.
“It is impossible to know, evaluate and advise the service trade of all conceivable ways in which service might be done or of the possible hazardous consequences of each way. Accordingly, anyone
who uses a service procedure or tool must first assure that neither personal safety nor vehicle safety will be jeopardized by the selected service methods.”
Product Upgrade Bulletin 191010REV page 7 of 7


If the PDF is very large, it may not load in the preview below.
Some older TSBs had multiple PDFs — visit the NHTSA Website to view all PDFs.
If the TSB PDF does not show, download or view it on the NHTSA Website.
Click on the (+) Plus Sign
Then Click on Associated Document(s)
Search NHTSA Database for Recalls
Search NHTSA Database for Vehicle Investigations
View Latest Vehicle Investigations
Search NHTSA Database for Vehicle Complaints
View Latest Vehicle Complaints
TSB/Document ID: 191010REV_SB
Replacement Service Bulletin Number:
MFR Communication Date: 2019-12-27
MFR Internal Campaign ID/Software Version:
Communication Type: Service Bulletin/Repair Instructions
NHTSA Components: EQUIPMENT ADAPTIVE/MOBILITY
MFR Component System:
MFR Component Subsystem:
Previous TSB | Next TSB |
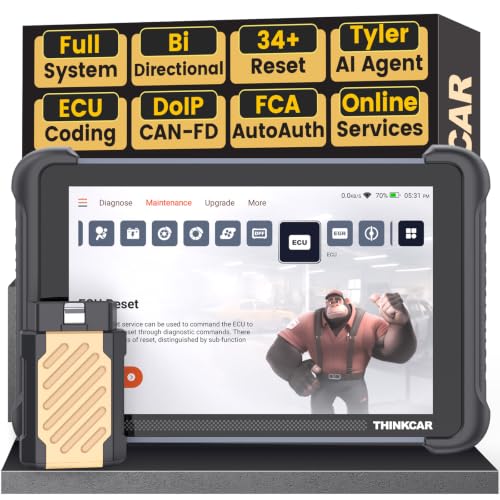
- [Notice] When you receive a used device, it may be a customer return resold by Amazon without inspection. You can exchange it for a new one through Amazon. As this situation is unavoidable, we sincerely apologize. For any issues, contacting us via Amazon's "Messages" is the best way. THINKSCAN 689BT Bidirectional Scan Tool Can Be Used Immediately After It is Turned On, Without Complicated Registration Process, Which is More Convenient & Quick.
- AI-Assisted Diagnosis Upgrade:Connect your THINKSCAN 689BT diagnostic scanner to WiFi and free-upgrade the software to unlock Tyler AI Agent. Get step-by-step diagnostic guidance, illustrated guides, and smart parts recommendations. One tap jumps to Amazon for real-time pricing. Boost efficiency up to 300% and finish jobs faster. Upgrade your shop today.
- Full Bi-Directional Control & 3000+ Active Tests: Take control and test components like actuators, fuel injectors, relays, and cooling fans in real time. You’ll quickly see if the problem is in the part itself or the control module — saving you hours of guesswork and frustrating trial-and-error.
- Advanced ECU Coding Capabilities: Handle module matching and hidden feature activation with confidence. When you replace an ECU or want to customize settings, this obd2 scanner diagnostic bi directional tool gives you the professional-level capabilities you need without the dealership price tag.
- 34+ Useful Reset and Maintenance Functions: Complete everyday service tasks smoothly with a wide range of helpful reset and maintenance functions. Whether you’re keeping up with regular upkeep or tackling a specific job, this car scanner diagnostic tool makes maintenance simpler and less stressful for both DIYers and pros.

- Top Reasons to Choose the D7S OBD2 Scanner: XTOOL D7S car scan tool, an upgrade of XTOOL D7, offers comprehensive features for automotive technicians, workshops, and DIY enthusiasts 1. Upgraded Hardware: 2+64GB memory, rear camera, intuitive interface, foldable bracket 2. Complete Diagnostics: FCA Autoauth, OE-level all system scan, 39+ maintenance services, 4K+ bidirectional, CANFD/DoIP protocol 3. Advanced Capabilities: ECU coding, PMI functions 4. Wide Compatibility: Support 10,000+ models, covering 99% vehicle brands 5. Multi-language: Available in 22+ languages, No IP Restrictions 6. 3-Year Updates: Save 300 bucks on software updates for the latest features and optimizations
- 2026 Upgraded D7S Car Scanner Features: The newly 2026 D7S V2.0 scanner for car brings exciting features for advanced vehicle diagnostics and enhanced user experience 1. FCA AutoAuth: Now supports FCA SGW module for Chrysler, for Jeep, for Dodge (2018+), for Fiat (2017+), enabling faster vehicle communication without gateway restrictions 2. PMI (Offline ECU Programming): Allows for Ford, for Lincoln, and for Mazda ECU programming for new modules 3. Optimized Diagnostic Report 2.0: Personalized reports with logos and customer info for auto shops. Note: Compatibility varies by cars, please check before order
- Cost-effective ECU Coding Scan Tool for Specific Brands: Enhance your vehicle's performance with XTOOL D7S! This obd2 scanner all systems bidirectional offers advanced capabilities at an affordable price, supports online for BMW, for Benz and offline for BENZ, for MIT, along with PMI functions for Ford, for Mazda, and for Lincoln. Ideal for technicians and DIY enthusiasts, this automotive scanner diagnostic tool optimizes vehicle performance and enhances the driving experience. Note: Not for all cars and modules, please send car VIN to check the compatibility before purchase
- OE All System Diagnostic & 8 Pids Graphing: XTOOL D7S is a comprehensive all system bi directional obd2 scanner that delivers dealer-level diagnostics, completely controlling over your vehicle’s performance and health. This automotive scan tool can read and clear DTCs, view live data and ECU information, retrieve freeze frames, and perform active tests and full obd2 functions. This bi-directional scan tool can can identify your vehicle's make, model, and year information with just one click and show up to 8 PIDs live data with options for CSV viewing, playback, and recording for in-depth analysis. It is easy-to-use for both professionals and beginners, helping pinpoint issues efficiently
- 3 Years Software Update, Value for Money: With 3 years of software updates and 22+ languages(no IP restrictions), XTOOL D7S auto scanner code scanner ensures ongoing compatibility for the latest car models and improved diagnostic functions. This all system vehicle diagnostic scanner comes with a 30-day return policy and a 24-month repair for dependable performance. XTOOL are dedicated to your satisfaction, so enjoy seamless support and lifetime expert assistance. Should you encounter any issues or concerns, don’t hesitate to reach out XTOOL. D7S with newest update with 22 languages freely transfer without authorization, check details from setting-language or from XTOOL

- 🔥 Historical lowest pr-ice now on sa-le--hot se-lling.
- 【🎈𝗜𝗙𝟳𝟰𝟱 𝗽𝗲𝗿𝗳𝗼𝗿𝗺𝘀 𝟲 𝗲𝘀𝘀𝗲𝗻𝘁𝗶𝗮𝗹 𝗿𝗲𝘀𝗲𝘁 𝗳𝘂𝗻𝗰𝘁𝗶𝗼𝗻𝘀—𝗔𝗕𝗦 𝗕𝗹𝗲𝗲𝗱𝗶𝗻𝗴, 𝗢𝗶𝗹 𝗥𝗲𝘀𝗲𝘁, 𝗘𝗣𝗕, 𝗦𝗔𝗦, 𝗧𝗵𝗿𝗼𝘁𝘁𝗹𝗲 𝗥𝗲𝗹𝗲𝗮𝗿𝗻, 𝗮𝗻𝗱 𝗕𝗠𝗦—𝗽𝘂𝘁𝘁𝗶𝗻𝗴 𝗽𝗿𝗼𝗳𝗲𝘀𝘀𝗶𝗼𝗻𝗮𝗹-𝗴𝗿𝗮𝗱𝗲 𝗺𝗮𝗶𝗻𝘁𝗲𝗻𝗮𝗻𝗰𝗲 𝗯𝗮𝗰𝗸 𝗶𝗻 𝘆𝗼𝘂𝗿 𝗵𝗮𝗻𝗱𝘀.】Spongy brakes? Stuck oil light? Parking brake won't release? Off-center steering? Rough idle after battery disconnect? Draining battery? IF745 handles all with a few taps. One tool covers six dealer-level resets, saving hundreds in labor costs. ❗ NOTE: Does NOT support bidirectional control, coding, or programming.
- 【✨ 𝗜𝗙𝟳𝟰𝟱 𝗴𝗼𝗲𝘀 𝗯𝗲𝘆𝗼𝗻𝗱 𝗯𝗮𝘀𝗶𝗰 𝗰𝗼𝗱𝗲 𝗿𝗲𝗮𝗱𝗶𝗻𝗴 𝘄𝗶𝘁𝗵 𝟭𝟬 𝗶𝗻𝘁𝗲𝗴𝗿𝗮𝘁𝗲𝗱 𝗳𝘂𝗻𝗰𝘁𝗶𝗼𝗻𝘀—𝗗𝗧𝗖 𝗟𝗼𝗼𝗸𝘂𝗽, 𝗜/𝗠 𝗥𝗲𝗮𝗱𝗶𝗻𝗲𝘀𝘀, 𝗙𝗿𝗲𝗲𝘇𝗲 𝗙𝗿𝗮𝗺𝗲, 𝗟𝗶𝘃𝗲 𝗗𝗮𝘁𝗮, 𝗢𝟮𝗦, 𝗢𝗕𝗠, 𝗘𝗩𝗔𝗣, 𝗮𝗻𝗱 𝗺𝗼𝗿𝗲. 】Pulling a code tells you something is wrong. IF745 tells you what the code means, when the fault happened, and what data surrounds it. Pass emissions with one I/M Readiness tap. Freeze the fault moment with Freeze Frame. Monitor live sensor data in real time. Turn cryptic codes into clear answers.
- 【🛒 𝗜𝗙𝟳𝟰𝟱 𝗽𝗲𝗿𝗳𝗼𝗿𝗺𝘀 𝗳𝘂𝗹𝗹-𝘀𝘆𝘀𝘁𝗲𝗺 𝗱𝗶𝗮𝗴𝗻𝗼𝘀𝘁𝗶𝗰𝘀 𝗮𝗰𝗿𝗼𝘀𝘀 𝗮𝗹𝗹 𝗺𝗼𝗱𝘂𝗹𝗲𝘀—𝗲𝗻𝗴𝗶𝗻𝗲, 𝗔𝗕𝗦, 𝗮𝗶𝗿𝗯𝗮𝗴, 𝘁𝗿𝗮𝗻𝘀𝗺𝗶𝘀𝘀𝗶𝗼𝗻, 𝘀𝘁𝗲𝗲𝗿𝗶𝗻𝗴, 𝘀𝘂𝘀𝗽𝗲𝗻𝘀𝗶𝗼𝗻, 𝗯𝗼𝗱𝘆 𝗲𝗹𝗲𝗰𝘁𝗿𝗼𝗻𝗶𝗰𝘀, 𝗮𝗻𝗱 𝗺𝗼𝗿𝗲. 】Warning lights on but you don't know why? Skip the $100+ diagnostic fee at the shop. Run a complete self-check from your driveway. IF745 reads and clears fault codes, retrieves ECU info, and displays live data from every accessible module—delivering a full vehicle health report in minutes, without leaving home.
- 【✅𝗜𝗙𝟳𝟰𝟱 𝗳𝗲𝗮𝘁𝘂𝗿𝗲𝘀 𝗮 𝟳-𝗶𝗻𝗰𝗵 𝗱𝗶𝘀𝗽𝗹𝗮𝘆, 𝗲𝗿𝗴𝗼𝗻𝗼𝗺𝗶𝗰 𝗱𝗲𝘀𝗶𝗴𝗻, 𝗪𝗶-𝗙𝗶 𝘂𝗽𝗱𝗮𝘁𝗲𝘀, 𝗮𝗻𝗱 𝘇𝗲𝗿𝗼 𝘀𝘂𝗯𝘀𝗰𝗿𝗶𝗽𝘁𝗶𝗼𝗻 𝗳𝗲𝗲𝘀 𝗳𝗼𝗿 𝗵𝗮𝘀𝘀𝗹𝗲-𝗳𝗿𝗲𝗲 𝗱𝗶𝗮𝗴𝗻𝗼𝘀𝘁𝗶𝗰𝘀.】Large screen means no squinting. Intuitive navigation and customizable data displays put key info at your fingertips. Wi-Fi delivers lifetime free updates without a computer. No recurring fees. No hidden costs. Just a reliable tool that works as hard as you do.
This product presentation was made with AAWP plugin.