
NHTSA ID Number: 10141752
Manufacturer Communication Number: sb54148
TSB/Document Date: 2018-06-18
Summary
sb54148 Radio and Integrated Thin-Film Antenna Troubleshooting, and Field Service UpdatesB
Radio and Integrated Thin-Film Antenna Troubleshooting,
and Field Service Updates
> FLA COE
> FLB COE
> FLD Conventional
> Business Class
> FLC 112 Conventional
> Century Class Conventional
> Argosy COE
> Cargo
> Columbia
54-148
Freightliner
Service Bulletin
> Coronado
> Business Class M2
> Cascadia
> 108SD/114SD
Description of Revisions: This bulletin replaces the version dated
August 2013. The bulletin title is revised.
General Information
Refer to Table 1 for a list of radio troubleshooting topics in this bulletin.
Radio Diagnostics Troubleshooting
Main Symptom Area
Radio Fadeout, Radios With Built-In Fader
Control
Radio/Electronics Failures
Flashing Theft Deterrent LED
Radio Tuning
"Comm Error"
"No CDX"
"Focus"
"No CD"
Error Messages
"ERR"
"Load"
"Tracking"
"Bad Tape"
"TP Clean"
Poor or Weak Reception
Multiband Antenna Diagnostics
Poor Reception Diagnostics - CB thin-film
Antenna
MP3 feature is not functioning.
J1939 connection is not working.
Action
See "Radio Fadeout, Radios With Built-In Fader Control"
See "Radio/Electronics Failures"
See "Flashing Theft Deterrent LED Disabling"
See "Radio Tunes to Incorrect Frequency"
See Table 2, Error Message Diagnostics: "Comm Error"
See Table 3, Error Message Diagnostics: "No CDX"
See Table 4, Error Message Diagnostics: "Focus"
If this error occurs when there are CDs in the CD changer, replace the CD
changer.
See Table 5, Error Message Diagnostics: "ERR"
Replace radio/CD player.
Check to see if the CD is inserted upside down. If not, replace the radio/CD
player.
Try a known good cassette tape of less than 45 minutes per side. If this
error message persists, replace the radio/cassette player.
Clean the cassette tape deck, then reset the tape player timer to zero using
the instructions in the owners manual.
See Table 6, Poor Reception Diagnostics
See Table 7, Multiband Antenna Diagnostics
See Table 8, thin-film Antenna Diagnostics
Press the band button until the "EX AUDIO" message appears in the
display.
Refer to Service Bulletin 54-226, Radio and J1939 Datalink Wiring for the
Cascadia.
Stereo Does Not Turn On
or
See Table 10 and Table 11, Stereo System Power Diagnostics
Stereo Tuns On, Then Immediately Turns Off
Cassette Tape Player Inoperative
or
See Table 12, Tape Deck Diagnostics
Cassette Tape Player Plays Weak or Slow
No Audio From One or More Speakers
See Table 13, Speaker Diagnostics
Freightliner Service Bulletin, October 2015
Page 1
54-148
Radio and Integrated Thin-Film Antenna Troubleshooting,
and Field Service Updates
Freightliner
Service Bulletin
> FLA COE
> FLB COE
> FLD Conventional
> Business Class
> FLC 112 Conventional
> Century Class Conventional
> Argosy COE
> Cargo
> Columbia
> Coronado
> Business Class M2
> Cascadia
> 108SD/114SD
Radio Diagnostics Troubleshooting
Main Symptom Area
CD Player Skips or Mutes
Action
See Table 14, CD Player Diagnostics
or
CD Player Ejects CD Early
CD Changer Skips or Mutes
or
See Table 15, CD Changer Diagnostics
CD Changer Does Not Eject
or
CD Changer Is Inoperative
Table 1, Radio Diagnostics and Troubleshooting
Using the Correct Tools for Radio Removal
Refer to the following instructions if removal of the radio is required for diagnostics and repair. Failure to use the
correct tools when removing a radio can cause damage to the radio faceplate, which may result in a nonwarranty chargeback.
1. Park the vehicle on a level surface, apply the parking brakes, shut down the engine, chock the tires, and
disconnect the batteries at the negative terminals.
2. Install the removal tools into the holes in the radio faceplate. See Fig. 1. Push them in until they click.
1
1
08/31/2004
f602176
1. Removal Tools
Fig. 1, Removing the Radio
3. Pull on the removal tools to remove the radio from the dash.
4. With the radio removed from the dash, disconnect the wiring.
5. Remove the tools from the radio by squeezing.
Page 2
Freightliner Service Bulletin, October 2015
Radio and Integrated Thin-Film Antenna Troubleshooting,
and Field Service Updates
> FLA COE
> FLB COE
> FLD Conventional
> Business Class
> FLC 112 Conventional
> Century Class Conventional
> Argosy COE
> Cargo
> Columbia
> Coronado
> Business Class M2
> Cascadia
> 108SD/114SD
54-148
Freightliner
Service Bulletin
6. Install the new radio by first connecting the wiring, then pushing the radio into the dash. It will click on both
sides when fully seated.
NOTE: The removal tools are not needed for installation.
7. Connect the batteries and remove the chocks from the tires.
Delco Radio Diagnostics Troubleshooting
Radio Fadeout, Radios With Built-In Fader Control
If an AM/FM radio designed for use with four speakers is installed in a vehicle with only two speakers, the fader
control, which is intended to fade between front and rear pairs of speakers, will simply fade to silence. This can
also occur if the fader control is accidently set to the rear speakers on a vehicle that is equipped only with front
speakers. Fader control problems can occur in vehicles built since September 1990.
If a truck is experiencing this problem, turn the fader control all the way to the front speakers. If a more
permanent solution is desired, plug in a jumper harness between the radio and the speaker wiring harness. The
jumper harness shunts the fader control, negating its function. This part can be purchased through the direct
ship program from PanaPacific. The part number is PSO PPC9003.
Radio/Electronics Failures
WARNING
Use care when installing aftermarket components. Aftermarket installation of components requiring
drilling, cutting, brazing, soldering, or welding can create metal particles that can cause electrical
shorts. This can cause electrical/electronic component malfunction or create a heat source that can
cause a fire. It is not recommended that any aftermarket installation be performed. Use extreme care
when performing any alteration to capture and remove from the vehicle entirely all metal or other
electrically-conductive material. Failure to do this can result in component malfunction and/or fire,
which could cause personal injury or property damage.
Aftermarket mounting of components requiring drilling or cutting of metal inside of the vehicle can cause
unexpected electronics failures. Failures are caused by fine metal shavings entering unsealed electronic
components through heat ventilation openings. Vibration from vehicle movement can cause the shavings to
move around and cause an intermittent failure before an electronic component fails permanently.
If a customer complains of a radio or electronics failure after installation of an aftermarket component, inspect
the component and the surrounding areas for metal shavings.
Take great care to capture all metal shavings, as even one may be enough to create a short between circuits
on a printed circuit board. If installing aftermarket equipment, carefully cover all electronics including wiring and
connectors or create a barrier around the work to capture all metal shavings. Use a vacuum cleaner to remove
any shavings that may have spilled.
Flashing Theft Deterrent LED Disabling
The flashing theft deterrent LED on the face of the early generation Delco radios may disturb a driver sleeping
in the bunk.
To disable the flashing LED, use the following instructions.
1. With the ignition ON and the radio OFF, press and hold the TM SET button for about two seconds until the
hour digits flash.
Freightliner Service Bulletin, October 2015
Page 3
54-148
Radio and Integrated Thin-Film Antenna Troubleshooting,
and Field Service Updates
Freightliner
Service Bulletin
> FLA COE
> FLB COE
> FLD Conventional
> Business Class
> FLC 112 Conventional
> Century Class Conventional
> Argosy COE
> Cargo
> Columbia
> Coronado
> Business Class M2
> Cascadia
> 108SD/114SD
2. Within five seconds, press and release the Preset #1 button until the display reads FLASHOFF.
3. After five seconds with no activity the display will return to normal.
Radio Tunes to Incorrect Frequency
The symptoms for the radio being set for the wrong country are any of: poor reception wrong frequencies
displayed radio not tuning to known local stations.
1. Turn the key to ACC or IGN.
2. Turn the radio OFF.
3. Press the "SET DSPL" button for about 3 seconds until the hour digit of the clock begins flashing.
4. Press the "BAND" button to select the country that is correct for the region where the truck is operating.
See Fig. 2.
1
MP3
ON/AUDIO
PUSH
SCAN
DM
TMSET
DSPL
USA
ND
BA
+
PSCN
AUTO
RDM
ALA
RM
1
FLDR+
2
FLDR+
3
PAUSE
4
REV
5
FF
6
RPT
TUNE/SEEK
A
A. Once the "SET DSPL" button is pressed for 3 seconds, the "BAND" button is used to set the country code. For
example, USA is correct for Canada, Mexico, and the USA.
1. Set Display Button
07/08/2009
f602351
Fig. 2, Setting the Country Code
5. After several seconds of inactivity, the radio will leave programming mode.
Error Message Diagnostics: "Comm Error"
Step
1
Error Message Diagnostics: "Comm Error"
Test Procedure
Test Result
Disconnect the CD changer
harness from the radio. See
Yes
Go to step 2.
Fig. 16 and Table 16. Measure for
AC voltage at the radio on
connector A pin 30 using a known
good ground. AC voltage will vary
No
Replace the radio.
Action
Is AC voltage detected?
Page 4
Freightliner Service Bulletin, October 2015
Radio and Integrated Thin-Film Antenna Troubleshooting,
and Field Service Updates
> FLA COE
> FLB COE
> FLD Conventional
> Business Class
> FLC 112 Conventional
2
> Century Class Conventional
> Argosy COE
> Cargo
> Columbia
54-148
Freightliner
Service Bulletin
> Coronado
> Business Class M2
> Cascadia
> 108SD/114SD
Error Message Diagnostics: "Comm Error"
Test Procedure
Test Result
Action
Connect the CD changer harness
to the radio and disconnect it from
Yes
Replace the CD player.
the CD changer. See Fig. 16 and
Table 16. Measure for AC voltage
at the CD on connector B pin 14
using a known good ground. AC
voltage will vary.
No
Replace the CD player harness.
Is AC voltage detected?
Table 2, Error Message Diagnostics: "Comm Error"
Error Message Diagnostics: "No CDX"
NOTE: Insure the CD changer harness is properly connected at the radio and the CD changer. See
Fig. 16 and Fig. 17
Step
1
2
Error Message Diagnostics: "No CDX"
Test Procedure
Test Result
With the keyswitch in the
accessory position and the radio
Yes
Go to step 2.
turned on, backprobe radio
connector A, pin 31 (power) and
pin 34 (ground). Is battery voltage
present?
No
Replace the radio.
Is battery voltage present?
Backprobe CB changer connector
B, pin 15 (power) and pin 13
(ground).
Is battery voltage present?
Action
Yes
Replace the CD changer.
No
Repair or replace the CD changer wiring harness for an
open circuit.
Table 3, Error Message Diagnostics: "No CDX"
Error Message Diagnostics: "Focus"
NOTE: Make sure that CDs are being installed properly.
Step
1
2
Error Message Diagnostics: "Focus"
Test Result
Action
Yes
Instruct the driver how to correctly install a CD.
Is the CD upside down in the CD
changer?
No
Go to step 2.
Inserting a cold CD into a warm CD player can cause
condensation to form on the CD. A wet or contaminated CD
Yes
can cause the CD player to malfunction.
Is there moisture or condensation
on the CD?
Go to step 3.
No
Replace the CD player.
Test Procedure
Freightliner Service Bulletin, October 2015
Page 5
54-148
Radio and Integrated Thin-Film Antenna Troubleshooting,
and Field Service Updates
Freightliner
Service Bulletin
Step
3
> FLA COE
> FLB COE
> FLD Conventional
> Business Class
> FLC 112 Conventional
> Century Class Conventional
> Argosy COE
> Cargo
> Columbia
Error Message Diagnostics: "Focus"
Test Result
Yes
No action is required.
Will CDs play normally within one
hour of warming and drying?
No
Replace the CD player.
Test Procedure
> Coronado
> Business Class M2
> Cascadia
> 108SD/114SD
Action
Table 4, Error Message Diagnostics: "Focus"
Error Message Diagnostics: "ERR"
Step
1
Error Message Diagnostics: "ERR"
Test Result
Action
Inserting a cold CD into a warm CD player can cause
Insert a CD that is known to play
condensation to form on the CD. A wet or contaminated CD
properly and that is clean and free
Yes
can cause the CD player to malfunction.
from scratches.
Test Procedure

- Seamless Bluetooth Connectivity: Car stereo with Bluetooth...
- Powerful, Clear Audio Performance: Equipped with a built-in...
- High-Quality Music Playback via USB: Enjoy clear, detailed...
- Compact 1-DIN Design: Single din radio is designed with a...
- Simple Sound Customization: Dedicated Direct EQ Keys let you...

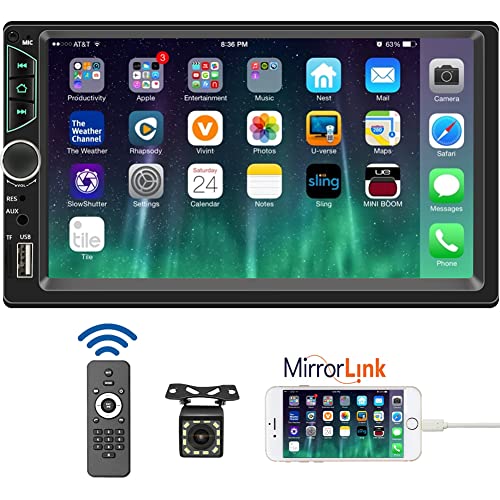
- 【High Quality Car Stereo Player】- Our double din car...
- 【Double Din Car Stereo Phone Mirror Link】- Support...
- 【7 inch Double Din Car Radio With Bluetooth 5.0 and FM...
- 【Car Stereo Double Din Inputs】- USB /SD/AUX input. car...
- 【Standard Double Din Stereo with Backup Camera】- Parking...
If the PDF is very large, it may not load in the preview below.
Some older TSBs had multiple PDFs — visit the NHTSA Website to view all PDFs.
If the TSB PDF does not show, download or view it on the NHTSA Website.
Click on the (+) Plus Sign
Then Click on Associated Document(s)
Search NHTSA Database for Recalls
Search NHTSA Database for Vehicle Investigations
View Latest Vehicle Investigations
Search NHTSA Database for Vehicle Complaints
View Latest Vehicle Complaints
TSB/Document ID: sb54148
Replacement Service Bulletin Number:
MFR Communication Date: 2018-02-26
MFR Internal Campaign ID/Software Version:
Communication Type: Service Bulletin/Repair Instructions
NHTSA Components: EQUIPMENT ADAPTIVE/MOBILITY
MFR Component System:
MFR Component Subsystem:
Previous TSB | Next TSB |

- [Notice] When you receive a used device, it may be a customer return resold by Amazon without inspection. You can exchange it for a new one through Amazon. As this situation is unavoidable, we sincerely apologize. For any issues, contacting us via Amazon's "Messages" is the best way. THINKSCAN 689BT Bidirectional Scan Tool Can Be Used Immediately After It is Turned On, Without Complicated Registration Process, Which is More Convenient & Quick.
- Full Bi-Directional Control & 3000+ Active Tests: Take control and test components like actuators, fuel injectors, relays, and cooling fans in real time. You’ll quickly see if the problem is in the part itself or the control module — saving you hours of guesswork and frustrating trial-and-error.
- Advanced ECU Coding Capabilities: Handle module matching and hidden feature activation with confidence. When you replace an ECU or want to customize settings, this obd2 scanner diagnostic bi directional tool gives you the professional-level capabilities you need without the dealership price tag.
- 34+ Useful Reset and Maintenance Functions: Complete everyday service tasks smoothly with a wide range of helpful reset and maintenance functions. Whether you’re keeping up with regular upkeep or tackling a specific job, this scanner makes maintenance simpler and less stressful for both DIYers and pros.
- Comprehensive Full System Diagnostics: Diagnose every major system — Engine, Transmission
 , ABS, SRS, TPMS, and more — all in one place. Finally stop wondering if you’re missing something important; get the full picture and clear codes with ease.

- Top Reasons to Choose the D7S OBD2 Scanner: XTOOL D7S car scan tool, an upgrade of XTOOL D7, offers comprehensive features for automotive technicians, workshops, and DIY enthusiasts 1. Upgraded Hardware: 2+64GB memory, rear camera, intuitive interface, foldable bracket 2. Complete Diagnostics: FCA Autoauth, OE-level all system scan, 39+ maintenance services, 4K+ bidirectional, CANFD/DoIP protocol 3. Advanced Capabilities: ECU coding, PMI functions 4. Wide Compatibility: Support 10,000+ models, covering 99% vehicle brands 5. Multi-language: Available in 22+ languages, No IP Restrictions 6. 3-Year Updates: Save 300 bucks on software updates for the latest features and optimizations
- 2026 Upgraded D7S Car Scanner Features: The newly 2026 D7S V2.0 scanner for car brings exciting features for advanced vehicle diagnostics and enhanced user experience 1. FCA AutoAuth: Now supports FCA SGW module for Chrysler, for Jeep, for Dodge (2018+), for Fiat (2017+), enabling faster vehicle communication without gateway restrictions 2. PMI (Offline ECU Programming): Allows for Ford, for Lincoln, and for Mazda ECU programming for new modules 3. Optimized Diagnostic Report 2.0: Personalized reports with logos and customer info for auto shops. Note: Compatibility varies by cars, please check before order
- Cost-effective ECU Coding Scan Tool for Specific Brands: Enhance your vehicle's performance with XTOOL D7S! This obd2 scanner all systems bidirectional offers advanced capabilities at an affordable price, supports online for BMW, for Benz and offline for BENZ, for MIT, along with PMI functions for Ford, for Mazda, and for Lincoln. Ideal for technicians and DIY enthusiasts, this automotive scanner diagnostic tool optimizes vehicle performance and enhances the driving experience. Note: Not for all cars and modules, please send car VIN to check the compatibility before purchase
- OE All System Diagnostic & 8 Pids Graphing: XTOOL D7S is a comprehensive all system bi directional obd2 scanner that delivers dealer-level diagnostics, completely controlling over your vehicle’s performance and health. This automotive scan tool can read and clear DTCs, view live data and ECU information, retrieve freeze frames, and perform active tests and full obd2 functions. This bi-directional scan tool can can identify your vehicle's make, model, and year information with just one click and show up to 8 PIDs live data with options for CSV viewing, playback, and recording for in-depth analysis. It is easy-to-use for both professionals and beginners, helping pinpoint issues efficiently
- 3 Years Software Update, Value for Money: With 3 years of software updates and 22+ languages(no IP restrictions), XTOOL D7S auto scanner code scanner ensures ongoing compatibility for the latest car models and improved diagnostic functions. This all system vehicle diagnostic scanner comes with a 30-day return policy and a 24-month repair for dependable performance. XTOOL are dedicated to your satisfaction, so enjoy seamless support and lifetime expert assistance. Should you encounter any issues or concerns, don’t hesitate to reach out XTOOL. D7S with newest update with 22 languages freely transfer without authorization, check details from setting-language or from XTOOL

- 【✅Compared to BOSSCOMM IF742, IF745 Offers Full-System Diagnostics】The BOSSCOMM IF745 car diagnostic scanner is an upgraded model of IF742. In addition to supporting all OBD2 Code Reader functions and 6 reset options (ABS/EPB/SAS/BMS/Oil/Throttle), it expands diagnostics from 4 systems (Check Engine/ABS/SRS/Transmission) to vehicle All systems, including Steering, Suspension, and Body Electronics. This provides deeper, more comprehensive diagnostic capabilities.
- 【✨6 Essential Resets: ABS Bleeding, Oil, EPB, SAS, Throttle, BMS】The BOSSCOMM IF745 obd2 scanner diagnostic tool swiftly purges air from brake lines to restore braking sensitivity, fine-tunes maintenance cycles to eliminate false alerts, resolves parking brake issues with one-click control, recalibrates steering sensors for stability, optimizes engine idling/acceleration for smoother performance, and deeply resets battery systems to extend lifespan and range via precise parameter adjustments.❗NOTE: Does NOT support bidirectional control, coding, or programming.
- 【✨Deep Diagnostics for All Vehicle System Modules】Beyond code reading/clearing and ECU information retrieval, our all-in-one data stream feature lets you inspect all current fault codes and their locations across the vehicle’s systems. This vehicle code reader helps you turn off dashboard warning lights and perform a comprehensive self-check of your car at home—no more back-and-forth trips to the repair shop or hefty inspection fees.
- 【✨10 OBD2 Functions】The BOSSCOMM IF745 scan tool’s DTC Lookup instantly translates fault codes into user-friendly explanations, its I/M Readiness feature streamlines emissions testing with a single tap, and Freeze Frame lets you pinpoint the exact moment of a fault for in-depth root-cause diagnosis. Combined with a live data dashboard and advanced diagnostics (O2S, OBMon, EVAP), it delivers comprehensive insights for confident troubleshooting.
- 【✨10,000+ Car Models, AutoVIN, 13 Languages】The BOSSCOMM IF745 vehicle scanner diagnostic tool covers 73+ global car brands and offers support in 13 languages, making it perfect for DIYers, auto mechanics, or as a thoughtful gift. With a single-click AutoVIN feature, it instantly retrieves vehicle serial numbers, streamlining diagnostics for users globally. This adaptable tool balances user-friendliness with precision, catering to both personal and professional requirements.✅Unsure about compatibility? Compatibility will vary on vehicles' model and year, pls reach us via 📧 [email protected] 📧 before purchase.
This product presentation was made with AAWP plugin.