
NHTSA ID Number: 10118520
Manufacturer Communication Number: B17-011
TSB/Document Date: 2017-10-05
Summary
Service bulletin - Some 9-speed transmission warmers were improperly manufactured and allow the engine coolant and ATF to mix. If the fluids mix, the engine and transmission may be permanently damaged and require replacement.
bubbles.
•
•
NOTE: Some bubbles are normal when the transmission warmer is first submerged and will come to a stop.
If there is a leak, there will be a steady stream of bubbles coming from the transmission warmer.
If there are no bubbles coming from the warmer, continue with the warmer replacement. Go to step 14.
If there are bubbles, take photos (see Photos) and check to see if the vehicle also overheated by checking the
customer responses on the RO.
- If the transmission warmer leaks, but the engine did not overheat, go to REPAIR PROCEDURE B.
- If the transmission warmer leaks, and the engine overheated, go to REPAIR PROCEDURE C.
Page 18 of 46
Photos
If there are bubbles because of a leaking transmission warmer, take photos of the bubbles during the
pressure test, the transmission warmer serial number, and the VIN.
• The pressure test
•
The transmission warmer serial number
•
VIN
NOTE:
• These photos must be submitted with any warranty claim where the transmission is replaced.
• Make sure you install the leaking transmission warmer on the original transmission to be returned to the
remanufacturing facility. Any transmission replacement claims that do not have the leaking warmer installed
on the returned transmission may be subject to debit.
• Any transmission replacement claims that do not include the required photos may be subject to debit.
Unacceptable Photos
Photos must correspond to the warranty claim submittal standards. Photos may be rejected for the following
reasons:
• Out of focus and unreadable
• Too small of a file size
• Too dark
Page 19 of 46
14. Remove the two ATF lines from the transmission warmer, then remove the 8 O-rings on the pipes by gently pushing
the O-rings off with your fingers.
NOTE:
- Do not use picks or screwdrivers to remove the O-rings as you may damage the sealing surface.
15. Clean the pipes, then install 4 new O-rings.
NOTE: Make sure your hands or gloves are clean to avoid contaminating the O-rings.
16. Coat the O-rings with ATF 3.1.
17. Install the original ATF warmer pipes onto the new transmission warmer using the fixing plates. Torque the bolts to
10 N·m (7 lb-ft).
Page 20 of 46
18. Install the transmission warmer to the transmission. Install the ATF warmer pipes using fixing plates. Torque the
bolts to 10 N·m (7 lb-ft).
19. Connect the water bypass hoses. Make sure you align the paint marks on the ATF warmer lines with the paint
marks on the water bypass hoses as shown. Secure the water bypass hoses with the clamps.
Page 21 of 46
20. Install the connector bracket.
21. Install the battery box and the 12-volt battery.
22. Install the intake air guide and the air cleaner.
23. Fill the engine with coolant.
24. Check the ATF, and adjust as needed. Refer to the service information.
NOTE: Make sure you use the recommended Honda ATF Type 3.1 if you have to add fluid. Using the wrong ATF
can affect shift quality.
25. Check for any ATF or coolant leaks.
26. Install the splash shield.
Page 22 of 46
REPAIR PROCEDURE B
NOTE:
• Use this procedure only if the transmission warmer failed the pressure test and the engine did not overheat.
If the engine overheated, go to REPAIR PROCEDURE C.
• Fill in the flush work sheet (see page 39), and attach it to the RO.
1. Remove the transmission. Refer to the service information.
Engine and Heater Core Flush Procedure
2. Disconnect the upper and lower radiator hoses at the engine.
3. Disconnect the two heater hoses at the engine.
4. Disconnect the ATF warmer line (coolant).
5. Remove the thermostat housing.
Page 23 of 46
6. Remove the thermostat from the housing using a 32 mm socket. Push in on the thermostat, and twist the socket.
Once the thermostat has released from the housing, remove the thermostat.
7. Install the green rubber plug from the coolant flush kit into the thermostat water jacket as shown. To prevent the
plug from falling into the water passage, cover the opening with a shop towel.
8. Remove the shop towel, and install the thermostat housing without the thermostat.
Page 24 of 46
9. Using the three colored plugs from the flush kit, cap off both heater hoses and the ATF transmission warmer line as
shown.
10. Using commercially-available clamps, clamp the throttle body coolant lines as shown.
11. Remove the lid from the SUPPLY bucket, and install the large (1.5 in.) return hose with the T-fitting through the hole
in the lid as shown.
Page 25 of 46
12. Install the thermostat adaptor to the pump outlet hose.
13. Install the pump outlet hose to the thermostat housing.
14. Install the return hose to the water passage as shown, then fill the bucket with 4.5 gallons of fresh water, and install
the lid.
Page 26 of 46
15. Install the pump inlet line to the SUPPLY bucket lid as shown.
NOTE: If this is the first time using the pump, remove the priming plug, fill the pump with clean water, then reinstall
the plug.
Page 27 of 46
16. Turn on the pump, and let it run for 10 minutes.
17. After 10 minutes, turn the pump off and dump all the contents of the SUPPLY bucket into the waste coolant
container. Wipe off any oil residue from the bucket, refill the bucket with water, then repeat the flush 4 more times
(50 minutes total time flushing with water).
18. Substitute the water for coolant (OL999-9011A), and run the pump for 10 minutes to circulate the fluid.
19. After 10 minutes, turn the pump off and dump all the contents of the SUPPLY bucket into the waste coolant
container. Refill the SUPPLY bucket with coolant, and run the pump for 10 minutes.
Page 28 of 46
20. Disconnect the pump outlet line from the engine, and remove the thermostat adaptor. Replace the outlet adaptor
with the 0.75 in. heater hose adaptor.
21. Remove the thermostat cover, remove the green rubber plug, and return it to the coolant flush kit. To prevent the
plug from falling into the water passage, cover the passage with a shop towel.
22. Connect the pump outlet hose to the heater hose as shown.
Page 29 of 46
23. Install the heater core return hose through the DUMP bucket lid.
24. Attach the heater core return hose to the heater hose as shown.
Page 30 of 46
25. Fill the SUPPLY bucket with water, and run the pump until the SUPPLY bucket is empty.
26. Empty the DUMP bucket into the waste coolant container.
27. Repeat the flush (steps 25 and 26) 3 more times.
28. Empty the DUMP bucket into the waste coolant container and wipe off any oil residue from the bucket.
29. Remove the pump and return hoses, throttle body hose clamps, and the three colored plugs from the vehicle.
Page 31 of 46
Reassemble Vehicle
30. Replace the radiator, the 10 indicated coolant hoses, thermostat, coolant reserve tank and hoses, and the 2 ECT
sensor (1 and 2) O-rings. Refer to the image for the location of all the components.
NOTE:
• Make sure to remove the green rubber plug that was installed in the thermostat water jacket and return
it to the flush kit.
• When refilling the cooling system after the flush is complete, some oil may be present in the cooling
system. Thorough testing has shown the amount left over after the flush procedure is within acceptable
limits provided the flush procedure was followed completely.
Page 32 of 46
31. Install the new remanufactured transmission. To ensure proper shift quality, update the TCM and PCM as
necessary, then do the PCM idle learn, teach-in (Hydraulic Pressure Characteristic Calibration), and adaptation
(see Tech2Tech listed below). Refer to the service information.
PCM
Trim
2015-16 Base Tech
2015-16 ADV
2015-16 Tech AWD
2015-16 ADV AWD
Program IN (or later)
J23050
J23060
J23070
J23090
Program P/N (or later)
37805-5J2-3050
37805-5J2-3060
37805-5J2-3070
37805-5J2-3090
Program IN (or later)
J4A590
Program P/N (or later)
28101-5J4-A590
TCM
Trim
2015–16 2WD Base,
Technology
2015–16 2WD Advance
2015–16 AWD Base,
Technology
2015–16 AWD Advance
-
J4A690
L9A700
28101-5J4-A690
28101-5L9-A700
L9A690
28101-5L9-A690
Automatic Transmission Removal and Installation
Tech2Tech “Power Up a One-Push Start Vehicle with the i-HDS – With Replaced Components”
Tech2Tech “9-Speed Transmission or TCM Replacement Procedure”
32. Give your warranty clerk the digital photos and RO. For the warranty claim to be paid, the three photos must be
included in the warranty claim. See ATTACHING PHOTOS TO A CLAIM for information about attaching photos to
warranty claims.
Page 33 of 46
REPAIR PROCEDURE C
NOTE:
• Use this procedure only if the transmission warmer failed the pressure test and the engine overheated. If
the engine did not overheat, go to REPAIR PROCEDURE B.
• Fill in the heater core section of the flush work sheet (see page 39), and attach it to the RO.
1. Remove the engine and transmission assembly. Refer to the service information.
Heater Core Flush Procedure
2. Connect the pump to the SUPPLY bucket.
3. Make sure the 0.75 in. heater hose adaptor is installed on the pump outlet hose, then connect the pump outlet hose
to the heater hose as shown.
Page 34 of 46
4. Install the return hose through the DUMP bucket lid, then install the lid on the bucket.
5. Attach the return hose to the heater hose as shown.
Page 35 of 46
6. Fill the SUPPLY bucket with water, and run the pump until the SUPPLY bucket is empty.
NOTE: If this is the first time using the pump, remove the priming plug, and fill the pump with clean water, then
reinstall the plug.
7. Empty the DUMP bucket into the waste coolant container.
8. Repeat the flush 3 more times.
9. Remove the pump and return hose from the vehicle.
Page 36 of 46
Reassemble Vehicle
10. Replace the radiator, the 10 indicated coolant hoses, the thermostat, the water passage and water connecting pipe,
the coolant reserve tank, the 2 ECT sensor (1 and 2) O-Rings, and the coolant reserve tank and hoses. Refer to the
image for the location of all the components.
Page 37 of 46
11. Install a new short block, the water connecting pipe, the water passage, new cylinder heads, and a new
remanufactured transmission. To ensure proper shift quality, update the TCM and PCM as necessary, then do the
PCM idle learn, teach-in (Hydraulic Pressure Characteristic Calibration), adaptation (see Tech2Tech listed below),
and CKP-pattern learn. Refer to service information.
PCM
Trim
2015-16 Base Tech
2015-16 ADV
2015-16 Tech AWD
2015-16 ADV AWD
Program IN (or later)
J23050
J23060
J23070
J23090
Program P/N (or later)
37805-5J2-3050
37805-5J2-3060
37805-5J2-3070
37805-5J2-3090
Program IN (or later)
J4A590
J4A690
L9A700
L9A690
Program P/N (or later)
28101-5J4-A590
28101-5J4-A690
28101-5L9-A700
28101-5L9-A690
TCM
Trim
2015–16 2WD Base, Technology
2015–16 2WD Advance
2015–16 AWD Base, Technology
2015–16 AWD Advance
-
Automatic Transmission Removal and Installation
Tech2Tech “Power Up a One-Push Start Vehicle with the i-HDS – With Replaced Components”
Tech2Tech “9-Speed Transmission or TCM Replacement Procedure”
12. Give your warranty clerk the digital photos and RO. For the warranty claim to be paid, the three photos must be
included in the warranty claim. See ATTACHING PHOTOS TO A CLAIM for information about attaching photos to
warranty claims.
END
Page 38 of 46
VIN_____________________
RO______________________
Flush Work Sheet.
(Check each box when completed.)
(Attach to the RO.)
ENGINE FLUSH
Prime pump.
Fill Supply bucket with 4.5 gallons of plain water flush 5 times wiping the bucket out between each flush.
1. Flush with plain water 10 min ___
2. Flush with plain water 10 min ___
3. Flush with plain water 10 min ___
4. Flush with plain water 10 min ___
5. Flush with plain water 10 min ___
Add 4.5 gallons 50/50 mix coolant for the final 2 flushes.
1. Flush with 50/50 mix 10 min ___
2. Flush with 50/50 mix 10 min ___
HEATER CORE FLUSH
Attach flush hoses to heater core. Fill supply bucket with 4.5 gallons of plain water, and flush 4 times.
1. Flush with plain water ___
2. Flush with plain water ___
3. Flush with plain water ___
4. Flush with plain water ___
5. Disconnect flush hoses ____
6. Remove
thermostat ___
plug ____
END
Page 39 of 46
ATTACHING PHOTOS TO A CLAIM
Go to the Photo Attachments area of the claim form to upload images as shown below.
1. To attach photos to the claim, click on Upload Images.
The Claim Photo Attachment screen appears.
2. Click on Browse. The Choose File to Upload window appears.
3. Click on an image file to be uploaded.
4. Click on Open to select the file.
Page 40 of 46
5. Click on Preview if you would like to view the image before uploading. The preview image appears.
Fit To Window is selected by default as the size at which the preview image is displayed. Click on Full Size if you
want to enlarge the image, and use the scrollbars to view different areas of the enlarged image.
6. Click on Upload to attach the image to the warranty claim.
The Uploaded Images count increases each time you upload a photo.
7. Click on Browse again and follow the same steps to continue attaching images to the claim. To properly document
each warranty repair claim, at least 3 photos must be attached.
Page 41 of 46
8. When finished attaching photos, click on Close.
The file names of your attached photos now appear in the Photo Attachments area of the claim form, as shown
below.
VIEWING AND DELETING PHOTO ATTACHMENTS
After uploading photo attachments, you can view the photos by clicking on View Images in the Photo Attachments
area. The Claim Photo Attachment screen displays thumbnails of all photos attached to the claim.
Page 42 of 46
Click on a thumbnail to view the photo attachment as shown above. To delete a photo attachment, simply click on
Delete to the left of its thumbnail.
When your claim and photos are completely ready, click on Submit to send the claim to the American Honda Warranty
department.
WARRANTY CLAIM PHOTO ATTACHMENT INQUIRY
After submitting a warranty claim, you can view its photo attachments at any time as follows:
1. Click on Service > Warranty > Warranty Claim Photo Attachment Inquiry.
2. Enter any of the following: Claim Number, VIN, Repair Order Number, or Repair Order Date.
3. Click on submit. Thumbnails of all photos attached to the claim appear, as shown below.
4. Click on any thumbnail to view the photo attachment.
NOTE:
• Photo attachments are archived on the iN for 2 years.
• Whenever you open a saved warranty claim and attach or delete photos, you must either save or submit the
claim to retain your photo attachment changes.
Page 43 of 46
CORRECTING PHOTO PROBLEMS USING PICTURE MANAGER
Microsoft Office Picture Manager is a very useful tool to help improve the quality of photos submitted for warranty
consideration.
While the Picture Manager program cannot correct blurry, out-of-focus pictures, it can adjust pictures for brightness,
contrast, and color, helping to reveal details. It can also crop or resize digital photo files so that they can be submitted
for warranty claim consideration.
• To use this program on your PC, click on Start > Programs > Microsoft Office > Microsoft Office Tools >
Microsoft Office Picture Manager.
• If the above instruction does not lead you to the Picture Manager program, click on Start > Search. Under Search
for Folders or Files, enter Picture Manager in the Search window, then click on Search Now.
• To create a shortcut to open Microsoft Picture Manager from your desktop, go to Start > Programs > Microsoft
Office >Microsoft Office Tools > Microsoft Picture Manager >, then right-click and choose Create Shortcut.
The shortcut icon and title will appear below the original Microsoft Picture Manager icon and title. Left-click and hold
on the shortcut icon and drag it to the desktop. Once there, if you wish to change its name, right-click on the icon
and select Rename.
• To open and edit photos directly from Microsoft Picture Manager, right-click on any JPEG picture file, then move
your cursor to Open with.
Another window will open listing Microsoft Office Picture Manager and other programs. Do not click on Picture
Manager, but instead scroll down the list, then click on Choose Program.
Another window will open, with Picture Manager already selected. Check the open box next to Always use the
selected program to open this kind of file; this will make Picture Manager your default picture management
program.
NOTE: The next time you click on a JPEG photo, it will automatically open in the Picture Manager program.
Page 44 of 46
Correction Example #1: Photo is Too Dark
In Picture Manager, select Edit/Edit Pictures > Edit Using These Tools/Brightness and Contrast. Use the sliding
scales to adjust the photo to the brightness and contrast that best reveal the fault.
Before Picture Manager Correction
After Picture Manager Correction
Page 45 of 46
Correction Example #2: Photo Size is Too Large
For maximum clarity, the file size for each photo must be between 500 kB and 10,000 kB (10 mB). ZIP-compressed
files are not acceptable. Photo file sizes over 10,000 kB (10 mB) cannot be accepted by the American Honda
Warranty department.
To reduce a picture's file size, open Picture Manager. Click on the photo to be reduced, then click on Edit Pictures >
Resize > Percentage of original width x height, then click on the down arrow to reduce its percentage (%) size.
View the pixel count change in Size Setting Summary, which displays the photo's Original size and its New size.
NOTE: The % function changes the pixels per inch, so a photo’s size should be reduced only enough to meet the
maximum file size requirement. For example, a 10% reduction in pixels per inch will reduce a photo's size and its
resolution by almost 50%.
END
Page 46 of 46
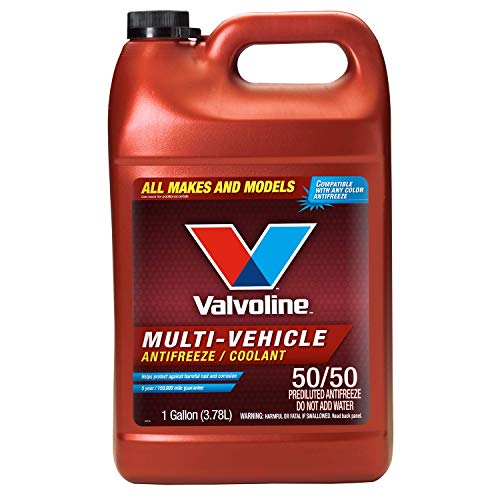
- Contains Alugard Plus for compatibility with all ethylene...
- Fights corrosion, scaling and rust while protecting all...
- High-quality additives protect against leaks and won’t...
- Pre-mixed yellow formula is ready-to-use in a 50/50 ratio...
- Contains 30 – 50 ppm of denatonium benzoate as a bittering...


- 5 year/150, 000 mile . Silicate-free, long-life, phosphate...
- Formulated to replace the OEM fluid in Asian make vehicles...
- The long life formula provides protection for all cooling...
- Meets the following OEM and industry specifications...
- Contains 30 – 50 ppm of denatonium benzoate as a bittering...
If the PDF is very large, it may not load in the preview below.
Some older TSBs had multiple PDFs — visit the NHTSA Website to view all PDFs.
If the TSB PDF does not show, download or view it on the NHTSA Website.
Click on the (+) Plus Sign
Then Click on Associated Document(s)
Search NHTSA Database for Recalls
Search NHTSA Database for Vehicle Investigations
View Latest Vehicle Investigations
Search NHTSA Database for Vehicle Complaints
View Latest Vehicle Complaints
TSB/Document ID: B17-011
Replacement Service Bulletin Number:
MFR Communication Date: 2017-09-22
MFR Internal Campaign ID/Software Version:
Communication Type: Service Bulletin/Repair Instructions
NHTSA Components: POWER TRAIN
MFR Component System:
MFR Component Subsystem:
Previous TSB | Next TSB |

- [Notice] When you receive a used device, it may be a customer return resold by Amazon without inspection. You can exchange it for a new one through Amazon. As this situation is unavoidable, we sincerely apologize. For any issues, contacting us via Amazon's "Messages" is the best way. THINKSCAN 689BT Bidirectional Scan Tool Can Be Used Immediately After It is Turned On, Without Complicated Registration Process, Which is More Convenient & Quick.
- Full Bi-Directional Control & 3000+ Active Tests: Take control and test components like actuators, fuel injectors, relays, and cooling fans in real time. You’ll quickly see if the problem is in the part itself or the control module — saving you hours of guesswork and frustrating trial-and-error.
- Advanced ECU Coding Capabilities: Handle module matching and hidden feature activation with confidence. When you replace an ECU or want to customize settings, this obd2 scanner diagnostic bi directional tool gives you the professional-level capabilities you need without the dealership price tag.
- 34+ Useful Reset and Maintenance Functions: Complete everyday service tasks smoothly with a wide range of helpful reset and maintenance functions. Whether you’re keeping up with regular upkeep or tackling a specific job, this scanner makes maintenance simpler and less stressful for both DIYers and pros.
- Comprehensive Full System Diagnostics: Diagnose every major system — Engine, Transmission, ABS, SRS, TPMS, and more — all in one place. Finally stop wondering if you’re missing something important; get the full picture and clear codes with ease.

- Top Reasons to Choose the D7S OBD2 Scanner: XTOOL D7S car scan tool, an upgrade of XTOOL D7, offers comprehensive features for automotive technicians, workshops, and DIY enthusiasts 1. Upgraded Hardware: 2+64GB memory, rear camera, intuitive interface, foldable bracket 2. Complete Diagnostics: FCA
 Autoauth, OE-level all system scan, 39+ maintenance services, 4K+ bidirectional, CANFD/DoIP protocol 3. Advanced Capabilities: ECU coding, PMI functions 4. Wide Compatibility: Support 10,000+ models, covering 99% vehicle brands 5. Multi-language: Available in 22+ languages, No IP Restrictions 6. 3-Year Updates: Save 300 bucks on software updates for the latest features and optimizations
 - 2026 Upgraded D7S Car Scanner Features: The newly 2026 D7S V2.0 scanner for car brings exciting features for advanced vehicle diagnostics and enhanced user experience 1. FCA AutoAuth: Now supports FCA SGW module for Chrysler, for Jeep, for Dodge (2018+), for Fiat (2017+), enabling faster vehicle communication without gateway restrictions 2. PMI (Offline ECU Programming): Allows for Ford, for Lincoln, and for Mazda ECU programming for new modules 3. Optimized Diagnostic Report 2.0: Personalized reports with logos and customer info for auto shops. Note: Compatibility varies by cars, please check before order
- Cost-effective ECU Coding Scan Tool for Specific Brands: Enhance your vehicle's performance with XTOOL D7S! This obd2 scanner all systems bidirectional offers advanced capabilities at an affordable price, supports online for BMW, for Benz and offline for BENZ, for MIT, along with PMI functions for Ford, for Mazda, and for Lincoln. Ideal for technicians and DIY enthusiasts, this automotive scanner diagnostic tool optimizes vehicle performance and enhances the driving experience. Note: Not for all cars and modules, please send car VIN to check the compatibility before purchase
- OE All System Diagnostic & 8 Pids Graphing: XTOOL D7S is a comprehensive all system bi directional obd2 scanner that delivers dealer-level diagnostics, completely controlling over your vehicle’s performance and health. This automotive scan tool can read and clear DTCs, view live data and ECU information, retrieve freeze frames, and perform active tests and full obd2 functions. This bi-directional scan tool can can identify your vehicle's make, model, and year information with just one click and show up to 8 PIDs live data with options for CSV viewing, playback, and recording for in-depth analysis. It is easy-to-use for both professionals and beginners, helping pinpoint issues efficiently
- 3 Years Software Update, Value for Money: With 3 years of software updates and 22+ languages(no IP restrictions), XTOOL D7S auto scanner code scanner ensures ongoing compatibility for the latest car models and improved diagnostic functions. This all system vehicle diagnostic scanner comes with a 30-day return policy and a 24-month repair for dependable performance. XTOOL are dedicated to your satisfaction, so enjoy seamless support and lifetime expert assistance. Should you encounter any issues or concerns, don’t hesitate to reach out XTOOL. D7S with newest update with 22 languages freely transfer without authorization, check details from setting-language or from XTOOL

- 【✅Compared to BOSSCOMM IF742, IF745 Offers Full-System Diagnostics】The BOSSCOMM IF745 car diagnostic scanner is an upgraded model of IF742. In addition to supporting all OBD2 Code Reader functions and 6 reset options (ABS/EPB/SAS/BMS/Oil/Throttle), it expands diagnostics from 4 systems (Check Engine/ABS/SRS/Transmission) to vehicle All systems, including Steering, Suspension, and Body Electronics. This provides deeper, more comprehensive diagnostic capabilities.
- 【✨10 OBD2 Functions】The BOSSCOMM IF745 scan tool’s DTC Lookup instantly translates fault codes into user-friendly explanations, its I/M Readiness feature streamlines emissions testing with a single tap, and Freeze Frame lets you pinpoint the exact moment of a fault for in-depth root-cause diagnosis. Combined with a live data dashboard and advanced diagnostics (O2S, OBMon, EVAP), it delivers comprehensive insights for confident troubleshooting.
- 【✨Deep Diagnostics for All Vehicle System Modules】Beyond code reading/clearing and ECU information retrieval, our all-in-one data stream feature lets you inspect all current fault codes and their locations across the vehicle’s systems. This vehicle code reader helps you turn off dashboard warning lights and perform a comprehensive self-check of your car at home—no more back-and-forth trips to the repair shop or hefty inspection fees.
- 【✨6 Essential Resets: ABS Bleeding, Oil, EPB, SAS, Throttle, BMS】The BOSSCOMM IF745 obd2 scanner diagnostic tool swiftly purges air from brake lines to restore braking sensitivity, fine-tunes maintenance cycles to eliminate false alerts, resolves parking brake issues with one-click control, recalibrates steering sensors for stability, optimizes engine idling/acceleration for smoother performance, and deeply resets battery systems to extend lifespan and range via precise parameter adjustments.❗NOTE: Does NOT support bidirectional control, coding, or programming.
- 【✨10,000+ Car Models, AutoVIN, 13 Languages】The BOSSCOMM IF745 vehicle scanner diagnostic tool covers 73+ global car brands and offers support in 13 languages, making it perfect for DIYers, auto mechanics, or as a thoughtful gift. With a single-click AutoVIN feature, it instantly retrieves vehicle serial numbers, streamlining diagnostics for users globally. This adaptable tool balances user-friendliness with precision, catering to both personal and professional requirements.✅Unsure about compatibility? Compatibility will vary on vehicles' model and year, pls reach us via 📧 [email protected] 📧 before purchase.
This product presentation was made with AAWP plugin.