
| “This site contains affiliate links for which OEMDTC may be compensated” |
April 1, 2021 NHTSA CAMPAIGN NUMBER: 21V226000
Air Leak In Spring Brake Chamber
A hole in the diaphragm may cause an air leak, causing the parking brake to engage and increasing the risk of a crash.
NHTSA Campaign Number: 21V226
Manufacturer Navistar, Inc.
Components PARKING BRAKE
Potential Number of Units Affected 615
Summary
Navistar, Inc. (Navistar) is recalling certain 2021 International LT and International RH vehicles. The spring inside the spring brake chamber may allow the pressure plate to shift and wear a hole through the diaphragm.
Remedy
Navistar will notify owners, and dealers will inspect and, as necessary, replace the spring brake chambers, free of charge. Owner notification letters were mailed on May 28, 2021. Owners may contact Navistar customer service at 1-800-448-7825. Navistar’s number for this recall is 21502.
Notes
Owners may also contact the National Highway Traffic Safety Administration Vehicle Safety Hotline at 1-888-327-4236 (TTY 1-800-424-9153), or go to www.safercar.gov.
SERVICE PROCEDURE
21502
MAY 2021
SUBJECT: SAFETY RECALL
Spring Brake Chamber on certain International® LT® and RH™ series trucks built 11 February 2020 thru 16 July 2020 with feature code 04AAR (Park Brake Chambers; spring type, T20/24 Sq. In. for Air Disc brakes).
DEFECT DESCRIPTION
The spring inside the spring brake chamber may allow the pressure plate to shift and wear a hole through the diaphragm resulting in an air leak. An air leak in the spring brake chamber may result in an uncommanded application of the parking brakes and increase the risk of a vehicle crash.
MODELS INVOLVED
This safety recall involves certain International® LT® and RH™ Series trucks built
11 February 2020 thru 16 July 2020 with feature code 04AAR (Park Brake
Chambers; spring type, T20/24 Sq. In. for Air Disc brakes).
ELIGIBILITY
This procedure applies ONLY to vehicles marked in the International® Service PortalSM with Safety Recall 21502. Also complete any other open campaigns listed on the Service Portal at this time.
PARTS INFORMATION
NOTE: Do not preorder chambers for inventory as only 10% of the spring
brake chambers may contain the defect.
| Part Number | Part Description | Quantity |
| 8900293R91 | Spring Brake Chamber | As Needed |
SERVICE PROCEDURE
WARNING! To prevent personal mJury and / or death, or damage to property, park vehicle on hard flat surface, turn the engine off, set the parking brake and install wheel chocks to prevent the vehicle from moving in either direction.
WARNING! To prevent personal injury and / or death, or damage to property, if the vehicle must be raised, do not work under the vehicle supported only by jacks. Jacks can slip or fall over.
WARNING! To prevent personal injury and I or death, always wear safe eye protection when performing vehicle maintenance.
NOTE: This service procedure is divided into the following sections:
- Brake Chamber Inspection: Steps 6 – 8 for all rear brake chambers.
- Brake Chamber Replacement: Steps 9 – 43 when brake chamber replacement is required after inspection.
- Brake Chambers that Cannot Be Caged Due to Shifted Pressure Plate: Steps A1 -A3.
Brake Chamber Inspection
- Park vehicle on flat surface.
- Shift transmission to Park or Neutral and set parking brake.
- Turn vehicle ignition to Key OFF position.
- Install wheel chocks.
- Release parking brake.
Figure 1. Plates
- Centered pressure plate
- Shifted pressure plate
NOTE: Inspection procedure must be performed on all spring brake chambers. Only chambers that fail inspection with the caging tool are to be replaced. Any brake chambers found by the supplier that should not have been replaced will result in a warranty charge back.
NOTE: If all four chambers pass inspection after performing Steps 6, 7, and 8, proceed to Step 45.
- Starting with spring brake chamber on driver-side of forward drive axle, remove dust plug from chamber to check for centering of pressure plate.
a. If pressure plate is centered (Figure 1, Item 1) install dust plug. Proceed to Step 8.
b. If pressure plate is not centered (Figure 1, Item 2), continue with Step 7.
- Remove caging tool and insert into chamber.
a. If caging tool can be fully inserted into chamber, remove caging tool and insert it into holder. Using a torque wrench, tighten nut to 11 to 35 lb-ft (7 to 15 N•m). Continue with Step 8.
b. If caging tool cannot be fully inserted into chamber, chamber must be Continue with Step 8.
- Perform Steps 6 and 7 on remaining spring brake chambers.
a. All chambers pass inspection; install dust Proceed to Step 45.
b. One or more chambers require Continue with Step 9.
Brake Chamber Replacement
- Using jack, raise axle that requires spring brake chamber replacement and support on suitable jack stands.
- Remove wheels on side of axle that requires spring brake chamber replacement.
WARNING! To prevent personal injury and / or death, or damage to property, do not attempt to mechanically release (cage) the spring on any spring brake that shows sign of structural damage, significant corrosion or any other damage that the operator or mechanic deems unsafe. Handle damaged spring brakes with extreme caution. Caging the spring disassembling the chamber may result in a forceful release of the chamber and / or its contents.
WARNING! To prevent personal injury and / or death, or damage to property, do not work from behind the spring brakes, always work from the side and front. Spring brake chambers are under more than 2,000 pounds. (8,900 newtons} of spring force.
CAUTION! To prevent damage to property, do not apply more than 50 lb-ft of torque to nut of manual caging tool.
NOTE: If caging tool cannot be inserted to manually cage brakes, perform Steps A1 -A3 (below}. Then perform Steps 12 thru 16.
- With parking brake released, manually cage spring brake.
a. If caging tool cannot be inserted, set parking brake and manually cage spring brake.
- Drain air tanks.
NOTE: For installation reference, be sure to mark air line from air inlet port identified as “Spring.”
- Record orientation between two air hoses and their respective valves and ports located on spring brake chamber. Orientation needed in Steps 25 31, and 32.
Figure 2. Brake Hoses
- Quick release valve
- ABS modulator valve
- Service brake hose
- Spring brake hose
- Disconnect spring brake air hose (Figure 2, Item 4) from quick release valve (Figure 2, Item 1).
- Remove hose tender from both air hoses. Save for reuse.
- Disconnect service brake air hose (Figure 2, Item 3) from ABS modulator valve (Figure 2, Item 2).
- Support spring brake chamber and remove then discard mounting nuts and washers.
- Remove spring brake chamber.
Figure 3. 90-Degree Fittings Orientation
- Air hose (2)
- 90-degree fitting (2)
- Spring brake chamber
- Remove both air hoses (Figure 3, Item 1) from 90-degree fittings (Figure 3, Item 2).
- Note orientation of both 90-degree fittings (Figure 3, Item 2) located on spring brake chamber (Figure 3, Item 3). Remove fittings and save chamber for parts return.
- Clean remaining sealant from threads of both fittings.
- Apply thread sealant to both 90-degree fittings and thread into each port hand tight on new spring brake
NOTE: Orienting fittings must be made in tightening direction only. DO NOT BACK OFF (LOOSEN) to correctly orient 90-degree fittings. If correct orientation cannot be attained when 90-degree fittings are tightened to 1 1/2 to 2 turns from hand tight, continue to turn 90-degree fittings up to one half turn more to attain correct orientation.
- Tighten both 90-degree fittings 1 1/2 to 2 turns. Orient both 90-degree fittings to position noted in Step 20.
- Clean any thread sealant from threads of both air lines. Apply fresh sealant to air line threads.
- Install both air hoses hand tight to their correct port fitting as noted in Step 13.
- Tighten both air hoses 1 1/2 to 2 turns.
WARNING! To prevent personal injury and / or death, or damage to property, do not work from behind the spring brakes, always work from the side and front. Spring brake chambers are under more than 2,000 pounds (8900 newtons) of spring force.
- Correctly orient new spring brake chamber into position. As chamber is being positioned onto caliper, visually check that chamber push rod is nesting in pocket of operating shaft.
- Firmly hold the chamber onto the caliper by hand. Place the two washers and nuts onto the mounting studs.
- Tighten nuts until the mating surfaces Use minimal torque on both nuts.
- Using a torque wrench, tighten each nut to 59-75 lb-ft (80-100 N•m). Then, tighten each nut to 133-155 lb-ft (180-210 N•m).
- Connect service brake air hose (Figure 2, Item 3) to ABS modulator valve (Figure 2, Item 2) and tighten swivel nut.
- Connect spring brake air hose (Figure 2, Item 4) to quick release valve (Figure 2, Item 1) and tighten swivel nut.
- Reinstall hose tender removed in Step 15.
- Turn vehicle ignition to Key ON, Engine RUNNING position. Allow air system to reach full system
- Turn vehicle ignition to Key OFF
- Release parking brake and check for air leaks.
Figure 4. Spring Brake Chamber
- Caging bolt, nut, and washer
- Holder
- Spring brake chamber
- Remove caging bolt (Figure 4, Item 1) from spring brake chamber (Figure 4, Item 3). Stow caging bolt in holder on chamber (Figure 4, Item 2) with threaded end up. Using a torque wrench, tighten nut to 5 to 11 lb ft (7 to 15 N•m).
- Install dust plug on back of spring brake chamber.
- Apply service brake and observe air gauges; drop in pressure indicates leak in service brake air line.
Figure 5. Flange Stud Mounts
- Flange stud mount – 8 stud
- Flange stud mount – 10 stud
- Install tires, wheel assemblies and wheel nuts. Refer to appropriate service manual for instructions. Tighten wheel nuts alternately following crisscross pattern sequence (Figure 5). Do not fully tighten nuts at this This procedure allows uniform seating of nuts and ensures even, face-to-face contact of wheel and hub.
- Raise vehicle, remove jack stands, and lower vehicle.
- Set parking brake.
- Using a torque wrench, tighten wheel nuts to 450 to 500 lb-ft (610 to 678 N•m).
- Repeat Steps 9 through 43 for any additional chamber requiring replacement.
- Remove wheel chocks.
Brake Chambers That Cannot Be Caged Due to Shifted Pressure Plate
A1. Release park brake.
A2. Remove chamber from caliper.
A3. Once chamber is removed from caliper, set parking brake.
END OF SERVICE PROCEDURE
LABOR INFORMATION
| Operation Number | Description | Time |
| A40-21502-1 | Inspect All Chambers | 0.4 hrs |
| A40-21502-2 | Replace (1) Chamber, If Necessary | 1.3 hrs |
CAMPAIGN IDENTIFICATION LABEL
Each vehicle corrected in accordance with this campaign must be marked with a CTS-1075 Campaign Identification Label.
Complete the label and attach on a clean surface next to the vehicle identification number (VIN) plate.
ADMINISTRATIVE / DEALER RESPONSIBILITIES
WARRANTY CLAIMS
Warranty claim expense is to be charged to Warranty. Claims are to be submitted in the normal manner, making reference to Safety Recall 21502.
Section 7 of the Warranty Policy and Procedures Manual contains further information related to the submission and processing of AFC/ Recall claims. As with all claim submissions, items acquired locally must be submitted in the “Other Charges” tab. The cost of any bulk items (such as a bag of cable tie straps, roll of wire, barrel of oil, or tube of silicone) should be prorated for the cost of the individual pieces / amount used during each repair.
UNITED STATES AND POSSESSIONS
The National Traffic and Motor Vehicle Safety Act, as amended, provides that each vehicle that is subject to a vehicle recall campaign must be adequately repaired within a reasonable time after the owner has tendered it for repair. A failure to adequately repair within 60 days after a tender of a vehicle is prima facie evidence of failure to repair within a reasonable time. If the condition is not adequately repaired within 60 days, the owner may be entitled to replacement with an identical or reasonable equivalent vehicle at no charge, or to a refund of the purchase price less a reasonable allowance for depreciation.
Dealers must correct all vehicles subject to this campaign at no charge to the owner, regardless of mileage, age of vehicle, or ownership, from this time forward.
Dealers should proceed immediately to make necessary correction to units in inventory. All inventory vehicles subject to this recall campaign must be corrected prior to sale, transfer or delivery. If vehicles have been sold or transferred and you are in receipt of Customer Notification Letters and Authorization for Recall Service cards for those vehicles, the transfer location or customer must be notified immediately from your dealer location.
Dealers must make every effort to promptly schedule an appointment with each owner to repair his or her vehicle as soon as possible. However, consistent with the customer notification, dealers are expected to complete the repairs on the mutually agreed upon service date.
Dealers involved in the recall process will be furnished a listing of owner names and addresses to enable them to follow up with owners and have the vehicles corrected. Use of this listing must be limited to this campaign because the list may contain information obtained from state motor vehicle registration records, and the use of such motor vehicle registration data for purposes other than this campaign is a violation of law in several states.
CANADA
Dealers must correct all vehicles subject to this campaign at no charge to the owner, regardless of mileage, age of vehicle, or ownership, from this time forward.
Dealers should proceed immediately to make necessary correction to units in inventory. All inventory vehicles subject to this recall campaign must be corrected prior to sale, transfer or delivery. If vehicles have been sold or transferred and you are in receipt of Customer Notification Letters and Authorization for Recall Service cards for those vehicles, the transfer location or customer must be notified immediately from your dealer location.
Dealers must make every effort to promptly schedule an appointment with each owner to repair his or her vehicle as soon as possible. However, consistent with the customer notification, dealers are expected to complete the repairs on the mutually agreed upon service date.
Dealers involved in the recall process will be furnished a listing of owner names and addresses to enable them to follow up with owners and have the vehicles corrected. Use of this listing must be limited to this campaign because the list may contain information obtained from state motor vehicle registration records, and the use of such motor vehicle registration data for purposes other than this campaign is a violation of law in several states.
EXPORT
Export Distributors should proceed immediately to make necessary correction to units in inventory. All inventory vehicles subject to this recall campaign must be corrected prior to sale, transfer or delivery. If vehicles have been sold or transferred and you are in receipt of Customer Notification Letters and Authorization for Recall Service cards for those vehicles, the transfer location or customer must be notified immediately from your distributor location.
Export Distributors are to submit warranty claims in the usual manner making reference to this recall number.
Export Distributors are expected to provide full cooperation and follow-up with respect to this important subject matter. If you have any questions or need further assistance, please contact the Regional Service Manager at your regional office.
NAVISTAR, INC.
IMPORTANT SAFETY RECALL 21502
NHTSA RECALL NO. 201-226
This notice applies to your vehicle identified on the enclosed card.
MAY 2021
Dear INTERNATIONAL@ Customer,
This notice applies to your vehicle identified on the enclosed card. This notice is sent to you in accordance with the requirements of the National Traffic and Motor Vehicle Safety Act.
Navistar has decided that a defect which relates to motor vehicle safety exists in certain 2021 LT@ and RH@ series 04AAR (Park Brake Chambers; spring type, T20/24 Sq. ln. for Air Disc brakes).
REASON FOR THIS RECALL
The spring inside the spring brake chamber may allow the pressure plate to shift and wear a hole through the diaphragm resulting in an air leak.
RISK TO MOTOR VEHICLE SAFETY
An air leak in the spring brake chamber may result in an uncommanded application of the parking brakes and increase the risk of a vehicle crash.
DEFECT REMEDY
The repair will involve an inspection and possible replacement of all spring brake chambers found with a shifted pressure plate. Authorized repair locations have parts and instructions to repair your vehicle. The repair will be performed free of charge and take approximately 30 minutes to 2 hours to complete.
ACTIONS YOU SHOULD TAKE
If you own this vehicle, please contact any INTERNATIONAL@ dealer or a Love’s Truck Tire Care or Speedco* location to have your vehicle repaired at no cost to you. You can find your nearest service location by calling 1-800448-7825 or by using the service locator at https://www.internationaltrucks.com or https:/lwww.toves.com .
*Love’s and Speedco locations in Texas cannot perform warranty services.
If you have already paid for repairs prior to this notice that corrected the defect, you may be eligible for reimbursement of certain repair expenses if they occurred 04/01/2020 thru 06/07/2021. Present your original repair paperwork and proof of payment to any INTERNATIONAL@ dealer and your eligibility Will be reviewed. You may also submit a claim using the enclosed Request for Reimbursement card.
If you are the lessor of this vehicle. please forward a copy of this notice to the lessee within ten days to comply with federal regulations.
If you do not own this vehicle, please fill out and return mail the enclosed card so that you will not be contacted again about this recall.
IF YOU NEED FURTHER ASSISTANCE
If you believe that Navistar has failed to remedy the defect without charge or within a reasonable time, please follow the procedure described in the Owner Assistance Guide section in your Owners Manual or call toll free 1-800-448* 7825.
You may also submit a complaint to the Administrator, National Highway Traffic Safety Administration, 1200 New Jersey Ave, SE, Washington, DC 20590; or call the toll free Vehicle safety Hotline at 1-888-3274236 (TTY: 1-800424-9153); or go to https://www.safercar.gov.
Navistar requests your prompt attention and patience regarding the correction of this defect and apologizes for any inconvenience this may cause you.
Navistar, Inc.
- 01/06/2021 Navistar Field Service receives communication from a fleet customer related to spring brake air leaks at the diaphragm.
- 01/12/2021 Navistar Compliance reviews customer concern related to the spring brake air leak issue and initiates an investigation.
- 01/19/2021 Navistar Compliance, Supplier Quality, and Meritor meet with TSE Brakes to discuss the parking brake chamber issue and impact to International vehicles.
- 02/01/2021 Navistar Compliance and Engineering meets to evaluate failure mode and potential for safety concerns.
- 02/04/2021 Navistar Compliance Committee meets to discuss failure mode, warranty history on suspect build range, and root cause. Compliance Committee requests on vehicle testing with leaking brake chamber to verify air pressure warning light and brake performance.
- 02/10/2021 Navistar Compliance and Meritor meet to discuss TSE Brakes suspect lot codes and develop test plan for on vehicle testing of a leaking diaphragm in the spring brake chamber.
- 02/19/2021- Navistar, TSE, Meritor and Matthew Warren (TSE supplier, manufacturer of the defective spring) confirmed the suspect build range was 02/11/2020 thru 07/14/2020 based off production date of the springs and shipment received by Meritor
- 02/26/2021 Navistar Compliance and Meritor meet to review Meritor s brake dynamometer tests and on vehicle tests. In all test conditions the truck air warning system activated prior to any application of the spring brake.
- 03/04/2021 Navistar Compliance Committee reviews Meritor s brake dynamometer test, on vehicle test, and suspect build range. Brake dynamometer tests and on vehicle tests confirmed that reducing pressure from 100 to 62 PSI did not increase temperature on the wheel end and warning air pressure light come on at 70 PSI. Light brake drag began to occur at 55 PSI.
- 03/08/2021 Navistar Compliance and Meritor meet to review warranty data and verify all failures occurred within the suspect lot build range.
- 03/18/2021 Navistar performs additional field inspections of parking brake chambers built within the suspect lot range.
- 03/22/2021 3 vehicles out of 15 inspected within the suspect lot were found to have shifted pressure plates due to the spring perpendicularity condition.
- 03/25/2020 Navistar finalizes the suspect vehicle population, reviews the number of chambers found in the field with shifted pressure plates and declares a Safety Recall.
2 Affected Products
Vehicles
| MAKE | MODEL | YEAR |
| INTERNATIONAL | LT | 2021 |
| INTERNATIONAL | RH | 2021 |
8 Associated Documents
Recall Quarterly Report #1, 2021-2
RCLQRT-21V226-9049.PDF 211.123KB
 Loading...
Remedy Instructions and TSB
RCRIT-21V226-5549.pdf 339.081KB
Loading...
Miscellaneous Document- Chronology
RMISC-21V226-0277.pdf 17.992KB
Loading...
ISSUED Owner Notification Letter(Part 577)
RCONL-21V226-7250.pdf 42.051KB
Loading...
Defect Notice 573 Report
RCLRPT-21V226-1287.PDF 214.066KB
Loading...
Recall Acknowledgement
RCAK-21V226-3348.pdf 645.749KB
Loading...
Recall Quarterly Report #3, 2021-4
RCLQRT-21V226-6904.PDF 211.311KB
Loading...
Recall Quarterly Report #2, 2021-3
RCLQRT-21V226-1704.PDF 211.225KB
Loading...
Latest Recalls Documents
For the Latest and Most Recent Recalls Information Visit the link below…
https://www-odi.nhtsa.dot.gov/acms/cs/documentList.xhtml?docId=21V226&docType=RCL
| “This site contains affiliate links for which OEMDTC may be compensated” |

- high performance with low noise

- Cross References: R4709G2, 01027, 819707, 4719ES2, L3367, E10272, E-10272, A1819700, 819700, 819776, 974110, K091345, 819707, 819772, 819770, A1819700, PR4709ESII, 620-PR4709ESII
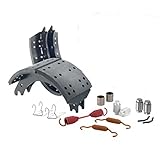
- Premium 23K Air Brake Shoes & Hardware Kit For Eaton 16-1/2" x 7" 'ES II' Extended Service Brakes
- This is the 2nd generation of Eaton Extended Service brake shoe that uses hold-down springs that attach to the shoe web. The first generation Extended Service brake shoe has anchor end hold-down springs that attach to tabs on the brake shoe table. You can use these 2nd generation brake shoes if you currently have the 1st generation on your truck as long as you use the included hardware kit
- Fits 16-1/2" x 7" Eaton 'ES II' Extended Service air brakes
- Premium 23,000 lb Brake Lining

- Cross References: E5503, E-5503, A193222D2006, 01008, M3189, TDAA3222D2006, A3222L2066, 4707D, 4707Q, L3011, A193222D200, R4707, 21855, 4707R, 4707XT, HV774707QG, XSEG24707QP
- Fits 16-1/2" Diameter x 7" Wide Meritor 'Q Plus' Quick Change Brakes
- New Brake Shoes (No Core Charge)
- Shoe FMSI Number: 4707
- Has The Plus (+) Symbol In The Brake Shoe Table
- Premium Replacement 23k Friction
- New Lined Shoes
- No Core Charge
- Hardware Included
- FMVSS 121 APPROVED

- Compatibility:LT890 can be easily installed with Eaton air brake shoe anchor springs, compatible with all Eaton air brake shoe anchor springs, universally suitable for trucks
- Durable:LT890 truck brake spring tool is made of high quality steel, which is more durable. The red protective layer on the surface prevents corrosion and prolongs the service life
- Easy Work:This truck brake spring tool can easily install the air brake shoe anchor spring. The outward handle cleverly uses the design concept of the labor-saving lever, which is easier to grasp and apply pressure
- Breakthrough:The handle part adopts a plastic sleeve, which is easier to grasp and apply pressure, allowing you to easily take it by yourself and work more easily
- Quality Service:We provide hassle-free replacement, you can buy with confidence. If you have any questions about steel truck brake spring tools, please feel free to contact us
- Premium Replacement 23k Friction
- New Lined Shoes
- No Core Charge
- Hardware Included
- FMVSS 121 APPROVED
- Premium Replacement 20k Friction
- New Lined Shoes
- No Core Charge
- Hardware Included
- FMVSS 121 APPROVED
- Reduced Stopping Distance 23K
- New Lined Shoes
- No Core Charge
- Hardware Included
- FMVSS 121 APPROVED

- Wide Compatibility: This replacement rear parking brake shoes are specifically designed for select Buick Cadillac Chevrolet GMC and Oldsmobile models, ensuring a precise fit.Replace for 781PG 781B 111.07810 110.07810 8889357430 8889357470 89027098 12472852 12477910 12477911 12482786 15817020 88935747 88967122 88982875.
- Superior Performance: Crafted with high-quality materials, these brake shoes deliver reliable and consistent braking performance, offering safety and peace of mind.
- Organic Construction: Made with organic materials, these brake shoes provide excellent stopping power while reducing noise and minimizing wear on the drums.
- Dependable Replacement: Replace your worn-out or damaged parking brake shoes with this set to restore the functionality of your braking system and maintain optimal vehicle control.
- Easy Installation: Designed for convenience, these brake shoes are easy to install and compatible with the original equipment. They come with some necessary accessories for a hassle-free installation process.

- Feature:The LT895 tool is designed to remove and replace brake spring quickly and easily without the danger of scraping or hand injuries. No need to struggling with doing brakes on a Kenworth truck or drive axle brake, works on both 7” and 9” brake shoes. The LT895 easily installs Eaton air brake shoe anchor springs.
- Durable:LT895 truck brake spring tool is made of high quality steel, which is more durable. The red protective layer on the surface prevents corrosion and prolongs the service life
- Breakthrough:The handle part adopts a plastic sleeve, which is easier to grasp and apply pressure, allowing you to easily take it by yourself and work more easily
- Easy Work:This truck brake spring tool can easily install the air brake shoe anchor spring. The outward handle cleverly uses the design concept of the labor-saving lever, which is easier to grasp and apply pressure
- Quality Service:We provide hassle-free replacement, you can buy with confidence. If you have any questions about steel truck brake spring tools, please feel free to contact us
Last update on 2024-04-13 / Affiliate links / Images from Amazon Product Advertising API
This product presentation was made with AAWP plugin.