| “This site contains affiliate links for which OEMDTC may be compensated” |
November 18, 2020 NHTSA CAMPAIGN NUMBER: 20V715000
A buckled frame may fail and increase the risk of a crash.
NHTSA Campaign Number: 20V715
Manufacturer Keystone RV Company
Components STRUCTURE
Potential Number of Units Affected 1,296
Summary
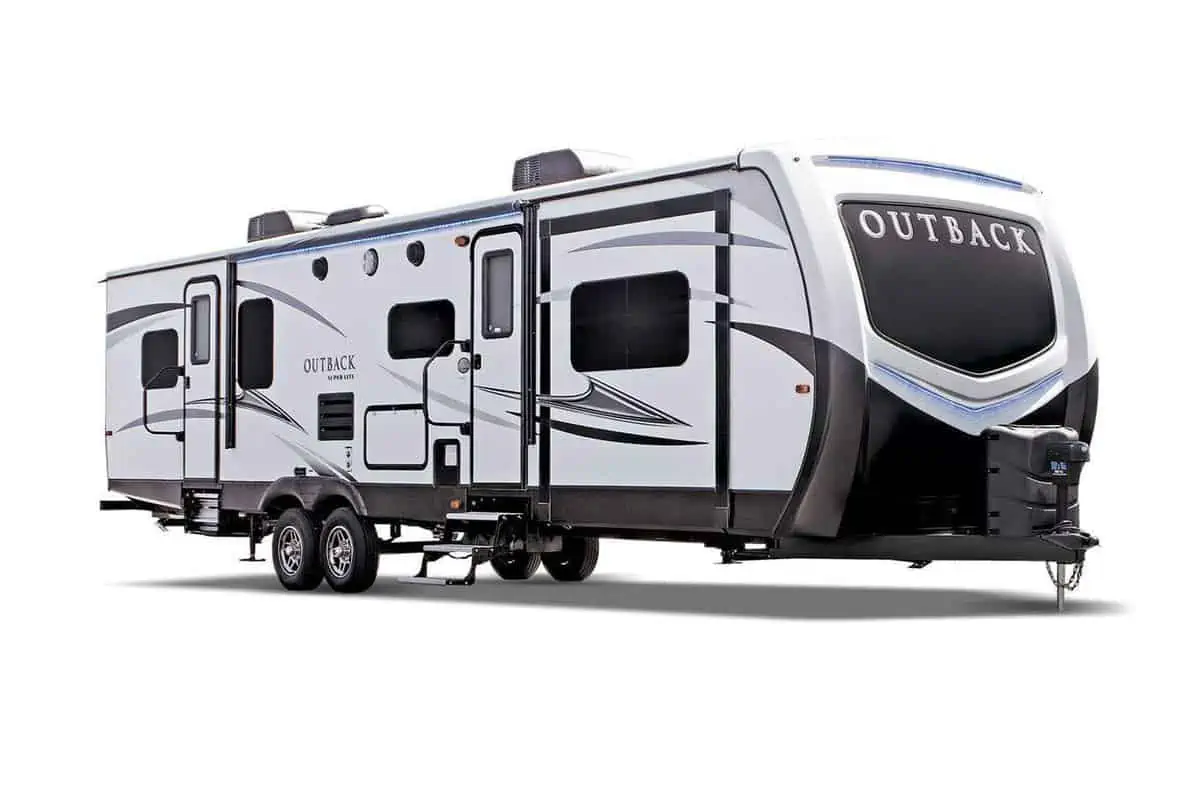
Keystone RV Company (Keystone) is recalling certain 2019-2021 Outback 335CG and 340BH recreational trailers. A section of the frame rail may have inadequate support where the draw bar is attached, allowing the frame rail to buckle.
Remedy
Keystone will notify owners, and dealers will add reinforcement plates to the existing frame, free of charge. The recall began December 15, 2020. Owners may contact Keystone customer service at 1-866-425-4369. Keystone’s number for this recall is 20-391.
Notes
Owners may also contact the National Highway Traffic Safety Administration Vehicle Safety Hotline at 1-888-327-4236 (TTY 1-800-424-9153), or go to www.safercar.gov.
SAFETY ADVISORY # 20-391
Outback 335CG and 340BH Frame
Keystone is conducting a voluntary RECALL notification campaign in accordance with the National Highway Transportation and Safety Act. It has been decided that the vehicles in the recall population may have a section of frame rail with inadequate support where the draw bar is attached. Under certain conditions during travel, the frame rail may yield and buckle possibly leading to an increased failure and vehicle crash.
The remedy is to inspect VIN and determine what parts are needed as listed above for reinforcement plates. If the frame rail is buckled adding the reinforcement plates as outlined in this advisory will eliminate the buckle if properly installed. If the frame rails are cracked at the buckle take clear pictures. The frame rail section will need to be replaced and reinforcement plates added to the frame rails where the drawbar connects to the frame as outlined in this advisory.
REPAIR INSTRUCTIONS
Step 1
Locate the trailer on a level, flat, hard surface. Chock the wheels.
Step 2
Disconnect the 120VAC and 12VDC power from the unit.
Step3
Inspect the VIN, verify correct parts were ordered. 340BH models in the VIN sequence between KB451063 – KB452341 will use 1- KRV # 676599 – Frame – Service Kit – Reinforcement Plate Only and 1 – KRV # 673277 – Frame – Service Kit – Hardware Only – (24 Bolts & 24 Nuts). Use the following repair labeled 20101112 DROP RAIL REPAIR.
All other models and 340BH models in the VIN sequence between KB452444 – MB452323 will use 1 – KRV # 673276 – Frame – Service Kit – Plate Only and 1 – KRV # 673277 – Frame – Service Kit – Hardware Only – (24 Bolts & 24 Nuts). DROP RAIL REPAIR
Step 4
Support the frame with jack stands just behind the drop frame. Remove underbelly in the front section of the frame back to the second u-channel support on the frame.
Step 5
Using the following Norco Industries instructions, install the reinforcement plates as outlined.
Please note: if the frame is buckled the support plates when installed properly will remove the buckle in the frame as designed. If the frame is buckled and cracked please see Step 6.
SEOCONTENT-START
Models Included: 2019-2021 Outback Travel Trailers: Model 335CG, 340BH Serial Number Ranges: 2019 KB451063 – KB452951 2020 LB450012 – LB453963 2021 MB450019 – MB452323
Parts Required: Model 340BH – VIN KB451063 – KB452341 1- KRV # 676599 – Frame – Service Kit – Reinforcement Plate Only – 21700163 – For 20101112 (VIN required for part order)
1 – KRV # 673277 – Frame – Service Kit – Hardware Only – (24 Bolts & 24 Nuts) – 21700158 (VIN required for part order)
If inspection determines that the frame rails are needed on KB451063 – KB452341: 1 – KRV # 676601 – Frame – Service Kit – Drop rails – LH & RH – 12700164 – For 20101112 (VIN required for part order)
1 – KRV # 676609 – Frame – Service Kit – Hardware – 21700260 – Drop Rail Hardware Kit (VIN required for part order)
All other Models and 340BH VIN KB452444 – MB452323:
1 – KRV # 673276 – Frame – Service Kit – Plate Only – 21700159 (VIN required for part order)
1 – KRV # 673277 – Frame – Service Kit – Hardware Only – (24 Bolts & 24 Nuts) – 21700158 (VIN required for part order)
If inspection determines that the frame rails are needed on KB452444 – MB452323 1 – KRV # 676607 – Frame – Service Kit – Drop rails – 21700162 (VIN required for part order)
1 – KRV # 676609 – Frame – Service Kit – Hardware – 21700260 – Drop Rail Hardware Kit (VIN required for part order)
Keystone RV Company Updated: 2/24/21
Safety Advisory 20-391 Page 2 of 22 Tools Required: – Screw gun – Caulk Gun – Jack Stands – Torch, Plasma Cutter, Or Grinder – 3/8” Drill Bit – Drill – Hammer – Cold Chisel – 9/16” Socket – Ratchet – 9/16” Wrench If frame rail is cracked take clear pictures and submit an authorization.
Note – Check serial number on Key Express to verify the campaign is open. Some vehicles were repaired before they left Keystone. When performing warranty or recall service, please make certain that appropriate Personal Protective Equipment (PPE) is used. The remedy is to inspect VIN and determine what parts are needed as listed above for reinforcement plates. If the frame rail is buckled adding the reinforcement plates as outlined in this advisory will eliminate the buckle if properly installed. If the frame rails are cracked at the buckle take clear pictures. The frame rail section will need to be replaced and reinforcement plates added to the frame rails where the drawbar connects to the frame as outlined in this advisory.
REPAIR INSTRUCTIONS Step 1 Locate the trailer on a level, flat, hard surface. Chock the wheels. Step 2 Disconnect the 120VAC and 12VDC power from the unit.
Step3 Inspect the VIN, verify correct parts were ordered. 340BH models in the VIN sequence between KB451063 – KB452341 will use 1- KRV # 676599 – Frame – Service Kit – Reinforcement Plate Only and 1 – KRV # 673277 – Frame – Service Kit – Hardware Only – (24 Bolts & 24 Nuts). Use the following repair labeled 20101112 DROP RAIL REPAIR. All other models and 340BH models in the VIN sequence between KB452444 – MB452323 will use 1 – KRV # 673276 – Frame – Service Kit – Plate Only and 1 – KRV # 673277 – Frame – Service Kit – Hardware Only – (24 Bolts & 24 Nuts). DROP RAIL REPAIR Step 4 Support the frame with jack stands just behind the drop frame. Remove underbelly in the front section of the frame back to the second u-channel support on the frame. Step 5 Using the following Norco Industries instructions, install the reinforcement plates as outlined. Please note: if the frame is buckled the support plates when installed properly will remove the buckle in the frame as designed. If the frame is buckled and cracked please see Step 6.
20101112 DROP RAIL REPAIR
20101112 DROP RAIL REPAIR
•
•Identify repair area Identify repair area ––road sideroad sideof the frame is shownof the frame is shown
•
•If the area is deformed, a reinforcement plate should If the area is deformed, a reinforcement plate should be installed.be installed.
•
•If the area is deformed and cracked, the drop rail If the area is deformed and cracked, the drop rail should be replaced, and reinforcement plates should be replaced, and reinforcement plates installed.installed.
•
•Using jack stands, support the unit rearward of the Using jack stands, support the unit rearward of the repair area to remove load from the tongue jack and repair area to remove load from the tongue jack and aa–frame.frame.
NOTE: Huck fasteners are under tension and will pop
NOTE: Huck fasteners are under tension and will pop apart when cut loose. Use safety glasses and be aware apart when cut loose. Use safety glasses and be aware that the hot fastener could cause injury if it hits you.that the hot fastener could cause injury if it hits you.
•
•The heads of the first 6 hucks can be cut off with a The heads of the first 6 hucks can be cut off with a torch, plasma, or grinder from the outside of the torch, plasma, or grinder from the outside of the frame. The uframe. The u–channel and Lchannel and L–bracket will be bracket will be discarded, it is ok if these parts are gouged during discarded, it is ok if these parts are gouged during removal since they won’t be reused. Do not gouge or removal since they won’t be reused. Do not gouge or cut the frame rail behind these parts.cut the frame rail behind these parts.
Remove these 6 hucks first
Remove these 6 hucks first
Road side
Road sidereinforcement areareinforcement area
Carefully remove this huck without
Carefully remove this huck without
causing damage to frame rail
causing damage to frame rail
•
•Carefully remove the last huck without gouging Carefully remove the last huck without gouging or cutting the frame rail. Torching or plasma or cutting the frame rail. Torching or plasma cutting in this area is not recommended. Either cutting in this area is not recommended. Either grind the head off or use a 3/8” drill bit to drill grind the head off or use a 3/8” drill bit to drill the center of the head until it comes off.the center of the head until it comes off.
•
•With 7 hucks removed from the rail, clamp the With 7 hucks removed from the rail, clamp the appropriate repair plate on the frame rail appropriate repair plate on the frame rail aligning the holes with the existing holes in the aligning the holes with the existing holes in the rail as shown.rail as shown.
•
•Verify that 6 holes in the repair plate properly Verify that 6 holes in the repair plate properly align with the current holes in the rail. If the align with the current holes in the rail. If the holes are slightly misaligned, it may be holes are slightly misaligned, it may be necessary to chase the holes with a 3/8” drill necessary to chase the holes with a 3/8” drill bit, ideally from the inside of the frame bit, ideally from the inside of the frame outward.outward.
•
•Install hardware in these 6 holes and snug by Install hardware in these 6 holes and snug by hand.hand.
•
•With fasteners installed in 6 holes, use With fasteners installed in 6 holes, use the reinforcement plate as a template the reinforcement plate as a template to drill the remaining 6, 3/8” holes, 4 to drill the remaining 6, 3/8” holes, 4 through the web, 2 through the bottom through the web, 2 through the bottom flange.flange.
•
•Install inside backer plate on the inside Install inside backer plate on the inside of the frame rail. Two previously of the frame rail. Two previously installed nuts will need removed and installed nuts will need removed and replaced over the backer.replaced over the backer.
•
•Install hardware in remaining holes.Install hardware in remaining holes.
•
•Torque all fasteners to 23 ft*Torque all fasteners to 23 ft*lbslbsto flatten to flatten the frame rail between reinforcement plates.the frame rail between reinforcement plates.
•
•Repeat previous steps on opposite side of Repeat previous steps on opposite side of the frame.the frame.
Service Kit
Service Kit ––Plates Only (21700163)Plates Only (21700163)
Service Kit
Service Kit ––Hardware Only (21700158)Hardware Only (21700158)
DROP RAIL REPAIR
DROP RAIL REPAIR
•
•Identify repair area Identify repair area ––road sideroad sideof the of the frame is shownframe is shown
•
•Support the front of the frame on the Support the front of the frame on the tongue jack and front leveling legs or tongue jack and front leveling legs or jack stands rearward of the repair area.jack stands rearward of the repair area.
NOTE: Huck fasteners are under tension
NOTE: Huck fasteners are under tension and will pop apart when cut loose. Use and will pop apart when cut loose. Use safety glasses and be aware that the hot safety glasses and be aware that the hot fastener could cause injury if it hits you.fastener could cause injury if it hits you.
•
•The heads of the first 6 hucks can be cut The heads of the first 6 hucks can be cut off with a torch, plasma, or grinder from off with a torch, plasma, or grinder from the outside of the frame. The uthe outside of the frame. The u–channel channel and Land L–bracket will be discarded, it is ok if bracket will be discarded, it is ok if these parts are gouged during removal these parts are gouged during removal since they won’t be reused. Do not since they won’t be reused. Do not gouge or cut the frame rail behind these gouge or cut the frame rail behind these parts.parts.
Remove these 6 hucks first
Remove these 6 hucks first
Road side
Road sidereinforcement areareinforcement area
Carefully remove this huck without
Carefully remove this huck without
causing damage to frame rail
causing damage to frame rail
•
•Carefully remove the last huck without gouging Carefully remove the last huck without gouging or cutting the frame rail. Torching or plasma or cutting the frame rail. Torching or plasma cutting in this area is not recommended. Either cutting in this area is not recommended. Either grind the head off or use a 3/8” drill bit to drill grind the head off or use a 3/8” drill bit to drill the center of the head until it comes off.the center of the head until it comes off.
•
•With 7 hucks removed from the rail, clamp the With 7 hucks removed from the rail, clamp the appropriate repair plate on the frame rail appropriate repair plate on the frame rail aligning the holes with the existing holes in the aligning the holes with the existing holes in the rail as shown.rail as shown.
•
•Verify that 6 holes in the repair plate properly Verify that 6 holes in the repair plate properly align with the current holes in the rail. If the align with the current holes in the rail. If the holes are slightly misaligned, it may be holes are slightly misaligned, it may be necessary to chase the holes with a 3/8” drill necessary to chase the holes with a 3/8” drill bit, ideally from the inside of the frame bit, ideally from the inside of the frame outward.outward.
•
•Install hardware in these 6 holes and snug by Install hardware in these 6 holes and snug by hand.hand.
•
•With fasteners installed in 6 holes, use With fasteners installed in 6 holes, use the reinforcement plate as a template the reinforcement plate as a template to drill the remaining 6, 3/8” holes, 4 to drill the remaining 6, 3/8” holes, 4 through the web, 2 through the bottom through the web, 2 through the bottom flange.flange.
•
•Install inside backer plate on the inside Install inside backer plate on the inside of the frame rail. Two previously of the frame rail. Two previously installed nuts will need removed and installed nuts will need removed and replaced over the backer.replaced over the backer.
•
•Install hardware in remaining holes.Install hardware in remaining holes.
•
•Torque all fasteners to 23 ft*Torque all fasteners to 23 ft*lbslbsto flatten to flatten the frame rail between reinforcement plates.the frame rail between reinforcement plates.
•
•Repeat previous steps on opposite side of Repeat previous steps on opposite side of the frame.the frame.
Service Kit
Service Kit ––Plates Only (21700159)Plates Only (21700159)
Service Kit
Service Kit ––Hardware Only (21700158)Hardware Only (21700158)
Safety Advisory 20-391 Page 15 of 22 Step 6 Please note: if the buckled frame section is cracked take clear pictures and follow the Norco Industries instructions labeled 20101112 DROP RAIL REPLACEMENT to remove the cracked frame section and replace with the following parts. Model 340BH – VIN KB451063 – KB452341 1 – KRV # 676601 – Frame – Service Kit – Drop rails – LH & RH – 12700164 – For 20101112 (VIN required for part order)
1 – KRV # 676609 – Frame – Service Kit – Hardware – 21700260 – Drop Rail Hardware Kit (VIN required for part order)
All other Models and 340BH VIN KB452444 – MB452323:
1 – KRV # 676607 – Frame – Service Kit – Drop rails – 21700162 (VIN required for part order)
1 – KRV # 676609 – Frame – Service Kit – Hardware – 21700260 – Drop Rail Hardware Kit (VIN required for part order)
20101112 DROP RAIL REPLACEMENT
20101112 DROP RAIL REPLACEMENT
•
•Identify repair area Identify repair area ––road sideroad sideof the frame of the frame is shownis shown
•
•If the area is deformed, a reinforcement plate If the area is deformed, a reinforcement plate should be installed.should be installed.
•
•If the area is deformed and cracked, the drop If the area is deformed and cracked, the drop rail should be replaced, and reinforcement rail should be replaced, and reinforcement plates installed.plates installed.
•
•Using jack stands, support the unit rearward Using jack stands, support the unit rearward of the repair area to remove load from the of the repair area to remove load from the tongue jack and atongue jack and a–frame.frame.
NOTE: Huck fasteners are under tension and will
NOTE: Huck fasteners are under tension and will pop apart when cut loose. Use safety glasses pop apart when cut loose. Use safety glasses and be aware that the hot fastener could cause and be aware that the hot fastener could cause injury if it hits you.injury if it hits you.
•
•Repair one side of the frame at a time so the Repair one side of the frame at a time so the aa–frame doesn’t need to be removed.frame doesn’t need to be removed.
•
•The heads of the circled hucks can be cut off The heads of the circled hucks can be cut off with a torch, plasma, or grinder from the with a torch, plasma, or grinder from the outside of the frame. The front uoutside of the frame. The front u–channel channel and Land L–bracket will be discarded, it is ok if bracket will be discarded, it is ok if these parts are gouged during removal since these parts are gouged during removal since they won’t be reused. they won’t be reused.
Road side
Road sidereinforcement areareinforcement area
•
•Support aSupport a–frame and front crossmember with a frame and front crossmember with a jack stand before removing the drop rail.jack stand before removing the drop rail.
•
•With the aWith the a–frame supported, remove the frame supported, remove the remaining 5 hucks in the rail flange and remove remaining 5 hucks in the rail flange and remove the rail .the rail .
•
•Install the replacement drop rail and attach it to Install the replacement drop rail and attach it to the main rail with 5 bolts through the top the main rail with 5 bolts through the top flange. Hand tighten.flange. Hand tighten.
•
•Install hardware to attach the drop rail to the Install hardware to attach the drop rail to the front crossmember, reattach the outrigger, and front crossmember, reattach the outrigger, and attach aattach a–frame to the drop rail. Hand tighten.frame to the drop rail. Hand tighten.
•
•Install hardware to attach the rear uInstall hardware to attach the rear u–channel channel and rear crossmember to the drop rail. Hand and rear crossmember to the drop rail. Hand tighten.tighten.
•
•Install the repair plate and align with Install the repair plate and align with the current 6 holes in the rail. It may be the current 6 holes in the rail. It may be necessary to chase the holes with a necessary to chase the holes with a 3/8” drill bit if there is misalignment. 3/8” drill bit if there is misalignment. Install hardware in these holes and Install hardware in these holes and hand tighten.hand tighten.
•
•With fasteners installed in 6 holes, use With fasteners installed in 6 holes, use the reinforcement plate as a template the reinforcement plate as a template to drill the remaining 6, 3/8” holes, 4 to drill the remaining 6, 3/8” holes, 4 through the web, 2 through the bottom through the web, 2 through the bottom flange.flange.
•
•Install inside backer plate on the inside Install inside backer plate on the inside of the frame rail. Two previously of the frame rail. Two previously installed nuts will need removed and installed nuts will need removed and replaced over the backer.replaced over the backer.
•
•Install hardware in remaining holes.Install hardware in remaining holes.
•
•Torque all fasteners to 23 ft*lbs.Torque all fasteners to 23 ft*lbs.
•
•Repeat previous steps on opposite side of Repeat previous steps on opposite side of the frame.the frame.
Service Kit
Service Kit ––Rails Only (21700164)Rails Only (21700164)
Service Kit
Service Kit ––Hardware Only (21700160)Hardware Only (21700160)
Safety Advisory 20-391 Page 22 of 22 Step 7 Proceed to Warranty Reimbursement. WARRANTY REIMBURSEMENT REPAIR – Adding Reinforcement Plates Only Submit the claim on Key Express using Flat Rate Code # 7139142B
In the Complaint section note: Safety Advisory # 20-391 In the Cause section note: Safety Advisory # 20-391 In the Correction section note: Add reinforcement plates as directed. The amount of time authorized for this repair is 4.0 hours.
REPLACEMENT – Replacing Frame Rail and Adding Reinforcement Plates Submit pictures of the cracked frame on a preauthorization and then claim on Key Express using Flat
Rate Code # 7139142A
In the Complaint section note: Safety Advisory # 20-391 In the Cause section note: Safety Advisory # 20-391 In the Correction section note: Frame cracked. Replace frame section and add reinforcement plates. The amount of time authorized for this repair is 7.0 hours.
PARTS DISPOSITION No return parts. Please call Keystone RV Customer Service at (866)-273-1456 if you have any questions.
*****************************************************************************************************************
PO Box 2000 – Goshen, IN 46527-2000
Phone: (574) 535-2100 – Fax: (574) 535-2199
www.keystonerv.com
IMPORTANT SAFETY RECALL
«Owner_name»
«Street»
«Street_2»
«City», «State» «Zip»
This notice applies to your vehicle: «VIN»
Dear «Owner_name»:
This notice is sent to you in accordance with the requirements of the National Traffic and Motor Vehicle Safety Act.
Keystone RV Company has decided that a defect which relates to motor vehicle safety exists in certain model
2019-2021 Outback Travel Trailers. As a result, Keystone RV is conducting a safety recall. We apologize for any
inconvenience this action may cause you; however your safety and continued satisfaction are of the utmost importance
to us.
It has been decided that the vehicles in the recall population may have a section of frame rail with
inadequate support where the draw bar is attached. Under certain conditions during travel, the frame
rail may yield and buckle possibly leading to an increased failure and vehicle crash.
Keystone representatives have been in contact with the staff at your selling dealership regarding this
situation. The remedy is add reinforcement plates to the existing frame. The service and parts
required for this corrective action will be provided at no charge to you.
Do not overload the recommended carrying capacity, and use properly matched weight distribution
hitch. As soon as possible, please make an appointment to have your RV serviced by your
dealership. The labor time to perform this correction is approximately 2 ½ hours. Please ask your
dealer if you wish to know how much additional time will be needed to schedule and process your
RV for this repair.
Your dealer is best equipped to obtain parts and provide service to ensure your RV is corrected as
promptly as possible. Please contact Keystone Customer service if your dealer is unable to assist or
if you take your RV to your dealer on the agreed service date, and the dealer does not remedy the
condition within a reasonable amount of time, or without charge to you. You may be eligible to
receive reimbursement if you paid to have the defect resolved prior to receiving this correspondence.
Keystone Customer Service is available toll-free at 1-866-425-4369.
If after contacting Keystone Customer Service you are still not satisfied we have done our best to remedy this situation,
you may also submit a written complaint to: Administrator, National Highway Traffic Safety Administration, 1200
New Jersey Avenue, SE, Washington, DC 20590. You may call the toll-free Vehicle Safety Hotline at 1-888-327-
4236 (TTY: 1-800-424-9153; or go to https://www.safercar.gov.) Federal regulations require that any vehicle lessor
receiving this recall notice must forward a copy of this notice to the lessee within ten days.
Thank you for your attention and cooperation in this matter.
Sincerely,
KEYSTONE RV COMPANY
Rick Deisler
Vice President Service Operations
cc: National Highway Traffic Safety Administration (NHTSA)
Reason for
this recall
What we
will do
What we
need you to
do
If you have
questions
RECREATIONAL VEHICLE
SAFETY RECALL NOTICE
Safety Recall: 20V-715
Safety Advisory: 20-391
December 14, 2020
*****************************************************************************************************************
PO Box 2000 – Goshen, IN 46527-2000
Phone: (574) 535-2100 – Fax: (574) 535-2199
www.keystonerv.com
SAFETY ADVISORY 20-391
«Dealer_name»
ATTN: Service Manager
«Street»
«Street_2»
«City», «State» «Zip»
«Country»
Dear «Dealer_name»,
Keystone RV Company has decided that a defect which relates to motor vehicle safety exists in certain model
2019-2021 Outback Travel Trailers. As a result, Keystone RV is conducting a safety recall.
It has been decided that the vehicles in the recall population may have a section of frame rail with
inadequate support where the draw bar is attached. Under certain conditions during travel, the
frame rail may yield and buckle possibly leading to an increased failure and vehicle crash. The
vehicles included in the recall are:
2019-2021 Outback Travel Trailers, Models 335CG, 340BH
Serial Number Ranges: 2019 KB451063 – KB452951
2020 LB450012 – LB453963
2021 MB450019 – MB452323
Our records indicate unit(s) sold or in your present lot inventory fall within this range, which will require immediate
preventative action. Important: If some of the units are still in your inventory, Federal Law requires you to
complete the recall service on those units before retail delivery. The unit VIN(s) our records indicate are presently in
your inventory or have been sold are as follows:
«VIN1» «VIN2» «VIN3» «VIN4»
«VIN5» «VIN6» «VIN7» «VIN8»
«VIN9» «VIN10» «VIN11» «VIN12»
«VIN13» «VIN14» «VIN15» «VIN16»
«VIN17» «VIN18» «VIN19» «VIN20»
«VIN21» «VIN22» «VIN23» «VIN24»
«VIN25» «VIN26» «VIN27» «VIN28»
«VIN29» «VIN30»
— Serial numbers with ‘*’ have been retail sold —
Claims for the units which have been serviced must be submitted. Claims submitted will be used by Keystone to
record recall service completions and provide dealer payments. Enclosed is a copy of the Safety Advisory #20-391,
which details how to remedy the situation and the proper reimbursement procedures.
We apologize for any inconvenience this situation may cause and greatly appreciate your cooperation. Should you
have any questions or concerns regarding this correspondence or the enclosed Safety Advisory, please feel free to
contact us.
Sincerely,
KEYSTONE RV COMPANY
Rick Deisler
Vice President Service Operations
cc. National Highway Traffic Safety Administration (NHTSA)
cc. Transport Canada
Reason for
this recall
RECREATIONAL VEHICLE
SAFETY RECALL NOTICE
Safety Recall: US: 20V-715
CAN: 2020-564
Safety Advisory: 20-391
December 10, 2020
*****************************************************************************************************************
PO Box 2000 – Goshen, IN 46527-2000
Phone: (574) 535-2100 – Fax: (574) 535-2199
www.keystonerv.com
SAFETY ADVISORY 20-391
«Dealer_name»
ATTN: Service Manager
«Street»
«Street_2»
«City», «State» «Zip»
«Country»
Dear «Dealer_name»,
Keystone RV Company has decided that a defect which relates to motor vehicle safety exists in certain model
2019-2021 Outback Travel Trailers. As a result, Keystone RV is conducting a safety recall.
It has been decided that the vehicles in the recall population may have a section of frame rail with
inadequate support where the draw bar is attached. Under certain conditions during travel, the
frame rail may yield and buckle possibly leading to an increased failure and vehicle crash. The
vehicles included in the recall are:
2019-2021 Outback Travel Trailers, Models 335CG, 340BH
Serial Number Ranges: 2019 KB451063 – KB452951
2020 LB450012 – LB453963
2021 MB450019 – MB452323
Our records indicate unit(s) sold or in your present lot inventory fall within this range, which will require immediate
preventative action. Important: If some of the units are still in your inventory, Federal Law requires you to
complete the recall service on those units before retail delivery. The unit VIN(s) our records indicate are presently in
your inventory or have been sold are as follows:
«VIN1» «VIN2» «VIN3» «VIN4»
«VIN5» «VIN6» «VIN7» «VIN8»
«VIN9» «VIN10» «VIN11» «VIN12»
«VIN13» «VIN14» «VIN15» «VIN16»
«VIN17» «VIN18» «VIN19» «VIN20»
«VIN21» «VIN22» «VIN23» «VIN24»
«VIN25» «VIN26» «VIN27» «VIN28»
— Serial numbers with ‘*’ have been retail sold —
Claims for the units which have been serviced must be submitted. Claims submitted will be used by Keystone to
record recall service completions and provide dealer payments. Enclosed is a copy of the Safety Advisory #20-391,
which details how to remedy the situation and the proper reimbursement procedures.
We apologize for any inconvenience this situation may cause and greatly appreciate your cooperation. Should you
have any questions or concerns regarding this correspondence or the enclosed Safety Advisory, please feel free to
contact us.
Sincerely,
KEYSTONE RV COMPANY
Rick Deisler
Vice President Service Operations
cc. National Highway Traffic Safety Administration (NHTSA)
cc. Transport Canada
Reason for
this recall
RECREATIONAL VEHICLE
SAFETY RECALL NOTICE
Safety Recall: US: 20V-715
CAN: 2020-564
Safety Advisory: 20-391
March 2, 2021
Safety Advisory
Updated
2/24/2021
*****************************************************************************************************************
*****************************************************************************************************************
*****************************************************************************************************************
SEOCONTENT-END
3 Affected Products
Vehicle
| MAKE | MODEL | YEAR |
| KEYSTONE | OUTBACK | 2019-2021 |
13 Associated Documents
ISSUED Owner Notification Letter(Part 577)
RCONL-20V715-0069.pdf 93.216KB
 Loading...
Remedy Instructions and TSB
RCRIT-20V715-3643.pdf 907.658KB
Loading...
Manufacturer Notices(to Dealers,etc) – 20-391 dealer email sent 12-10-2020
RCMN-20V715-6897.pdf 120.486KB
Loading...
Manufacturer Notices(to Dealers,etc)
Loading...
Remedy Instructions and TSB
RCRIT-20V715-2074.pdf 2837.423KB
Loading...
Manufacturer Notices(to Dealers,etc)- 20-391 dealer email sent 3-2-2021
RCMN-20V715-8068.pdf 122.284KB
Loading...
Manufacturer Notices(to Dealers,etc) – 20-391 Outback Frame Recall Dealer Letter V2
RCMN-20V715-5897.pdf 110.654KB
Loading...
Recall Quarterly Report #1, 2020-4
RCLQRT-20V715-3934.PDF 211.129KB
Loading...
Recall Quarterly Report #2, 2021-1
RCLQRT-20V715-9620.PDF 211.234KB
Loading...
Recall Quarterly Report #3, 2021-2
RCLQRT-20V715-1484.PDF 211.321KB
Loading...
Defect Notice 573 Report
RCLRPT-20V715-5859.PDF 215.225KB
Loading...
Recall Acknowledgement
RCAK-20V715-5697.pdf 244.724KB
Loading...
Recall Quarterly Report #4, 2021-3
RCLQRT-20V715-8297.PDF 211.422KB
Loading...
Latest Recalls Documents
For the Latest and Most Recent Recalls Information Visit the link below…
https://www-odi.nhtsa.dot.gov/acms/cs/documentList.xhtml?docId=20V715&docType=RCL

- [MORE POWERFUL] Up to 135 Amp output allows you to weld mild steel up to 2/5” in the plate. Suitable for 2LB .030” & .035” flux core wire.
- [MULTI-PROCESS] 3-in-1 Welder, capable of Gasless MIG/Stick/Lift TIG. (need to buy an extra lift TIG torch) Meets your various welding needs.
- [DIGITAL DISPLAY] Advanced digital display, increases the visual clarity and improves the efficiency of the operation.
- [SYNERGIC CONTROL] When adjusting the wire feeding speed, the voltage will be automatically matched. Suitable for beginners and professionals.
- [SAFETY FIRST] Automatic compensation for voltage fluctuation, over current protection, over load protection.

- SYNERGIC CONTROL: The recommend current and wire feeding speed will be automatically matched after selected diameter of the welding wire(you can choose .030”/.035”/.040" flux core wire). The MIG welder is easier for beginners or those that are learning to weld and want to make small repairs around the house. 1 Free Flux Core Wire .030".
- 3-IN-1 WELDER: 3 welding modes Flux Core Gasless MIG/ Lift TIG/ MMA meet your different requirements (Need to buy extra Lift tig torch). Adjust the current and 10-speed variable feed controls for perfectly managed flux-cored welding of carbon steel, stainless or even thicker steel, Ideal for home DIY, outdoor repairs, rusty metal, farm and road equipment, and maintenance and repairs.
- SAFETY PROTECTION: The welder comes with an attached MIG torch and power cable, you can weld after unpacking the box, it’s convenient to use. Built-in over-current protection, over-load protection, overheating, and over-voltage function that extend the lifespan of the machine.
- PORTABLE AND COMPACT: The machine weighs only 11.79 pounds, and you can freely carry it anywhere with a handle or shoulder strap. Package includes 1* MIG130 Welder, 1* MIG Torch, 1*Ground Clamp, 1* Electronic Holder, 1* .030"/2lb Flux Cored Wire,1* 0.8/.030" conductive Nozzle,1* 0.9/.035" conductive Nozzle,1* Brush&Hammer,1* User Manual.
- WARM SERVICE & 2-YEAR WARRANTY: 30-Day Money Back Guarantee and 2-Year Warranty. Ideal for fathers day gifts. Every single of our welder machines passed various authoritative Laboratory tests in simulating extremely harsh environments before leaving our ARCCAPTAIN factory that conforms to the high standards.

- WELD ANYWHERE: Plug in the Weld-Pak 90i MIG wire feed welder anywhere 120V input power is available; It's designed to use with flux-cored welding wire (1/4” max thickness) or solid MIG wire (3/16" max thickness)
- ACCESSORIES INCLUDED: The machine comes with a full list of accessories including a welding gun, nozzle, contact tip, work cable and clamp; Metal case provides protection from the elements
- LIGHT & PORTABLE: Ideal for maintenance and mobile welders, thanks to its small and lightweight (15 lbs) inverter design and shoulder strap for portability; A good choice for professionals but it’s an easy to use welder for beginners too
- SMOOTH & EASY OPERATION: Has simple control with two knobs for wire speed and voltage; Inverter power source makes it more efficient to operate and provides smoother weld characteristics compared to traditional welders
- PERFECT FOR SMALL WELD JOBS: This machine is best for DIY projects, hobbyists, home repairs and more; Infinite welding voltage allows fine-tuning of weld characteristics

- Synergic Control: The welding parameter is built-in with precise data. It will choose the voltage, amperage and feeding speed that is needed based on welder data, making it much easier for new welders.
- Multi-functions in one machine: Suitable for stick, lift TIG(torch is not included), flux MIG, gas MIG
- Powerful Machine: Up to 200A output current that can weld mild up to 5/32 inch (4.0mm) plate.
- Big enough to apply to 2 and 10 pounds rolls of wire. Ready to feed .030"(0.8mm) with solid core wire, and .035" (0.9mm)with flux core wire.Can Handle E7018 basic electrode.
- Dual voltage input design: Welding machine can be plugged into 110(120)V / 220(230)V dual voltage (Automatic fitting).

- 4 in 1 Welding Machine:This is a multifunctional welding machine,suitable for MMA, Lift TIG, flux MIG, gas MIG,4 welding modes for you to choose.
- Synergic Control: Adjusting the amperage or choosing different wire thicknesses,the voltage and wire feeding speed will automatically change.Even a beginner can easily use it.
- Gas/Gasless Welding: You can choose Flux Core Wire(Gasless) or Solid Wire(Gas). This Welder Can handle 2 lb and 10 lb rolls of wire 0.8mm~1.0mm Flux Core Wire/Solid Wire, MAX Welding Thickness 8.0mm.
- Lift TIG/ARC Welding: Lift TIG available,TIG Torch fits WP17V, not included in the package.TIG Welding thickness 1.0MM-8.0MM, Suitable for thin work-pieces such as stainless steel, alloy steel, carbon steel etc.Arc Welding fits rods E6013.
- Powerful And Safe Machine:This 200A Welding machine can weld mild up to 8.0mm plate,equipped with overload and overheating system,feel free to use,it’s very safe.

- 【EASY TO USE】: The welding machine has included with voltage control knob,wire speed adjustment knob and with synergic control, automatic change of the voltage & wire feeding speed by adjusting the amperage or choosing different thicknesses. Even beginners can use it easily.
- 【POWERFUL AND SAGE WELDER MACHINE】: This 130A Welding machine can weld mild up to 3.0mm plate,equipped with overload and overheating system,feel free to use,it’s very safe.Big enough to handle 2.2 pound rolls of wire.
- 【PORTABLE DESIGN】: Lightweight and compact design, with a comfortable hand grip that makes it easy to carry wherever you want; It only weighs 8.6 lbs., so you can effortlessly take it as far as you can.
- 【WIDE APPLICATIONS】: It can be used with a wide variety of metals and alloys. Suitable for home users, DIY craft enthusiasts, beginners and small projects.
- 【PACKAGE INCLUDES】: 130 MIG welding machine; Mig torch; Ground clamp; Brush&Hammer; 1lb .030" flux cored welding wire; Contact Tip*2.

- 【POWERFUL 3-IN-1 MIG WELDER】The 135Amp MIG welder that included Gas/Solid Wire MIG(GMAW), Gasless Flux Core MIG(FCAW), Stick/MMA. The machine is delivered ready for operation without adjustments with 0.8 mm diameter filler wire.Also, 0.6 mm, 0.9 mm or 1.0mm solid wire or cored wire can be used as filler wire.
- 【SYNERGIC CONTROL】Adjusting the welding power according to sheet thickness affects simultaneously both wire feed speed and amount of current lead to the wire. This is a good starting point for welding in different operating situations.It's suitable for both hobby and professional use.
- 【IGBT TECHNOLOGY】IGBT intelligent inverter technology. IGBT power device with unique control mode improves the reliability of welding machine. The flux core welder works more efficiently, reduces energy loss, and welds better.
- 【PACKAGE INCLUDED】1*MIG/MMA Welder; 1*8.2ft CCA cable with 200A Electrode holder; 1*8.2ft CCA cable with 200A Earth clamp; 1*8.2ft Power cable with American standard plug; 1*8.2ft fixed MIG; 1*slag hammer; 1*User Manual
- 【SAFETY & DURABLE】The machine has passed a variety of professional tests and certifications before leaving the factory.The welding gun has an overheating protector which prevents operation when the machine is overheated. The machine is also protected from too low or too high supply voltage.

- ➠【𝐒𝐲𝐧𝐞𝐫𝐠𝐢𝐜 𝐌𝐈𝐆 𝐂𝐨𝐧𝐭𝐫𝐨𝐥】The wire feeding speed (current) and welding voltage will be automatically matched after selected diameter of the welding wire (.030/.035 inch flux core wire). The MIG welder is easier to make a beginner becoming a master welder.
- ➠【𝐒𝐦𝐚𝐫𝐭 𝐒𝐭𝐢𝐜𝐤 𝐖𝐞𝐥𝐝】Bulit-in smart Hot-start and Arc-force provide easy, quick and reliable arc start, and stable welding current, this mini welder has ideal performance for the most E6013, E6011, E6010, E7018 and E308-16 rods.
- ➠【𝐋𝐢𝐟𝐭 𝐓𝐈𝐆 𝐅𝐮𝐧𝐜𝐭𝐢𝐨𝐧】This 3 in 1 welder has excellent Lift-arc TIG function, just touch the tungsten rod to the workpiece and lift off, easily arc starting, don't need to scratch it, it's like you getting a TIG welder for free.
- ➠【𝐒𝐚𝐟𝐞 𝐚𝐧𝐝 𝐒𝐭𝐚𝐛𝐥𝐞】This multiprocess welder built-in automatic Anti-stick, compensation for voltage fluctuation, over current protection, over heat protection, short circuit damage protection, to make sure the welding kit safely operation and long life.
- ➠【𝐖𝐢𝐝𝐞 𝐀𝐩𝐩𝐥𝐢𝐜𝐚𝐭𝐢𝐨𝐧 𝐚𝐧𝐝 𝐏𝐨𝐫𝐭𝐚𝐛𝐥𝐞】The wire feed welder is capable of welding all kinds of ferrous metals such as carbon steel, medium carbon steel, mild steel, stainless steel and cast iron. Only weighs 10.1 lbs, easy to carry with a handle or shoulder strap(included), very suitable for outdoor maintenance, farm, road equipment, and home DIY.
- Simple user interface - Seven segment display with basic knob controls.
- Process Capabilities - MIG, Flux-Cored and Spool Gun.
- Dual Input Voltage - 120V and 230V inputs so you can plug into any common power supply.
- Ergonomic Case - Sleek and robust case design with multiple lift points for ease of mobility around the shop.
- Lightweight and Portable - Only 41 lbs

- 【POWERFUL 3-IN-1 WELDER】Composed with Flux MIG, Lift TIG and Stick/MMA. Our powerful 3-in-1 welding machine meets your requirement for different welding situations like home DIY, outdoor maintenance and repairs, etc. (NOTE: the lift tig torch is not included)
- 【SYNERGIC CONTROL】Equipped with precise data, this flux core welder will automatically match the most suitable voltage, wire feeding speed by adjusting amperage, which is quite friendly for both professional welding worker and beginner. You can also adjust machine parameters by manually In order to best suit for your demand.
- 【SAFE & INTELLIGENT】Our MIG welder features overheat and overload protection will automatically shut off while overheated, and the built-in fan will consistently cool down your welder for 1-2 mins after shutdown. Additionally, the intelligent IGBT technology helps the welder reduce energy loss and works more efficiently.
- 【LIGHTWEIGHT & DURABLE】Item Dimensions: 13.6(L) x 6.6(W) x 11.15(H) inches, welder machine weight: 10.14lbs. This lightweight 135amp stick welder designed with two portable handles, allows you to take it anywhere, and you can add a shoulder belt by your own if need. Besides, IP21 water rating better protect your welder and extend its service life.
- 【SET INCLUDES】To spend you less money and bring you more convenience, our 3-in-1 welder set includes a solar powered auto darkening welding helmet (viewing size: 3.66"x1.69"), a pair of 932°F/500℃ heat resistant leather welding gloves and a roll of E71T-GS .030" 2lb flux core welding wire.
Last update on 2024-04-12 / Affiliate links / Images from Amazon Product Advertising API
This product presentation was made with AAWP plugin.