
| “This site contains affiliate links for which OEMDTC may be compensated” |
NHTSA ID Number: 10164360
Manufacturer Communication Number: 059-A35-00
Summary
Integral Disc Brake Installation Instructions
1 Affected Product
Equipment
| BRAND | PART NO. | PRODUCTION DATES |
| DEXTER AXLE CO | DEXTER AXLE CO | |
INSTALLATION INSTRUCTIONS
Integral Disc Brake
| CAUTION |
|
- Jack up trailer and secure on adequate capacity jack stands. Follow trailer manufacturer’s recommendations for lifting and supporting the unit. Use the jack only to lift the trailer, never for support when servicing. Always fully support the trailer with jack stands, all around; and block the trailer to keep it from rolling, moving, or falling off the stands when being serviced.
| CAUTION |
| Do not lift or support the trailer on any part of the axle or suspension system. Never go under any trailer unless it is properly supported on jack stands which have been rated for the load. Improperly supported vehicles can fall unexpectedly and cause serious injury or death. |
- Remove the tire and wheel assembly.
- Remove the existing dust cap or bearing protector by carefully prying it off progressively, or gently tapping it to the side with a mallet as the hub or hub & drum is rotated by hand.
- Remove the existing hub or hub & drum, retain the existing spindle nut, washer, and any nut retaining hardware. Discard used cotter pins, bearings, and seal that came with the original hub.
- Remove any existing drum brake backing plates and rigid brake lines that were connected, and cap the brake line(s) temporarily. Clean the axle spindle of debris or grease, and inspect the bearing surfaces and threads for damage. Carefully inspect the original brake flange for straightness and any weld spatter or imperfections that will affect proper mounting of the brake caliper later (Fig. 1).
For 3,500 lbs. disc brake kits, proceed to step 7. For 5,200 lbs. and 6,000 lbs. disc brake kits, proceed to step 6.
- 5,200 lbs. and 6,000 lbs. disc brakes kits will come with a brake flange adapter plate (Fig. 2). Install the brake flange adapter plate onto the existing axle brake flange, with bent legs of the bracket facing out towards the axle wheel end. The adapter plate mounts with five 3/8”-24 UNF bolts, nuts, and lock washers. Install medium grade (blue) Loctite® 242 or equivalent on the threads and torque the bolts/nuts evenly in a star pattern to 35 ft. lbs..
- Remove the hub & rotor from its packaging. If it came with the bearings installed and pre-greased, be careful not to let the outer bearing fall out of the hub & rotor when installing it. If bearings were not installed, wipe the hub & rotor bearing cups with a clean cloth, lubricate the inside bearing cone and cup and install the bearing, then press the rear seal flush with the machined top of the seal cavity on the rear of the hub & rotor per the axle manufacturer’s instructions. If not otherwise specified by the axle manufacturer, use a NLGI #2 boat trailer wheel bearing grease and fully work it into all the bearing rollers and cups. Wipe a thin coat of the lubricant on the rubber seal inner lip. Lubricate the spindle bearing journals and lightly lubricate the seal journal. Slide the hub & rotor carefully onto the spindle with a slight rotation to guide the inner bearing cone and seal over the spindle threads, bearing journals, and the seal journal without nicking the seal lip. Lubricate the outer bearing cone and cup and install the cone, along with the original spindle washer and nut, and finger tighten the nut.
- Use a wrench to tighten the spindle nut to 50 ft. lbs. torque, continuously rotating the hub & rotor slowly while tightening the nut. If a torque wrench is not available, use a 12” long wrench with hand force. The bearings should bind, but not lock up. If they lock up, investigate and repair as required.
- Leave the hub & rotor stationary and slowly loosen the wrench just until the torque on the nut goes to zero. Be ready, the torque will typically go to zero suddenly; don’t loosen past that point.
- While rotating hub & rotor, finger tighten the spindle nut as the critical final bearing adjustment step. Install any spindle nut retainers or a new cotter pin per the axle manufacturer’s instructions. If necessary, move the nut to install the pin or retainer; loosen the nut only as much as necessary, never tighten the nut beyond finger tight (Fig. 3 & 4). If the axle manufacturer has different bearing assembly instructions than above, follow them. Figure 4
- If the axle has an E-Z Lube® or similar style spindle with the grease fitting installed, properly lubricate the bearings at this time, and reinstall the dust cap. If the axle has a pressurized bearing protector, such as a Trailer Buddy, install it using a block of wood and mallet. Add grease through the fitting until the protector’s piston just rocks or is in the middle of its travel.
- Inspect the caliper ensuring that the brake pads are properly installed. The brake pad friction material faces towards the rotor and seats into anchor points and against the caliper piston. Slide the caliper over the rotor and attach the caliper to the brake flange or brake flange adapter plate. The caliper bleeder screw should be oriented to the top, and caliper fluid inlet to the bottom. Typically, the caliper will be mounted with the caliper body/piston and brake lines towards the rear of the axle.
- Make sure the caliper bleeder screw is facing upward when bolting on the caliper (Fig. 5). Start the Figure 5 two 7/16”-20 UNF caliper bolts through the brake flange or adapter plate into the caliper yoke with medium (blue) Loctite® 242 or equivalent. Install and torque the bolts to 55 ft. lbs.. Ensure the hub & rotor will rotate inside the installed caliper with sufficient clearance and no more than a slight contact with the brake pads, or adjust caliper/pad clearances as required to allow hub & rotor rotation.
- Use a brake hose with a male 3/16” inverted flare fitting to connect to the caliper with enough flexibility to allow the caliper to move at least 1/2” as the brake pads wear. Tighten the brake line fitting into the brass banjo inlet on the caliper just snug enough not to leak. Reference torque: Only 6 to 7 ft. lbs. or finger tight + 1/2 turn on the brake line. The 5/8” head banjo bolt and fitting is torqued to 30-35 ft.-lbs.; no tighter or the hollow banjo bolt may strip the threads. Connect and secure all brake lines appropriately for the trailer’s intended use. Ensure that the caliper and brake inlet line have sufficient clearance to the trailer frame and suspension to avoid contact under any loading scenario. Fill the brake system with new DOT 3 fluid (or if these are replacement brakes, a different fluid may have been specified by the trailer manufacturer in very rare cases; confirm compatible fluid for those) and bleed per the brake actuator manufacturer’s instructions. Use a clear bottle with hose at the caliper bleed ports so one can absolutely verify all air bubbles are removed from the system when bleeding.
- Install the trailer wheel and ensure the wheel inside has clearance to the brake caliper body as it rotates. Tighten all lug nuts in a star pattern with an accurate torque wrench to the torque specified by the trailer manufacturer (Fig. 6).
| CAUTION |
| When finished with the installation, torque the wheel nuts to the trailer manufacturer’s specifications. Re-torque nuts again at 10, 25, and 50 miles to avoid a possible wheel separation, which can result in property damage, serious injury, or death. |
- Road test the trailer in a safe Figure 7 After the first few stops, check the brake fluid in the actuator reservoir and top off again to the proper level. Note: brake performance may not be optimum until the brake pads adjust and seat themselves to the rotor. If braking performance still needs improvement, repeat the brake bleeding procedure to resolve.
| CAUTION |
| Before road testing, make sure the area is clear of vehicular and pedestrian traffic. Failure to brake safely could result in an accident and personal injury to yourself and/or others. |
Additional resources are available at www.dexteraxle.com.
059-A35-00 | 2019.09
059-A35-00
https://www.nhtsa.gov/recalls?nhtsaId=10164360
https://static.nhtsa.gov/odi/tsbs/2019/MC-10164360-0001.pdf
 Loading...
SaleBestseller No. 1


Bestseller No. 2

VEVOR Electric Trailer Brake Assembly, 12" x 2", 2 Pairs Self-Adjusting Electric Brakes Kit for 7000 lbs Axle, 5-Hole Mounting, Backing Plates for Braking System Part Replacement (2 Right + 2 Left)
- Self-Adjusting Electric Brake: Say goodbye to manual adjustments! Dive into the world of 12" x 2" electric trailer brake assemblies that self-adjust. It's not just smart; it's efficient and gives your trailer that smooth braking touch.
- Hassle-Free Installation: DIY's best friend! Our electric trailer brake is straightforward and a breeze to install. It's ready to install right out of the box and boasts high compatibility. Wherever you are, installation is just a few steps away.
- Built for the Long Haul: Keep on rolling! With a lifespan of up to 30,000 kilometers, these trailer brakes are in it for the long haul, designed for your trailer's daily adventures. Constructed from premium materials, our brakes promise robust durability and resistance to wear and tear.
- Versatility at Its Best: The trailer brake kit has a broad range of applications, including towing trailers, transporting goods, camping trips, and more. It's compatible with Dexter, AL-KO (a brand under the former), and other trailer axles.
- Top-Notch Packaging: When it comes to packaging, we don't just box; we care. Our trailer electric brake kit is packaged above industry standards. Every brake is meticulously checked and wrapped to ensure what you get is nothing short of perfect.
Bestseller No. 3
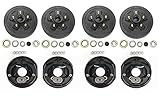
LIBRA 2 Sets Trailer 5 on 4.5" B.C. Hub Drum Kits with 10" x2-1/4 Electric Brakes for Tandem 3500 Lbs Axles
- 4 x trailer 5 on 4.5" hub drum kits + 4 x 10"x2-1/4" electric brakes for Dexter and other brands 3,500 lbs trailer axle
- Drum Bolt pattern: 5 on 4.5", bearing races and 1/2"-20 studs installed, Ref part #. 008-247-05, 84546
- Kits also includ: 4x L68149 inner cone bearings and 4x L44649 outer cone bearings, 4x Grease seals 1.719" x 2.565", 4x E Z lube grease caps with rubber plug; 20 cone wheel nuts 1/2"-20 thread
- Also include: 2 left + 2 right 10"x2-1/4" electric brakes with 3" center bore and 4" mounting bolts circle diamter
Bestseller No. 4
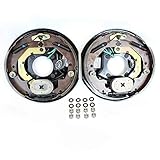
Southwest Wheel 10" X 2-1/4" TruRyde Trailer Electric Brake Assembly (1 Right + 1 Left)
- Pair of 10" x 2.25" TruRdye electric trailer brake assemblies with parts.
- 4 Hole mounting, comes with mounting bolts, nuts, and lock washers
- For Alko, Dexter, Quality, or other popular trailer axle manufacturers.
- TruRyde Brakes
- TruRyde parts are manufactured to automotive standard in ISO/TS-16949 registered factory.
Bestseller No. 5

LIBRA 6 on 5.5" B.C. Trailer Hub Drum Kits with 12"x2" Electric Brakes for 5200-6000 Lbs Axle
- 2x Trailer 6 on 5.5" B.C. hub drum Kits + 2x 12"x2" electric brakes for 5200-6000 Lbs Axle. Bolt pattern: 6 on 5.5";
- Kit also include: 2x 25580 inner cone bearings and 2x 15123 outer cone bearings, 2x Grease seals 2.25" x 3.371", 2x EZ lube grease caps with rubber plug, 12 cone wheel nuts 1/2"x20 thread,
- Also include: One right and one left 12" x 2" electric brakes with 3-1/4" center hole
- Ref drum part #. 008-201, 42656; ref brake part #. K23-180-00, K23-181-00
Bestseller No. 6

Southwest Wheel 2-Pack 3,500 lbs. Trailer Axle Self Adjusting Electric Brake Kit 5-4.5" Bolt Circle
- 2-Pack 3,500 lbs. Trailer Axle Self Adjusting Electric Brake Kit 5-4.5" Bolt Circle
- 4 x 10" x 2 1/4" 5-4.5" bolt circle TruRyde hub and drums with parts (2 5/8" from center of one stud to the center of the next stud)
- 2 x 10" x 2 1/4" TruRyde Self-Adjusting electric backing plates
- Works with Al-Ko, Dexter, Lippert, and Quality Trailer Axles. TruRyde parts are manufactured to automotive standard in ISO/TS-16949 registered factory.
- Comes with TruRyde bearings, seals, lug nuts, open and closed grease caps, cotter pins, spindle washers, tang washers, spindle nuts, and brake mounting washers and nuts
Bestseller No. 8

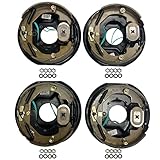
4Pcs 10" x 2-1/4" Electric Trailer Brake Assemblies for 3,500lbs, Left and Right
- Compatible with: Fit For Alko/ for Dexter/ for Quality, and other brands 3,500lbs trailer axle
- Kit Includes: 2x 10" x 2-1/4" left electric brake assemblies, 2x 10" x 2-1/4" right electric brake assemblies, 16x spring pad, 16x nut
- Production and Installation: Strictly follow automotive standards and comply with the G3000 standard in the US; Easy to install
- Product Introduction: The AEagle electronic brake features non-asbestos brake linings for superior friction performance, ensuring longevity and enhanced braking capabilities.
- Quality Assurance: 12-month warranty! Tested before shipping.
Bestseller No. 9

JADODE Electric Trailer Brake Assembly 12" x 2" fits 7000 lbs Axle Trailers,Electric and Hydraulic Brake for One Pair- 23-108-00/23-181-00 Trailer Brakes
- Set of two 12" x 2" electric trailer brake assembly, for most 5200lbs 6000lbs 7000lbs trailer axle;Center hole diameter: 3-1/4"
- Fits the wheel bolt pattern 6 lug or 8 lug,fits spline size #42 steel brake drum.Bolt hole spacing: 2.0" O.C. around the top,Bolt hole spacing: 3.0" O.C.across the bottom
- Replace :K23-180-00,K23-181-00;77-12EA-1-2;replace Axletech B12E-22 (12x2);Al-Ko Lippert,etc
- The trailer brakes are NOT self adjusting, unlike most drum brakes on cars and trucks,need to be done when installed and periodically thereafter.If you cannot adjust yourself, please find a professional adjustment
- JADODE electric and hydraulic trailer brake parts offers 3 years warranty.Note make sure it matches you size,hub has to fit over
SaleBestseller No. 10

JADODE Trailer Electric Brake Assembly 10" x 2-1/4" for 3500 lbs Heavy Duty Axle Trailr 10" x 2.25" One Pair
- 10" x 2.25"electric trailer brake assembly (left & right side), fit most 3500lbs - 4000lbs trailer axle; 4-hole mount w/mounting bolt
- Fits the wheel bolt pattern 4 lug,fits spline size #84 steel drum; center hole diameter: 3" ; bolt circle diameter: 4"
- Replace 023-026-00 and 023-027-00;77-10-2;23-105, 23-106,296649;replace Dexter Lippert Al-Ko,etc brake assemblies
- The electric brakes are NOT self adjusting, unlike most drum brakes on cars and trucks,need to be done when installed and periodically thereafter.If you cannot adjust yourself, please find a professional adjustment
- JADODE electric and hydraulic trailer brake parts offers 3 years warranty.Note make sure it matches you size,hub has to fit over
Last update on 2024-04-12 / Affiliate links / Images from Amazon Product Advertising API
This product presentation was made with AAWP plugin.