| “This site contains affiliate links for which OEMDTC may be compensated” |
July 12, 2019 NHTSA CAMPAIGN NUMBER: 19V528000
Hydraulic Velocity Fuses May Not Activate
If the velocity fuses do not activate and stop the cab from lowering, the cab may hit occupants working underneath, increasing the risk of an injury.
NHTSA Campaign Number: 19V528
Manufacturer Kovatch Mobile Equipment Corp.
Components STRUCTURE
Potential Number of Units Affected 529
Summary
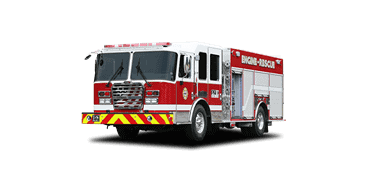
Kovatch Mobile Equipment Corp. (KME) is recalling certain 2017-2019 Predator Rescue, SS Rescue, SS Aerial, Aerial, SS TDA and Tanker and Predator Panther Rescue and Aerial, 2016-2020 Predator Panther Pumper and Predator SS Pumper, 2017-2020 Predator Panther Tanker and Predator Pumper, 2017 Predator SS Tanker and 2017-2018 Predator TDA. In the event of a hydraulic system failure while raising or lowering the cab, the hydraulic velocity fuses may not activate and lock the cab in place to prevent the cab from quickly closing.
Remedy
KME will notify owners, and dealers will replace the velocity fuses for each cab lift cylinder, free of charge. The recall is expected to begin in August 2019. Owners may contact KME customer service at 1-800-235-3928.
Notes
Owners may also contact the National Highway Traffic Safety Administration Vehicle Safety Hotline at 1-888-327-4236 (TTY 1-800-424-9153), or go to www.safercar.gov.
ONRD – 00008282019- 24
TECHNICAL SERVICE BULLETIN
| Title: | Cab Tilt Velocity Fuse 2-Door Cab |
| Date: | August 28, 2019 |
| Vehicles: | KME Custom Pumpers |
| Problem: | See Recall 19V528 |
| Corrective Action: | Ensure correct fuse. |
| Work Instructions: | See Attachment. |
| Tools Required: | PART A. DETERMINE ACTION TO BE TAKEN
PART B. INSTALLING CORRECT VELOCITY FUSE
|
| KME Parts Required: | (2) – 1.0 (113861V002) Closing Flow Velocity Fuses
(1) – Fitting Pipe to JIC (039683V) (1) – JIC 90 Degree Female to Male Fitting (044938V013) |
| KME Contact: | Jim Hauser, Technical Support Manager |
| Telephone: | 570-656-0903 |
| E-Mail: | jhauser@kmefire.com |
| Mailing Address
|
KME Fire Apparatus Plant #8 One Industrial Complex Nesquehoning, PA 18240ATTENTION: Mr. Jim Hauser |
WORK INSTRUCTIONS
- Do the following before beginning these work instructions:
- Park the vehicle on a flat, level surface.
- Ensure the park brake is set and the wheels are chocked.
- Proper personal protective equipment should be worn.
NOTE: THE CAB TILT CONTROL IS EQUIPPED WITH AN INTERLOCK THAT DISABLES THE CAB TILT SYSTEM IN THE EVENT THE PARKING BRAKE IS NOT APPLIED.
WARNING
- REMOVE ALL LOOSE ITEMS FROM THE CAB COMPARTMENT INCLUDING THE INSIDE COMMAND DESK AREA BEFORE TILTING AS CONTENTS MAY SHIFT OR DROP CAUSING PROPERTY DAMAGE OR PERSONAL INJURY.
- NEVER WORK AROUND OR UNDER A TILTED CAB UNLESS THE STAY ARM OR MECHANICAL SUPPORT IS SECURED IN THE SUPPORT POSITION. HYDRAULIC CYLINDERS CAN LEAK AND DRIFT AND CANNOT BE RELIED UPON TO SUPPORT THE CAB ON THEIR OWN. FAILURE TO ENSURE THAT THE STAY ARM IS SECURELY IN ITS SUPPORT POSITION COULD CAUSE SEVERE PERSONAL INJURY OR DEATH.
- ALWAYS CHECK THE CAB FOR PEOPLE WORKING ON OR AROUND THE CAB BEFORE RAISING OR LOWERING THE CAB. FAILURE TO ENSURE THAT EVERYONE IS CLEAR OF THE CAB COULD CAUSE SEVERE PERSONAL INJURY OR DEATH.
- CHECK FRONT BUMPER EXTENSION TO ENSURE THE WINCH COVER IS SHUT AND NO TOOLS OR ADDED EQUIPMENT IS OUT OF THE WAY BEFORE TILTING CAB TO AVOID POSSIBLE INTERFERENCE AND SUBSEQUENT PROPERTY DAMAGE WHEN THE CAB IS FULLY TILTED.
- ALWAYS ENSURE THAT THE VEHICLE IS ON A FLAT AND LEVEL SURFACE BEFORE TILTING THE CAB. TILTING THE CAB ON AN INCLINED OR NON-FLAT SURFACE MAY PRODUCE INTERFERENCE BETWEEN COMPONENTS AS THE CAB IS LOWERED CAUSING DAMAGE TO THE AIR INTAKE SEAL AND ENGINE TUNNEL.
- IF THE CAB FAILS TO LOWER AFTER FOLLOWING THE PROPER INSTRUCTIONS, DO NOT ATTEMPT TO FORCE IT. HAVE THE SYSTEM CHECKED BY A QUALIFIED TECHNICIAN AND REFER TO THE CAB TILT SYSTEM INSTRUCTIONS IN THE SERVICE MANUAL.
RAISING THE CAB
The controls for raising the cab are located inside the rear officer side door. Open the locking panel located under the officer side rearward seat. Inside this compartment is the remote control to raise and lower the cab.
-
- Ensure all loose equipment inside the front of the cab is secure. Follow previous warnings.
- Close front doors of the cab, remove guide posts from bumper, and check the front discharge and swivel are clear before fully tilting.
- Remove the Safety Pin from both sides of the cab. See picture above.
-
- Lift the hydraulic valve handle UP on both sides of the cab. See previous Figure.
- Remove the locking latches on the compartment under the rearward, officer side seat in the back of the cab.
- Remove the remote control.
- To raise the cab, hold the “UP” arrow button “IN” until the cab is fully raised.
- A safety bar will lock the cab in place to avoid suddenly falling down.
- Ensure the safety bar is in place.
- Locate the Velocity Fuse. See Figures on next page.
- Ensure that the closing flow is 1.0; if so, no further action is required. Go to lowering the cab instructions.
If the fuse is 2.5, the fuse must be replaced with a 1.0 closing flow fuse. Go to Step 7.
- Contact Jim Hauser, Technical Support Manager, for proper velocity fuse.
- Lower Cab.
LOWERING THE CAB
NOTE: FOLLOW THE PREVIOUS WARNINGS AND CHECK THAT ALL TOOLS AND PERSONNEL ARE FREE AND CLEAR FROM THE PATH OF THE CAB.
-
- Pull the T-handle on the Safety Bar to release. This control is located under the passenger side door.
- Press the “DOWN” arrow button on the remote control in until the cab is all the way down.
- Pull the locking handle down on both sides of the vehicle.
- Insert the Safety Pins on both sides of the vehicle.
PART B. INSTALLING CORRECT VELOCITY FUSE
Do the following before continuing these work instructions:
- Park the vehicle on a flat, level surface.
- Ensure the park brake is set and the wheels are chocked.
- Proper personal protective equipment should be worn.
- Tilt Cab. Follow the warnings and instructions in Part A, Step 4 of this bulletin.
NOTE: FOLLOW THE PREVIOUS WARNINGS AND CHECK THAT ALL TOOLS AND PERSONNEL ARE FREE AND CLEAR FROM THE PATH OF THE CAB.
- Locate the velocity fuse near the driver side cab tilt cylinder.
- Cover the wires and tubing in the area with plastic.
- Place a fluid drip pan underneath the velocity fuse assembly.
- Rotate or loosen the fuse assembly to the side of the cylinder to have clearance to thread-off the complete fuse assembly, including the 90º fitting.
- Clean the threads of the existing pieces of the fuse assembly.
- Inspect the existing pieces of the fuse assembly for cracks or damaged threads. Replace, if needed. Thread the adapter and then the 90 degree JIC fitting on the upper portion (outlet or top) of the velocity fuse and reconnect hydraulic line.
- Ensure that a thread sealant is used when replacing any necessary couplings, fittings, etc.
- Ensure to catch the starter thread while threading on the replacement velocity fuse.
- Connect the cab tilt line on both sides of the velocity fuse. See attachment for correct torque requirements.
- Carefully, remove plastic and fluid drain pan. Use rags to clean any spills on loom, tubing or shop floor. Dispose of any items with hydraulic fluid properly.
- Repeat Steps 2 to 12, Part B, for the passenger side of the unit.
- Lower the cab. Follow the warnings and instructions in Part A, Step 8 of this bulletin.
NOTE: FOLLOW THE PREVIOUS WARNINGS AND CHECK THAT ALL TOOLS AND PERSONNEL ARE FREE AND CLEAR FROM THE PATH OF THE CAB.
- Inform Jim Hauser, Technical Support Manager, that the work has been completed. See first page of this bulletin.
ONRD – 00008202019- 25
TECHNICAL SERVICE BULLETIN
| Title: | Cab Tilt Velocity Fuse Split Cab |
| Date: | August 26, 2019 |
| Vehicles: | KME Custom Pumpers |
| Problem: | See Recall 19V528 |
| Corrective Action: | Ensure correct fuse. |
| Work Instructions: | See Attachment. |
| Tools Required: | PART A. DETERMINE ACTION TO BE TAKEN
PART B. INSTALLING CORRECT VELOCITY FUSE
|
| KME Parts Required: | (2) – 1.0 (113861V002) Closing Flow Velocity Fuses
(1) – Fitting Pipe to JIC (039683V) (1) – JIC 90 Degree Female to Male Fitting (044938V013) |
| KME Contact: | Jim Hauser, Technical Support Manager |
| Telephone: | 570-656-0903 |
| E-Mail: | jhauser@kmefire.com |
| Mailing Address
|
KME Fire Apparatus Plant #8 One Industrial Complex Nesquehoning, PA 18240ATTENTION: Mr. Jim Hauser |
WORK INSTRUCTIONS
- Do the following before beginning these work instructions:
- Park the vehicle on a flat, level surface.
- Ensure the park brake is set and the wheels are chocked.
- Proper personal protective equipment should be worn.
NOTE: THE CAB TILT CONTROL IS EQUIPPED WITH AN INTERLOCK THAT DISABLES THE CAB TILT SYSTEM IN THE EVENT THE PARKING BRAKE IS NOT APPLIED.
- REMOVE ALL LOOSE ITEMS FROM THE CAB COMPARTMENT INCLUDING THE INSIDE COMMAND DESK AREA BEFORE TILTING AS CONTENTS MAY SHIFT OR DROP CAUSING PROPERTY DAMAGE OR PERSONAL INJURY.
- NEVER WORK AROUND OR UNDER A TILTED CAB UNLESS THE STAY ARM OR MECHANICAL SUPPORT IS SECURED IN THE SUPPORT POSITION. HYDRAULIC CYLINDERS CAN LEAK AND DRIFT AND CANNOT BE RELIED UPON TO SUPPORT THE CAB ON THEIR OWN. FAILURE TO ENSURE THAT THE STAY ARM IS SECURELY IN ITS SUPPORT POSITION COULD CAUSE SEVERE PERSONAL INJURY OR DEATH.
- ALWAYS CHECK THE CAB FOR PEOPLE WORKING ON OR AROUND THE CAB BEFORE RAISING OR LOWERING THE CAB. FAILURE TO ENSURE THAT EVERYONE IS CLEAR OF THE CAB COULD CAUSE SEVERE PERSONAL INJURY OR DEATH.
- CHECK FRONT BUMPER EXTENSION TO ENSURE THE WINCH COVER IS SHUT AND NO TOOLS OR ADDED EQUIPMENT IS OUT OF THE WAY BEFORE TILTING CAB TO AVOID POSSIBLE INTERFERENCE AND SUBSEQUENT PROPERTY DAMAGE WHEN THE CAB IS FULLY TILTED.
- ALWAYS ENSURE THAT THE VEHICLE IS ON A FLAT AND LEVEL SURFACE BEFORE TILTING THE CAB. TILTING THE CAB ON AN INCLINED OR NON-FLAT SURFACE MAY PRODUCE INTERFERENCE BETWEEN COMPONENTS AS THE CAB IS LOWERED CAUSING DAMAGE TO THE AIR INTAKE SEAL AND ENGINE TUNNEL.
- IF THE CAB FAILS TO LOWER AFTER FOLLOWING THE PROPER INSTRUCTIONS, DO NOT ATTEMPT TO FORCE IT. HAVE THE SYSTEM CHECKED BY A QUALIFIED TECHNICIAN AND REFER TO THE CAB TILT SYSTEM INSTRUCTIONS IN THE SERVICE MANUAL.
RAISING THE CAB
The controls for raising the cab are located inside the rear officer side door. Open the locking panel located under the officer side rearward seat. Inside this compartment is the remote control to raise and lower the cab.
-
- Ensure all loose equipment inside the front of the cab is secure. Follow previous warnings.
- Close front doors of the cab, remove guide posts from bumper, and check the front discharge and swivel are clear before fully tilting.
- Remove the Safety Pin from both sides of the cab. See picture above.
-
- Lift the hydraulic valve handle UP on both sides of the cab. See previous Figure.
- Remove the locking latches on the compartment under the rearward, officer side seat in the back of the cab.
- Remove the remote control.
- To raise the cab, hold the “UP” arrow button “IN” until the cab is fully raised.
- A safety bar will lock the cab in place to avoid suddenly falling down.
- Ensure the safety bar is in place.
- Locate the Velocity Fuse. See Figures on next page.
- Ensure that the closing flow is 1.0; if so, no further action is required. Go to lowering the cab instructions.
If the fuse is 2.5, the fuse must be replaced with a 1.0 closing flow fuse. Go to Step 7.
- Contact Jim Hauser, Technical Support Manager, for proper velocity fuse.
- Lower Cab.
LOWERING THE CAB
NOTE: FOLLOW THE PREVIOUS WARNINGS AND CHECK THAT ALL TOOLS AND PERSONNEL ARE FREE AND CLEAR FROM THE PATH OF THE CAB.
- Pull the T-handle on the Safety Bar to release. This control is located under the passenger side door.
- Press the “DOWN” arrow button on the remote control in until the cab is all the way down.
- Pull the locking handle down on both sides of the vehicle.
- Insert the Safety Pins on both sides of the vehicle.
PART B. INSTALLING CORRECT VELOCITY FUSE
Do the following before continuing these work instructions:
- Park the vehicle on a flat, level surface.
- Ensure the park brake is set and the wheels are chocked.
- Proper personal protective equipment should be worn.
- Tilt Cab. Follow the warnings and instructions in Part A, Step 4 of this bulletin.
NOTE: FOLLOW THE PREVIOUS WARNINGS AND CHECK THAT ALL TOOLS AND PERSONNEL ARE FREE AND CLEAR FROM THE PATH OF THE CAB.
- Locate the velocity fuse near the driver side cab tilt cylinder.
- Cover the wires and tubing in the area with plastic.
- Place a fluid drip pan underneath the velocity fuse assembly.
- Rotate or loosen the fuse assembly to the side of the cylinder to have clearance to thread-off the complete fuse assembly, including the 90º fitting.
- Clean the threads of the existing pieces of the fuse assembly.
- Inspect the existing pieces of the fuse assembly for cracks or damaged threads. Replace, if needed. Thread the adapter and then the 90 degree JIC fitting on the upper portion (outlet or top) of the velocity fuse and reconnect hydraulic line.
- Ensure that a thread sealant is used when replacing any necessary couplings, fittings, etc.
- Ensure to catch the starter thread while threading on the replacement velocity fuse.
- Connect the cab tilt line on both sides of the velocity fuse. See attachment for correct torque requirements.
- Carefully, remove plastic and fluid drain pan. Use rags to clean any spills on loom, tubing or shop floor. Dispose of any items with hydraulic fluid properly.
- Repeat Steps 2 to 12, Part B, for the passenger side of the unit.
- Lower the cab. Follow the warnings and instructions in Part A, Step 8 of this bulletin.
NOTE: FOLLOW THE PREVIOUS WARNINGS AND CHECK THAT ALL TOOLS AND PERSONNEL ARE FREE AND CLEAR FROM THE PATH OF THE CAB.
- Inform Jim Hauser, Technical Support Manager, that the work has been completed. See first page of this bulletin.
ONRD – 00008202019- 23
TECHNICAL SERVICE BULLETIN
| Title: | Cab Tilt Velocity Fuse 4-Door Cab, Full Tilt |
| Date: | August 20, 2019 |
| Vehicles: | KME Custom Pumpers |
| Problem: | See Recall NHTSA 19V528 / Transport Canada 2019344 |
| Corrective Action: | Ensure correct fuse. |
| Work Instructions: | See Attachment. |
| Tools Required: | PART A. DETERMINE ACTION TO BE TAKEN
PART B. INSTALLING CORRECT VELOCITY FUSE
|
| KME Parts Required: | If necessary, (2) – 1.5 (113861V) Closing Flow Velocity Fuses |
| KME Contact: | Jim Hauser, Technical Support Manager |
| Telephone: | 570-656-0903 |
| E-Mail: | jhauser@kmefire.com |
| Mailing Address
|
KME Fire Apparatus Plant #8 One Industrial Complex Nesquehoning, PA 18240ATTENTION: Mr. Jim Hauser |
WORK INSTRUCTIONS
- Do the following before beginning these work instructions:
- Park the vehicle on a flat, level surface.
- Ensure the park brake is set and the wheels are chocked.
- Proper personal protective equipment should be worn.
PART A. DETERMINE ACTION TO BE TAKEN
NOTE: There are two determining factors as to whether or not further action is required: Check under the front of the chassis for a Tee Fitting and Check the size of the velocity fuse.
- Use a creeper to check for a Tee fitting that splits the hydraulic supply from the pump to the tilt cylinders. The Tee fitting will be located behind the front bumper on the front engine support crossmember.
NOTE: If you do not have a Tee fitting behind the front bumper on the front engine support crossmember, there is no further action required. Report the findings to KME using the Recall Response Card.
- If you do have a Tee fitting that splits the hydraulic supply from the pump to the tilt cylinders, go to Step 4.
- Tilt the cab.
NOTE: THE CAB TILT CONTROL IS EQUIPPED WITH AN INTERLOCK THAT DISABLES THE CAB TILT SYSTEM IN THE EVENT THE PARKING BRAKE IS NOT APPLIED.
- REMOVE ALL LOOSE ITEMS FROM THE CAB COMPARTMENT INCLUDING THE INSIDE COMMAND DESK AREA BEFORE TILTING AS CONTENTS MAY SHIFT OR DROP CAUSING PROPERTY DAMAGE OR PERSONAL INJURY.
- NEVER WORK AROUND OR UNDER A TILTED CAB UNLESS THE STAY ARM OR MECHANICAL SUPPORT IS SECURED IN THE SUPPORT POSITION. HYDRAULIC CYLINDERS CAN LEAK AND DRIFT AND CANNOT BE RELIED UPON TO SUPPORT THE CAB ON THEIR OWN. FAILURE TO ENSURE THAT THE STAY ARM IS SECURELY IN ITS SUPPORT POSITION COULD CAUSE SEVERE PERSONAL INJURY OR DEATH.
- ALWAYS CHECK THE CAB FOR PEOPLE WORKING ON OR AROUND THE CAB BEFORE RAISING OR LOWERING THE CAB. FAILURE TO ENSURE THAT EVERYONE IS CLEAR OF THE CAB COULD CAUSE SEVERE PERSONAL INJURY OR DEATH.
- CHECK FRONT BUMPER EXTENSION TO ENSURE THE WINCH COVER IS SHUT AND NO TOOLS OR ADDED EQUIPMENT IS OUT OF THE WAY BEFORE TILTING CAB TO AVOID POSSIBLE INTERFERENCE AND SUBSEQUENT PROPERTY DAMAGE WHEN THE CAB IS FULLY TILTED.
- ALWAYS ENSURE THAT THE VEHICLE IS ON A FLAT AND LEVEL SURFACE BEFORE TILTING THE CAB. TILTING THE CAB ON AN INCLINED OR NON-FLAT SURFACE MAY PRODUCE INTERFERENCE BETWEEN COMPONENTS AS THE CAB IS LOWERED CAUSING DAMAGE TO THE AIR INTAKE SEAL AND ENGINE TUNNEL.
- IF THE CAB FAILS TO LOWER AFTER FOLLOWING THE PROPER INSTRUCTIONS, DO NOT ATTEMPT TO FORCE IT. HAVE THE SYSTEM CHECKED BY A QUALIFIED TECHNICIAN AND REFER TO THE CAB TILT SYSTEM INSTRUCTIONS IN THE SERVICE MANUAL.
RAISING THE CAB
The controls for raising the cab are located either inside the Officer Side Stepwell Compartment or on the Officer Side Discharge Panel. The Park Brake must be set.
- To raise the cab, hold the momentary “ON” Toggle Switch “UP” and hold the black Pushbutton Switch “IN” until the cab is fully raised.
- Turn the safety bar control knob counterclockwise, pull “OUT”, and turn clockwise to lock.
The Safety Bar is located at the bottom of the Officer Side, Front Body Compartment or lower-right Officer Side Discharge Panel.
- Locate the Velocity Fuse. See Figures on next page.
- Ensure that the closing flow is 1.5; if so, no further action is required. Go to lowering the cab instructions.
If the fuse is 2.5, the fuse must be replaced with a 1.5 closing flow fuse. Go to Step 7.
- Contact Jim Hauser, Technical Support Manager, for proper velocity fuse.
- Lower Cab.
LOWERING THE CAB
NOTE: FOLLOW THE PREVIOUS WARNINGS AND CHECK THAT ALL TOOLS AND PERSONNEL ARE FREE AND CLEAR FROM THE PATH OF THE CAB.
- To lower the cab, turn the Safety Bar Control Knob counterclockwise, push-in, and turn clockwise to lock. Push the Toggle Switch “DOWN”. Cab will begin to lower.
- Keep the silver Toggle Switch in the “DOWN” position after cab is fully down and in place.
PART B. INSTALLING CORRECT VELOCITY FUSE
Do the following before continuing these work instructions:
- Park the vehicle on a flat, level surface.
- Ensure the park brake is set and the wheels are chocked.
- Proper personal protective equipment should be worn.
- Tilt Cab. Follow the warnings and instructions in Part A, Step 4 of this bulletin.
NOTE: FOLLOW THE PREVIOUS WARNINGS AND CHECK THAT ALL TOOLS AND PERSONNEL ARE FREE AND CLEAR FROM THE PATH OF THE CAB.
- Locate the velocity fuse near the driver side cab tilt cylinder.
- Cover the wires and tubing in the area with plastic.
- Place a fluid drip pan underneath the velocity fuse assembly.
- Rotate or loosen the fuse assembly to the side of the cylinder to have clearance to thread-off the complete fuse assembly, including the 90º fitting.
- Clean the threads of the existing pieces of the fuse assembly.
- Inspect the existing pieces of the fuse assembly for cracks or damaged threads. Replace, if needed.
- Ensure that a thread sealant is used when replacing any necessary couplings, fittings, etc.
- Ensure to catch the starter thread while threading on the replacement velocity fuse.
- Connect the cab tilt line on both sides of the velocity fuse. See attachment for correct torque requirements.
- Carefully, remove plastic and fluid drain pan. Use rags to clean any spills on loom, tubing or shop floor. Dispose of any items with hydraulic fluid properly.
- Repeat Steps 2 to 12, Part B, for the passenger side of the unit.
- Lower the cab. Follow the warnings and instructions in Part A, Step 8 of this bulletin.
NOTE: FOLLOW THE PREVIOUS WARNINGS AND CHECK THAT ALL TOOLS AND PERSONNEL ARE FREE AND CLEAR FROM THE PATH OF THE CAB.
- Inform Jim Hauser, Technical Support Manager, that the work has been completed. See first page of this bulletin.
August 28, 2019
Name
Address
City, State Zip
IMPORTANT SAFETY RECALL NOTICE: 19V528
IMPORTANT SAFETY RECALL
This notice applies to your vehicle(s):
Dear KME Vehicle Owner:
This notice is sent to you in accordance with the requirements of the National Traffic and Motor Vehicle Safety Act.
Why is a recall being conducted?
KME has decided that a defect which relates to motor vehicle safety exists in certain model year 20002020 KME vehicles manufactured from August 1999 through July 2019 equipped with certain hydraulic cab lift systems.
On KME vehicles with custom cabs, a hydraulic cab lift system is provided to raise the cab to allow access to the engine and other components for maintenance. A mechanical cab lock that physically locks the cab in the raised position is part of this system and is required to be engaged prior to any personnel entering the area underneath the raised cab. In addition to the primary mechanical cab lock, a secondary locking system is provided by way of hydraulic velocity fuses connected to the cab lift cylinders. The hydraulic velocity fuses are meant to lock the cab in place in the event of a hydraulic system failure while raising or lowering the cab. KME vehicles with certain hydraulic system installations have hydraulic velocity fuses that may not activate as expected.
The hydraulic velocity fuse is designed to close in the event of a large system leak, such as a burst hydraulic hose. They trap hydraulic oil in the cab lift cylinders locking the cab in that position. Operating instructions require that personnel only work underneath a raised cab when the mechanical locking bar is engaged. If personnel ignore the operating instructions and are underneath the cab prior to the mechanical cab lock being engaged and a hydraulic system failure occurs, the velocity fuses may not activate allowing the cab to lower faster than normal which may cause injury or death.
What are we doing about the problem?
KME or its dealers will replace the velocity fuses for the cab lift cylinders at no cost to the vehicle owner.
The estimated time to complete the replacement is 1.5 hours.
What should you do?
Never work around or under a tilted cab unless the stay arm or mechanical support is secured in the support position. Hydraulic cylinders can leak and drift and cannot be relied upon to support the cab on their own. Failure to ensure that the stay arm is securely in its support position could cause severe personal injury or death.
If you receive this notification, please contact your KME Dealer or KME Customer Service at (570) 6695230 to schedule an appointment to have your vehicle(s) remedied.
INCLUDED WITH THIS LETTER IS AN OWNER RESPONSE CARD TO BE FILLED OUT AND RETURNED TO KME. Please have your Truck VIN or GSO available. After the repair has been completed, please fill in the appropriate information on the enclosed Owner Response Postcard, sign it, and return it to:
Mail: KME, One Industrial Complex, Nesquehoning, PA 18240
E-mail: bpolgrean@kmefire.com
Fax: (570) 669-5182
What if you no longer own this vehicle?
If you are not the current owner of the vehicle, please indicate this on the Owner Response Postcard and return the card to us.
Federal law requires any lessor who receives a notification of a safety related defect or noncompliance pertaining to any leased motor vehicle shall send the notice to the lessee within 10 days. If you are no longer the owner of this vehicle, please provide us with any contact information so we may contact the new owner.
If you have already paid to have your vehicle repaired for this condition, you may be eligible for reimbursement of the charges you paid for the repair or replacement of components. To learn more about what you need to do to obtain reimbursement, contact our customer service department at (570) 6695230.
If after having attempted to take advantage of this recall you believe you have not been able to have your vehicle remedied without charge and within a reasonable amount of time, you may submit a complaint to the Administrator, National Highway Traffic Safety Administration, 1200 New Jersey Ave., S.E., Washington, D.C., 20590; or call the toll-free Vehicle Safety Hotline at 1-888-327-4236 (TTY: 1-800-4249153); or go to https://www.safercar.gov.
We apologize for any inconvenience this safety recall may cause, but your safety is our first concern.
Sincerely,
KME, Inc
August 23, 2019
SAFETY RECALL NOTICE: 19V528
TO: Affected KME Dealers
KME has decided that a defect which relates to motor vehicle safety exists in certain model year 2000-2020 KME vehicles manufactured from August 1999 through July 2019 equipped with certain hydraulic cab lift systems.
On KME vehicles with custom cabs, a hydraulic cab lift system is provided to raise the cab to allow access to the engine and other components for maintenance. A mechanical cab lock that physically locks the cab in the raised position is part of this system and is required to be engaged prior to any personnel entering the area underneath the raised cab. In addition to the primary mechanical cab lock, a secondary locking system is provided by way of hydraulic velocity fuses connected to the cab lift cylinders. The hydraulic velocity fuses are meant to lock the cab in place in the event of a hydraulic system failure while raising or lowering the cab. KME vehicles with certain hydraulic system installations have hydraulic velocity fuses that may not activate as expected.
Owners will be notified by mail about the recall and will be instructed to contact their KME Dealer or KME to replace the velocity fuses for the cab lift cylinders, if required. The estimated time to complete the replacement is 1.5 hours. There is no cost to owners for this recall.
Please be reminded that it is a violation of Federal law for you deliver a new motor vehicle or any new or used item of motor vehicle equipment covered by this notification until this defect has been remedied. Substantial civil penalties apply to violations of this law.
Your assistance with this recall is appreciated. Should you have any questions or concerns, please contact KME Customer Service at (570) 669-5230.
Sincerely,
KME, Inc.
45 Affected Products
Vehicles
| MAKE | MODEL | YEAR |
| KME | PREDATOR AERIAL | 2017-2019 |
| KME | PREDATOR PANTHER AERIAL | 2017-2019 |
| KME | PREDATOR PANTHER PUMPER | 2016-2020 |
| KME | PREDATOR PANTHER RESCUE | 2017-2019 |
| KME | PREDATOR PANTHER TANKER | 2017-2020 |
| KME | PREDATOR PUMPER | 2017-2020 |
| KME | PREDATOR RESCUE | 2017-2019 |
| KME | PREDATOR SS AERIAL | 2017-2019 |
| KME | PREDATOR SS PUMPER | 2016-2020 |
| KME | PREDATOR SS RESCUE | 2017-2019 |
| KME | PREDATOR SS TANKER | 2017 |
| KME | PREDATOR SS TDA | 2017-2019 |
| KME | PREDATOR TANKER | 2017-2019 |
| KME | PREDATOR TDA | 2017-2018 |
10 Associated Documents
Remedy Instructions and TSB
RCRIT-19V528-1044.pdf 584.414KB
 Loading...
Remedy Instructions and TSB
RCRIT-19V528-1635.pdf 601.013KB
Loading...
Remedy Instructions and TSB
RCRIT-19V528-6281.pdf 608.532KB
Loading...
ISSUED Owner Notification Letter(Part 577)
RCONL-19V528-2393.pdf 135.833KB
Loading...
Recall Quarterly Report #3, 2020-1
RCLQRT-19V528-0984.PDF 211.323KB
Loading...
Recall Quarterly Report #2, 2019-4
RCLQRT-19V528-8858.PDF 211.24KB
Loading...
Recall Acknowledgement
RCAK-19V528-4701.pdf 245.255KB
Loading...
Defect Notice 573 Report
RCLRPT-19V528-1406.PDF 221.32KB
Loading...
Recall Quarterly Report #1, 2019-3
RCLQRT-19V528-3374.PDF 211.138KB
Loading...
Manufacturer Notices(to Dealers,etc)
Loading...
Latest Recalls Documents
For the Latest and Most Recent Recalls Information Visit the link below…
https://www-odi.nhtsa.dot.gov/acms/cs/documentList.xhtml?docId=19V528&docType=RCL
- Formulated with premium base stocks for added resistance to thermal breakdown
- Outstanding wear protection
- Excellent resistance to system rust and oil oxidation
- Maintains excellent water separating properties
- Excellent foam control and air release deliver consistent system operation
- Formulated with premium base stocks for added resistance to thermal breakdown
- Outstanding wear protection
- Excellent resistance to system rust and oil oxidation
- Maintains excellent water separating properties
- Excellent foam control and air release deliver consistent system operation


- SUPERIOR WEAR PROTECTION: U1P ISO AW 68 Hydraulic Oil minimizes friction and wear for extended equipment life.
- VERSATILE PERFORMANCE: Suitable for high-pressure industrial applications, this fluid remains stable across wide temperature ranges, safeguarding critical components and seals.
- ADVANCED RUST & CORROSION PREVENTION: Protects hydraulic systems from rust and corrosion for optimal operation.
- OUTSTANDING DEMULSIFICATION: Separates water for cleaner oil and improved system life.
- EXCELLENT FILTERABILITY: Maintains performance at high temperatures and prevents filter clogs.


- Reduces the operating temperature of hydraulic systems
- Conditions old seals and O-rings to stop and prevent future leaks
- Well suited for use in equipment with wet brakes
- Removes varnish and restores pressure for more efficient operation
- Compatible with both synthetic and conventional hydraulic fluids

- MAG 1 AW32 (ISO32) 10-Weight Hydraulic Fluid is a high quality oil that is ideal for use in most 2-stage log splitter pumps. Benefits include exceptional protection against wear from contaminants and higher operating temperatures and pressures ensures longer equipment life.
- Formulated with highly refined group ii base stocks for added resistance to thermal breakdown
- Superior wear protection to protect critical components
- Excellent frictional properties for smooth-shifting, excellent anti-shudder performance
- J20c equivalent, protection against varnish and sludge formation
- Superior thermal stability and oxidation resistance, good seal compatibility

- Formulated with premium base stocks for added resistance to thermal breakdown
- Outstanding wear protection
- Excellent resistance to system rust and oil oxidation
- Maintains excellent water separating properties
- Excellent foam control and air release deliver consistent system operation
Last update on 2024-04-11 / Affiliate links / Images from Amazon Product Advertising API
This product presentation was made with AAWP plugin.